
Customize your settings Part of Android Jetpack.
This document describes how to customize
Preference objects in your hierarchy.
Find preferences
To access an individual Preference, such as when getting or setting a
Preference value, use
PreferenceFragmentCompat.findPreference().
This method searches the entire hierarchy for a Preference with the given key.
For example, to access an
EditTextPreference with a
key of "signature", do the following:
<EditTextPreference
        app:key="signature"
        app:title="Your signature"/>
Retrieve this Preference by using the following code:
Kotlin
override fun onCreatePreferences(savedInstanceState: Bundle?, rootKey: String?) {
    setPreferencesFromResource(R.xml.preferences, rootKey)
    val signaturePreference: EditTextPreference? = findPreference("signature")
    // Do something with this preference.
}
Java
@Override
public void onCreatePreferences(Bundle savedInstanceState, String rootKey) {
    setPreferencesFromResource(R.xml.preferences, rootKey);
    EditTextPreference signaturePreference = findPreference("signature");
    // Do something with this preference.
}
Control Preference visibility
You can control which Preference objects are visible to the user when they
navigate to a settings screen. For example, if a particular Preference is
meaningful only when a corresponding feature is enabled, you might want to hide
that Preference when the feature is disabled.
To show a Preference only when a condition is met, first set the Preference
visibility to false in the XML, as shown in the following example:
<EditTextPreference
        app:key="signature"
        app:title="Your signature"
        app:isPreferenceVisible="false"/>
In onCreatePreferences(), show the Preference when the corresponding
condition is met:
Kotlin
override fun onCreatePreferences(savedInstanceState: Bundle?, rootKey: String?) {
    setPreferencesFromResource(R.xml.preferences, rootKey)
    if(/*some feature*/) {
        val signaturePreference: EditTextPreference? = findPreference("signature")
        signaturePreference?.isVisible = true
    }
}
Java
@Override
public void onCreatePreferences(Bundle savedInstanceState, String rootKey) {
    setPreferencesFromResource(R.xml.preferences, rootKey);
    if(/*some feature*/) {
        EditTextPreference signaturePreference = findPreference("signature");
        if (signaturePreference != null) {
            signaturePreference.setVisible(true);
        }
    }
}
Dynamically update summaries
A Preference that persists data must display the current value in its
summary to help the user better understand the current state of the
Preference. For example, an EditTextPreference must show the saved text
value, and a ListPreference must show the selected list entry. You might also
have Preference objects that need to update their summary based on internal or
external app state—for example, a Preference that displays a version
number. You can do this by using a
SummaryProvider.
Use a SimpleSummaryProvider
ListPreference
and
EditTextPreference
include simple SummaryProvider implementations that automatically display the
saved Preference value as the summary. If no value is saved, they display "Not
set."
To enable these implementations from XML, set
app:useSimpleSummaryProvider="true".
Alternatively, in code you can use
ListPreference.SimpleSummaryProvider.getInstance()
and
EditTextPreference.SimpleSummaryProvider.getInstance()
to get the simple SummaryProvider instance and then set it on the
Preference, as shown in the following example:
Kotlin
listPreference.summaryProvider = ListPreference.SimpleSummaryProvider.getInstance()
editTextPreference.summaryProvider = EditTextPreference.SimpleSummaryProvider.getInstance()
Java
listPreference.setSummaryProvider(ListPreference.SimpleSummaryProvider.getInstance());
editTextPreference.setSummaryProvider(EditTextPreference.SimpleSummaryProvider.getInstance());
Use a custom SummaryProvider
You can create your own SummaryProvider and override
provideSummary()
to customize the summary whenever it is requested by the Preference. For
example, the following EditTextPreference displays the length of its saved
value as the summary:
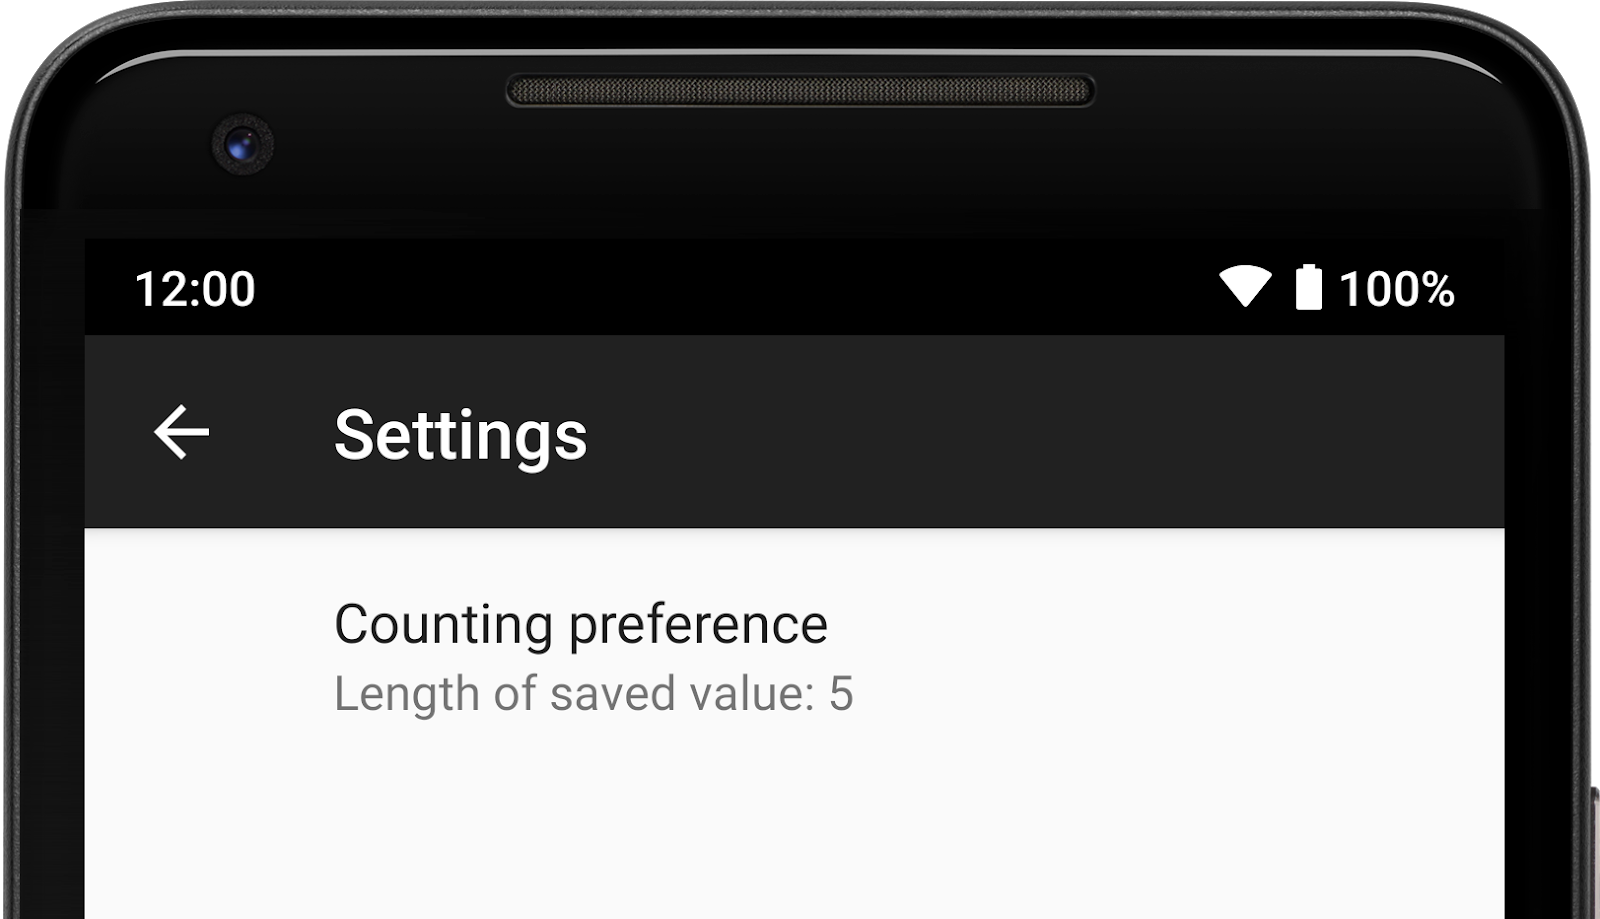
EditTextPreference.
As an example, assume the following EditTextPreference:
<EditTextPreference
        app:key="counting"
        app:title="Counting preference"/>
In onCreatePreferences(), you can create a new SummaryProvider and override
provideSummary() to return the summary to be displayed:
Kotlin
val countingPreference: EditTextPreference? = findPreference("counting")

countingPreference?.summaryProvider = SummaryProvider<EditTextPreference> { preference ->
    val text = preference.text
    if (text.isNullOrEmpty()) {
        "Not set"
    } else {
        "Length of saved value: " + text.length
    }
}
Java
EditTextPreference countingPreference = findPreference("counting");

if (countingPreference != null) {
    countingPreference.setSummaryProvider(new SummaryProvider<EditTextPreference>() {
        @Override
        public CharSequence provideSummary(EditTextPreference preference) {
            String text = preference.getText();
            if (TextUtils.isEmpty(text) || text == null){
                return "Not set";
            }
            return "Length of saved value: " + text.length();
        }
    });
}
The Preference summary displays the length of the saved value or "Not set"
when no saved value exists.
Customize an EditTextPreference dialog
Within an EditTextPreference dialog, you can customize text field behavior by
attaching an
OnBindEditTextListener.
This listener is invoked when the dialog is shown to the user.
As an example, you can customize a dialog to accept only numbers. First, create
the EditTextPreference:
<EditTextPreference
        app:key="number"
        app:title="Numbers only preference"/>
Next, in onCreatePreferences(), create a new OnBindEditTextListener and
override onBindEditText() to customize the EditText when it is shown to the
user.
Kotlin
val numberPreference: EditTextPreference? = findPreference("number")

numberPreference?.setOnBindEditTextListener { editText ->
    editText.inputType = InputType.TYPE_CLASS_NUMBER
}
Java
EditTextPreference numberPreference = findPreference("number");

if (numberPreference != null) {
    numberPreference.setOnBindEditTextListener(
            new EditTextPreference.OnBindEditTextListener() {
                @Override
                public void onBindEditText(@NonNull EditText editText) {
                    editText.setInputType(InputType.TYPE_CLASS_NUMBER);
                }
            });
}
Now, when the dialog is shown to the user, the keyboard opens in numeric-only
mode, so the user can enter only numbers into the EditText.
Preference actions
A Preference can have a specific action when tapped. For example, a
Preference can act as a link to a separate part of your app. To add an action
to a Preference, you can set an Intent on the Preference directly or you
can set an
OnPreferenceClickListener
for more specific logic.
Set an Intent
You can set an Intent on a Preference to launch a new Fragment,
Activity, or separate app whenever the Preference is tapped. This is the
same as using
Context.startActivity()
with a given Intent.
You can set an Intent in XML using a nested <intent> tag. The following
example defines an Intent that launches an Activity:
<Preference
        app:key="activity"
        app:title="Launch activity">
    <intent
            android:targetPackage="com.example"
            android:targetClass="com.example.ExampleActivity"/>
</Preference>
Alternatively, you can use setIntent() directly on a Preference, as follows:
Kotlin
val intent = Intent(context, ExampleActivity::class.java)
activityPreference.setIntent(intent)
Java
Intent intent = new Intent(getContext(), ExampleActivity.class);
activityPreference.setIntent(intent);
You can also include extras with an Intent using XML:
<Preference
        app:key="activity"
        app:title="Launch activity">
    <intent
            android:targetPackage="com.example"
            android:targetClass="com.example.ExampleActivity">
        <extra
                android:name="example_key"
                android:value="example_value"/>
    </intent>
</Preference>
Here is an example of a Preference with an Intent that launches a web page:
<Preference
        app:key="webpage"
        app:title="View webpage">
    <intent
            android:action="android.intent.action.VIEW"
            android:data="http://www.google.com" />
</Preference>
Kotlin
val intent = Intent(Intent.ACTION_VIEW)
intent.data = Uri.parse("http://www.google.com")

val webpagePreference = findPreference("webpage")
webpagePreference?.intent = intent
Java
Intent intent = new Intent(Intent.ACTION_VIEW);
intent.setData(Uri.parse("http://www.google.com"));
webpagePreference.setIntent(intent);
OnPreferenceClickListener
You can set an OnPreferenceClickListener on a Preference, which adds a
callback to onPreferenceClick() when the Preference is tapped. For example,
you can use the listener to navigate to another Fragment or Activity if you
have more complex logic for handling navigation.
To set an OnPreferenceClickListener, use code similar to the following:
Kotlin
onClickPreference.setOnPreferenceClickListener({
    // Do something.
    true
})
Java
onClickPreference.setOnPreferenceClickListener(preference -> {
    // Do something.
    return true;
});