

किसी Image कंपोज़ेबल पर मौजूद प्रॉपर्टी (जैसे, contentScale, colorFilter) इस्तेमाल करके, इमेज पसंद के मुताबिक बनाई जा सकती हैं. Image पर अलग-अलग इफ़ेक्ट लागू करने के लिए, मौजूदा मॉडिफ़ायर भी इस्तेमाल किए जा सकते हैं. मॉडिफ़ायर, Image कंपोज़ेबल पर ही नहीं, बल्कि हर कंपोज़ेबल पर इस्तेमाल किए जा सकते हैं. वहीं, contentScale और colorFilter खास तौर पर Image कंपोज़ेबल के लिए ही बनाए गए पैरामीटर हैं.
कॉन्टेंट स्केल
किसी इमेज को काटने या उसका साइज़ बदलने का तरीका तय करने के लिए, contentScale विकल्प का इस्तेमाल करें. डिफ़ॉल्ट रूप से, अगर आपने कोई contentScale विकल्प नहीं चुना है, तो ContentScale.Fit का इस्तेमाल किया जाएगा.
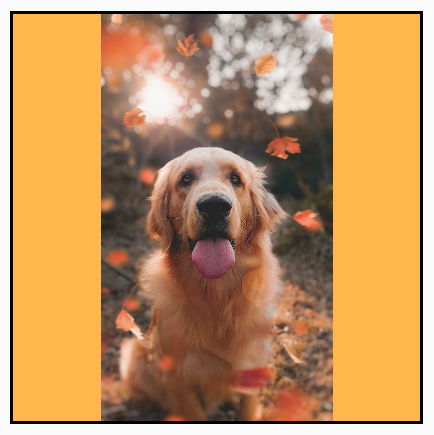
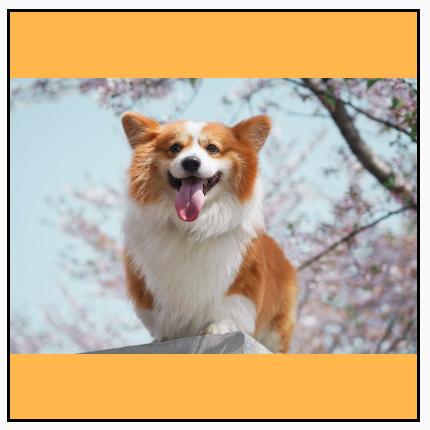
यहां दिए गए उदाहरण में, Image कंपोज़ेबल को 150 डीपी साइज़ तक सीमित किया गया है और इसमें बॉर्डर भी जोड़ा गया है. इसके अलावा, Image कंपोज़ेबल का बैकग्राउंड पीले रंग पर सेट किया गया है, ताकि नीचे दी गई टेबल में अलग-अलग ContentScale विकल्प दिखाए जा सकें.
val imageModifier = Modifier .size(150.dp) .border(BorderStroke(1.dp, Color.Black)) .background(Color.Yellow) Image( painter = painterResource(id = R.drawable.dog), contentDescription = stringResource(id = R.string.dog_content_description), contentScale = ContentScale.Fit, modifier = imageModifier )
अलग-अलग ContentScale विकल्प सेट करने से, अलग-अलग आउटपुट मिलते हैं. यहां दी गई टेबल से, आपको सही ContentScale मोड चुनने में मदद मिलेगी:
| सोर्स इमेज |
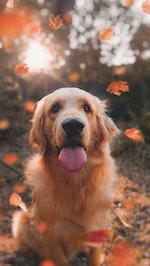
|
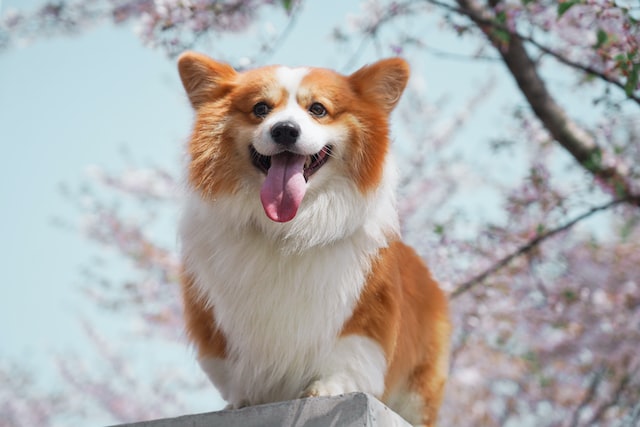
|
ContentScale |
नतीजा - पोर्ट्रेट इमेज: | नतीजा - लैंडस्केप इमेज: |
ContentScale.Fit: इमेज को समान रूप से स्केल करता है और आसपेक्ट रेशियो (डिफ़ॉल्ट) बनाए रखता है. अगर इमेज का साइज़ छोटा है, तो उसे बॉक्स में फ़िट करने के लिए बड़ा कर दिया जाता है. |
|
|
ContentScale.Crop: इमेज को बॉक्स में पूरी तरह फ़िट करने के लिए, उसके किनारे काट दिए जाते हैं और बीच का हिस्सा दिखाया जाता है. |
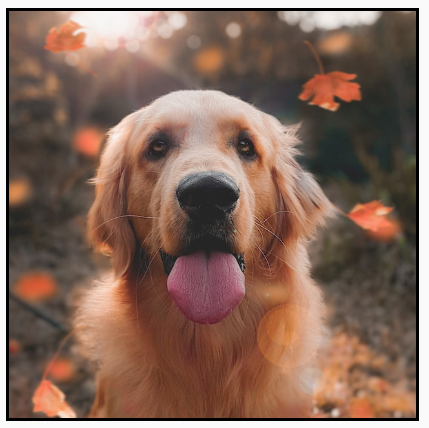
|
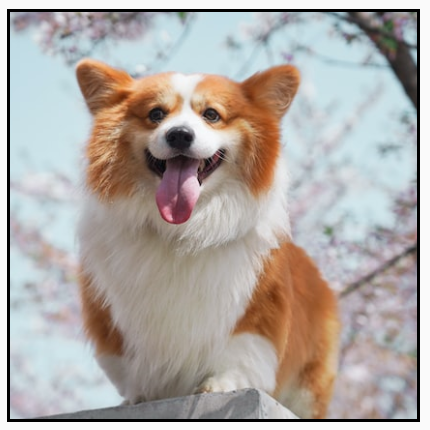
|
ContentScale.FillHeight: इमेज की आसपेक्ट रेशियो को बदले बिना, उसे ऐसे स्केल करता है कि उसकी ऊंचाई बिलकुल बॉक्स की ऊंचाई के बराबर हो जाए. |
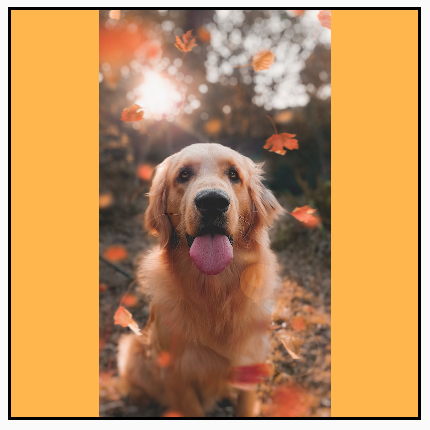
|
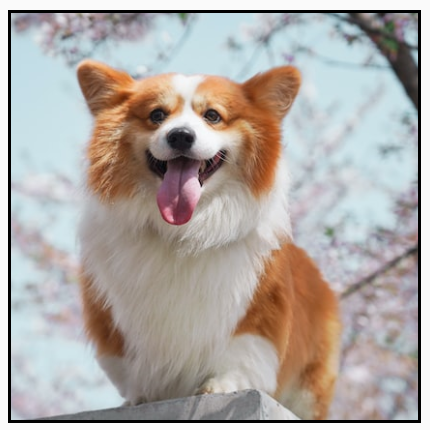
|
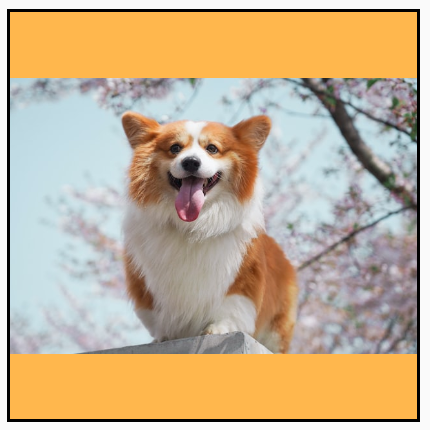
ContentScale.FillWidth: इमेज की आसपेक्ट रेशियो को बदले बिना, उसे ऐसे स्केल करता है कि उसकी चौड़ाई बिलकुल बॉक्स की चौड़ाई के बराबर हो जाए. |
|
|
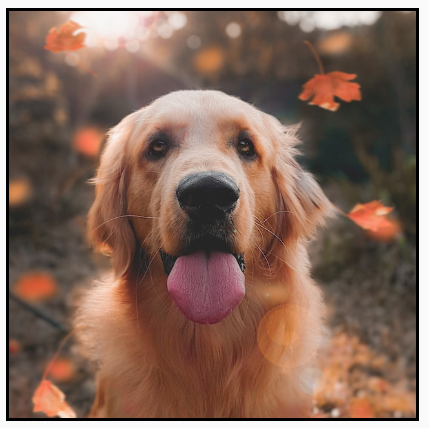
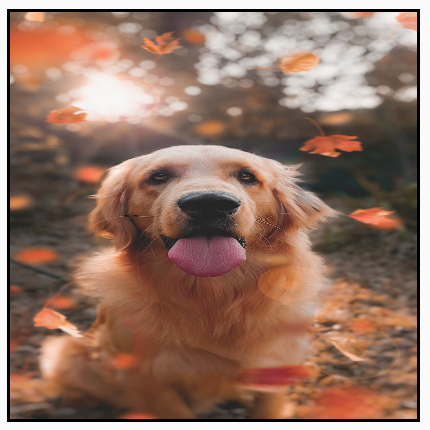
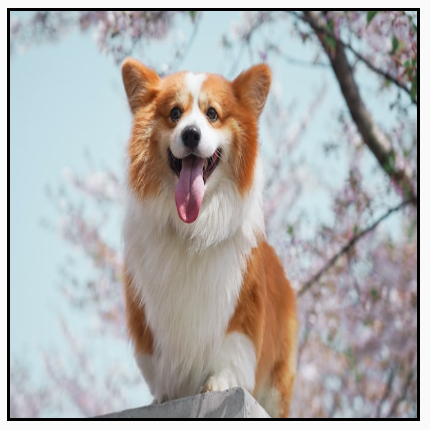
ContentScale.FillBounds: इमेज को वर्टिकल और हॉरिज़ॉन्टल तौर पर असमान रूप से खींचकर, उसे बॉक्स के बराबर साइज़ का कर दिया जाता है. (ध्यान दें: अगर इमेज ऐसे कंटेनर में रखी जाती हैं जो उनके आसपेक्ट रेशियो से मेल नहीं खाते हैं, तो इमेज खराब हो जाएंगी). |
|
|
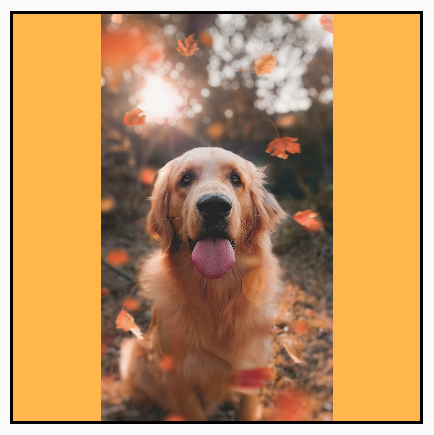
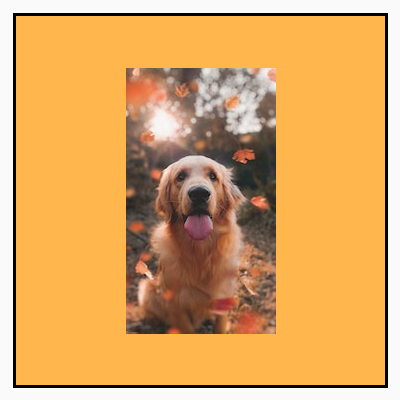
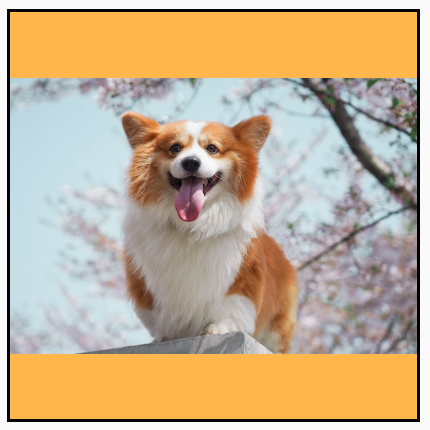
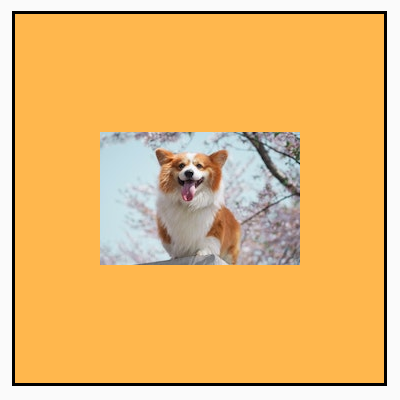
ContentScale.Inside: इमेज को इस हिसाब से स्केल किया जाता है कि उसकी आसपेक्ट रेशियो न बदले और वह बॉक्स के अंदर भी रहे. अगर इमेज, लंबाई और चौड़ाई दोनों में बॉक्स से छोटी या उसके बराबर है, तो यह None की तरह काम करता है. कॉन्टेंट हमेशा तय की गई सीमाओं के अंदर रहेगा. अगर इमेज बॉक्स से छोटी है, तो उसे बड़ा नहीं किया जाएगा. |
सोर्स इमेज का साइज़, बॉक्स से बड़ा है:
 सोर्स इमेज का साइज़, बॉक्स से छोटा है:
|
सोर्स इमेज का साइज़, बॉक्स से बड़ा है:
 सोर्स इमेज का साइज़, बॉक्स से छोटा है:
|
ContentScale.None: इमेज को छोटा-बड़ा नहीं किया जाता है. अगर इमेज, बॉक्स के साइज़ से छोटी है, तो उसे बॉक्स में फ़िट करने के लिए बड़ा नहीं किया जाएगा. |
सोर्स इमेज का साइज़, बॉक्स से बड़ा है:
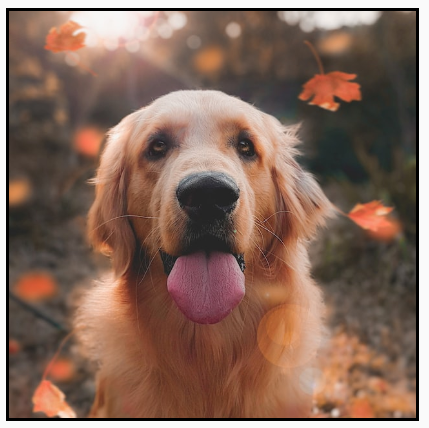 सोर्स इमेज का साइज़, बॉक्स से छोटा है:
|
सोर्स इमेज का साइज़, बॉक्स से बड़ा है:
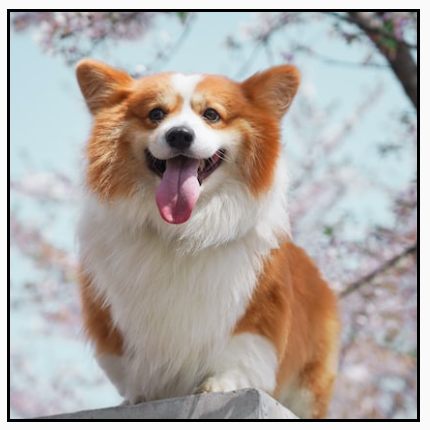 सोर्स इमेज का साइज़, बॉक्स से छोटा है:
|
किसी Image कंपोज़ेबल को किसी शेप में काटना
किसी इमेज को किसी शेप में फ़िट करने के लिए, पहले से मौजूद clip मॉडिफ़ायर का इस्तेमाल करें.
किसी इमेज को सर्कल के आकार में काटने के लिए, Modifier.clip(CircleShape) का इस्तेमाल करें:
Image( painter = painterResource(id = R.drawable.dog), contentDescription = stringResource(id = R.string.dog_content_description), contentScale = ContentScale.Crop, modifier = Modifier .size(200.dp) .clip(CircleShape) )
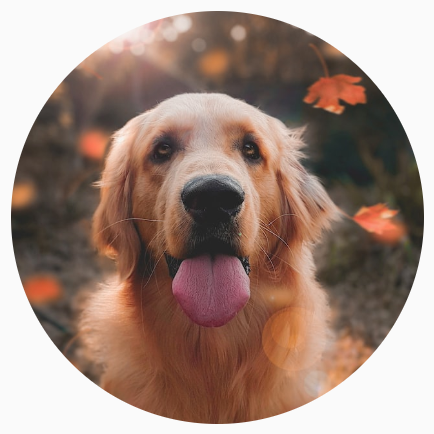
CircleShape की मदद से इमेज को क्लिप करना.गोल किनारों वाली शेप के लिए, Modifier.clip(RoundedCornerShape(16.dp) का इस्तेमाल करें और किनारों को कितना गोल करना है, इसका साइज़ तय करें:
Image( painter = painterResource(id = R.drawable.dog), contentDescription = stringResource(id = R.string.dog_content_description), contentScale = ContentScale.Crop, modifier = Modifier .size(200.dp) .clip(RoundedCornerShape(16.dp)) )
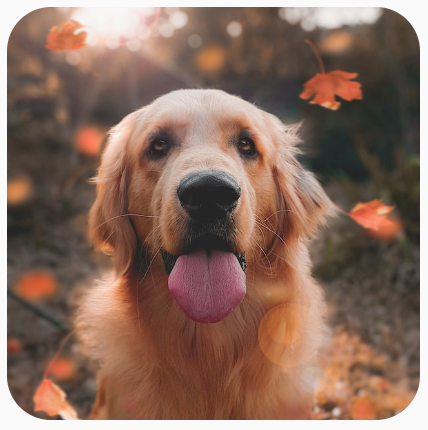
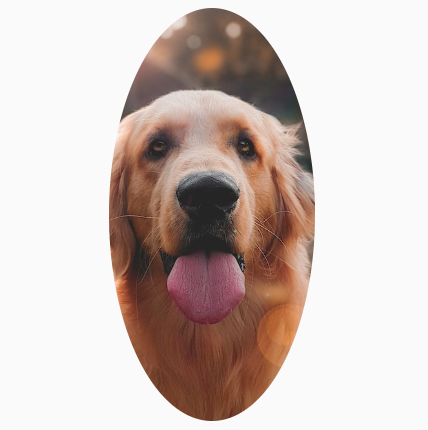
RoundedCornerShape की मदद से इमेज को क्लिप करना.Shape को एक्सटेंड करके, अपनी खुद की क्लिपिंग शेप भी बनाई जा सकती है. इसके लिए, आपको क्लिप करने के लिए शेप के चारों ओर Path देना होगा:
class SquashedOval : Shape { override fun createOutline( size: Size, layoutDirection: LayoutDirection, density: Density ): Outline { val path = Path().apply { // We create an Oval that starts at ¼ of the width, and ends at ¾ of the width of the container. addOval( Rect( left = size.width / 4f, top = 0f, right = size.width * 3 / 4f, bottom = size.height ) ) } return Outline.Generic(path = path) } } Image( painter = painterResource(id = R.drawable.dog), contentDescription = stringResource(id = R.string.dog_content_description), contentScale = ContentScale.Crop, modifier = Modifier .size(200.dp) .clip(SquashedOval()) )
किसी Image कंपोज़ेबल में बॉर्डर जोड़ना
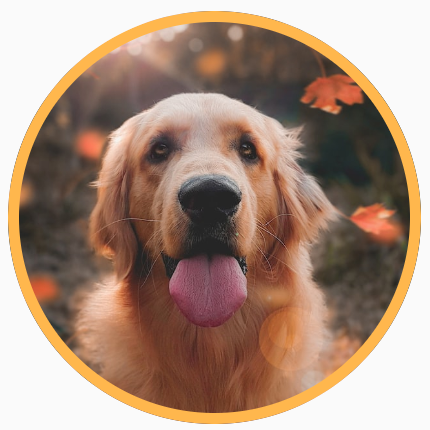
इमेज के चारों ओर बॉर्डर बनाने के लिए, Modifier.border() को Modifier.clip() के साथ जोड़ना एक सामान्य ऑपरेशन है:
val borderWidth = 4.dp Image( painter = painterResource(id = R.drawable.dog), contentDescription = stringResource(id = R.string.dog_content_description), contentScale = ContentScale.Crop, modifier = Modifier .size(150.dp) .border( BorderStroke(borderWidth, Color.Yellow), CircleShape ) .padding(borderWidth) .clip(CircleShape) )
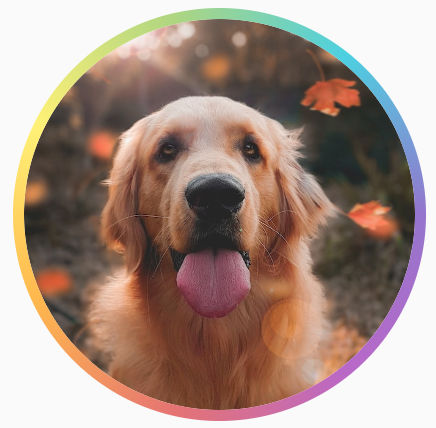
अगर आपको ग्रेडिएंट बॉर्डर बनाना है, तो Brush एपीआई का इस्तेमाल करके, इमेज के चारों ओर रेनबो ग्रेडिएंट बॉर्डर बनाया जा सकता है:
val rainbowColorsBrush = remember { Brush.sweepGradient( listOf( Color(0xFF9575CD), Color(0xFFBA68C8), Color(0xFFE57373), Color(0xFFFFB74D), Color(0xFFFFF176), Color(0xFFAED581), Color(0xFF4DD0E1), Color(0xFF9575CD) ) ) } val borderWidth = 4.dp Image( painter = painterResource(id = R.drawable.dog), contentDescription = stringResource(id = R.string.dog_content_description), contentScale = ContentScale.Crop, modifier = Modifier .size(150.dp) .border( BorderStroke(borderWidth, rainbowColorsBrush), CircleShape ) .padding(borderWidth) .clip(CircleShape) )
अपनी पसंद के मुताबिक आसपेक्ट रेशियो सेट करना
किसी इमेज का आसपेक्ट रेशियो अपनी पसंद के मुताबिक सेट करने के लिए, Modifier.aspectRatio(16f/9f) का इस्तेमाल करें. इससे किसी इमेज (या किसी भी कंपोज़ेबल) के लिए, पसंद के मुताबिक रेशियो सेट किया जा सकता है.
Image( painter = painterResource(id = R.drawable.dog), contentDescription = stringResource(id = R.string.dog_content_description), modifier = Modifier.aspectRatio(16f / 9f) )
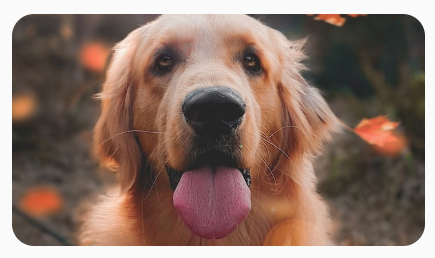
Image पर Modifier.aspectRatio(16f/9f) का इस्तेमाल करना.कलर फ़िल्टर: इमेज के पिक्सल के रंग बदलना
Image कंपोज़ेबल में colorFilter पैरामीटर होता है. इसकी मदद से, इमेज के हर पिक्सल के आउटपुट में बदलाव किया जा सकता है.
इमेज में रंगत जोड़ना
ColorFilter.tint(color, blendMode) का इस्तेमाल करने पर, दिए गए रंग के साथ ब्लेंड मोड लागू होता है. यह Image कंपोज़ेबल पर लागू होता है. ColorFilter.tint(color, blendMode)
कॉन्टेंट को रंग देने के लिए BlendMode.SrcIn का इस्तेमाल करता है. इसका मतलब है कि
स्क्रीन पर इमेज जहां दिखती है वहां दिया गया रंग दिखता है. यह उन आइकॉन और वेक्टर के लिए फ़ायदेमंद है जिन्हें अलग-अलग थीम में रखना होता है.
Image( painter = painterResource(id = R.drawable.baseline_directions_bus_24), contentDescription = stringResource(id = R.string.bus_content_description), colorFilter = ColorFilter.tint(Color.Yellow) )

ColorFilter.tint BlendMode.SrcIn से लागू किया गया.अन्य BlendMode से अलग-अलग इफ़ेक्ट मिलते हैं. उदाहरण के लिए, किसी इमेज पर Color.Green के साथ BlendMode.Darken सेट करने पर, यह नतीजा मिलता है:
Image( painter = painterResource(id = R.drawable.dog), contentDescription = stringResource(id = R.string.dog_content_description), colorFilter = ColorFilter.tint(Color.Green, blendMode = BlendMode.Darken) )
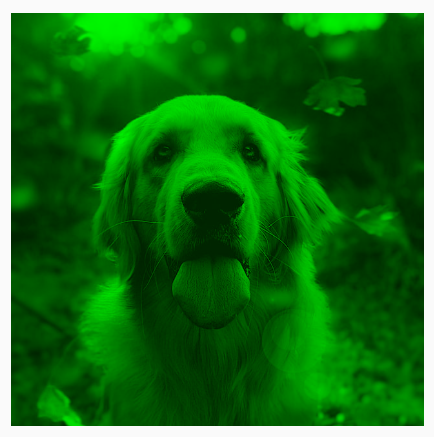
Color.Green tint के साथ BlendMode.Darken.अलग-अलग ब्लेंड मोड के बारे में ज़्यादा जानने के लिए, BlendMode रेफ़रंस दस्तावेज़ देखें.
कलर मैट्रिक्स के साथ कोई Image फ़िल्टर लागू करना
कलर मैट्रिक्स ColorFilter विकल्प का इस्तेमाल करके, अपनी इमेज में बदलाव करें. उदाहरण के लिए, अपनी इमेज पर ब्लैक ऐंड व्हाइट फ़िल्टर लागू करने के लिए, ColorMatrix का इस्तेमाल किया जा सकता है. साथ ही, सैचुरेशन को 0f पर सेट किया जा सकता है.
Image( painter = painterResource(id = R.drawable.dog), contentDescription = stringResource(id = R.string.dog_content_description), colorFilter = ColorFilter.colorMatrix(ColorMatrix().apply { setToSaturation(0f) }) )
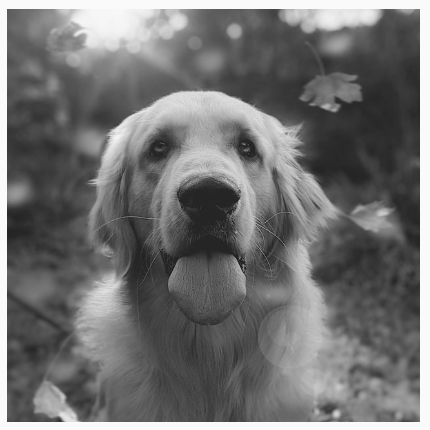
किसी Image कंपोज़ेबल के कंट्रास्ट या चमक को अडजस्ट करना
किसी इमेज का कंट्रास्ट और उसकी चमक बदलने के लिए, ColorMatrix का इस्तेमाल करके वैल्यू बदलें:
val contrast = 2f // 0f..10f (1 should be default) val brightness = -180f // -255f..255f (0 should be default) val colorMatrix = floatArrayOf( contrast, 0f, 0f, 0f, brightness, 0f, contrast, 0f, 0f, brightness, 0f, 0f, contrast, 0f, brightness, 0f, 0f, 0f, 1f, 0f ) Image( painter = painterResource(id = R.drawable.dog), contentDescription = stringResource(id = R.string.dog_content_description), colorFilter = ColorFilter.colorMatrix(ColorMatrix(colorMatrix)) )
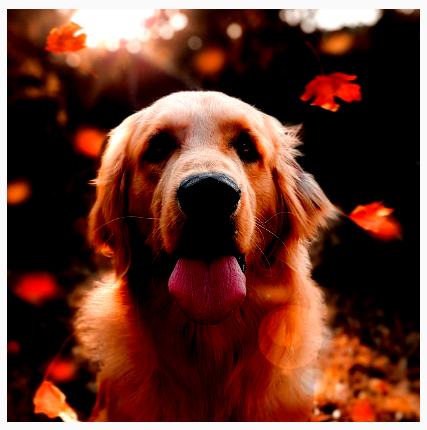
ColorMatrix.किसी Image कंपोज़ेबल के रंगों को उलटना
किसी इमेज के रंगों को उलटने के लिए, ColorMatrix को सेट करें, ताकि रंगों को उलटा जा सके:
val colorMatrix = floatArrayOf( -1f, 0f, 0f, 0f, 255f, 0f, -1f, 0f, 0f, 255f, 0f, 0f, -1f, 0f, 255f, 0f, 0f, 0f, 1f, 0f ) Image( painter = painterResource(id = R.drawable.dog), contentDescription = stringResource(id = R.string.dog_content_description), colorFilter = ColorFilter.colorMatrix(ColorMatrix(colorMatrix)) )
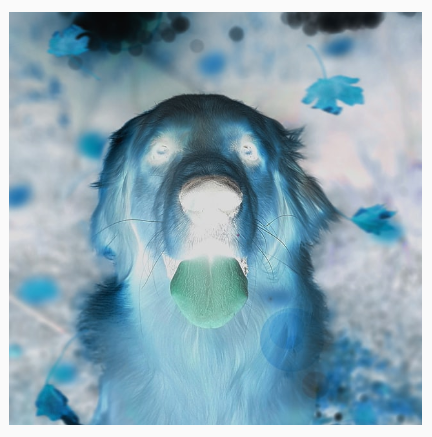
किसी Image कंपोज़ेबल को धुंधला करना
किसी इमेज को धुंधला करने के लिए, Modifier.blur() का इस्तेमाल करें. इसके लिए, radiusX और radiusY की वैल्यू दें, जो हॉरिज़ॉन्टल और वर्टिकल दिशा में ब्लर रेडियस को तय करते हैं.
Image( painter = painterResource(id = R.drawable.dog), contentDescription = stringResource(id = R.string.dog_content_description), contentScale = ContentScale.Crop, modifier = Modifier .size(150.dp) .blur( radiusX = 10.dp, radiusY = 10.dp, edgeTreatment = BlurredEdgeTreatment(RoundedCornerShape(8.dp)) ) )
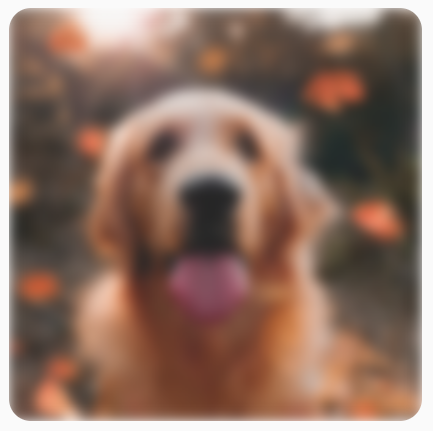
BlurEffect को किसी इमेज पर लागू किया गया है.Images ब्लर करते समय, BlurredEdgeTreatment.Unbounded के बजाय BlurredEdgeTreatment(Shape) का इस्तेमाल करने का सुझाव दिया जाता है. ऐसा इसलिए, क्योंकि इसका इस्तेमाल उन रेंडरिंग को धुंधला करने के लिए किया जाता है जिन्हें ओरिजनल कॉन्टेंट की सीमाओं से बाहर रेंडर किया जाना चाहिए. इमेज के मामले में, ऐसा हो सकता है कि वे बॉक्स के बाहर रेंडर न हों. वहीं, गोल कोनों वाले आयताकार को धुंधला करने के लिए, इस अंतर की ज़रूरत पड़ सकती है.
उदाहरण के लिए, अगर हम पिछली इमेज पर BlurredEdgeTreatment को Unbounded पर सेट करते हैं, तो इमेज के किनारे साफ़ दिखने के बजाय धुंधले दिखते हैं:
Image( painter = painterResource(id = R.drawable.dog), contentDescription = stringResource(id = R.string.dog_content_description), contentScale = ContentScale.Crop, modifier = Modifier .size(150.dp) .blur( radiusX = 10.dp, radiusY = 10.dp, edgeTreatment = BlurredEdgeTreatment.Unbounded ) .clip(RoundedCornerShape(8.dp)) )

BlurEdgeTreatment.Unbounded.आपके लिए सुझाव
- ध्यान दें: JavaScript बंद होने पर लिंक का टेक्स्ट दिखता है
- ग्राफ़िक्स मॉडिफ़ायर
- इमेज लोड हो रही हैं
- Material icons