
LinearLayout
est un groupe de vues qui aligne tous les enfants dans une seule direction, verticale ou horizontale. Vous pouvez spécifier la direction de la mise en page avec l'
android:orientation
attribut.

LinearLayout avec trois enfants orientés horizontalement.
Tous les enfants d'un LinearLayout sont empilés les uns après les autres. Par conséquent, une liste verticale ne comporte qu'un seul enfant par ligne, quelle que soit sa largeur. Une liste horizontale ne comporte qu'une seule ligne, et sa hauteur correspond à celle de l'enfant le plus haut, plus le remplissage. Un LinearLayout respecte les marges entre les
enfants et la gravité (alignement à droite, au centre ou à gauche)
de chaque enfant.
Pondération de la mise en page
LinearLayout permet également d'attribuer une pondération à
des enfants individuels avec l'
android:layout_weight
attribut. Cet attribut attribue une valeur d'"importance" à une vue en fonction de l'espace qu'elle occupe à l'écran. Une valeur de pondération plus élevée lui permet de s'étendre pour remplir l'espace restant dans la vue parent. Les vues enfants peuvent spécifier une valeur de pondération, et tout espace restant dans le groupe de vues est attribué aux enfants proportionnellement, en fonction de leur pondération déclarée. La pondération par défaut est zéro.
Distribution égale
Pour créer une mise en page linéaire dans laquelle chaque enfant utilise la même quantité d'espace
à l'écran, définissez la
android:layout_height
de chaque vue sur "0dp" pour une mise en page verticale, ou la
android:layout_width
de chaque vue sur "0dp" pour une mise en page horizontale. Définissez ensuite la android:layout_weight de chaque vue sur "1".
Distribution inégale
Vous pouvez également créer des mises en page linéaires dans lesquelles les éléments enfants utilisent différentes quantités d'espace à l'écran. Prenons les exemples suivants :
- Supposons que vous ayez trois champs de texte : deux avec une valeur de pondération de 1 et un troisième avec la valeur de pondération par défaut de 0. Le troisième champ de texte, avec la valeur de pondération de 0, n'occupe que la zone requise par son contenu. Les deux autres champs de texte, avec la valeur de pondération de 1, s'étendent de manière égale pour remplir l'espace restant après la mesure du contenu des trois champs.
- Si vous avez trois champs de texte où deux ont une valeur de pondération de 1 et le troisième une pondération de 2, l'espace restant après la mesure du contenu des trois champs est réparti comme suit : la moitié au champ avec la valeur de pondération de 2, et l'autre moitié divisée de manière égale entre les champs avec la valeur de pondération de 1.
La figure et l'extrait de code suivants montrent comment les pondérations de mise en page peuvent fonctionner dans une activité "Envoyer un message". Les champs À et Objet, ainsi que le bouton Envoyer, n'occupent que la hauteur dont ils ont besoin. La zone de message occupe le reste de la hauteur de l'activité.
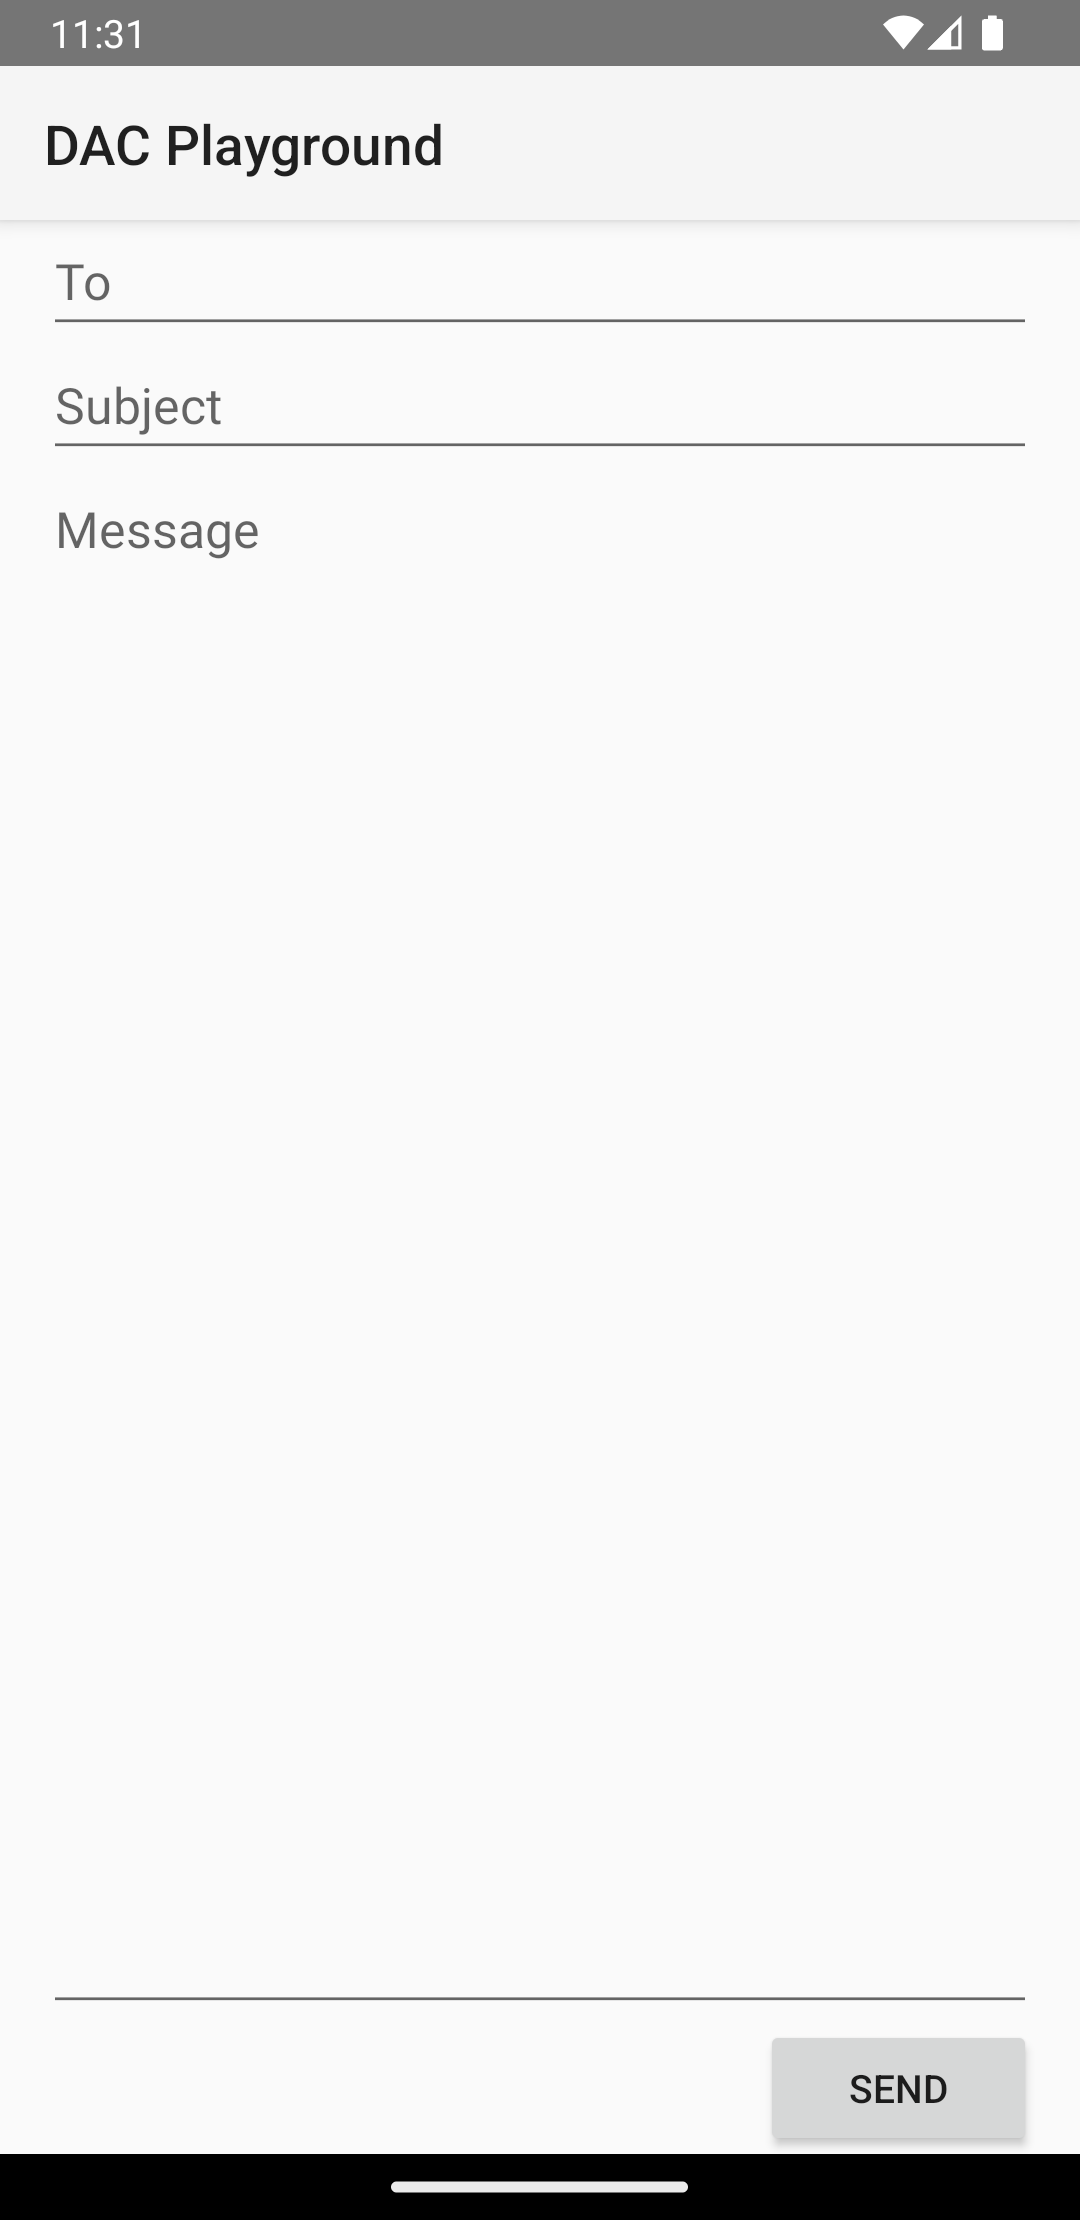
LinearLayout.
<?xml version="1.0" encoding="utf-8"?>
<LinearLayout xmlns:android="http://schemas.android.com/apk/res/android"
    android:layout_width="match_parent"
    android:layout_height="match_parent"
    android:paddingLeft="16dp"
    android:paddingRight="16dp"
    android:orientation="vertical" >
    <EditText
        android:layout_width="match_parent"
        android:layout_height="wrap_content"
        android:hint="@string/to" />
    <EditText
        android:layout_width="match_parent"
        android:layout_height="wrap_content"
        android:hint="@string/subject" />
    <EditText
        android:layout_width="match_parent"
        android:layout_height="0dp"
        android:layout_weight="1"
        android:gravity="top"
        android:hint="@string/message" />
    <Button
        android:layout_width="100dp"
        android:layout_height="wrap_content"
        android:layout_gravity="end"
        android:text="@string/send" />
</LinearLayout>
Pour en savoir plus sur les attributs disponibles pour chaque vue enfant d'un
LinearLayout, consultez
LinearLayout.LayoutParams.