
Android এর বিভিন্ন সংস্করণে আপনার বিজ্ঞপ্তিগুলিকে তাদের সেরা দেখাতে, আপনার বিজ্ঞপ্তিগুলি তৈরি করতে স্ট্যান্ডার্ড বিজ্ঞপ্তি টেমপ্লেট ব্যবহার করুন৷ আপনি যদি আপনার বিজ্ঞপ্তিতে আরও বিষয়বস্তু প্রদান করতে চান, তাহলে প্রসারণযোগ্য বিজ্ঞপ্তি টেমপ্লেটগুলির একটি ব্যবহার করার কথা বিবেচনা করুন৷
যাইহোক, যদি সিস্টেম টেমপ্লেটগুলি আপনার চাহিদা পূরণ না করে, আপনি বিজ্ঞপ্তির জন্য আপনার নিজস্ব লেআউট ব্যবহার করতে পারেন৷
বিষয়বস্তু এলাকার জন্য কাস্টম লেআউট তৈরি করুন
আপনার যদি কাস্টম লেআউটের প্রয়োজন হয়, আপনি আপনার বিজ্ঞপ্তিতে NotificationCompat.DecoratedCustomViewStyle প্রয়োগ করতে পারেন। নোটিফিকেশন আইকন, টাইমস্ট্যাম্প, সাব-টেক্সট এবং অ্যাকশন বোতামগুলির জন্য সিস্টেম সজ্জা ব্যবহার করার সময় এই API আপনাকে সাধারণত শিরোনাম এবং পাঠ্য সামগ্রী দ্বারা দখলকৃত বিষয়বস্তুর এলাকার জন্য একটি কাস্টম লেআউট প্রদান করতে দেয়।
এই APIটি নিম্নরূপ মৌলিক বিজ্ঞপ্তি বিন্যাস তৈরি করে প্রসারণযোগ্য বিজ্ঞপ্তি টেমপ্লেটগুলির অনুরূপভাবে কাজ করে:
-
NotificationCompat.Builderদিয়ে একটি মৌলিক বিজ্ঞপ্তি তৈরি করুন। -
setStyle()কে কল করুন, এটিকেNotificationCompat.DecoratedCustomViewStyleএর একটি উদাহরণ দিয়ে দিন। -
RemoteViewsএর উদাহরণ হিসেবে আপনার কাস্টম লেআউটকে স্ফীত করুন। - কলাপ করা বিজ্ঞপ্তির জন্য লেআউট সেট করতে
setCustomContentView()এ কল করুন। - ঐচ্ছিকভাবে, প্রসারিত বিজ্ঞপ্তির জন্য একটি ভিন্ন লেআউট সেট করতে
setCustomBigContentView()কল করুন।
লেআউট প্রস্তুত করুন
আপনি একটি small এবং large লেআউট প্রয়োজন. এই উদাহরণের জন্য, small লেআউটটি দেখতে এরকম হতে পারে:
<?xml version="1.0" encoding="utf-8"?>
<LinearLayout xmlns:android="http://schemas.android.com/apk/res/android"
android:layout_width="match_parent"
android:layout_height="wrap_content"
android:orientation="vertical">
<TextView
android:id="@+id/notification_title"
style="@style/TextAppearance.Compat.Notification.Title"
android:layout_width="wrap_content"
android:layout_height="0dp"
android:layout_weight="1"
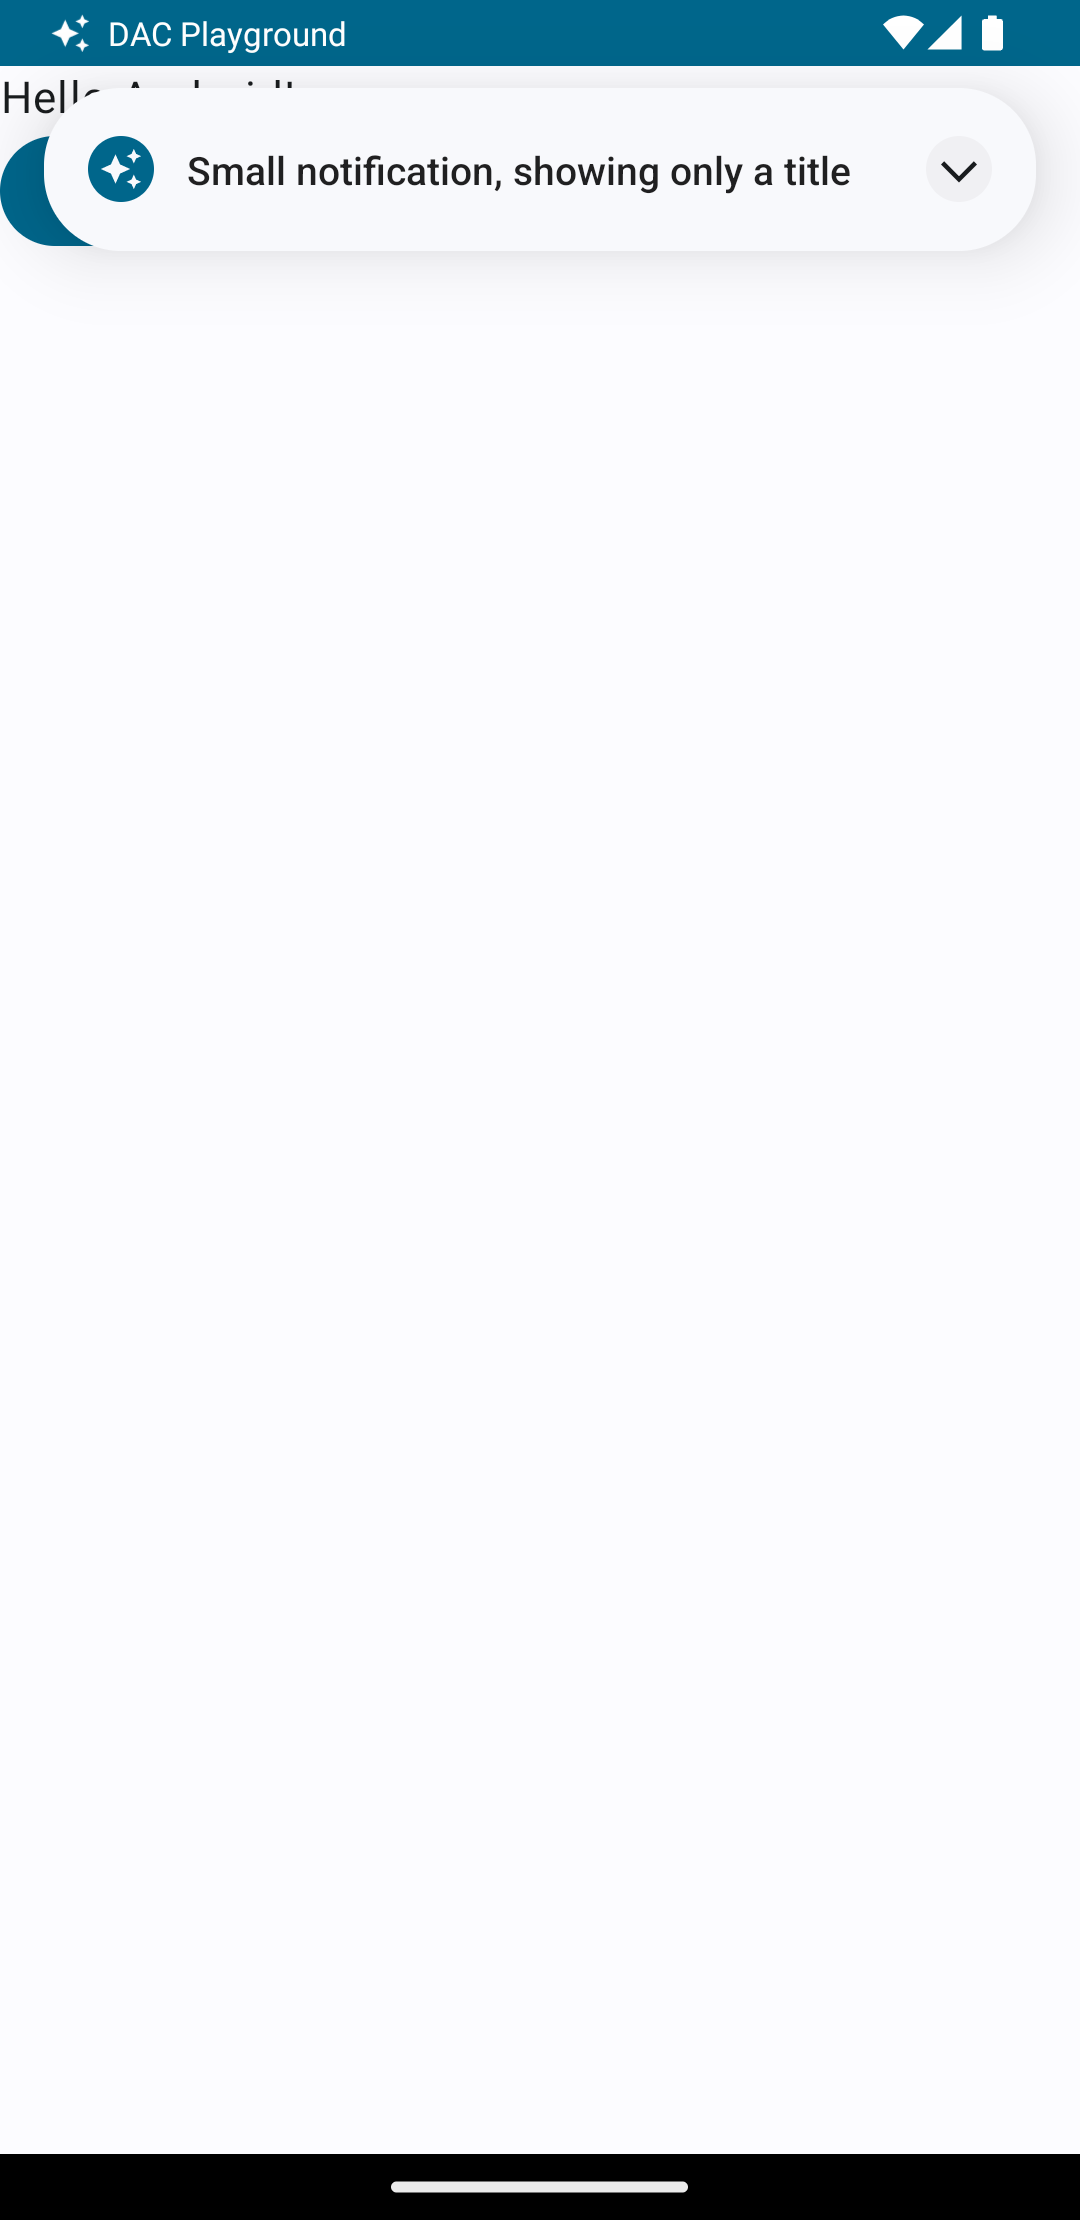
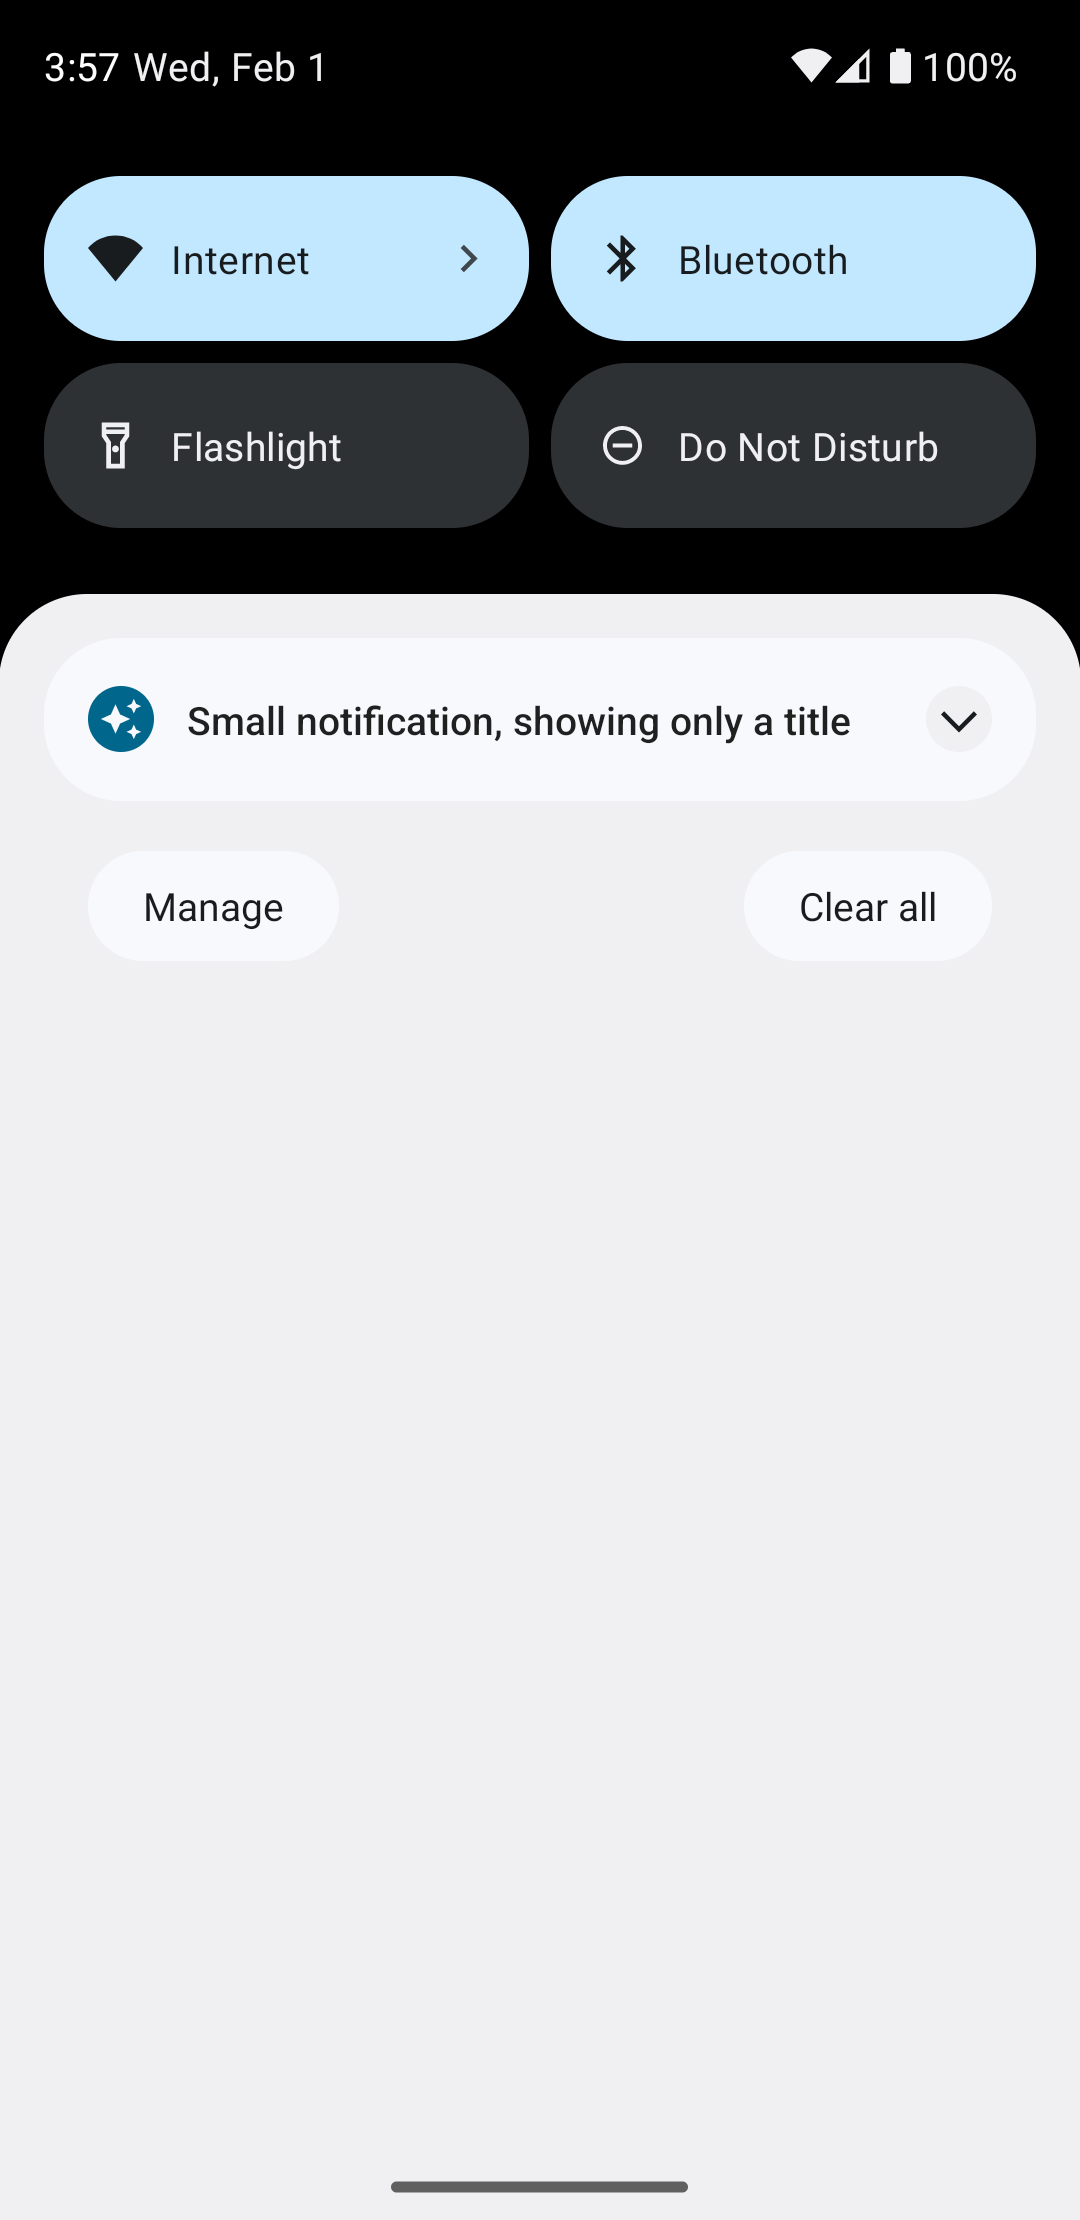
android:text="Small notification, showing only a title" />
</LinearLayout>
এবং large লেআউট এই মত দেখতে পারে:
<?xml version="1.0" encoding="utf-8"?>
<LinearLayout xmlns:android="http://schemas.android.com/apk/res/android"
android:layout_width="match_parent"
android:layout_height="300dp"
android:orientation="vertical">
<TextView
android:id="@+id/notification_title"
style="@style/TextAppearance.Compat.Notification.Title"
android:layout_width="wrap_content"
android:layout_height="wrap_content"
android:layout_weight="1"
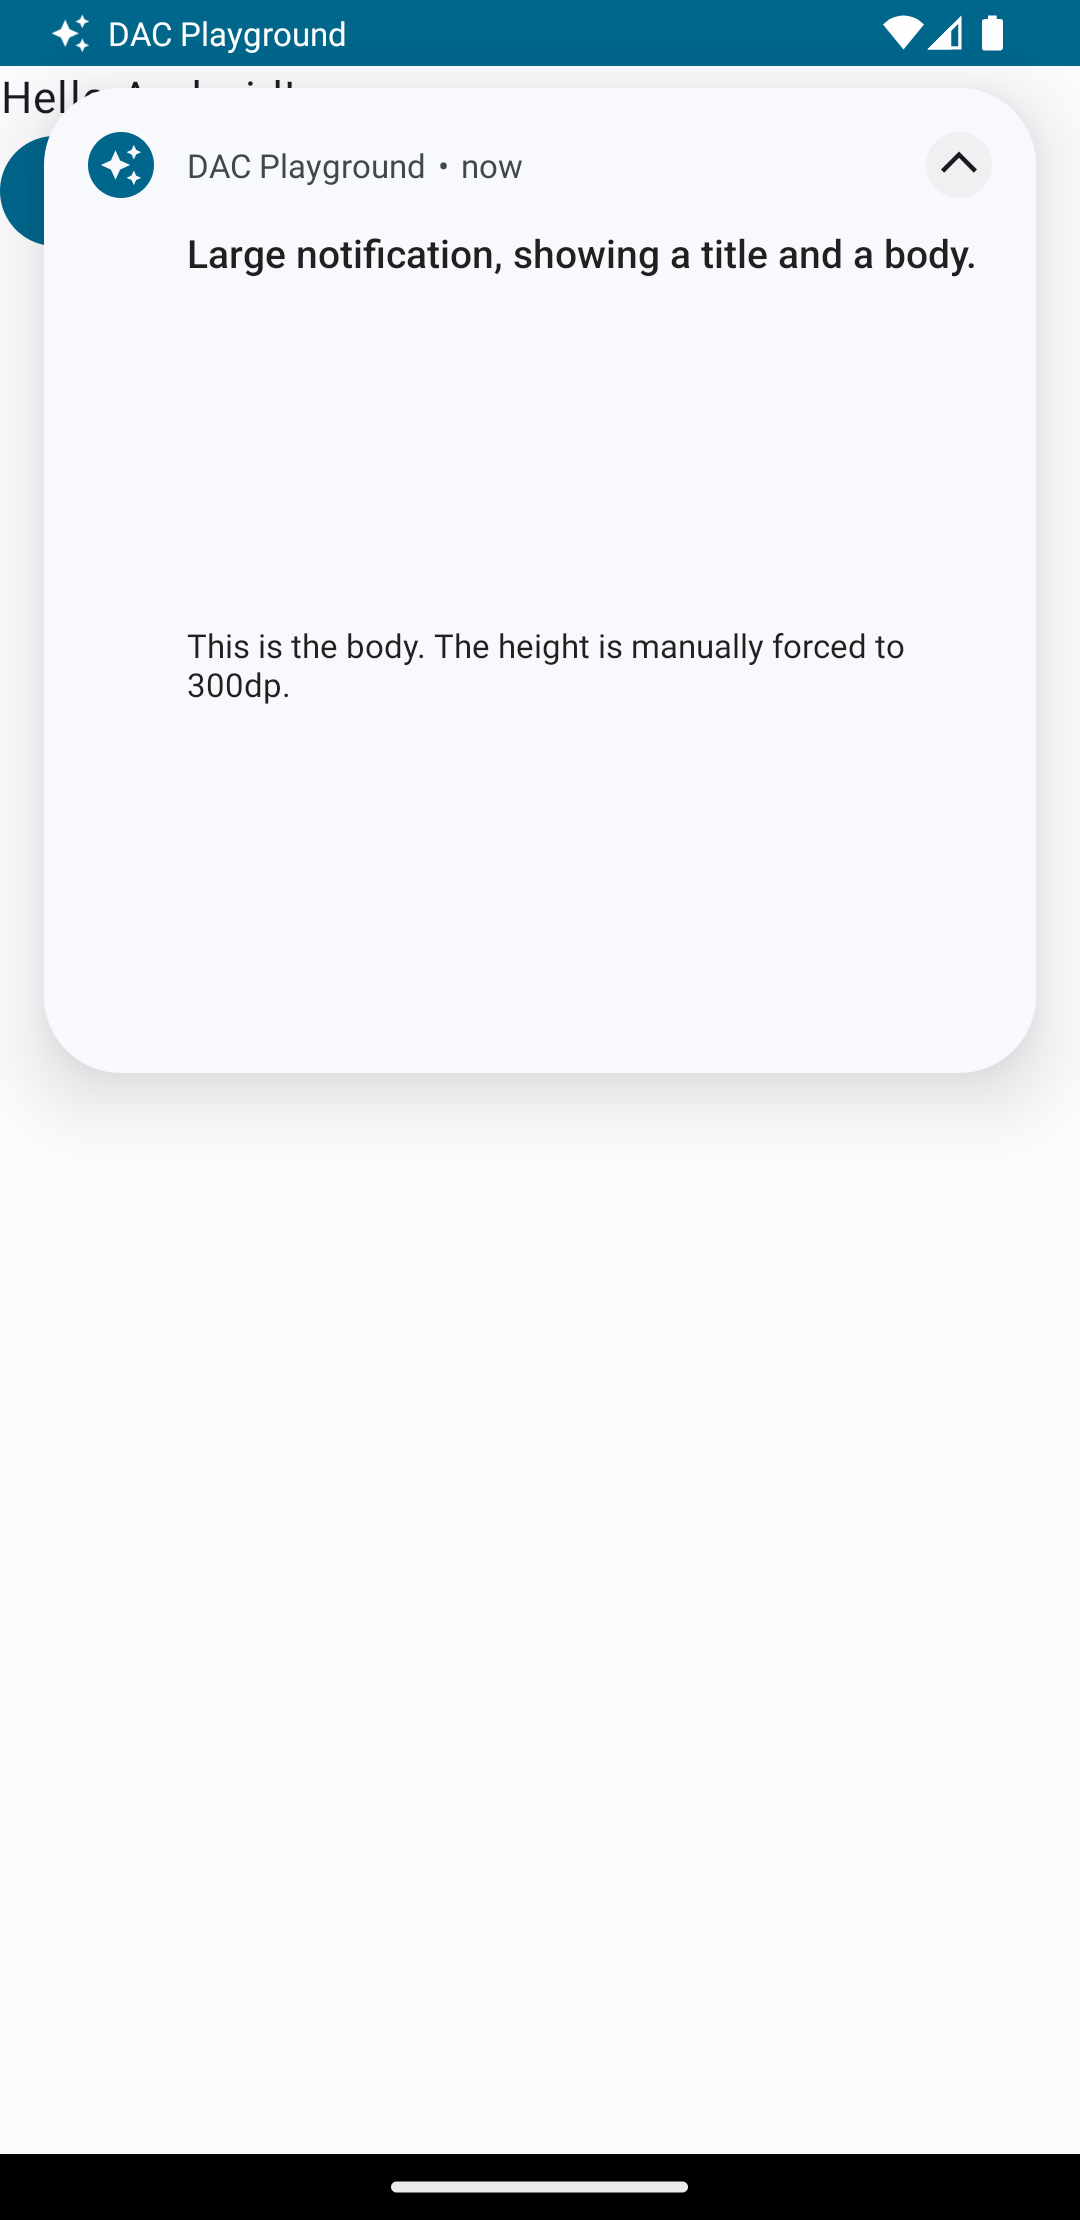
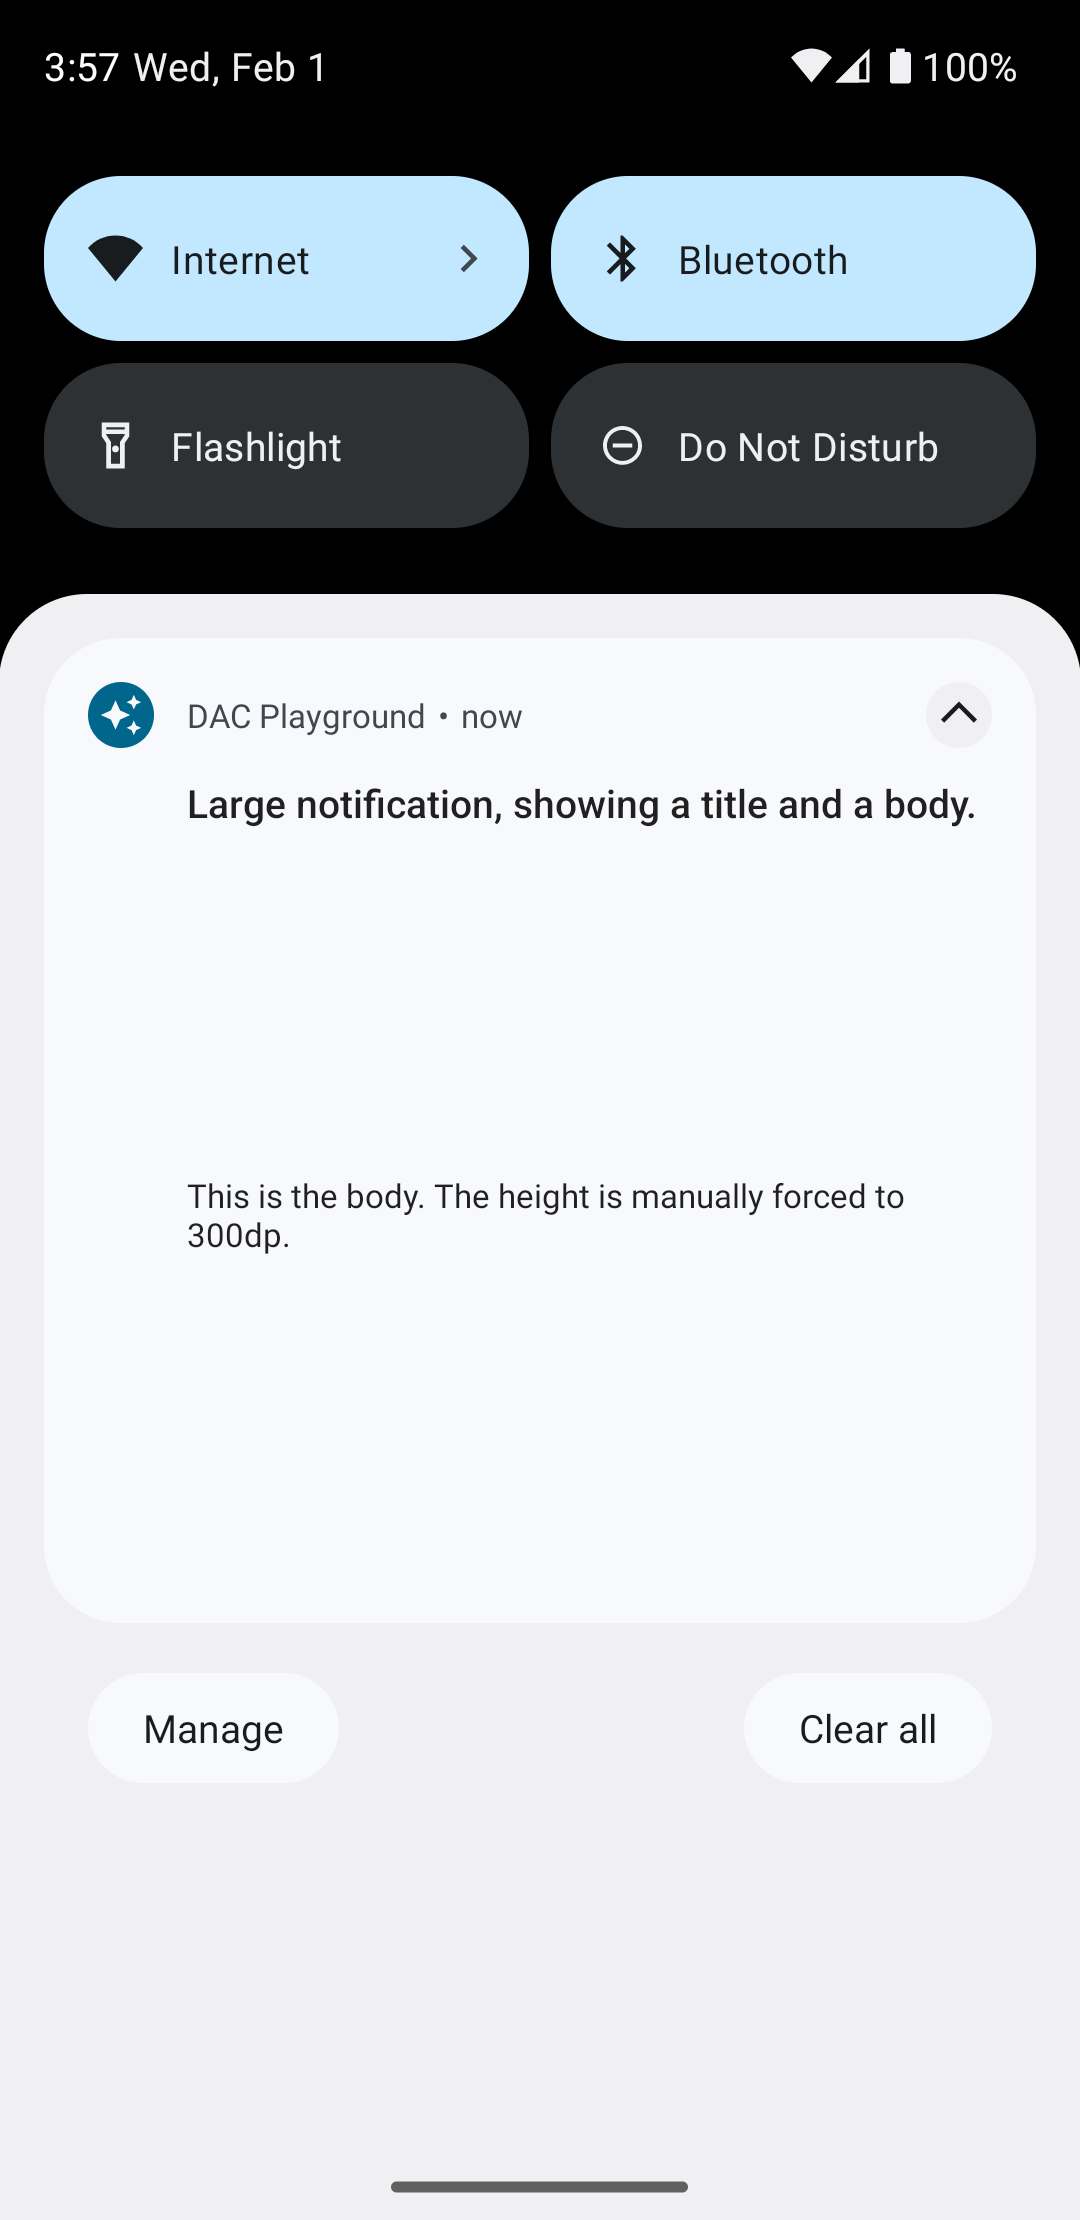
android:text="Large notification, showing a title and a body." />
<TextView
android:id="@+id/notification_body"
style="@style/TextAppearance.Compat.Notification.Line2"
android:layout_width="wrap_content"
android:layout_height="wrap_content"
android:layout_weight="1"
android:text="This is the body. The height is manually forced to 300dp." />
</LinearLayout>
বিল্ড এবং বিজ্ঞপ্তি দেখান
লেআউটগুলি প্রস্তুত হওয়ার পরে, আপনি নিম্নলিখিত উদাহরণে দেখানো হিসাবে সেগুলি ব্যবহার করতে পারেন:
কোটলিন
val notificationManager = getSystemService(Context.NOTIFICATION_SERVICE) as NotificationManager

// Get the layouts to use in the custom notification.
val notificationLayout = RemoteViews(packageName, R.layout.notification_small)
val notificationLayoutExpanded = RemoteViews(packageName, R.layout.notification_large)

// Apply the layouts to the notification.
val customNotification = NotificationCompat.Builder(context, CHANNEL_ID)
        .setSmallIcon(R.drawable.notification_icon)
        .setStyle(NotificationCompat.DecoratedCustomViewStyle())
        .setCustomContentView(notificationLayout)
        .setCustomBigContentView(notificationLayoutExpanded)
        .build()

notificationManager.notify(666, customNotification)
জাভা
NotificationManager notificationManager = (NotificationManager) getSystemService(Context.NOTIFICATION_SERVICE);

// Get the layouts to use in the custom notification
RemoteViews notificationLayout = new RemoteViews(getPackageName(), R.layout.notification_small);
RemoteViews notificationLayoutExpanded = new RemoteViews(getPackageName(), R.layout.notification_large);

// Apply the layouts to the notification.
Notification customNotification = new NotificationCompat.Builder(context, CHANNEL_ID)
        .setSmallIcon(R.drawable.notification_icon)
        .setStyle(new NotificationCompat.DecoratedCustomViewStyle())
        .setCustomContentView(notificationLayout)
        .setCustomBigContentView(notificationLayoutExpanded)
        .build();

notificationManager.notify(666, customNotification);
সচেতন থাকুন যে বিজ্ঞপ্তির জন্য পটভূমির রঙ ডিভাইস এবং সংস্করণ জুড়ে পরিবর্তিত হতে পারে। সাপোর্ট লাইব্রেরি শৈলী যেমন পাঠ্যের জন্য TextAppearance_Compat_Notification এবং আপনার কাস্টম লেআউটে শিরোনামের জন্য TextAppearance_Compat_Notification_Title প্রয়োগ করুন, যেমনটি নিম্নলিখিত উদাহরণে দেখানো হয়েছে। এই শৈলীগুলি রঙের বৈচিত্রের সাথে খাপ খায় যাতে আপনি কালো-কালো বা সাদা-অন-সাদা পাঠ্যের সাথে শেষ না হন।
<TextView
    android:layout_width="wrap_content"
    android:layout_height="match_parent"
    android:layout_weight="1"
    android:text="@string/notification_title"
    android:id="@+id/notification_title"
    style="@style/TextAppearance.Compat.Notification.Title" />
আপনার RemoteViews অবজেক্টে একটি ব্যাকগ্রাউন্ড ইমেজ সেট করা এড়িয়ে চলুন, কারণ আপনার টেক্সট অপঠনযোগ্য হতে পারে।
যখন আপনি একটি বিজ্ঞপ্তি ট্রিগার করেন যখন ব্যবহারকারী একটি অ্যাপ ব্যবহার করেন, ফলাফলটি চিত্র 1 এর মত হয়:
এক্সপেন্ডার তীরটি আলতো চাপলে বিজ্ঞপ্তিটি প্রসারিত হয়, যেমন চিত্র 2 এ দেখানো হয়েছে:
বিজ্ঞপ্তির সময়সীমা শেষ হওয়ার পরে, বিজ্ঞপ্তিটি কেবলমাত্র সিস্টেম বারে দৃশ্যমান হয়, যা চিত্র 3 এর মতো দেখায়:
এক্সপেন্ডার তীরটি আলতো চাপলে বিজ্ঞপ্তিটি প্রসারিত হয়, যেমন চিত্র 4 এ দেখানো হয়েছে:
একটি সম্পূর্ণ কাস্টম বিজ্ঞপ্তি লেআউট তৈরি করুন
আপনি যদি আপনার বিজ্ঞপ্তিকে স্ট্যান্ডার্ড নোটিফিকেশন আইকন এবং হেডার দিয়ে সাজাতে না চান, তাহলে পূর্ববর্তী ধাপগুলি অনুসরণ করুন কিন্তু setStyle() কে কল করবেন না ।