
지속적인 알람이나 수신 전화와 같은 특정 상황에서 앱이 급하게 사용자의 주의를 환기해야 할 수 있습니다. Android 9 (API 수준 28) 이하를 실행하는 기기를 타겟팅하는 앱에서는 앱이 백그라운드에 있는 동안 Activity를 시작하여 이를 처리할 수 있습니다. 이 문서에서는 Android 10 (API 수준 29)부터 Android 13 (API 수준 33)까지 실행되는 기기에서 이 동작을 달성하는 방법을 보여줍니다.
POST_NOTIFICATIONS 권한 추가
Android 13부터 AndroidManifest.xml 파일에 다음 줄을 추가합니다.
<manifest ...>
    <uses-permission android:name="android.permission.POST_NOTIFICATIONS"/>
    <application ...>
        ...
    </application>
</manifest>
이 정보가 있으면 알림 채널을 만들 수 있습니다.
알림 채널 만들기
알림을 올바르게 표시하고 사용자가 앱 설정에서 알림을 관리할 수 있도록 알림 채널을 만드세요. 알림 채널에 대한 자세한 내용은 알림 채널 만들기 및 관리를 참고하세요.
Application 클래스의 onCreate 메서드에서 알림 채널을 만듭니다.
Kotlin
class DACapp : Application() {
    override fun onCreate() {
        super.onCreate()
        val channel = NotificationChannel(
            CHANNEL_ID,
            "High priority notifications",
            NotificationManager.IMPORTANCE_HIGH
        )

        val notificationManager = getSystemService(Context.NOTIFICATION_SERVICE) as NotificationManager
        notificationManager.createNotificationChannel(channel)
    }
}
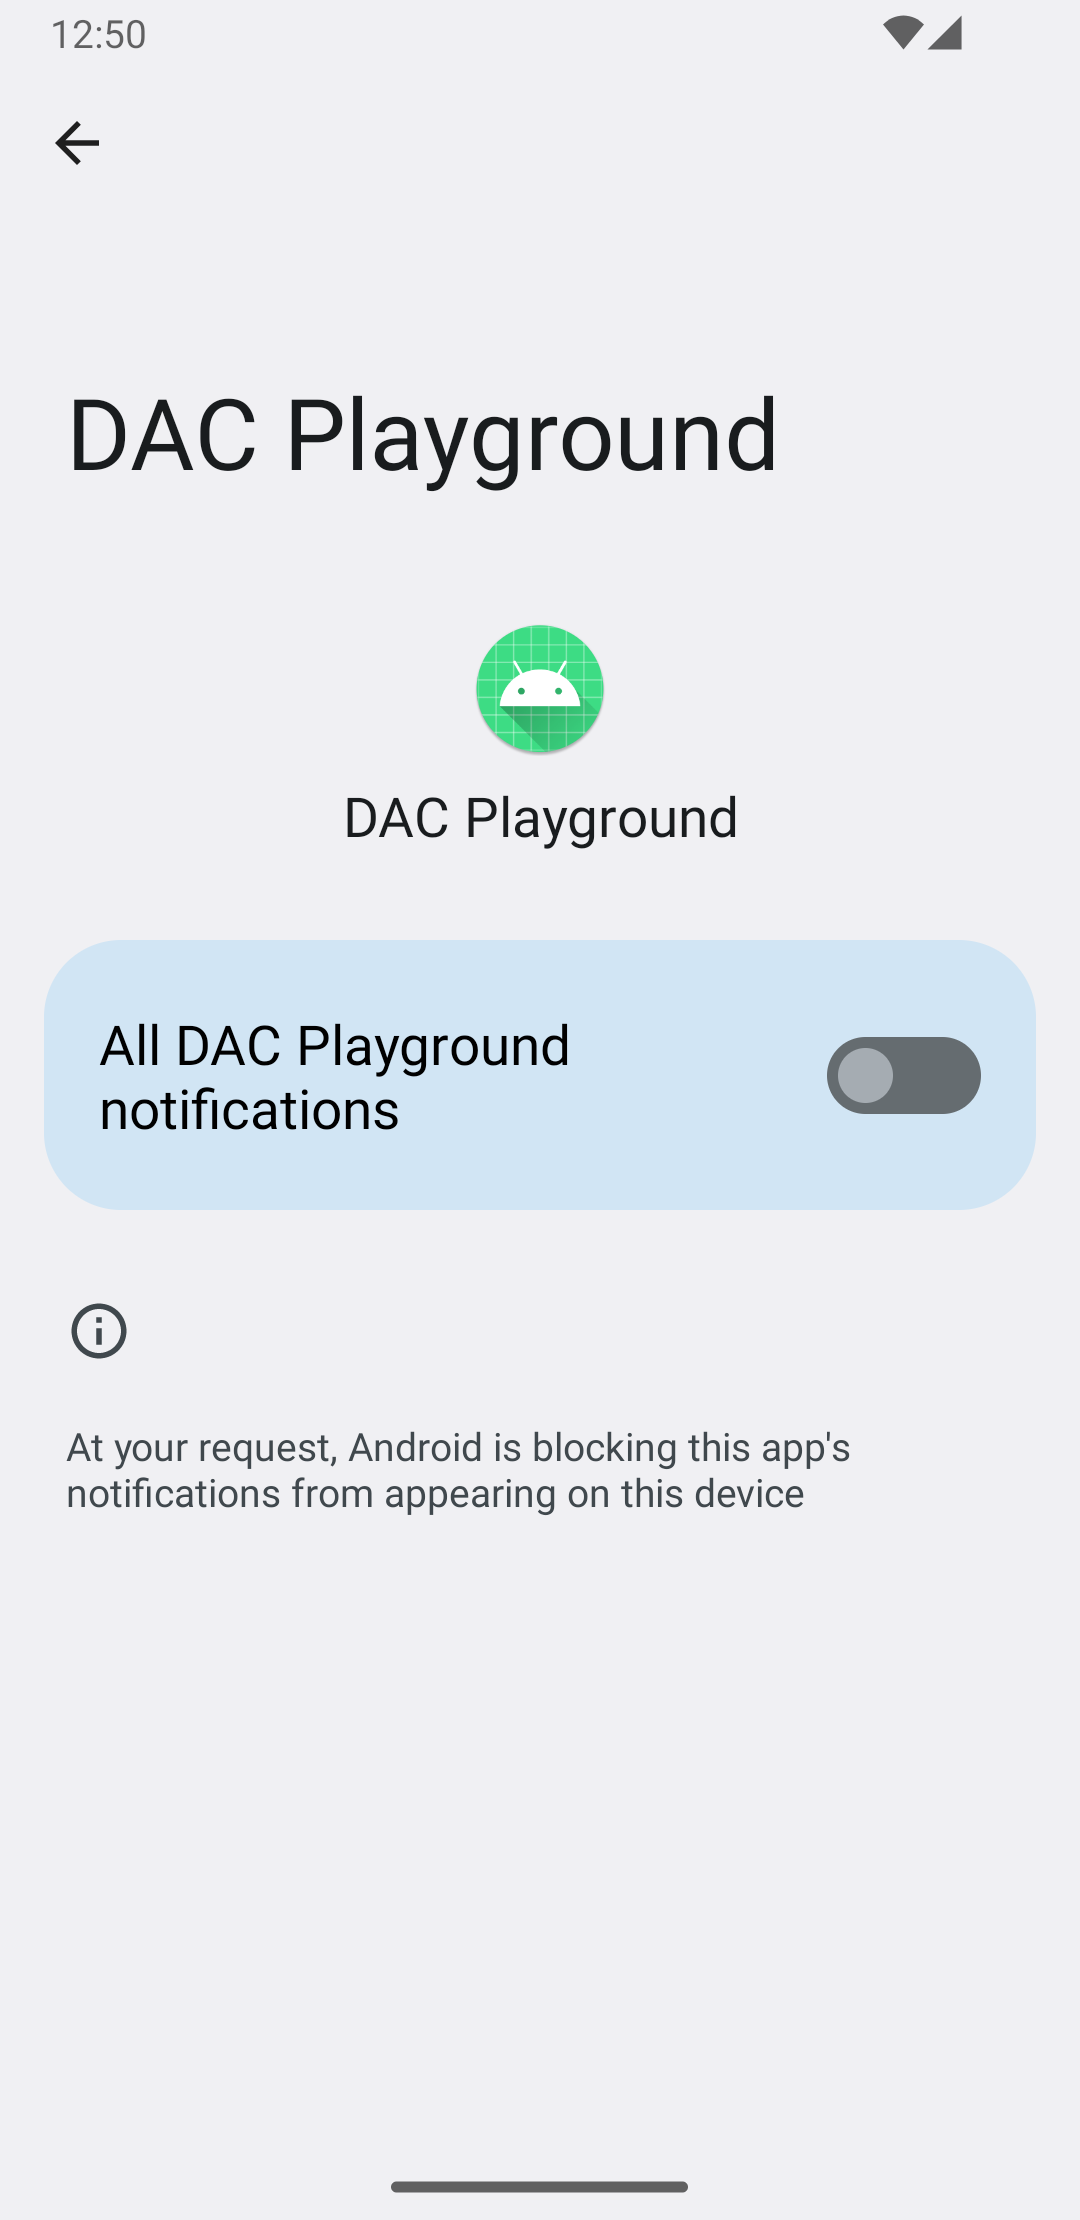
사용자가 앱을 처음 실행하면 앱의 앱 정보 시스템 화면에 그림 1과 같은 내용이 표시됩니다.
알림 권한 관리
Android 13부터는 사용자에게 알림을 표시하기 전에 알림 권한을 요청하세요.
최소 구현은 다음과 같습니다.
Kotlin
val permissionLauncher = rememberLauncherForActivityResult(
    contract = ActivityResultContracts.RequestPermission(),
    onResult = { hasNotificationPermission = it }
)
...
Button(
    onClick = {
        if (!hasNotificationPermission) {
            if (Build.VERSION.SDK_INT >= Build.VERSION_CODES.TIRAMISU) {
                permissionLauncher.launch(Manifest.permission.POST_NOTIFICATIONS)
            }
        }
    },
) {
    Text(text = "Request permission")
}
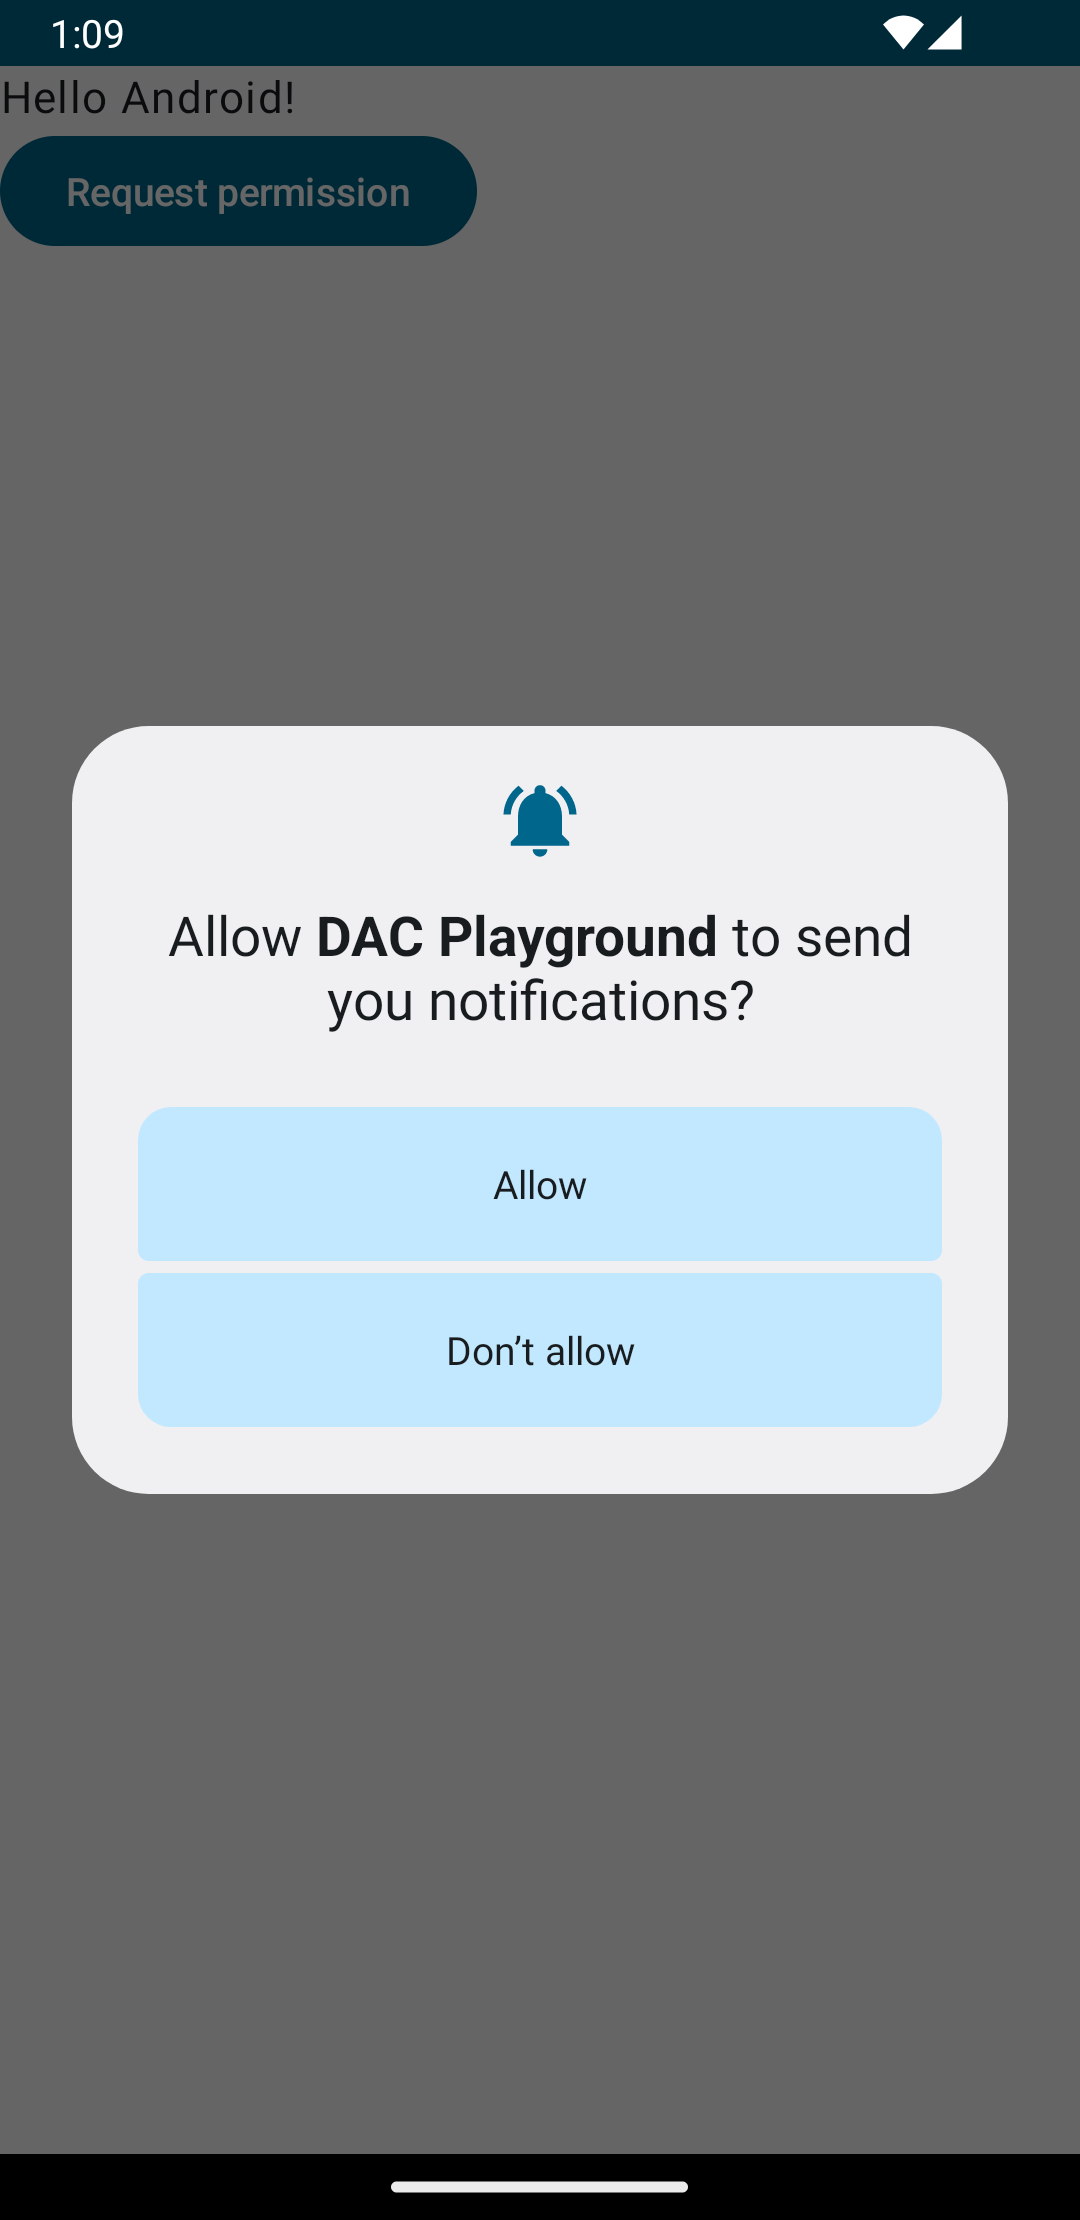
기기에서 Android 13을 실행하는 경우 Request
permission 버튼을 탭하면 그림 2에 표시된 대화상자가 트리거됩니다.
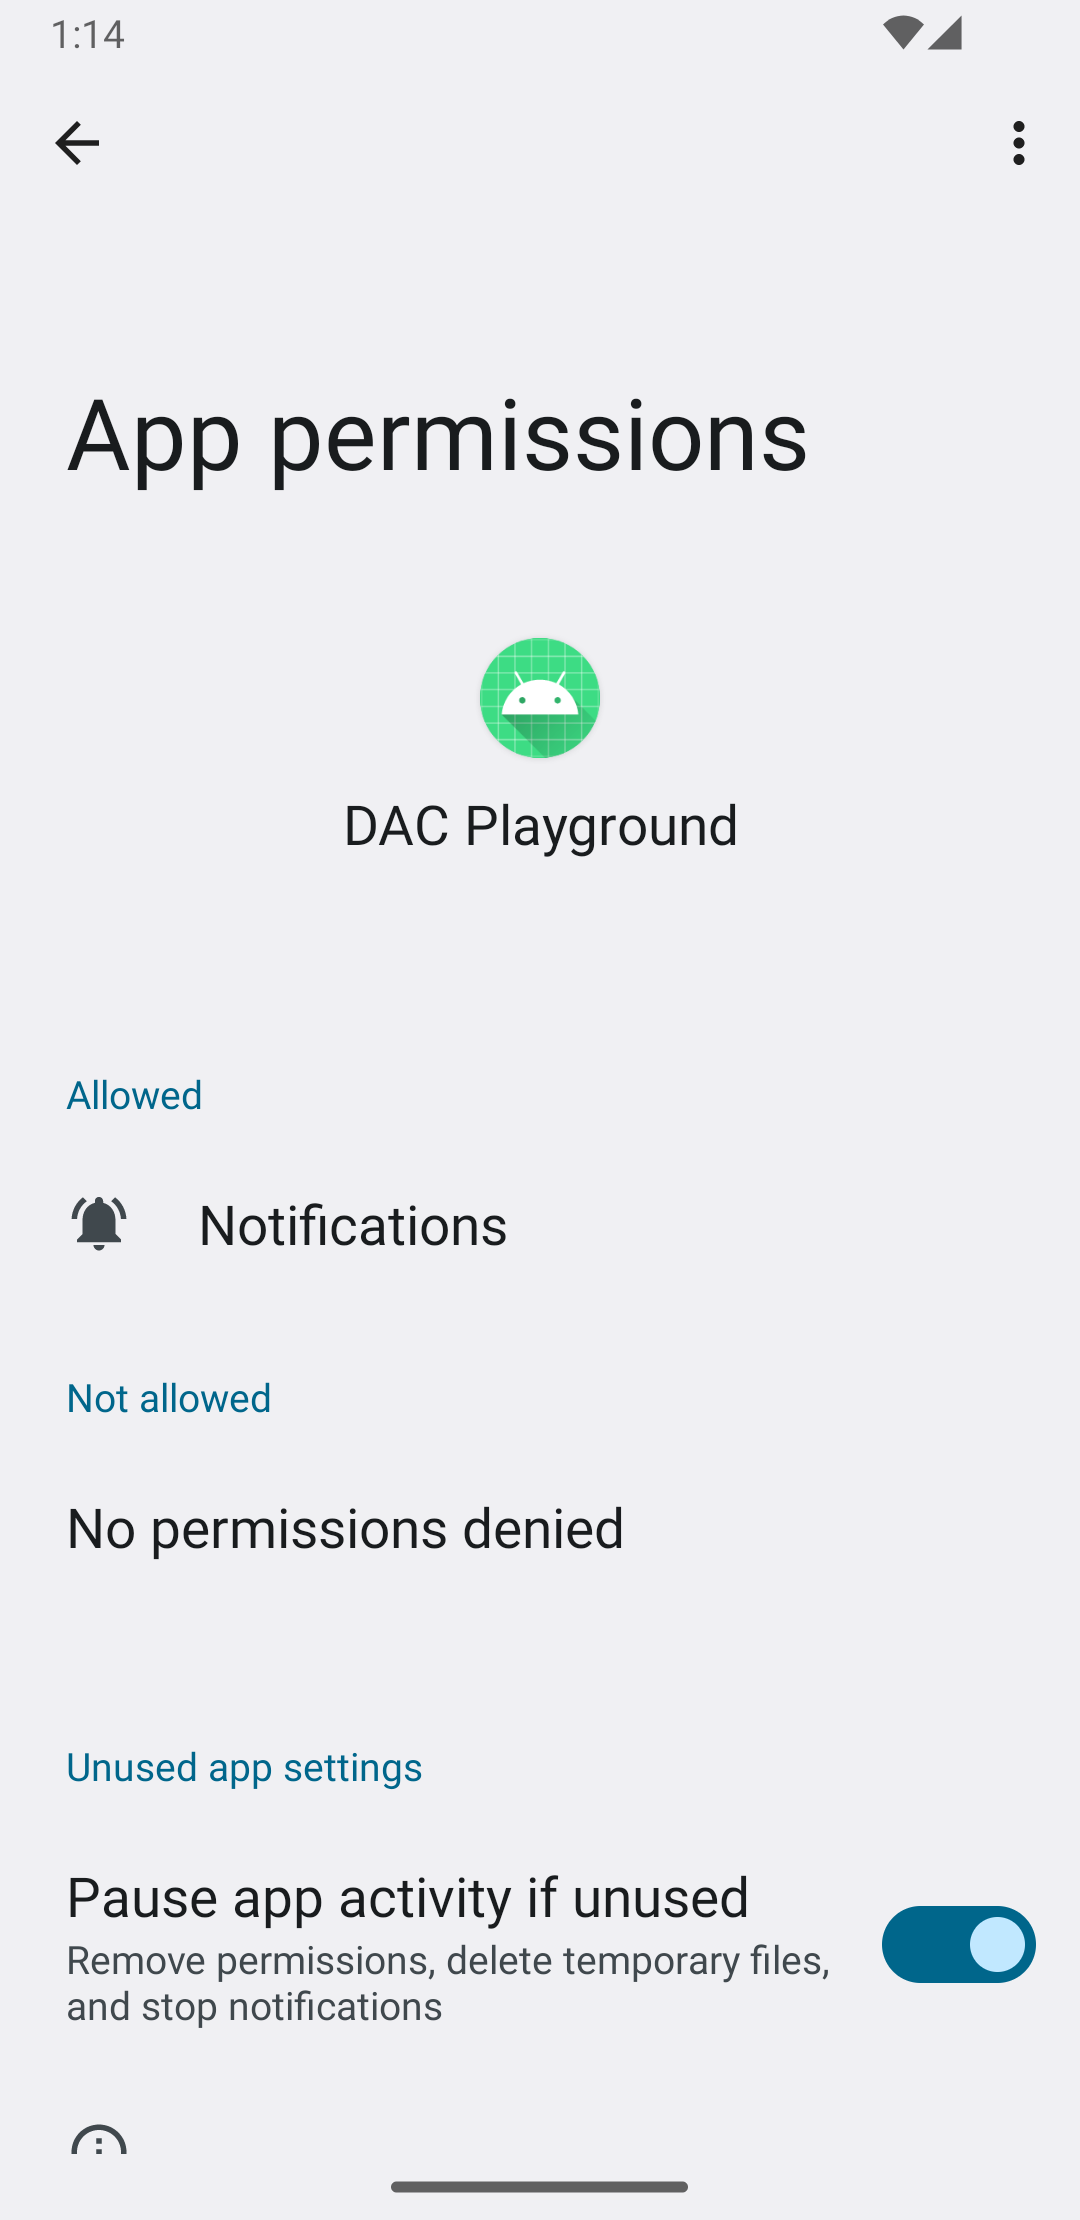
사용자가 권한 요청을 수락하면 앱의 앱 정보 섹션이 그림 3과 같이 표시됩니다.
우선순위가 높은 알림 만들기
알림을 만들 때 설명형 제목과 메시지를 포함합니다.
다음 예에는 알림이 포함되어 있습니다.
Kotlin
private fun showNotification() {
    val notificationManager = getSystemService(Context.NOTIFICATION_SERVICE) as NotificationManager

    val notificationBuilder =
        NotificationCompat.Builder(this, CHANNEL_ID)
            .setSmallIcon(R.drawable.baseline_auto_awesome_24)
            .setContentTitle("HIGH PRIORITY")
            .setContentText("Check this dog puppy video NOW!")
            .setPriority(NotificationCompat.PRIORITY_HIGH)
            .setCategory(NotificationCompat.CATEGORY_RECOMMENDATION)

    notificationManager.notify(0, notificationBuilder.build())
}
사용자에게 알림 표시
showNotification() 함수를 호출하면 다음과 같이 알림이 트리거됩니다.
Kotlin
Button(onClick = { showNotification() }) {
    Text(text = "Show notification")
}
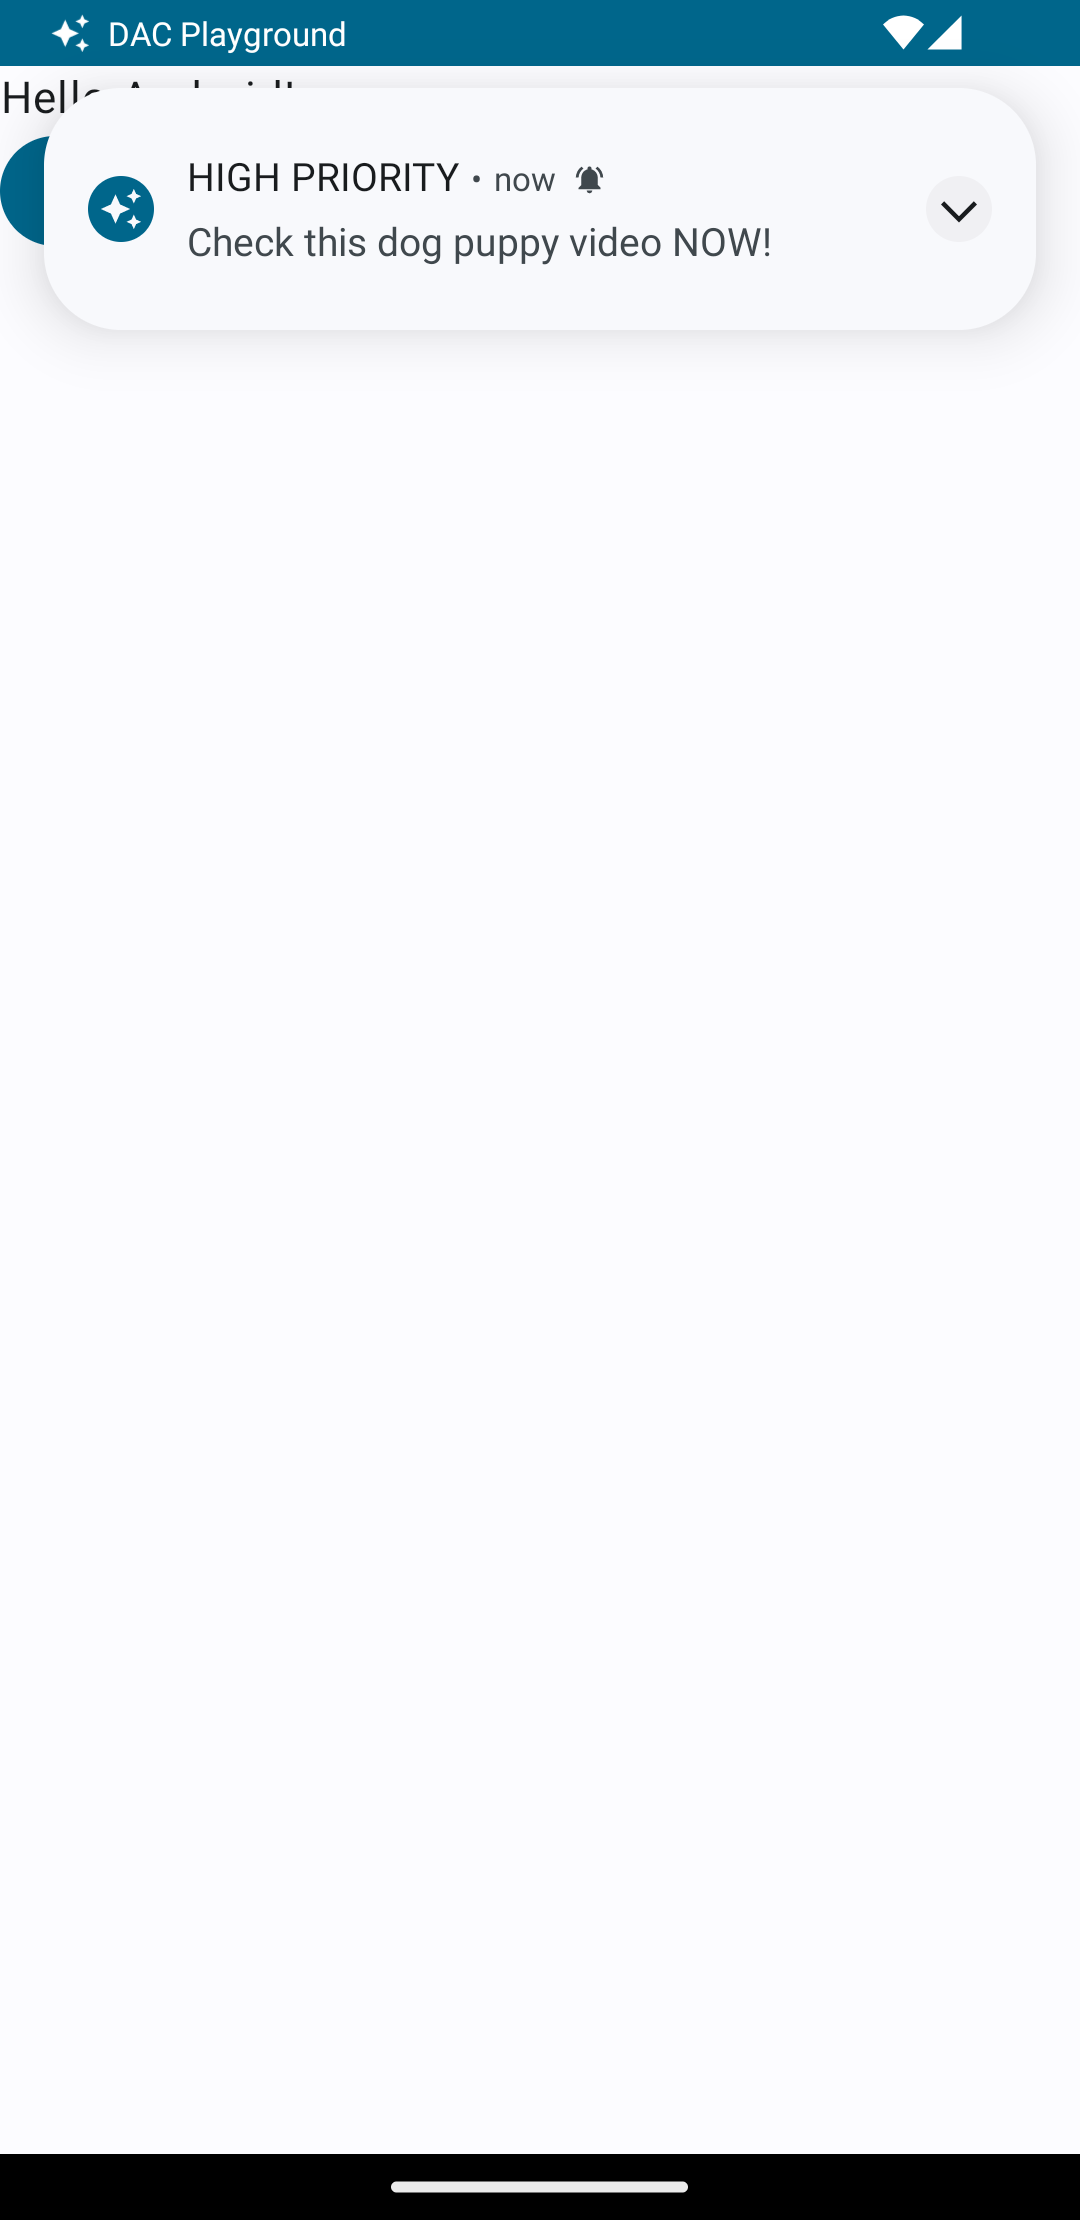
이 예의 알림은 그림 4와 같습니다.
진행 중인 알림
사용자에게 알림을 표시하면 사용자는 앱의 알림이나 리마인더를 승인 또는 거부할 수 있습니다. 예를 들어 사용자는 수신 전화를 수락하거나 거부할 수 있습니다.
수신 전화와 같은 지속적인 알림인 경우에는 알림을 포그라운드 서비스와 연결합니다. 다음 코드 스니펫은 포그라운드 서비스와 연결된 알림을 표시하는 방법을 보여줍니다.
Kotlin
// Provide a unique integer for the "notificationId" of each notification.
startForeground(notificationId, notification)
자바
// Provide a unique integer for the "notificationId" of each notification.
startForeground(notificationId, notification);
실시간 업데이트 사용 고려
시간에 민감한 진행 중인 알림은 가시성이 높을수록 좋습니다. 시간에 민감한 지속적인 알림을 실시간 업데이트로 홍보하여 다양한 시스템 UI 노출 영역에 표시하는 것이 좋습니다.