
Las notificaciones proporcionan información breve y oportuna sobre eventos de tu app cuando no está en uso. En este documento, se muestra cómo crear una notificación con varias funciones. Para ver una introducción sobre cómo aparecen las notificaciones en Android, consulta la Descripción general de notificaciones. Para ver un código de muestra que usa notificaciones, consulta la muestra de SociaLite en GitHub.
El código de esta página usa las APIs de NotificationCompat de la biblioteca de AndroidX. Estas APIs te permiten agregar funciones disponibles solo en versiones más recientes de Android, al tiempo que proporcionan compatibilidad con Android 9 (nivel de API 28).
Sin embargo, algunas funciones, como la acción de respuesta en línea, generan una no-op en versiones anteriores.
Cómo crear una notificación básica
En su forma más básica y compacta (también conocida como forma contraída), una notificación muestra un ícono, un título y una pequeña cantidad de texto contextual. En esta sección, se muestra cómo crear una notificación en la que el usuario puede presionar para iniciar una actividad en tu app.
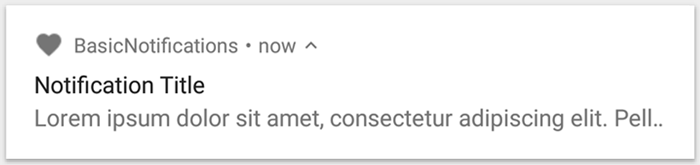
Figura 1: Una notificación con un ícono, un título y algo de texto.
Para obtener más detalles sobre cada parte de las notificaciones, lee la documentación sobre la anatomía de las notificaciones.
Declara el permiso de tiempo de ejecución
Android 13 (nivel de API 33) y versiones posteriores admiten un permiso de tiempo de ejecución para publicar notificaciones no exentas (incluidos los servicios en primer plano [FGS]) desde una app.
El permiso que debes declarar en el archivo de manifiesto de tu app aparece en el siguiente fragmento de código:
<manifest ...>
    <uses-permission android:name="android.permission.POST_NOTIFICATIONS"/>
    <application ...>
        ...
    </application>
</manifest>
Para obtener más detalles sobre los permisos de tiempo de ejecución, consulta Permiso de tiempo de ejecución de notificaciones.
Cómo definir el contenido de la notificación
Para comenzar, configura el contenido y el canal de la notificación con un objeto NotificationCompat.Builder. En el siguiente ejemplo, se muestra cómo crear una notificación con los siguientes elementos:
Un ícono pequeño, establecido por
setSmallIcon(). Este es el único contenido necesario visible para el usuario.Un título, establecido por
setContentTitle()El texto del cuerpo, establecido por
setContentText().La prioridad de la notificación, establecida por
setPriority(). La prioridad determina cuán intrusiva es la notificación en Android 7.1 y versiones anteriores. En Android 8.0 y versiones posteriores, establece la importancia del canal como se muestra en la siguiente sección.
val textTitle = "Title" val textContent = "Content" val builder = NotificationCompat.Builder(context, CHANNEL_ID) .setSmallIcon(R.drawable.ic_logo) .setContentTitle(textTitle) .setContentText(textContent) .setPriority(NotificationCompat.PRIORITY_DEFAULT)
El constructor NotificationCompat.Builder requiere que proporciones un ID de canal. Esto es necesario para la compatibilidad con Android 8.0 (nivel de API 26) y versiones posteriores, pero se ignora en versiones anteriores.
De forma predeterminada, el contenido de texto de la notificación se trunca para que quepa en una línea. Puedes mostrar información adicional creando una notificación expandible.
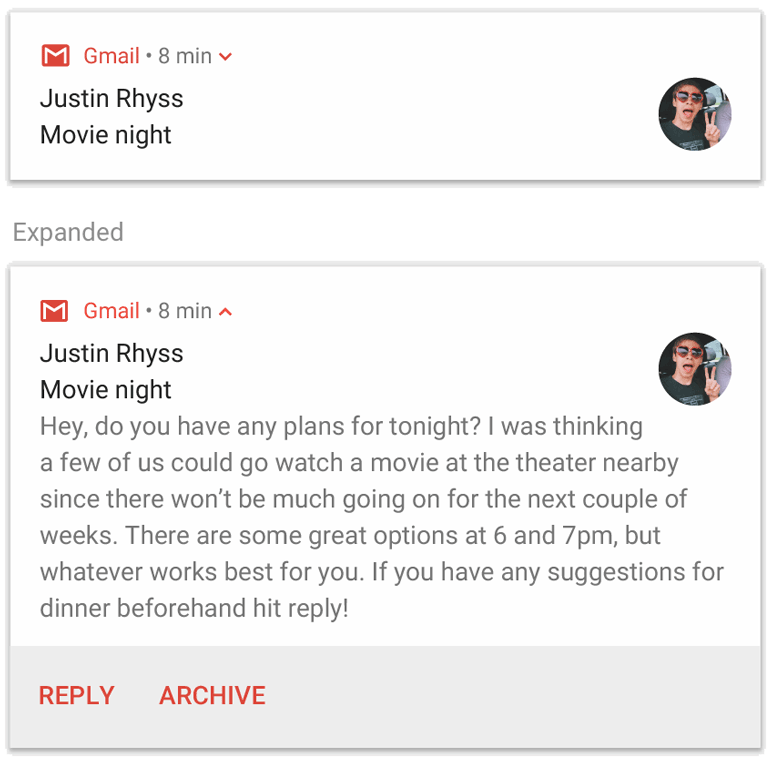
Figura 2: Una notificación expandible en sus formas contraída y expandida.
Si deseas que la notificación sea más larga, puedes habilitar una notificación expandible agregando una plantilla de estilo con setStyle(). Por ejemplo, el siguiente código crea un área de texto más grande:
val builder = NotificationCompat.Builder(context, CHANNEL_ID) .setSmallIcon(R.drawable.ic_logo) .setContentTitle("My notification") .setContentText("Much longer text that cannot fit one line...") .setStyle(NotificationCompat.BigTextStyle() .bigText("Much longer text that cannot fit one line...")) .setPriority(NotificationCompat.PRIORITY_DEFAULT)
Para obtener más información sobre otros estilos de notificaciones grandes, incluso cómo agregar una imagen y controles de reproducción multimedia, consulta Crea una notificación expandible.
Cómo crear un canal y definir la importancia
Antes de poder publicar la notificación en Android 8.0 y versiones posteriores, registra el canal de notificaciones de tu app en el sistema transfiriendo una instancia de NotificationChannel a createNotificationChannel(). El siguiente código se bloquea con una condición en la versión SDK_INT:
fun createNotificationChannel(context: Context) { // Create the NotificationChannel, but only on API 26+ because // the NotificationChannel class is not in the Support Library. if (Build.VERSION.SDK_INT >= Build.VERSION_CODES.O) { val name = context.getString(R.string.channel_name) val descriptionText = context.getString(R.string.channel_description) val importance = NotificationManager.IMPORTANCE_DEFAULT val channel = NotificationChannel(CHANNEL_ID, name, importance).apply { description = descriptionText } // Register the channel with the system. val notificationManager: NotificationManager = context.getSystemService(NotificationManager::class.java) as NotificationManager notificationManager.createNotificationChannel(channel) } }
Debido a que debes crear el canal de notificación antes de publicar notificaciones en Android 8.0 y versiones posteriores, ejecuta este código tan pronto como se inicie la app. Se considera que realizar llamadas repetidas es seguro porque, cuando se crea un canal de notificación existente, no se lleva a cabo ninguna operación.
El constructor NotificationChannel requiere un importance, con una de las constantes de la clase NotificationManager. Este parámetro determina cómo interrumpir al usuario con cualquier notificación que pertenezca a este canal. Establece la prioridad con setPriority() para admitir Android 7.1 y versiones anteriores, como se muestra en el ejemplo anterior.
Si bien debes definir la importancia o prioridad de la notificación como se muestra en el siguiente ejemplo, el sistema no garantiza el comportamiento de alerta que obtendrás. En algunos casos, el sistema puede cambiar el nivel de importancia en función de otros factores, y el usuario siempre puede redefinir el nivel de importancia para un canal determinado.
Para obtener más información sobre el significado de los diferentes niveles, lee información sobre los niveles de importancia de las notificaciones.
Cómo establecer la acción de toque de la notificación
Cada notificación debe responder a un toque, por lo general para abrir una actividad en la app que se corresponda con la notificación. Para ello, especifica un intent de contenido definido con un objeto PendingIntent y pásalo a setContentIntent().
En el siguiente fragmento, se muestra cómo crear un intent básico para abrir una actividad cuando el usuario presiona la notificación:
// Create an explicit intent for an Activity in your app. val intent = Intent(context, AlertDetails::class.java).apply { flags = Intent.FLAG_ACTIVITY_NEW_TASK or Intent.FLAG_ACTIVITY_CLEAR_TASK } val pendingIntent: PendingIntent = PendingIntent.getActivity(context, 0, intent, PendingIntent.FLAG_IMMUTABLE) val builder = NotificationCompat.Builder(context, CHANNEL_ID) .setSmallIcon(R.drawable.ic_logo) .setContentTitle("My notification") .setContentText("Hello World!") .setPriority(NotificationCompat.PRIORITY_DEFAULT) // Set the intent that fires when the user taps the notification. .setContentIntent(pendingIntent) .setAutoCancel(true)
Este código llama a setAutoCancel(), que quita automáticamente la notificación cuando el usuario la presiona.
Las marcas de intención del ejemplo anterior conservan la experiencia de navegación esperada del usuario después de que este abre tu app con la notificación. Es posible que quieras usarlo según el tipo de actividad que inicies, que puede ser una de las siguientes:
Una actividad que existe exclusivamente para respuestas a la notificación. No hay motivo para que el usuario navegue a esta actividad durante el uso normal de la app, por lo que la actividad inicia una nueva tarea en lugar de agregarse a la pila de actividades existente de la app. Este es el tipo de intent que se creó en el ejemplo anterior.
Una actividad que existe en el flujo regular de la app. En este caso, cuando se inicia la actividad, se crea una pila de actividades, de modo que se conserven las expectativas del usuario relacionadas con los botones Atrás y Arriba.
Cómo mostrar la notificación
Para que aparezca la notificación, llama a NotificationManagerCompat.notify() y pásale un ID único para la notificación y el resultado de NotificationCompat.Builder.build(). Esto se muestra en el siguiente ejemplo:
with(NotificationManagerCompat.from(context)) { if (ActivityCompat.checkSelfPermission( context, Manifest.permission.POST_NOTIFICATIONS ) != PackageManager.PERMISSION_GRANTED ) { // TODO: Consider calling ActivityCompat#requestPermissions here // to request the missing permissions, and then overriding // public fun onRequestPermissionsResult(requestCode: Int, permissions: Array<out String>, // grantResults: IntArray) // to handle the case where the user grants the permission. See the documentation // for ActivityCompat#requestPermissions for more details. return@with } // notificationId is a unique int for each notification that you must define. notify(notificationId, builder.build())
Guarda el ID de la notificación que le envías a NotificationManagerCompat.notify(), ya que lo necesitarás si deseas actualizar o quitar la notificación.
Además, para probar las notificaciones básicas en dispositivos que ejecutan Android 13 y versiones posteriores, activa las notificaciones de forma manual o crea un diálogo para solicitarlas.
Cómo agregar botones de acción
Una notificación puede ofrecer hasta tres botones de acción que le permitan al usuario responder de manera rápida, como posponer un recordatorio o responder un mensaje de texto. Pero estos botones de acción no deben duplicar la acción realizada cuando el usuario presiona la notificación.
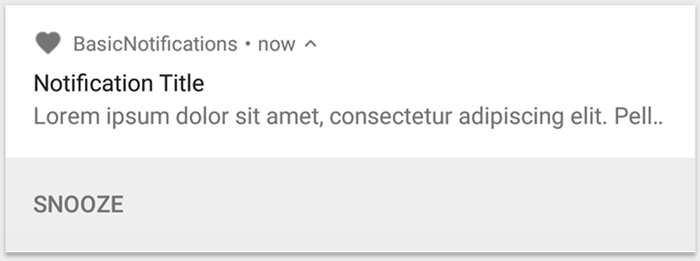
Figura 3: Una notificación con un botón de acción.
Para agregar un botón de acción, pasa un PendingIntent al método addAction(). Esto es similar a configurar la acción de toque predeterminada de la notificación, excepto que en lugar de iniciar una actividad, puedes llevar a cabo otras funciones, como iniciar un BroadcastReceiver que realice un trabajo en segundo plano, de modo que la acción no interrumpa a la app que ya está abierta.
Por ejemplo, en el siguiente código, se muestra cómo enviar una transmisión a un receptor específico:
val ACTION_SNOOZE = "snooze" val snoozeIntent = Intent(context, MyBroadcastReceiver::class.java).apply { action = ACTION_SNOOZE putExtra(EXTRA_NOTIFICATION_ID, 0) } val snoozePendingIntent: PendingIntent = PendingIntent.getBroadcast(context, 0, snoozeIntent, PendingIntent.FLAG_IMMUTABLE) val builder = NotificationCompat.Builder(context, CHANNEL_ID) .setSmallIcon(R.drawable.ic_logo) .setContentTitle("My notification") .setContentText("Hello World!") .setPriority(NotificationCompat.PRIORITY_DEFAULT) .setContentIntent(pendingIntent) .addAction(R.drawable.snooze, context.getString(R.string.snooze), snoozePendingIntent)
Para obtener más información sobre cómo compilar un elemento BroadcastReceiver para ejecutar el trabajo en segundo plano, consulta la Descripción general de las transmisiones.
En cambio, si estás intentando compilar una notificación con botones de reproducción multimedia, como pausar y omitir pistas, consulta cómo crear una notificación con controles de contenido multimedia.
Cómo agregar una acción de respuesta directa
La acción de respuesta directa, introducida en Android 7.0 (nivel de API 24), permite a los usuarios ingresar texto directamente en la notificación. Luego, el texto se entrega a tu app sin abrir una actividad. Por ejemplo, puedes usar una acción de respuesta directa para permitir que los usuarios respondan mensajes de texto o actualicen listas de tareas desde dentro de la notificación.

Figura 4: Cuando se presiona el botón "Reply", se abre la entrada de texto.
La acción de respuesta directa aparece como un botón adicional en la notificación, que permite abrir una entrada de texto. Cuando el usuario termina de escribir, el sistema adjunta la respuesta de texto al intent que especificas para la acción de la notificación y lo envía a tu app.
Cómo agregar el botón de respuesta
Para crear una acción de notificación que admita respuesta directa, sigue estos pasos:
Crea una instancia de RemoteInput.Builder que puedas agregar a tu acción de notificación. El constructor de esta clase acepta una cadena que el sistema usa como clave para la entrada de texto. Más adelante, tu app usará esa clave para recuperar el texto de la entrada.
// Key for the string that's delivered in the action's intent. val replyLabel: String = context.resources.getString(R.string.reply_label) val remoteInput: RemoteInput = RemoteInput.Builder(KEY_TEXT_REPLY).run { setLabel(replyLabel) build() }
Crea un PendingIntent para la acción de respuesta.
// Build a PendingIntent for the reply action to trigger. val replyPendingIntent: PendingIntent = PendingIntent.getBroadcast(context, conversationId, getMessageReplyIntent(conversationId), PendingIntent.FLAG_MUTABLE)
Adjunta el objeto RemoteInput a una acción con addRemoteInput().
// Create the reply action and add the remote input. val action: NotificationCompat.Action = NotificationCompat.Action.Builder(R.drawable.reply, context.getString(R.string.reply_label), replyPendingIntent) .addRemoteInput(remoteInput) .build()
Aplica la acción a una notificación y emite la notificación.
// Build the notification and add the action.
val newMessageNotification = NotificationCompat.Builder(context, CHANNEL_ID)
    .setSmallIcon(R.drawable.ic_message)
    .setContentTitle(context.getString(R.string.title))
    .setContentText(context.getString(R.string.content))
    .addAction(action)
    .build()

// Issue the notification.
NotificationManagerCompat.from(context).notify(notificationId, newMessageNotification)
Cuando se active la acción de notificación, el sistema le solicitará al usuario que ingrese una respuesta, como se muestra en la figura 4.
Cómo recuperar entradas del usuario a partir de la respuesta
Para recibir entradas del usuario de la IU de respuesta de la notificación, llama a RemoteInput.getResultsFromIntent() y pásale el elemento Intent que recibió tu BroadcastReceiver:
private fun getMessageText(intent: Intent): CharSequence? { return RemoteInput.getResultsFromIntent(intent)?.getCharSequence(KEY_TEXT_REPLY) }
Después de procesar el texto, actualiza la notificación llamando a NotificationManagerCompat.notify() con el mismo ID y la misma etiqueta, si se usaron. Esto es necesario para ocultar la IU de respuesta directa y confirmar al usuario que se recibió y procesó correctamente su respuesta.
// Build a new notification, which informs the user that the system // handled their interaction with the previous notification. val repliedNotification = NotificationCompat.Builder(context, CHANNEL_ID) .setSmallIcon(R.drawable.message) .setContentText(context.getString(R.string.replied)) .build() // Issue the new notification. NotificationManagerCompat.from(context).notify(notificationId, repliedNotification)
Recupera otros datos
El manejo de otros tipos de datos funciona de manera similar con RemoteInput. En el siguiente ejemplo, se usa una imagen como entrada.
val replyLabel: String = context.resources.getString(R.string.reply_label) val remoteInput: RemoteInput = RemoteInput.Builder(KEY_REPLY).run { setLabel(replyLabel) // Allow for image data types in the input. // This method can be used again to allow for other data types. setAllowDataType("image/*", true) build() }
Llama a RemoteInput#getDataResultsFromIntent y extrae los datos correspondientes.
class ReplyReceiver : BroadcastReceiver() { override fun onReceive(context: Context, intent: Intent) { val dataResults = RemoteInput.getDataResultsFromIntent(intent, KEY_REPLY) val imageUri: Uri? = dataResults?.get("image/*") as? Uri if (imageUri != null) { // Extract the image context.contentResolver.openInputStream(imageUri)?.use { inputStream -> val bitmap = BitmapFactory.decodeStream(inputStream) // Display the image // ... } } } companion object { const val KEY_REPLY = "key_reply" const val KEY_TEXT_REPLY = "key_text_reply" } }
Al trabajar con esta nueva notificación, usa el contexto que se pasa al método onReceive() del receptor.
Llama a setRemoteInputHistory() para adjuntar la respuesta en la parte inferior de la notificación. Sin embargo, si vas a compilar una app de mensajería, crea una notificación de estilo de mensajería y adjunta el nuevo mensaje a la conversación.
Si quieres obtener más consejos sobre las notificaciones de apps de mensajería, consulta la sección sobre las prácticas recomendadas para apps de mensajería.
Cómo mostrar un mensaje urgente
Es posible que tu app necesite mostrar un mensaje urgente e importante, como una llamada telefónica entrante o una alarma. En estas situaciones, puedes asociar un intent de pantalla completa a tu notificación.
Cuando se invoca la notificación, los usuarios ven una de las siguientes opciones, según el estado de bloqueo del dispositivo:
- Si el dispositivo del usuario está bloqueado, aparece una actividad en pantalla completa, que cubre la pantalla de bloqueo.
- Si el dispositivo del usuario está desbloqueado, la notificación aparece en forma expandida e incluye opciones para controlar o descartar la notificación.
En el siguiente fragmento de código, se demuestra cómo asociar la notificación con un intent de pantalla completa:
val fullScreenIntent = Intent(context, ImportantActivity::class.java) val fullScreenPendingIntent = PendingIntent.getActivity(context, 0, fullScreenIntent, PendingIntent.FLAG_IMMUTABLE) val builder = NotificationCompat.Builder(context, CHANNEL_ID) .setSmallIcon(R.drawable.ic_logo) .setContentTitle("My notification") .setContentText("Hello World!") .setPriority(NotificationCompat.PRIORITY_DEFAULT) .setFullScreenIntent(fullScreenPendingIntent, true)
Cómo establecer la visibilidad de la pantalla de bloqueo
Para controlar el nivel de los detalles visibles en la notificación desde la pantalla de bloqueo, llama a setVisibility() y especifica uno de los siguientes valores:
VISIBILITY_PUBLIC: El contenido completo de la notificación se muestra en la pantalla de bloqueo.VISIBILITY_SECRET: No se muestra ninguna parte de la notificación en la pantalla de bloqueo.VISIBILITY_PRIVATE: En la pantalla de bloqueo, solo se muestra información básica, como el ícono de la notificación y el título del contenido. No se muestra el contenido completo de la notificación.
Cuando estableces VISIBILITY_PRIVATE, también puedes proporcionar una versión alternativa del contenido de la notificación que oculta algunos detalles. Por ejemplo, una app de SMS podría mostrar una notificación que indique "Tienes 3 mensajes de texto nuevos", pero oculta el contenido del mensaje y los remitentes. Para proporcionar esta notificación alternativa, primero crea la notificación alternativa con NotificationCompat.Builder como de costumbre. Luego, adjunta la notificación alternativa a la normal con setPublicVersion().
Ten en cuenta que el usuario siempre tiene el control final sobre si sus notificaciones se ven en la pantalla de bloqueo y puede controlarlas en función de los canales de notificación de tu app.
Cómo actualizar una notificación
Para actualizar una notificación después de emitirla, vuelve a llamar a NotificationManagerCompat.notify() y pásale el mismo ID que usaste antes. Si se descarta la notificación anterior, se crea una notificación nueva.
De manera opcional, puedes llamar a setOnlyAlertOnce() para que tu notificación interrumpa al usuario (con sonido, vibración o pistas visuales) solo la primera vez que aparece, y no en las actualizaciones posteriores.
Cómo quitar una notificación
Las notificaciones permanecen visibles hasta que alguna de estas acciones tiene lugar:
- El usuario descarta la notificación.
- El usuario presiona la notificación si llamas a
setAutoCancel()cuando creas la notificación. - Llamas a
cancel()para un ID de notificación específico. Este método también borra las notificaciones en curso. - Llamas a
cancelAll(), que quita todas las notificaciones que emitiste previamente. - Transcurre la duración especificada si estableces un tiempo de espera cuando creas la notificación con
setTimeoutAfter(). Si es necesario, puedes cancelar una notificación antes de que transcurra el tiempo de espera especificado.
Prácticas recomendadas para apps de mensajería
Ten en cuenta las prácticas recomendadas que se enumeran aquí cuando crees notificaciones para tus apps de mensajería y chat.
Usa MessagingStyle
A partir de Android 7.0 (nivel de API 24), Android proporciona una plantilla de estilo de notificación específica para contenido de mensajería. Con la clase NotificationCompat.MessagingStyle, puedes cambiar varias de las etiquetas que se muestran en la notificación, incluidos el título de la conversación, los mensajes adicionales y la vista de contenido de la notificación.
En el siguiente fragmento de código, se muestra cómo personalizar el estilo de una notificación con la clase MessagingStyle.
val message1 = NotificationCompat.MessagingStyle.Message( messages[0].text, messages[0].time, messages[0].sender ) val message2 = NotificationCompat.MessagingStyle.Message( messages[1].text, messages[1].time, messages[1].sender ) notification = NotificationCompat.Builder(context, CHANNEL_ID) .setSmallIcon(R.drawable.ic_logo) .setStyle( NotificationCompat.MessagingStyle(Person.Builder().setName("Me").build()) .addMessage(message1) .addMessage(message2) ) .build()
A partir de Android 9.0 (nivel de API 28), también es necesario usar la clase Person para obtener una renderización óptima de la notificación y sus avatares.
Cuando uses NotificationCompat.MessagingStyle, haz lo siguiente:
- Llama a
MessagingStyle.setConversationTitle()para establecer un título para los chats en grupo con más de dos personas. El nombre del chat en grupo puede ser un buen título para la conversación. Si no tiene un nombre, puedes usar una lista de los participantes de la conversación. Sin esto, es posible que se considere erróneamente que el mensaje pertenece a una conversación entre dos personas con el remitente del mensaje más reciente. - Usa el método
MessagingStyle.setData()para incluir mensajes multimedia, como imágenes. Se admiten tipos de MIME del patrón image/*.
Cómo usar la Respuesta directa
La función Respuesta directa permite al usuario responder en línea a un mensaje.
- Después de que un usuario responda con la acción de respuesta en línea, usa
MessagingStyle.addMessage()para actualizar la notificaciónMessagingStyley no retractar ni cancelar la notificación. Si no cancelas la notificación, el usuario podrá enviar varias respuestas desde ella. - Para hacer que la acción de respuesta en línea sea compatible con Wear OS, llama a
Action.WearableExtender.setHintDisplayInlineAction(true). - Usa el método
addHistoricMessage()para proporcionar contexto a una conversación de respuesta directa agregando mensajes históricos a la notificación.
Cómo habilitar la Respuesta inteligente
- Para habilitar Respuesta inteligente, llama a
setAllowGeneratedResponses(true)en la acción de respuesta. Esto hace que las respuestas de Respuesta inteligente estén disponibles para los usuarios cuando se conecta la notificación con un dispositivo Wear OS. Los mensajes que sugiere Respuesta inteligente son generados por un modelo de aprendizaje automático totalmente incorporado en el reloj a partir del contexto que brinda la notificación deNotificationCompat.MessagingStyley no se suben datos a Internet para generar las respuestas.
Agrega metadatos de notificación
- Asigna metadatos de notificación para indicarle al sistema cómo debe controlar las notificaciones de tu app cuando el dispositivo está en modo No interrumpir. Por ejemplo, usa el método
addPerson()osetCategory(Notification.CATEGORY_MESSAGE)para anular el modo No interrumpir.