Kiểm thử ý định của ứng dụng chỉ đường trên Android Automotive OS
Sử dụng bộ sưu tập để sắp xếp ngăn nắp các trang
Lưu và phân loại nội dung dựa trên lựa chọn ưu tiên của bạn.
Kiểm thử khả năng tương tác của Trợ lý Google và Google Maps với các ứng dụng tuỳ chỉnh trên Android Automotive OS.
Tổng quan
Hướng dẫn này mô tả cách thiết lập và chạy một phiên bản Android Automotive có tích hợp Google. Hướng dẫn này cũng mô tả cách kiểm thử các API Google của bên thứ ba để sử dụng với các giải pháp điều hướng và giọng nói.
Như minh hoạ, bạn có thể sử dụng 3 loại ý định để mô tả hoạt động tương tác giữa trợ lý và hoạt động điều hướng: điều hướng, tìm kiếm và hành động tuỳ chỉnh.
Nội dung này mô tả cách kiểm thử các ý định bằng Google Maps. Chúng tôi cũng mô tả cách tích hợp một ứng dụng điều hướng tuỳ chỉnh để nhận ý định từ Trợ lý Google.
Mở Tools > Device Manager (Công cụ > Trình quản lý thiết bị) rồi thêm hình ảnh Automotive (1408p landscape) with Google Play (Automotive (hướng ngang 1408 pixel) có Google Play).
Khởi động hình ảnh trình mô phỏng và đăng nhập vào Google Play. Tìm và cập nhật Trợ lý Google.
Trích xuất nội dung của dự án ứng dụng minh hoạ rồi mở dự án trong Android Studio (File > Open... (Tệp > Mở...)
Chọn Run > Run automotive (Chạy > Chạy ô tô) để cài đặt và khởi động ứng dụng minh hoạ trong trình mô phỏng.
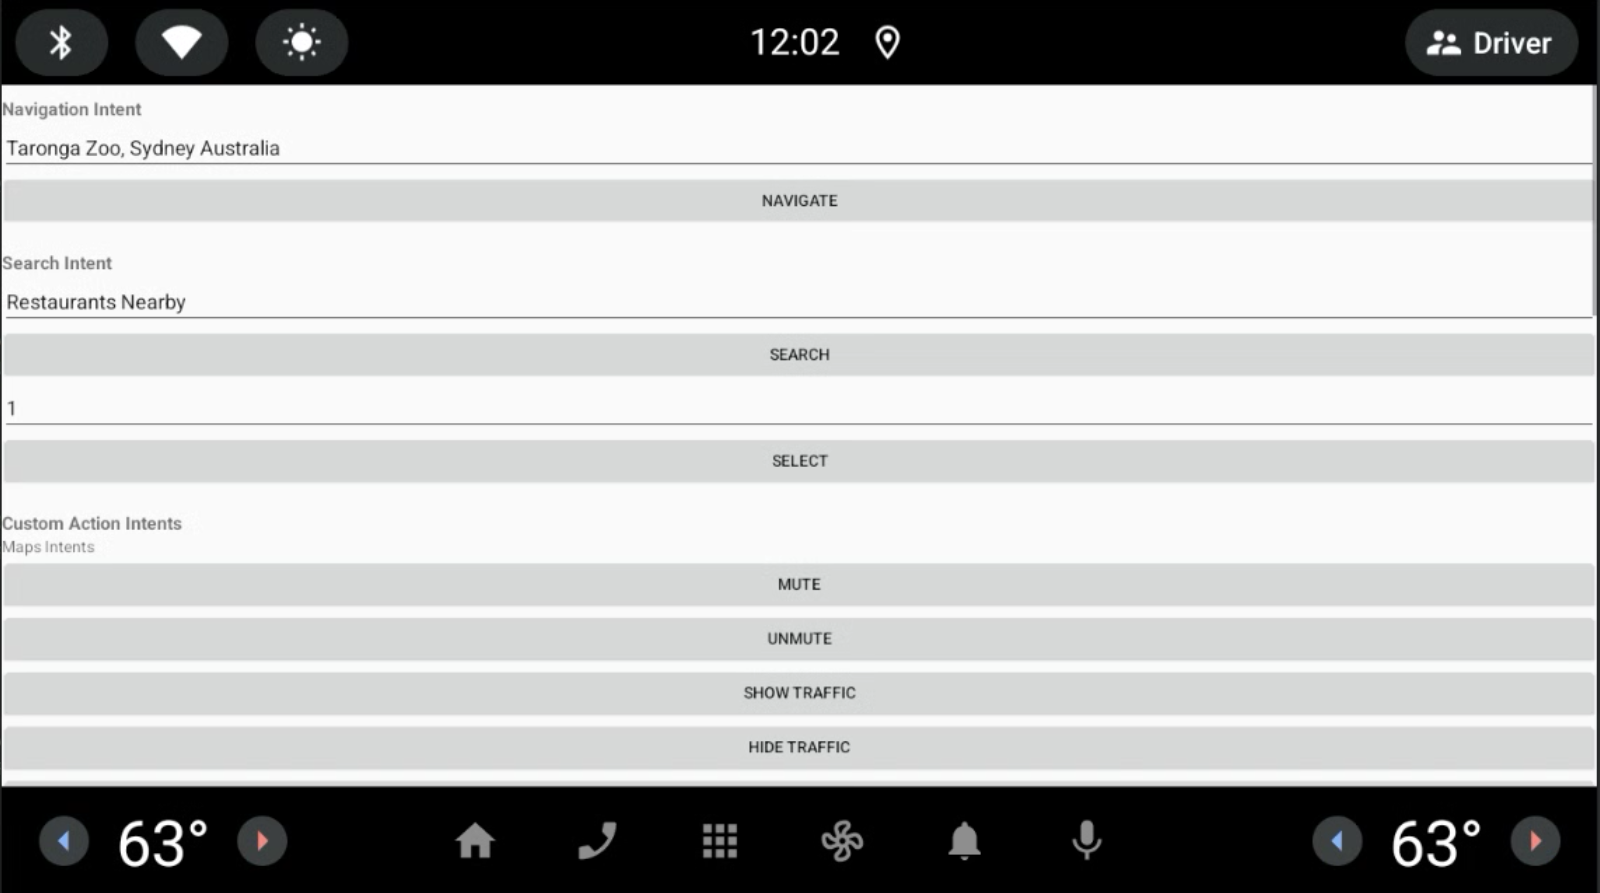
Google Maps thực hiện các thao tác được kích hoạt.
Cách chỉ định ứng dụng minh hoạ làm trình nhận ý định do Trợ lý Google kích hoạt:
Chuyển đến phần Cài đặt > Google > Trợ lý Google > Ứng dụng chỉ đường mặc định.
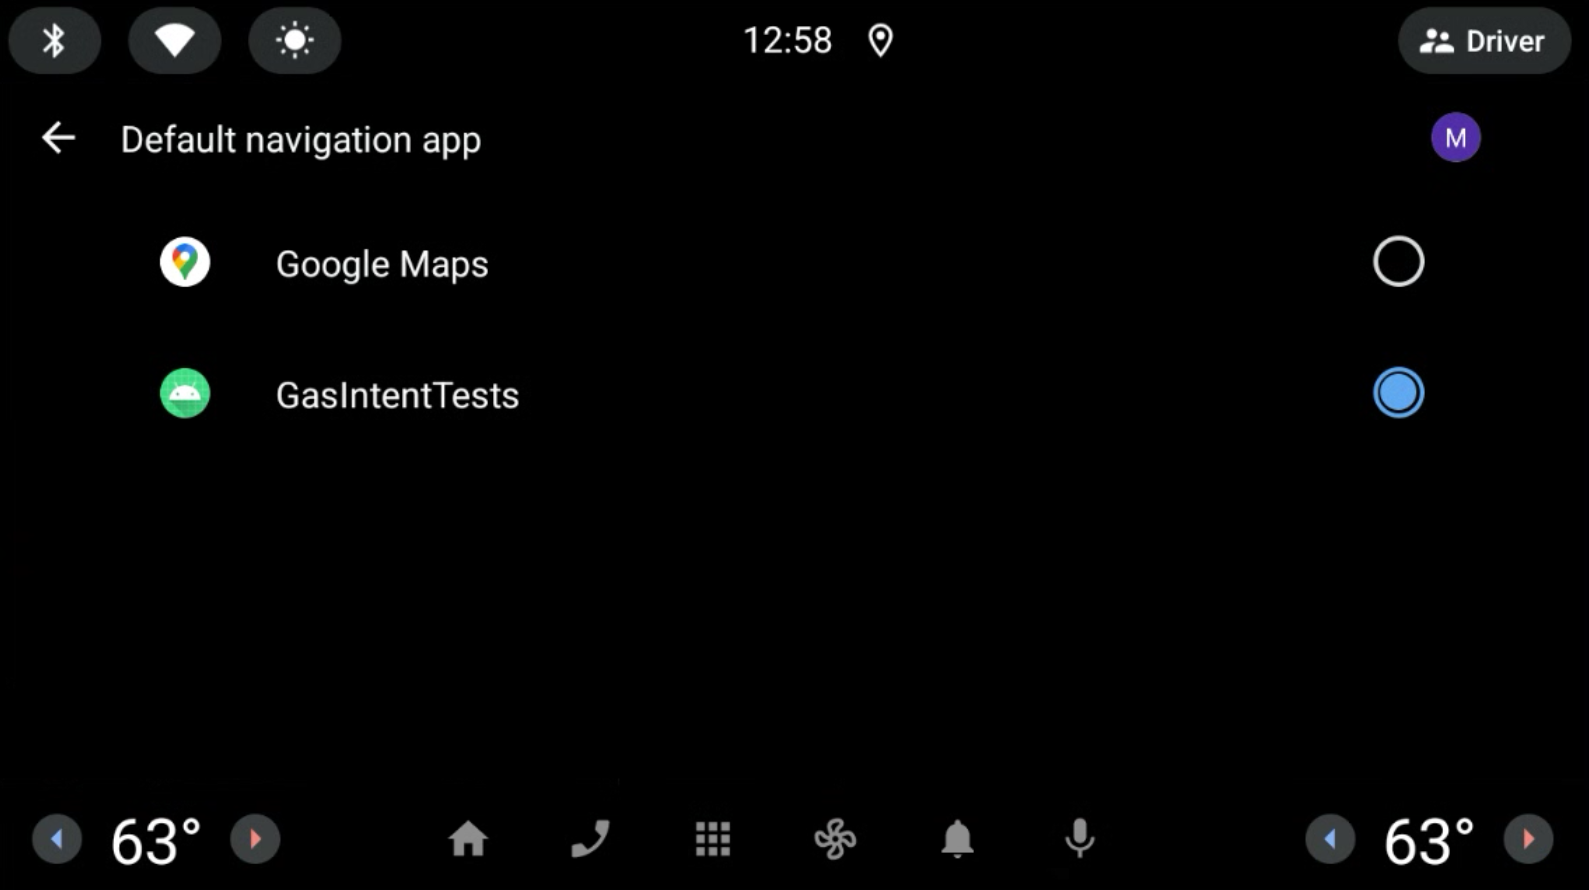
Hình 1. Chọn ứng dụng chỉ đường mặc định.
Nhấp vào biểu tượng Micrô rồi nói một câu hỏi. Ví dụ: "Nhà hàng gần đây". Hãy xem phần Chế độ điều khiển mở rộng, chế độ cài đặt và trợ giúp nếu micrô không hoạt động như mong đợi.
URI ý định được Trợ lý Google gửi đến ứng dụng chỉ đường để xử lý thêm.
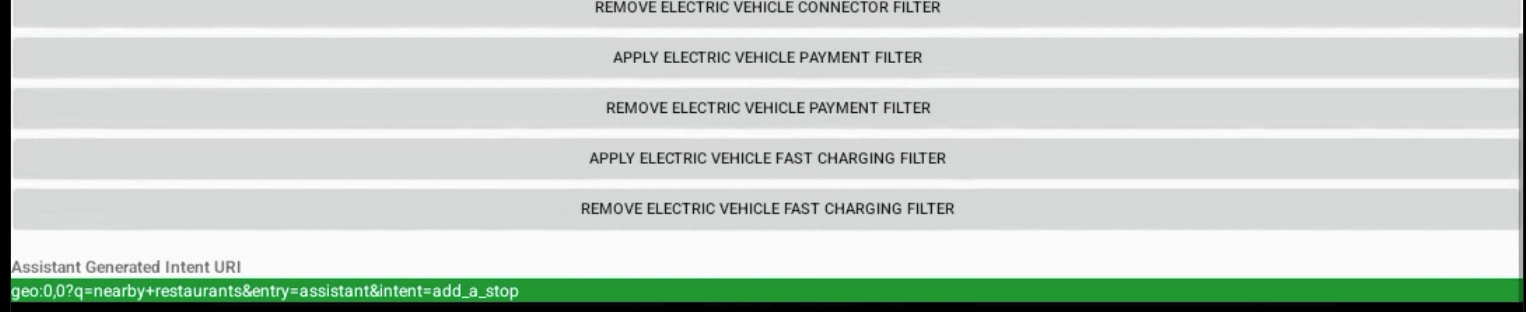
Hình 2. Đầu ra của Intent do Trợ lý Google tạo.
Thông tin chi tiết về kỹ thuật
Bạn có thể dùng Cầu gỡ lỗi Android (adb) để kích hoạt ý định từ bảng điều khiển.
Để tìm hiểu thêm, hãy xem gas-intents-console-tests.txt.
Để chỉ định rằng một ứng dụng có thể nhận ý định từ Trợ lý Google, hãy thêm mã này vào tệp AndroidManifest.xml của ứng dụng điều hướng:
Nội dung và mã mẫu trên trang này phải tuân thủ các giấy phép như mô tả trong phần Giấy phép nội dung. Java và OpenJDK là nhãn hiệu hoặc nhãn hiệu đã đăng ký của Oracle và/hoặc đơn vị liên kết của Oracle.
Cập nhật lần gần đây nhất: 2025-08-27 UTC.
[[["Dễ hiểu","easyToUnderstand","thumb-up"],["Giúp tôi giải quyết được vấn đề","solvedMyProblem","thumb-up"],["Khác","otherUp","thumb-up"]],[["Thiếu thông tin tôi cần","missingTheInformationINeed","thumb-down"],["Quá phức tạp/quá nhiều bước","tooComplicatedTooManySteps","thumb-down"],["Đã lỗi thời","outOfDate","thumb-down"],["Vấn đề về bản dịch","translationIssue","thumb-down"],["Vấn đề về mẫu/mã","samplesCodeIssue","thumb-down"],["Khác","otherDown","thumb-down"]],["Cập nhật lần gần đây nhất: 2025-08-27 UTC."],[],[],null,["Test interoperability of Google Assistant and Google Maps with custom Apps on\nAndroid Automotive OS.\n\nOverview\n\nThis guide describes how to set up and run an Android Automotive instance with\nGoogle built-in. This guide also describes how to test the third-party\nGoogle APIs for use with navigation and voice solutions.\n\nTo learn more about these APIs, see [Implement navigation app intents](/develop/devices/assistant/intents-assistant-nav-app)\nand [Google Maps for Android Automotive Intents](/training/cars/platforms/automotive-os/android-intents-automotive).\n\nAs shown, you can use three types of intents to describe the interaction between\nassistant and navigation: navigation, search and custom actions.\nThis content describes how to test the intents with Google Maps. We also\ndescribe how integrate a custom navigation application to receive intents\nfrom Google Assistant.\n\nSetup\n\nTo get started:\n\n1. Download and install [Android Studio](/studio).\n2. Open **Tools \\\u003e Device Manager** and add the **Automotive (1408p landscape) with Google Play** image.\n3. Start the emulator image and sign in to Google Play. Search for and update Google Assistant.\n4. Extract the contents of our [demo application project](/static/training/cars/testing/gas-intents/GasIntentTests.tgz) and open the project in Android Studio (**File \\\u003e Open...**).\n5. Select **Run \\\u003e Run automotive** to install and start the demo application in the emulator.\n\nDemo\n\n[Implement navigation app intents](/develop/devices/assistant/intents-assistant-nav-app) and\n[Google Maps for Android Automotive Intents](/training/cars/platforms/automotive-os/android-intents-automotive) describe the three types of\nintents you can execute: Navigation, Search, and Custom Action.\nMain activity of demo application\n\nGoogle Maps executes the triggered operations.\n\nTo specify the demo application as the receiver of the intents triggered\nby Google Assistant:\n\n1. Go to **Settings \\\u003e Google \\\u003e Google Assistant \\\u003e Default navigation app.**\n\n Figure 1. Select the default navigation App.\n2. Click the **Microphone** icon and speak a query. For example \"Nearby\n restaurants.\". See [Extended controls, settings, and help](/studio/run/emulator-extended-controls#microphone) if the microphone\n does not work as expected.\n The intent URI is sent by Google Assistant to the navigation app to process\n further.\n\n Figure 2. Output of Google Assistant generated Intent.\n\nTechnical Details\n\nYou can use the Android Debug Bridge (adb) to trigger intents from the console.\nTo learn more, see [gas-intents-console-tests.txt](/static/training/cars/testing/gas-intents/gas-intents-console-tests.txt).\n\nTo designate that an application can receive intents from\nGoogle Assistant, include this code in the `AndroidManifest.xml` file of the\nnavigation application: \n\n \u003c!-- Navigation Intent --\u003e\n \u003cintent-filter\u003e\n \u003caction android:name=\"androidx.car.app.action.NAVIGATE\" /\u003e\n \u003ccategory android:name=\"android.intent.category.DEFAULT\"/\u003e\n \u003cdata android:scheme=\"geo\" /\u003e\n \u003c/intent-filter\u003e\n\n \u003c!-- Search Intent --\u003e\n \u003cintent-filter\u003e\n \u003caction android:name=\"android.intent.action.VIEW\" /\u003e\n \u003ccategory android:name=\"android.intent.category.DEFAULT\"/\u003e\n \u003cdata android:scheme=\"geo\" /\u003e\n \u003c/intent-filter\u003e\n\n \u003c!-- Custom Action Intents --\u003e\n \u003cintent-filter\u003e\n \u003caction android:name=\"android.intent.action.VIEW\" /\u003e\n \u003ccategory android:name=\"android.intent.category.DEFAULT\"/\u003e\n \u003cdata android:scheme=\"geo.action\" /\u003e\n \u003c/intent-filter\u003e\n\nTo add the app to\n**Settings \\\u003e Google \\\u003e Google Assistant \\\u003e Default navigation app**\nso that it can be seen and selected, add: \n\n \u003cintent-filter\u003e\n \u003caction android:name=\"android.intent.action.MAIN\" /\u003e\n \u003ccategory android:name=\"android.intent.category.APP_MAPS\" /\u003e\n \u003c/intent-filter\u003e"]]