
LinearLayout은 세로 또는 가로의 단일 방향으로 모든 하위 요소를 정렬하는 뷰 그룹입니다. android:orientation 속성을 사용하여 레이아웃 방향을 지정할 수 있습니다.

LinearLayout
LinearLayout의 모든 하위 요소는 순차적으로 스택됩니다. 따라서 세로 목록은 너비에 상관없이 행 하나에 하나의 하위 요소만 갖고, 가로 목록의 높이는 한 행과 같으며, 가장 긴 하위 요소의 높이에 패딩을 더한 값입니다. LinearLayout은 하위 요소 사이의 여백 및 각 하위 요소의 중력(오른쪽, 가운데, 왼쪽 정렬)을 따릅니다.
레이아웃 가중치
LinearLayout을 사용해서도 android:layout_weight 속성으로 개별 하위 요소에 가중치를 할당할 수 있습니다. 이 속성은 뷰가 화면에서 차지하는 공간에 따라 해당 뷰에 '중요도' 값을 할당합니다. 큰 가중치 값을 사용하면 상위 뷰의 남은 공간을 모두 채우도록 확장할 수 있습니다. 하위 뷰에서는 가중치 값을 지정할 수 있고, 뷰 그룹의 남은 모든 공간이 선언된 가중치에 따라 하위 요소에 비례적으로 할당됩니다. 기본 가중치는 0입니다.
균등 분포
각 하위 요소가 화면에서 동일한 크기의 공간을 사용하는 선형 레이아웃을 생성하려면, 각 뷰의 android:layout_height를 "0dp"로 설정하거나(세로 레이아웃의 경우) 각 뷰의 android:layout_width를 "0dp"로 설정합니다(가로 레이아웃의 경우). 그런 다음 각 뷰의 android:layout_weight를 "1"로 설정합니다.
비균등 분포
하위 요소가 화면에 다른 크기의 공간을 사용하는 선형 레이아웃을 생성할 수도 있습니다. 다음 예를 고려하세요.
- 가중치 값이 1인 텍스트 필드 2개와 기본 가중치 값이 0인 텍스트 필드 1개가 있다고 가정해 보겠습니다. 가중치 값이 0인 세 번째 텍스트 필드는 해당 콘텐츠에 필요한 영역만 차지합니다. 가중치 값이 1인 다른 두 텍스트 필드는 세 필드의 콘텐츠가 모두 측정된 후 남은 공간을 균등하게 채우도록 확장됩니다.
- 반면 텍스트 필드가 세 개 있고 그중 두 개의 가중치 값이 1이고 세 번째 가중치가 2인 경우 세 필드의 콘텐츠가 모두 측정된 후 남은 공간은 가중치 값이 2인 필드에 절반이 할당되고 가중치 값이 1인 필드에 절반이 균등하게 할당됩니다.
다음 그림과 코드 스니펫은 '메시지 보내기' 활동에서 레이아웃 가중치가 작동하는 방식을 보여줍니다. To 필드, Subject 줄, Send 버튼은 각각 필요한 높이만 차지합니다. 메시지 영역은 활동의 나머지 높이를 차지합니다.
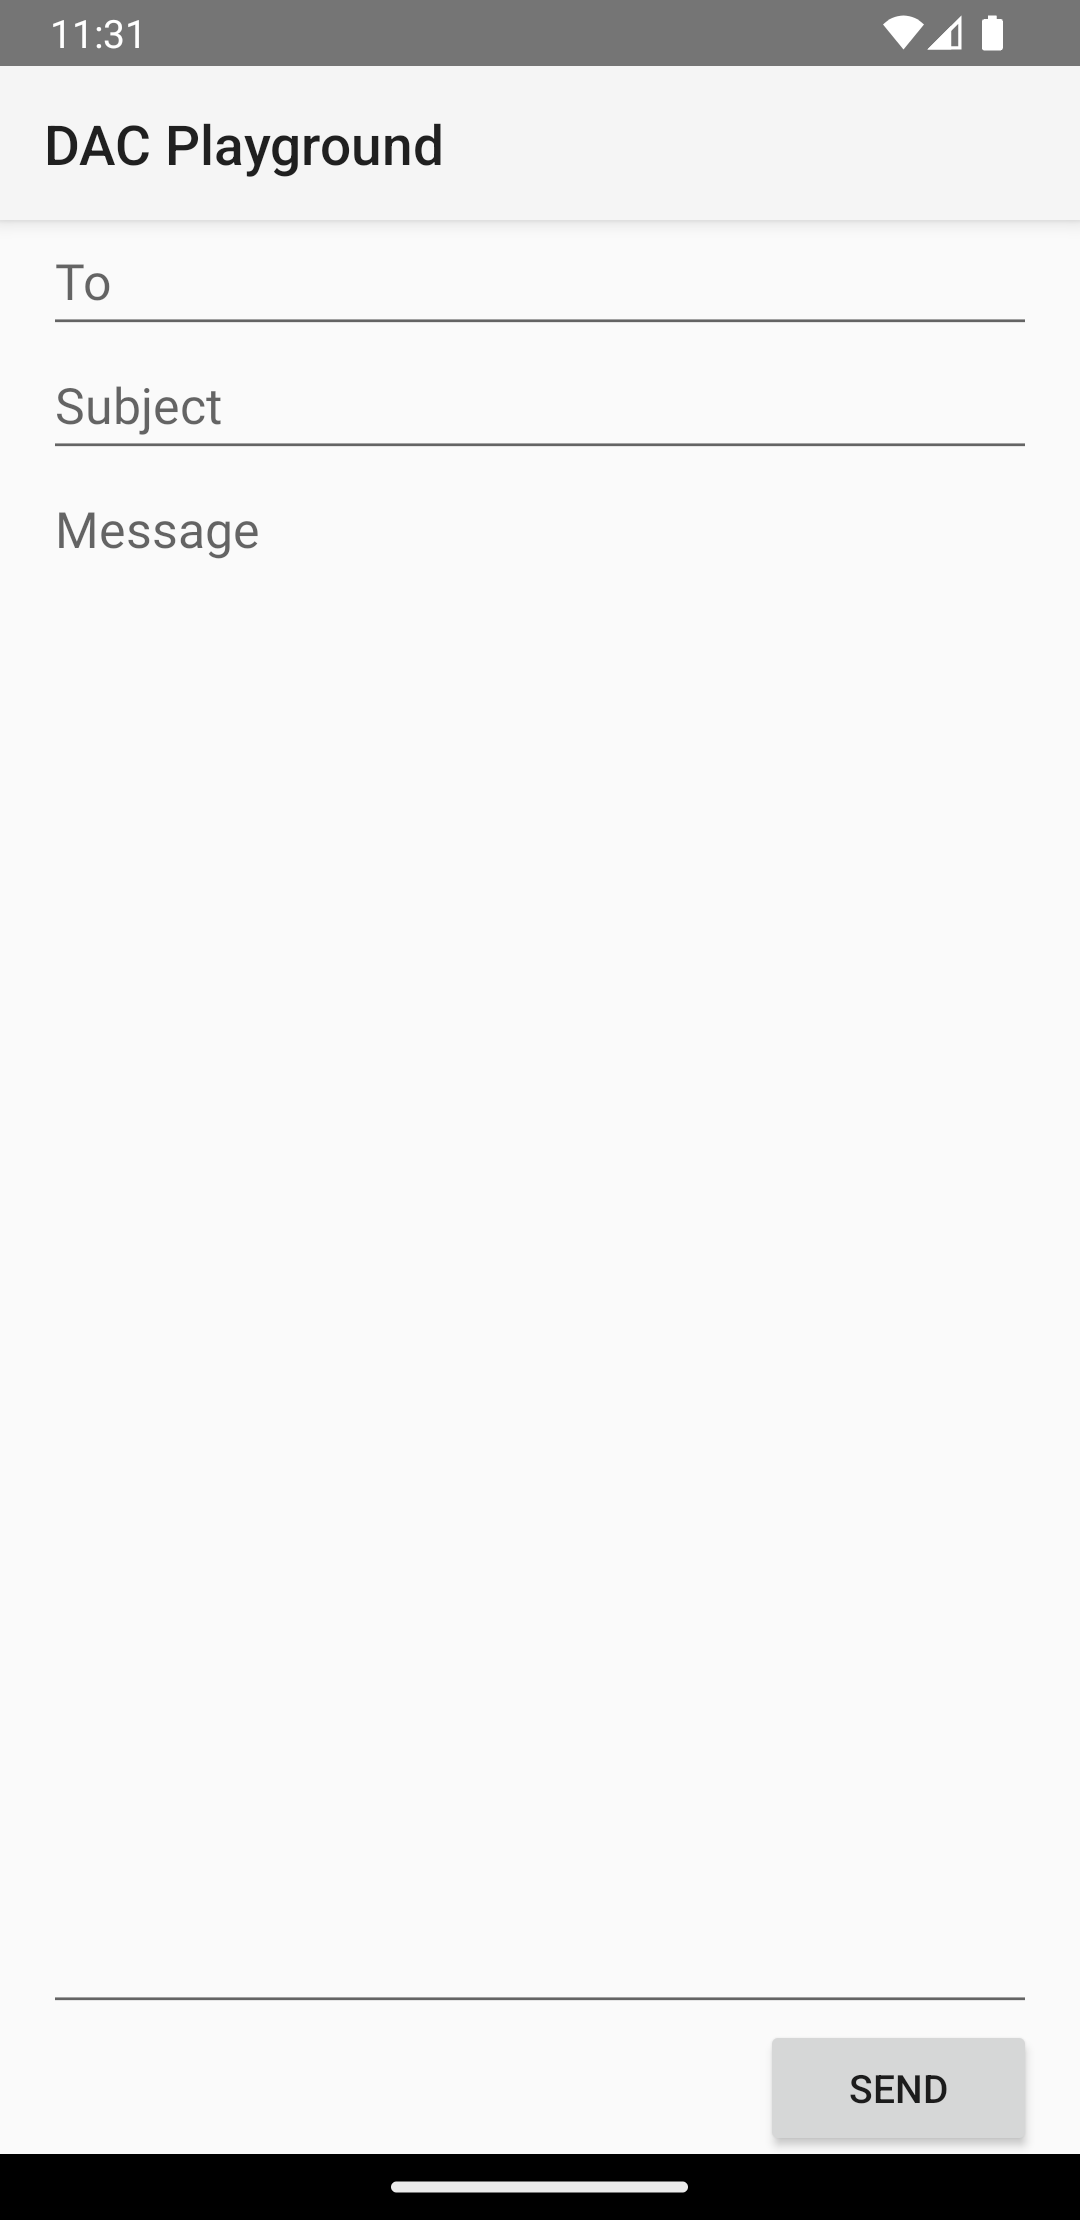
LinearLayout에 텍스트 필드 3개와 버튼이 있습니다.
<?xml version="1.0" encoding="utf-8"?>
<LinearLayout xmlns:android="http://schemas.android.com/apk/res/android"
    android:layout_width="match_parent"
    android:layout_height="match_parent"
    android:paddingLeft="16dp"
    android:paddingRight="16dp"
    android:orientation="vertical" >
    <EditText
        android:layout_width="match_parent"
        android:layout_height="wrap_content"
        android:hint="@string/to" />
    <EditText
        android:layout_width="match_parent"
        android:layout_height="wrap_content"
        android:hint="@string/subject" />
    <EditText
        android:layout_width="match_parent"
        android:layout_height="0dp"
        android:layout_weight="1"
        android:gravity="top"
        android:hint="@string/message" />
    <Button
        android:layout_width="100dp"
        android:layout_height="wrap_content"
        android:layout_gravity="end"
        android:text="@string/send" />
</LinearLayout>
LinearLayout의 각 하위 뷰에 사용할 수 있는 속성에 대한 자세한 내용은 LinearLayout.LayoutParams를 참고하세요.