Le visualizzazioni a scorrimento ti consentono di spostarti tra le schermate gemelle, come le schede, con una gesto orizzontale del dito o scorrimento. Questo schema di navigazione viene chiamato anche paginazione orizzontale. Questo argomento insegna come creare un layout di schede con visualizzazioni a scorrimento per passare da una scheda all'altra, oltre a istruzioni per mostrare un titolo anziché tabulazioni.
Implementare le visualizzazioni di scorrimento
Puoi creare visualizzazioni a scorrimento utilizzando
Widget ViewPager2.
Per utilizzare ViewPager2 e le schede, devi aggiungere una dipendenza
ViewPager2 e su
Componenti dei materiali
al tuo progetto.
Per configurare il layout con ViewPager2, aggiungi l'elemento <ViewPager2> a
Layout XML. Ad esempio, se ogni pagina nella visualizzazione a scorrimento deve utilizzare la
l'intero layout, il tuo layout dovrebbe avere l'aspetto seguente:
<androidx.viewpager2.widget.ViewPager2
    xmlns:android="http://schemas.android.com/apk/res/android"
    android:id="@+id/pager"
    android:layout_width="match_parent"
    android:layout_height="match_parent" />
Per inserire le viste secondarie che rappresentano ogni pagina, devi agganciare questo layout a
Un FragmentStateAdapter.
Ecco come potresti usarlo per scorrere una raccolta di Fragment oggetti:
Kotlin
class CollectionDemoFragment : Fragment() {
    // When requested, this adapter returns a DemoObjectFragment,
    // representing an object in the collection.
    private lateinit var demoCollectionAdapter: DemoCollectionAdapter
    private lateinit var viewPager: ViewPager2

    override fun onCreateView(
        inflater: LayoutInflater,
        container: ViewGroup?,
        savedInstanceState: Bundle?
    ): View? {
        return inflater.inflate(R.layout.collection_demo, container, false)
    }

    override fun onViewCreated(view: View, savedInstanceState: Bundle?) {
        demoCollectionAdapter = DemoCollectionAdapter(this)
        viewPager = view.findViewById(R.id.pager)
        viewPager.adapter = demoCollectionAdapter
    }
}

class DemoCollectionAdapter(fragment: Fragment) : FragmentStateAdapter(fragment) {

    override fun getItemCount(): Int = 100

    override fun createFragment(position: Int): Fragment {
        // Return a NEW fragment instance in createFragment(int)
        val fragment = DemoObjectFragment()
        fragment.arguments = Bundle().apply {
            // Our object is just an integer :-P
            putInt(ARG_OBJECT, position + 1)
        }
        return fragment
    }
}

private const val ARG_OBJECT = "object"

// Instances of this class are fragments representing a single
// object in our collection.
class DemoObjectFragment : Fragment() {

    override fun onCreateView(
        inflater: LayoutInflater,
        container: ViewGroup?,
        savedInstanceState: Bundle?
    ): View {
        return inflater.inflate(R.layout.fragment_collection_object, container, false)
    }

    override fun onViewCreated(view: View, savedInstanceState: Bundle?) {
        arguments?.takeIf { it.containsKey(ARG_OBJECT) }?.apply {
            val textView: TextView = view.findViewById(android.R.id.text1)
            textView.text = getInt(ARG_OBJECT).toString()
        }
    }
}
Java
public class CollectionDemoFragment extends Fragment {
    // When requested, this adapter returns a DemoObjectFragment,
    // representing an object in the collection.
    DemoCollectionAdapter demoCollectionAdapter;
    ViewPager2 viewPager;

    @Nullable
    @Override
    public View onCreateView(@NonNull LayoutInflater inflater, @Nullable ViewGroup container,
            @Nullable Bundle savedInstanceState) {
        return inflater.inflate(R.layout.collection_demo, container, false);
    }

    @Override
    public void onViewCreated(@NonNull View view, @Nullable Bundle savedInstanceState) {
        demoCollectionAdapter = new DemoCollectionAdapter(this);
        viewPager = view.findViewById(R.id.pager);
        viewPager.setAdapter(demoCollectionAdapter);
    }
}

public class DemoCollectionAdapter extends FragmentStateAdapter {
    public DemoCollectionAdapter(Fragment fragment) {
        super(fragment);
    }

    @NonNull
    @Override
    public Fragment createFragment(int position) {
        // Return a NEW fragment instance in createFragment(int)
        Fragment fragment = new DemoObjectFragment();
        Bundle args = new Bundle();
        // Our object is just an integer :-P
        args.putInt(DemoObjectFragment.ARG_OBJECT, position + 1);
        fragment.setArguments(args);
        return fragment;
    }

    @Override
    public int getItemCount() {
        return 100;
    }
}

// Instances of this class are fragments representing a single
// object in our collection.
public class DemoObjectFragment extends Fragment {
    public static final String ARG_OBJECT = "object";

    @Nullable
    @Override
    public View onCreateView(@NonNull LayoutInflater inflater, @Nullable ViewGroup container,
            @Nullable Bundle savedInstanceState) {
        return inflater.inflate(R.layout.fragment_collection_object, container, false);
    }

    @Override
    public void onViewCreated(@NonNull View view, @Nullable Bundle savedInstanceState) {
        Bundle args = getArguments();
        ((TextView) view.findViewById(android.R.id.text1))
                .setText(Integer.toString(args.getInt(ARG_OBJECT)));
    }
}
Le sezioni seguenti mostrano come aggiungere schede per facilitare la navigazione. tra le pagine.
Aggiungi schede utilizzando un layout Tab
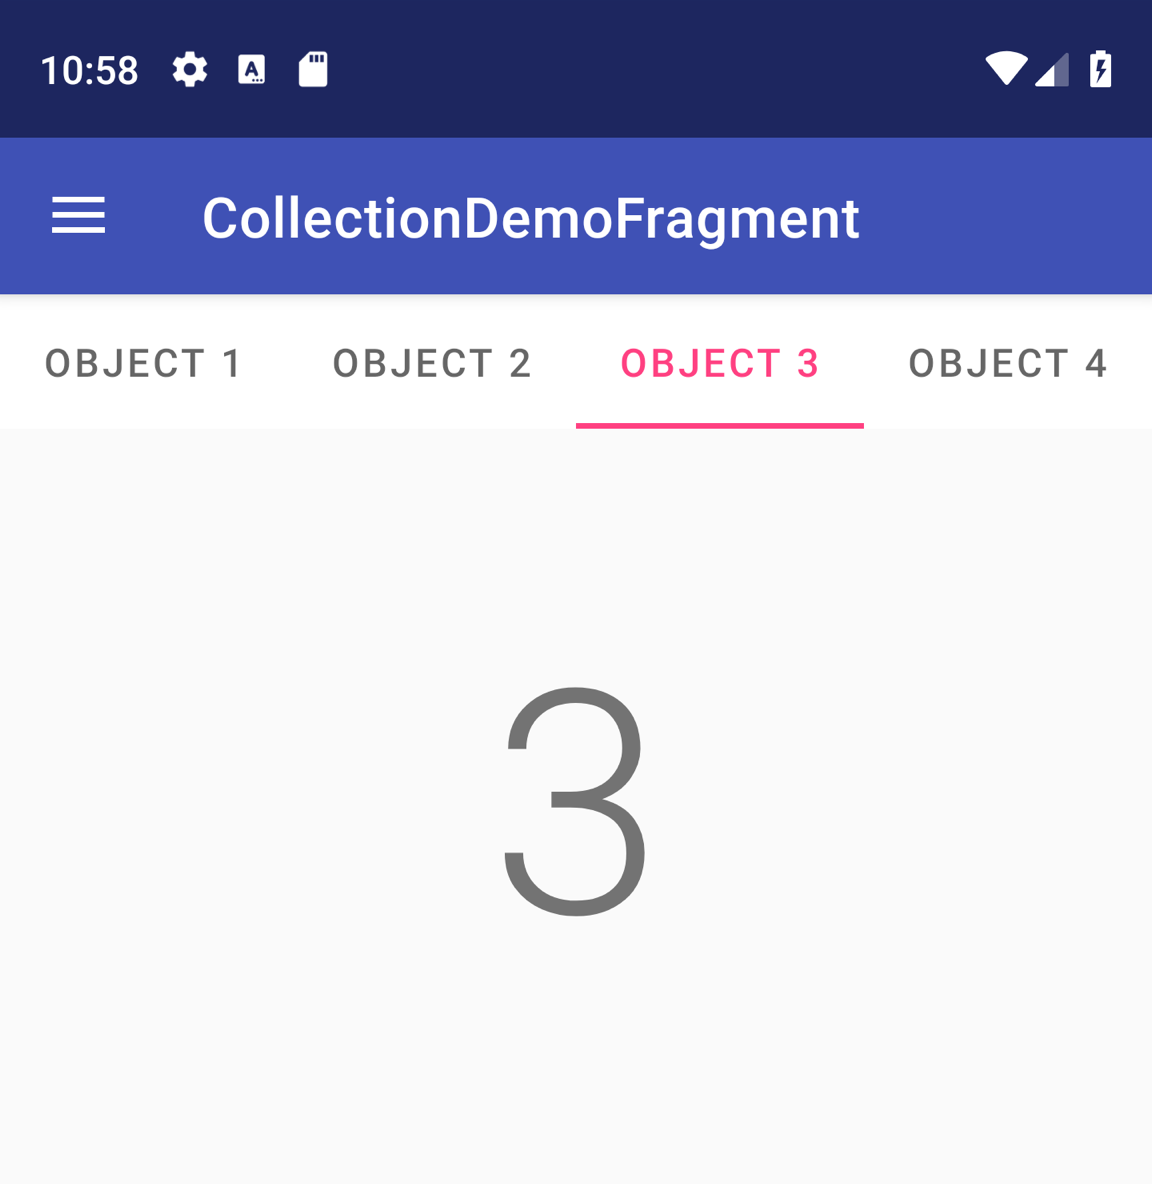
Un TabLayout fornisce
per visualizzare le schede in orizzontale. Se utilizzato insieme a un ViewPager2, un
TabLayout può fornire un'interfaccia già nota agli utenti per navigare da una pagina all'altra in un
visualizzazione scorrimento.

Figura 1: un TabLayout con quattro schede.
Per includere un TabLayout in un ViewPager2, aggiungi un elemento <TabLayout> sopra
l'elemento <ViewPager2>, come mostrato di seguito:
<LinearLayout xmlns:android="http://schemas.android.com/apk/res/android"
    android:layout_width="match_parent"
    android:layout_height="match_parent"
    android:orientation="vertical">

    <com.google.android.material.tabs.TabLayout
        android:id="@+id/tab_layout"
        android:layout_width="match_parent"
        android:layout_height="wrap_content" />

    <androidx.viewpager2.widget.ViewPager2
        android:id="@+id/pager"
        android:layout_width="match_parent"
        android:layout_height="0dp"
        android:layout_weight="1" />

</LinearLayout>
Quindi, crea
TabLayoutMediator
per collegare TabLayout a ViewPager2 e allegarlo come segue:
Kotlin
class CollectionDemoFragment : Fragment() {
    ...
    override fun onViewCreated(view: View, savedInstanceState: Bundle?) {
        val tabLayout = view.findViewById(R.id.tab_layout)
        TabLayoutMediator(tabLayout, viewPager) { tab, position ->
            tab.text = "OBJECT ${(position + 1)}"
        }.attach()
    }
    ...
}
Java
public class CollectionDemoFragment extends Fragment {
    ...
    @Override
    public void onViewCreated(@NonNull View view, @Nullable Bundle savedInstanceState) {
        TabLayout tabLayout = view.findViewById(R.id.tab_layout);
        new TabLayoutMediator(tabLayout, viewPager,
                (tab, position) -> tab.setText("OBJECT " + (position + 1))
        ).attach();
    }
    ...
}
Per ulteriori indicazioni sulla progettazione dei layout delle schede, consulta la sezione Documentazione di Material Design per le schede.
Risorse aggiuntive
Per scoprire di più su ViewPager2, consulta le seguenti risorse aggiuntive.
Campioni
- Esempi di ViewPager2 su GitHub
Video
- Già pagina: migrazione a ViewPager2 (Android Dev Summit '19)
