Sering kali aplikasi perlu menampilkan data dalam container dengan gaya yang mirip, seperti
container yang menyimpan informasi tentang item dalam daftar. Sistem menyediakan
CardView API agar Anda dapat
menampilkan informasi dalam kartu yang memiliki tampilan konsisten di seluruh platform. Misalnya, kartu memiliki elevasi default di atas grup tampilan yang menampungnya, sehingga sistem menggambar bayangan di bawahnya. Kartu memberikan cara untuk menampung sekelompok
tampilan sekaligus memberikan gaya yang konsisten untuk penampung.
Menambahkan dependensi
Widget CardView adalah bagian dari AndroidX. Untuk menggunakannya dalam project Anda, tambahkan dependensi berikut ke file build.gradle
modul aplikasi Anda:
Groovy
dependencies {
    implementation "androidx.cardview:cardview:1.0.0"
}
Kotlin
dependencies {
    implementation("androidx.cardview:cardview:1.0.0")
}
Membuat kartu
Untuk menggunakan CardView, tambahkan ke file tata letak Anda. Gunakan ini sebagai kelompok tampilan untuk
menampung tampilan lain. Dalam contoh berikut, CardView berisi
ImageView dan beberapa TextViews untuk menampilkan beberapa informasi kepada pengguna:
<?xml version="1.0" encoding="utf-8"?>
<androidx.constraintlayout.widget.ConstraintLayout
    xmlns:android="http://schemas.android.com/apk/res/android"
    xmlns:app="http://schemas.android.com/apk/res-auto"
    android:padding="16dp"
    android:background="#E0F7FA"
    android:layout_width="match_parent"
    android:layout_height="match_parent">

    <androidx.cardview.widget.CardView
        android:layout_width="match_parent"
        android:layout_height="wrap_content"
        app:layout_constraintBottom_toBottomOf="parent"
        app:layout_constraintEnd_toEndOf="parent"
        app:layout_constraintStart_toStartOf="parent"
        app:layout_constraintTop_toTopOf="parent">

        <androidx.constraintlayout.widget.ConstraintLayout
            android:padding="4dp"
            android:layout_width="match_parent"
            android:layout_height="match_parent">

            <ImageView
                android:id="@+id/header_image"
                android:layout_width="match_parent"
                android:layout_height="200dp"
                android:src="@drawable/logo"
                app:layout_constraintEnd_toEndOf="parent"
                app:layout_constraintStart_toStartOf="parent"
                app:layout_constraintTop_toTopOf="parent" />

            <TextView
                android:id="@+id/title"
                style="@style/TextAppearance.MaterialComponents.Headline3"
                android:layout_width="match_parent"
                android:layout_height="wrap_content"
                android:layout_marginTop="4dp"
                android:text="I'm a title"
                app:layout_constraintEnd_toEndOf="parent"
                app:layout_constraintStart_toStartOf="parent"
                app:layout_constraintTop_toBottomOf="@id/header_image" />

            <TextView
                android:id="@+id/subhead"
                style="@style/TextAppearance.MaterialComponents.Subtitle2"
                android:layout_width="match_parent"
                android:layout_height="wrap_content"
                android:layout_marginTop="4dp"
                android:text="I'm a subhead"
                app:layout_constraintEnd_toEndOf="parent"
                app:layout_constraintStart_toStartOf="parent"
                app:layout_constraintTop_toBottomOf="@id/title" />

            <TextView
                android:id="@+id/body"
                style="@style/TextAppearance.MaterialComponents.Body1"
                android:layout_width="match_parent"
                android:layout_height="wrap_content"
                android:layout_marginTop="4dp"
                android:text="I'm a supporting text. Very Lorem ipsum dolor sit amet, consectetur adipiscing elit, sed do eiusmod tempor incididunt ut labore et dolore magna aliqua. Ut enim ad minim veniam, quis nostrud exercitation ullamco laboris nisi ut aliquip ex ea commodo consequat. Duis aute irure dolor in reprehenderit in voluptate velit esse cillum dolore eu fugiat nulla pariatur. Excepteur sint occaecat cupidatat non proident, sunt in culpa qui officia deserunt mollit anim id est laborum."
                app:layout_constraintEnd_toEndOf="parent"
                app:layout_constraintStart_toStartOf="parent"
                app:layout_constraintTop_toBottomOf="@id/subhead" />
        </androidx.constraintlayout.widget.ConstraintLayout>
    </androidx.cardview.widget.CardView>
</androidx.constraintlayout.widget.ConstraintLayout>
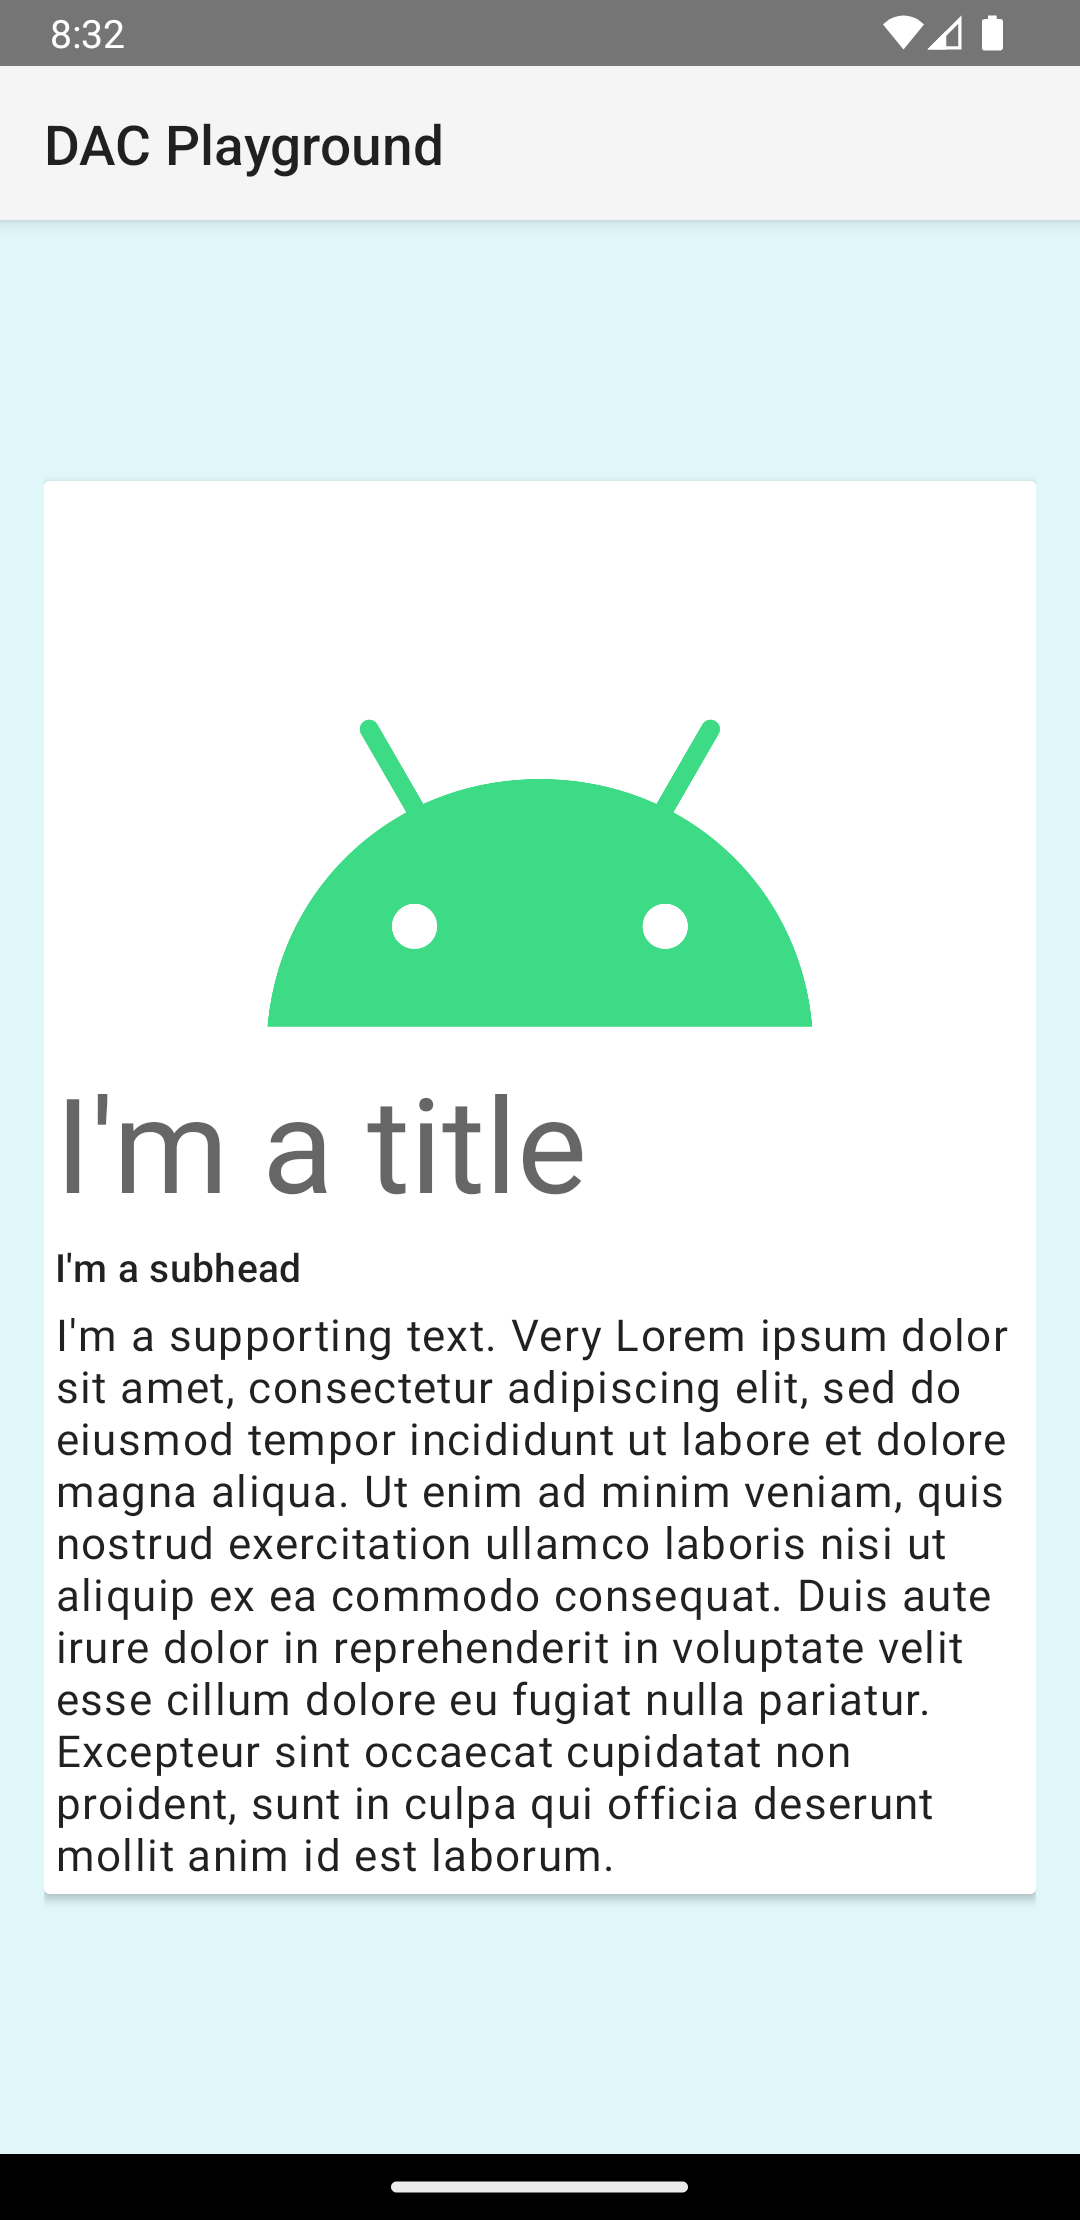
Cuplikan kode sebelumnya menghasilkan sesuatu yang mirip dengan berikut, dengan asumsi Anda menggunakan gambar logo Android yang sama:

Kartu dalam contoh ini digambar ke layar dengan elevasi default, yang menyebabkan sistem menggambar bayangan di bawahnya. Anda dapat memberikan elevasi kustom
untuk kartu dengan atribut card_view:cardElevation. Kartu dengan elevasi yang lebih tinggi memiliki bayangan yang lebih jelas, dan kartu dengan elevasi yang lebih rendah memiliki bayangan yang lebih terang. CardView menggunakan elevasi riil dan bayangan dinamis di Android 5.0 (API level 21) dan yang lebih tinggi.
Gunakan properti ini untuk menyesuaikan tampilan widget CardView:
- Untuk menetapkan radius sudut dalam tata letak Anda, gunakan atribut
card_view:cardCornerRadius. - Untuk menetapkan radius sudut dalam kode Anda, gunakan metode
CardView.setRadius. - Untuk menetapkan warna latar belakang kartu, gunakan atribut
card_view:cardBackgroundColor.

