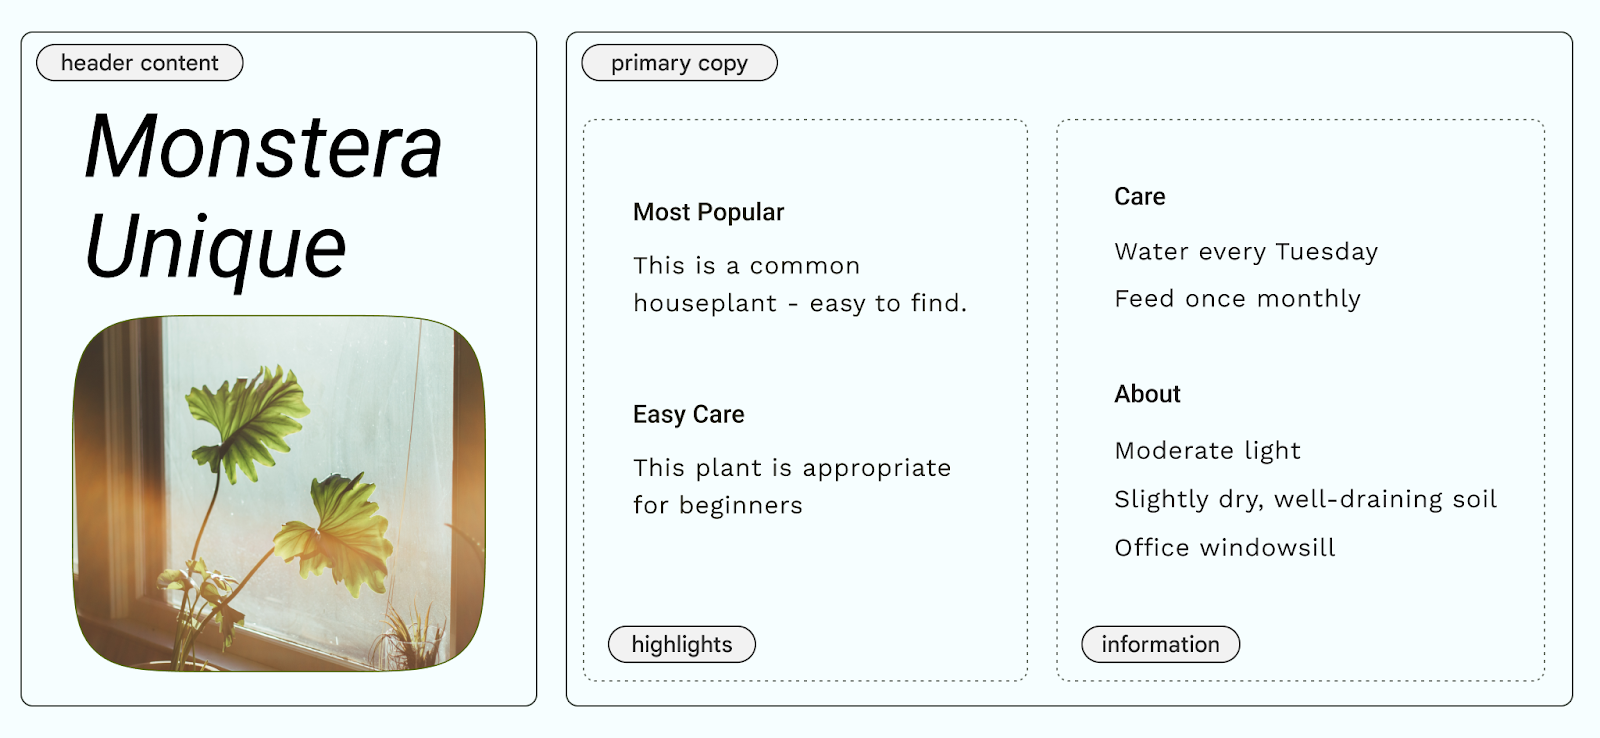
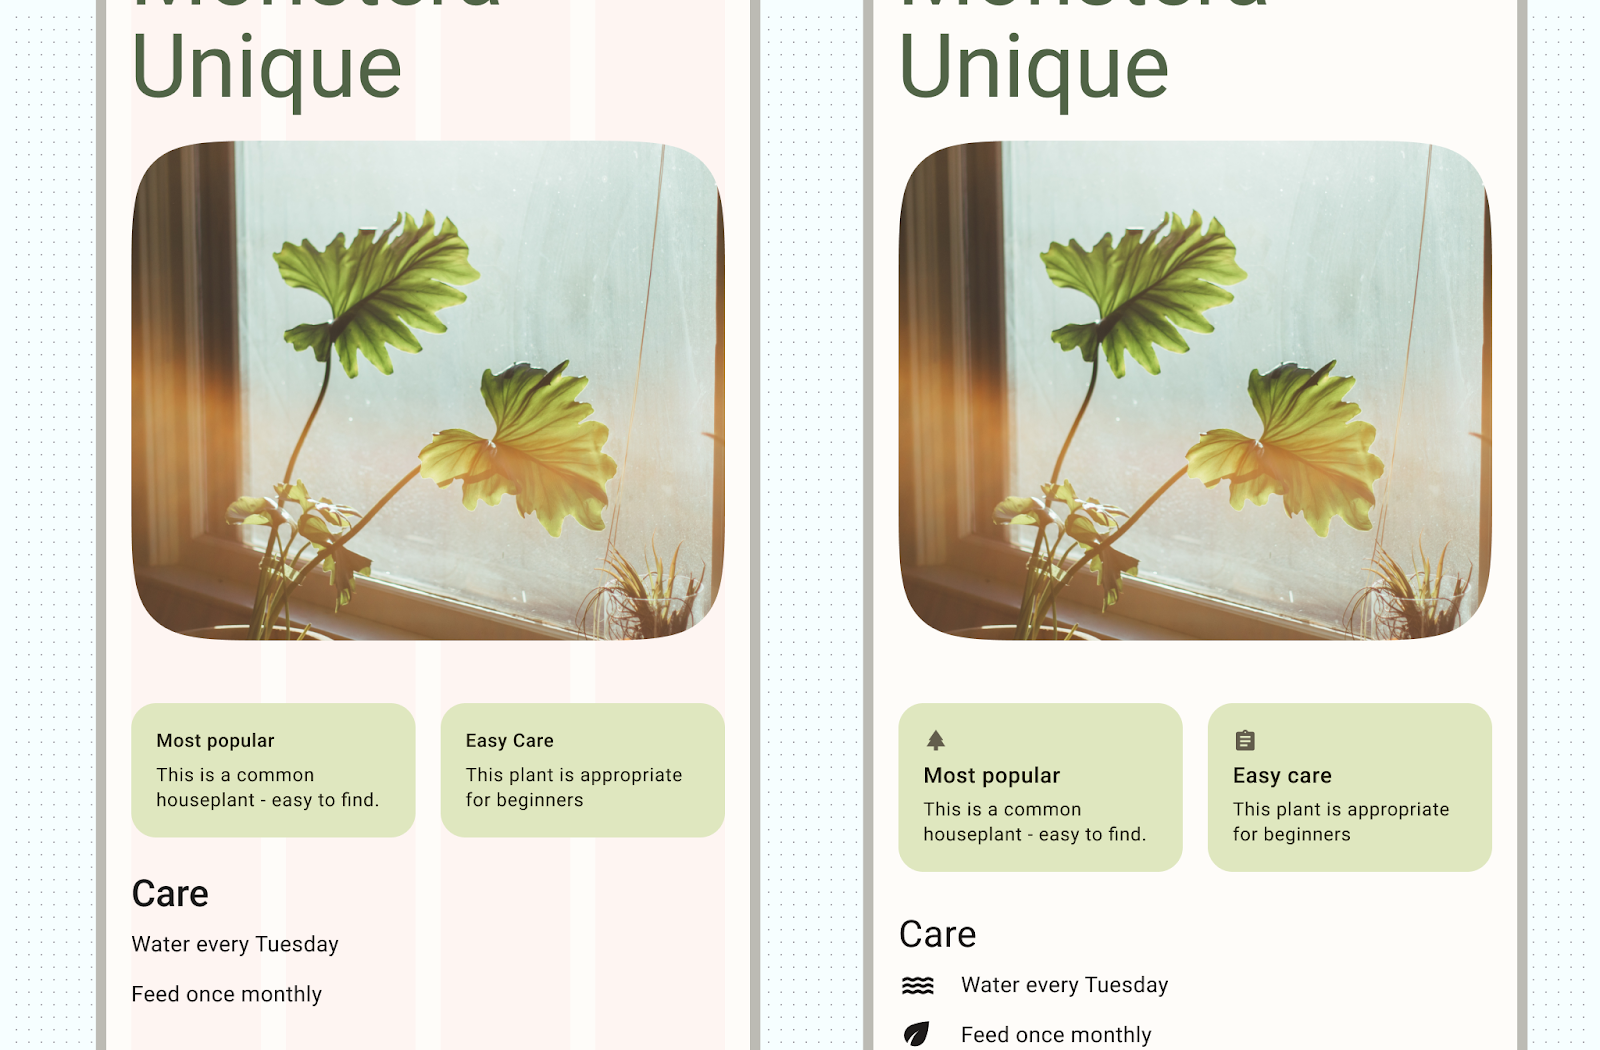
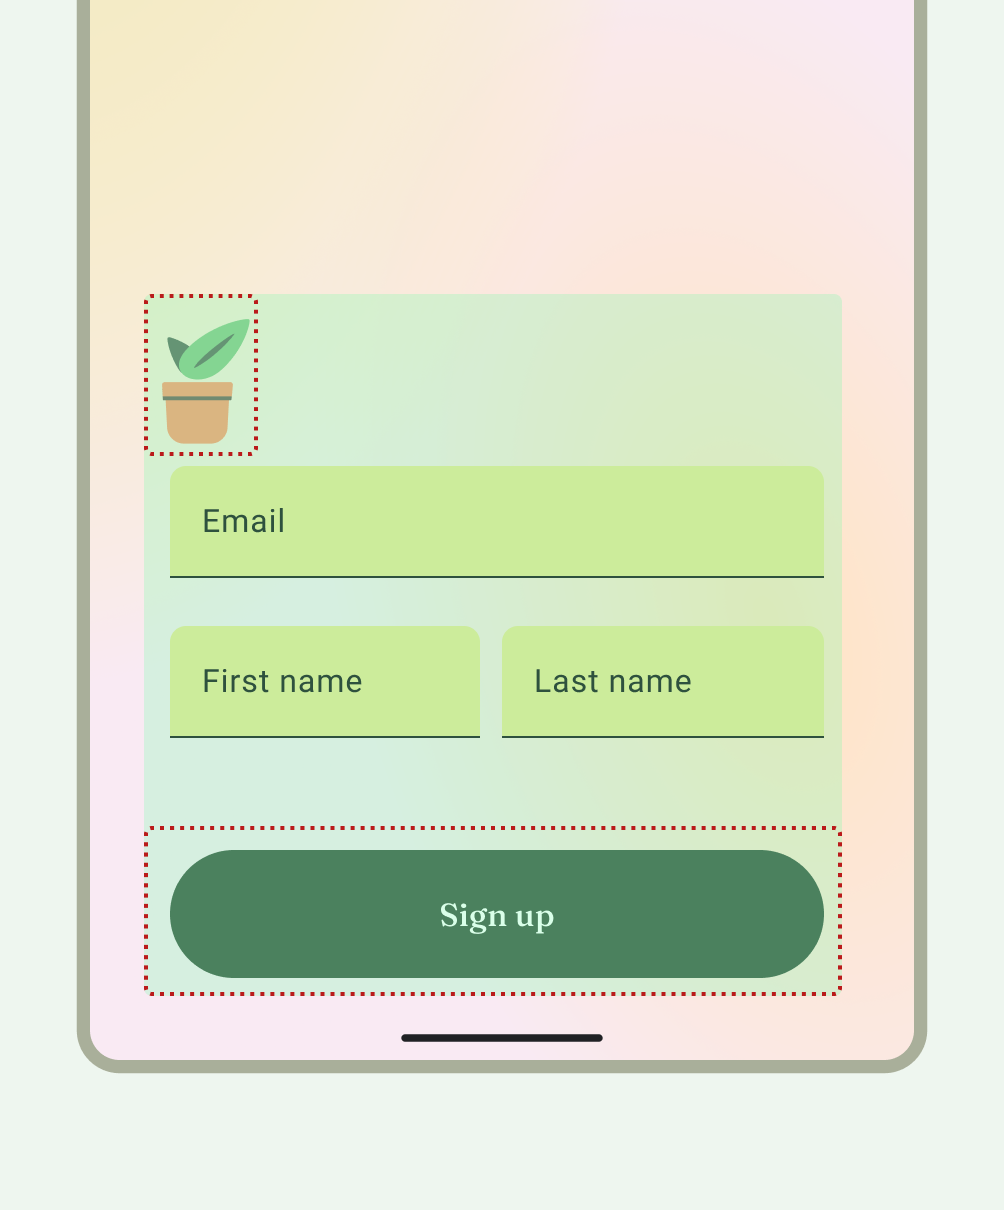
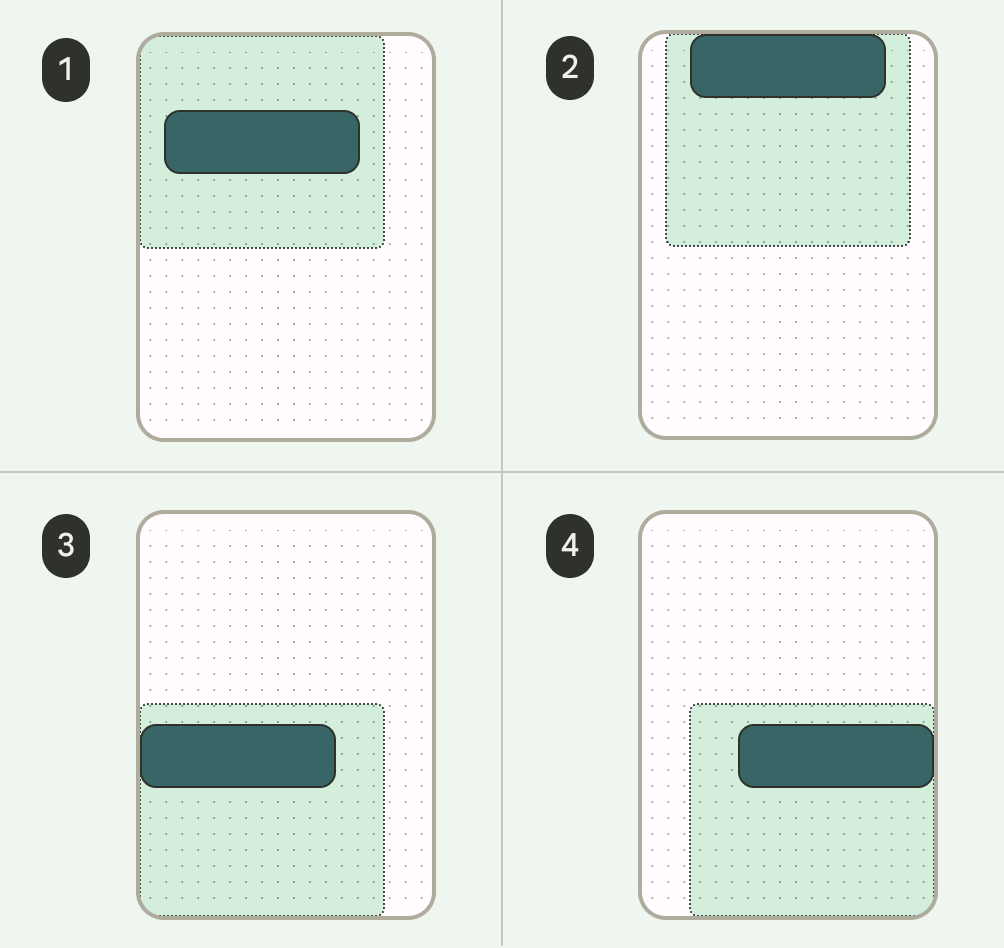
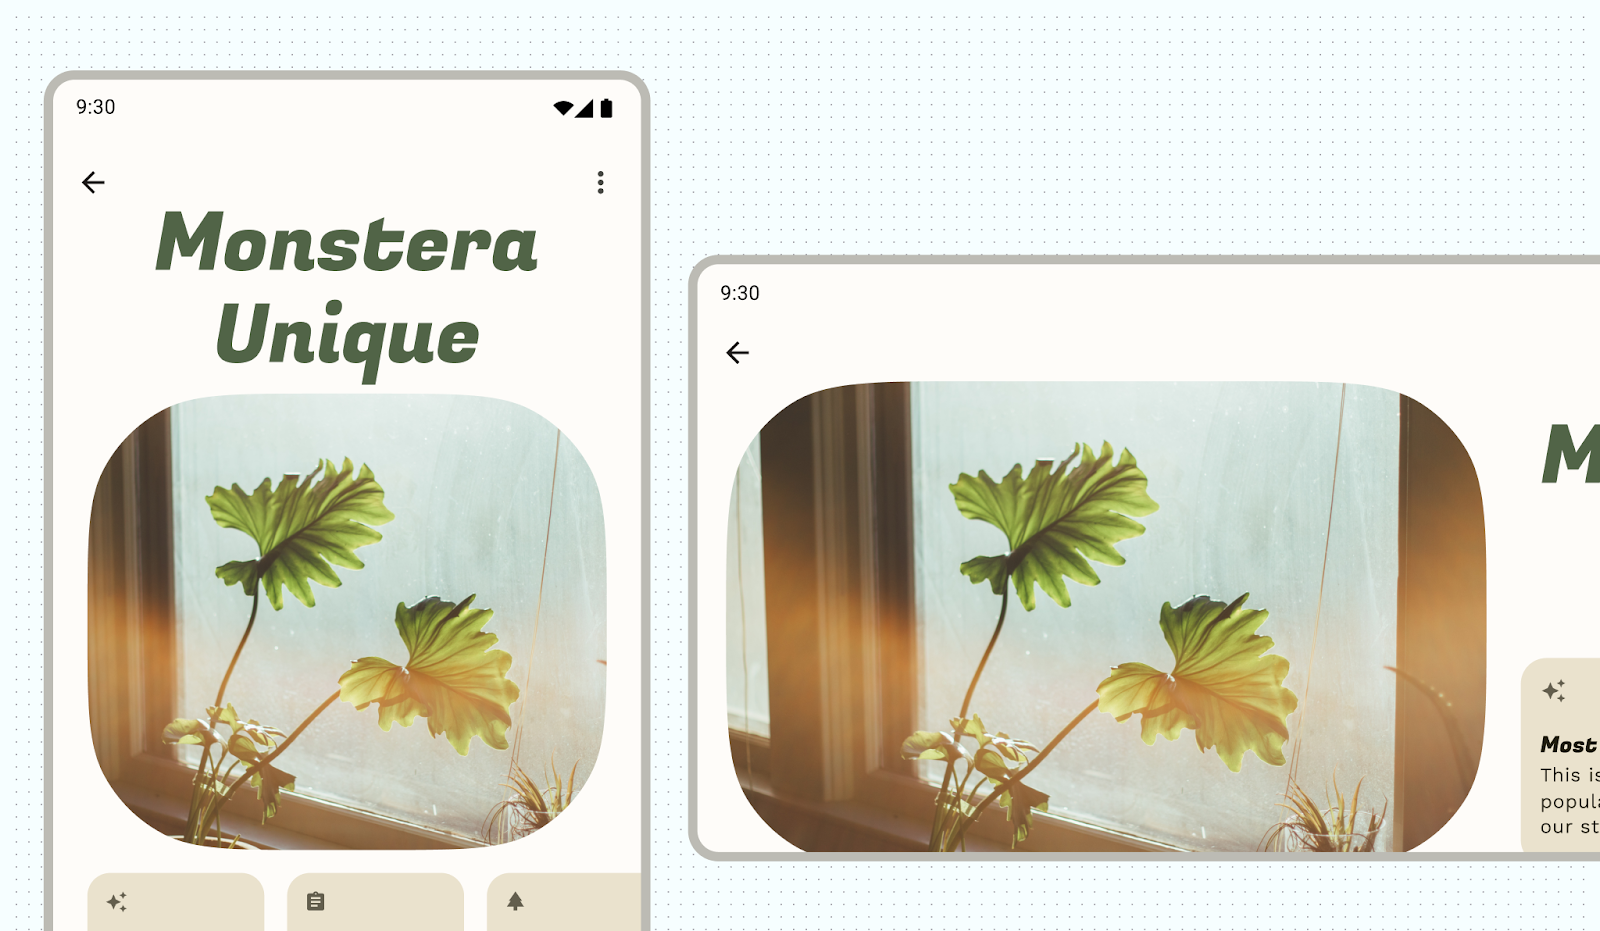
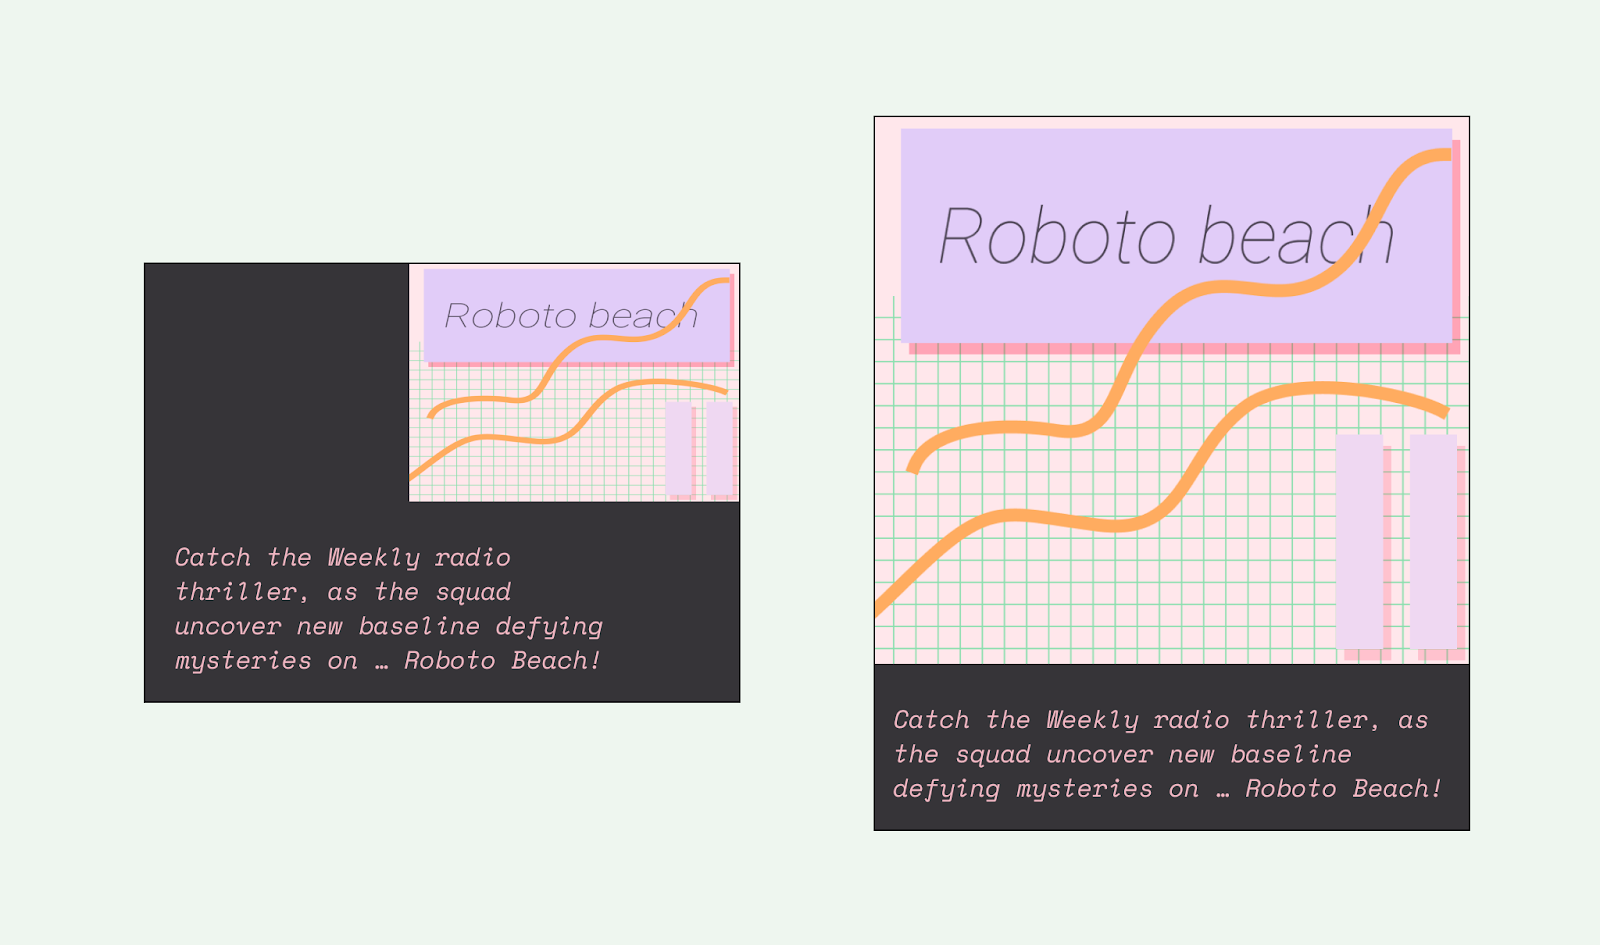
[[["容易理解","easyToUnderstand","thumb-up"],["確實解決了我的問題","solvedMyProblem","thumb-up"],["其他","otherUp","thumb-up"]],[["缺少我需要的資訊","missingTheInformationINeed","thumb-down"],["過於複雜/步驟過多","tooComplicatedTooManySteps","thumb-down"],["過時","outOfDate","thumb-down"],["翻譯問題","translationIssue","thumb-down"],["示例/程式碼問題","samplesCodeIssue","thumb-down"],["其他","otherDown","thumb-down"]],["上次更新時間:2025-08-28 (世界標準時間)。"],[],[],null,["Build up a flexible flow and rhythm with structure and containment methods for\nyour content.\n\n1. Base structure\n\n**To begin creating a solid structure with consistent guardrails, add margins and\ncolumns to your layouts.**\n\n*Margins* provide spacing on the left and right edges of the screen and content.\nA standard margin value for compact sizing is 16 dp, but margins should adapt to\naccommodate larger screens. Your app's body content and actions must stay within\nand align with these margins.\n\nYou can also ensure inset safe zones or insets at this step. System bar insets\nprevent crucial actions from falling under system bars. See [Draw your content\nbehind the system bars](/design/ui/mobile/guides/foundations/system-bars#draw-content) for details.\n**Figure 8:** Margins (1) and system bar inset (2)\n\nUse *columns* to build a flexible grid structure for consistent alignment, and\nto provide vertical definition to a layout by dividing content within the body\narea. Content goes in the areas of the screen containing columns. These columns\nlend structure to your layout, providing convenient structure to arrange\nelements.\n**Figure 9:** Mobile screens are often divided into four columns\n\nUse a *column grid* to align content with an underlying [grid](/design/ui/mobile/guides/layout-and-content/grids-and-units)\nbut retain flexible sizing. The column grid can accommodate different form\nfactors by changing the column sizes and number of columns as needed by the\nscreen size at certain points while allowing content to also scale. Avoid being\ntoo granular with the column grid, this is what the baseline grid is for:\nproviding consistent spacing units.\n\nBe careful of establishing an accompanying grid of rows as it can restrict\nhorizontal content scaling across orientations and form factors, typically\nestablishing padding rules will provide the needed visual consistency. \n**Place content**\n\n\nStarting to add copy to the layout structure.\nMargins protect content from the screen's edges. Columns provide a\nconsistent spacing and alignment structure.\nAlas, your browser doesn't support HTML5 video. That's OK! You can still [download the video](/static/images/design/ui/mobile/layout-basics-video-2.mp4) and watch it with a video player.\n\n2. Apply containment\n\n**Use containment to visually group elements.**\n\n*Containment* refers to using white space and visible elements together to\ncreate a visual grouping. A container is a shape that represents an enclosed\narea. In a single layout, you can group together elements that share similar\ncontent or functionality and separate them from other elements using open space,\ntypography, and dividers.\n\nYou can group similar items together with white space or visible division to\nhelp guide the user through content.\n**Figure 10:** Breaking content into two larger groupings of header and primary copy\n\n*Implicit containment* uses white space to visually group content to create\ncontainer boundaries while *explicit containment* uses objects like divider\nlines and cards to group content together.\n\nThe following figure shows an example of using implicit containment to contain\nthe header and primary copy. The column grid is used to align and create\ngroupings. Highlights are explicitly contained within cards. Using iconography\nand type hierarchy for greater visual separation.\n**Figure 11:** Example of implicit containment\n\n3. Position content\n\nAndroid has multiple ways to handle content elements in their respective\ncontainers that can help position them appropriately, including gravity,\nspacing, and scaling.\n**Figure 12:** Layout example showing containment boundaries and position of elements\n\n*Gravity* is a standard for placing an object within a potentially larger\ncontainer for specific use cases. The following figure shows examples of\npositioning objects start and center (1), top and\ncenter horizontal (2), bottom left\n(3), and end and right\n(1).\n**Figure 13:** Positioning gravity of child content and parent views\n\n4. Scale content\n\n**Scaling is crucial to accommodate dynamic content, device orientation, and\nscreen sizes. Elements can remain fixed or be scaled.**\n\nNoting how images are displayed within their containers with scaling and\nposition is important to ensure it appears how you want the image to look\ndespite the device context, otherwise the image's primary focus could appear cut\noff, images could be too small or large for the layout, or other undesirable\neffects.\n**Figure 14:** Center-cropped image, which ensures the plant is centered within the container regardless of device size\n\nContent that is not notated can appear differently than you expect or want.\n**Figure 15:** Content that is not notated can appear in unexpected ways\n\nPinned content\n\nMany elements have built in interactions, scrolling, and positioning with slots\nor scaffolds. Some elements can be modified to stay fixed instead of reacting to\nscrolling, for example floating action buttons (FABs) that house critical\nactions.\n\nAlignment\n\nUse [`AlignmentLine`](/jetpack/compose/layouts/alignment-lines) to create custom alignment lines, which parent layouts\ncan use to align and position their children. \ncheck_circle\n\nDo \nEstablish consistent spacing between like elements. \ncancel\n\nDon't \ndisrupt readability by inconsistently spacing like elements, which can make designs appear haphazard.\n\nComponent layout\n\n[Material 3 components](https://m3.material.io/components) provide their own configurations and\nstates for interaction and content.\n\nCompose provides convenient layouts for combining Material Components into\ncommon screen patterns. Composables such as [Scaffold](/reference/kotlin/androidx/compose/material3/package-summary#scaffold) provide slots for\nvarious components and other screen elements. [Read more about Material\nComponents and Layout](/jetpack/compose/layouts/material#scaffold)."]]