


กล่องโต้ตอบคือหน้าต่างขนาดเล็กที่แจ้งให้ผู้ใช้ตัดสินใจหรือป้อนข้อมูลเพิ่มเติม กล่องโต้ตอบจะไม่เต็มหน้าจอและโดยปกติจะใช้สำหรับเหตุการณ์แบบโมดอลที่กำหนดให้ผู้ใช้ดำเนินการก่อนจึงจะดำเนินการต่อได้

คลาส Dialog
เป็นคลาสฐานสำหรับกล่องโต้ตอบ แต่ไม่ควรสร้างอินสแตนซ์ Dialog
โดยตรง แต่ให้ใช้คลาสย่อยรายการใดรายการหนึ่งต่อไปนี้แทน
AlertDialog- กล่องโต้ตอบที่แสดงชื่อ ปุ่มได้สูงสุด 3 ปุ่ม รายการที่เลือกได้ หรือเลย์เอาต์ที่กำหนดเอง
DatePickerDialogหรือTimePickerDialog- กล่องโต้ตอบที่มี UI ที่กำหนดไว้ล่วงหน้าซึ่งช่วยให้ผู้ใช้เลือกวันที่หรือเวลาได้
คลาสเหล่านี้จะกำหนดสไตล์และโครงสร้างของกล่องโต้ตอบ นอกจากนี้ คุณยังต้องมี
DialogFragment
เป็นคอนเทนเนอร์สำหรับกล่องโต้ตอบด้วย DialogFragment class มี
การควบคุมทั้งหมดที่คุณต้องใช้ในการสร้างกล่องโต้ตอบและจัดการลักษณะที่ปรากฏ
แทนที่จะเรียกใช้เมธอดในออบเจ็กต์ Dialog
การใช้ DialogFragment เพื่อจัดการกล่องโต้ตอบจะช่วยให้จัดการเหตุการณ์วงจร
ได้อย่างถูกต้อง เช่น เมื่อผู้ใช้แตะปุ่มย้อนกลับหรือหมุน
หน้าจอ คลาส DialogFragment ยังช่วยให้คุณนํา UI ของกล่องโต้ตอบมาใช้ซ้ำเป็นคอมโพเนนต์ที่ฝังได้ใน UI ที่ใหญ่ขึ้นได้ด้วย เช่นเดียวกับ Fragment แบบเดิม
เช่น เมื่อคุณต้องการให้ UI ของกล่องโต้ตอบปรากฏแตกต่างกันในหน้าจอขนาดใหญ่และขนาดเล็ก
ส่วนต่อไปนี้ในเอกสารนี้จะอธิบายวิธีใช้ DialogFragment ร่วมกับออบเจ็กต์ AlertDialog
หากต้องการสร้างเครื่องมือเลือกวันที่หรือเวลา โปรดอ่านเพิ่มเครื่องมือเลือกใน
แอป
สร้าง DialogFragment
คุณสามารถออกแบบกล่องโต้ตอบได้หลากหลายรูปแบบ รวมถึงเลย์เอาต์ที่กำหนดเองและเลย์เอาต์ที่อธิบายไว้ในกล่องโต้ตอบของ Material Design โดยการขยาย DialogFragment และสร้าง AlertDialog ใน
onCreateDialog()
เมธอด Callback
ตัวอย่างเช่น นี่คือ AlertDialog พื้นฐานที่จัดการภายใน
DialogFragment
Kotlin
class StartGameDialogFragment : DialogFragment() {
    override fun onCreateDialog(savedInstanceState: Bundle?): Dialog {
        return activity?.let {
            // Use the Builder class for convenient dialog construction.
            val builder = AlertDialog.Builder(it)
            builder.setMessage("Start game")
                .setPositiveButton("Start") { dialog, id ->
                    // START THE GAME!
                }
                .setNegativeButton("Cancel") { dialog, id ->
                    // User cancelled the dialog.
                }
            // Create the AlertDialog object and return it.
            builder.create()
        } ?: throw IllegalStateException("Activity cannot be null")
    }
}

class OldXmlActivity : AppCompatActivity() {
    override fun onCreate(savedInstanceState: Bundle?) {
        super.onCreate(savedInstanceState)
        setContentView(R.layout.activity_old_xml)

        StartGameDialogFragment().show(supportFragmentManager, "GAME_DIALOG")
    }
}
Java
public class StartGameDialogFragment extends DialogFragment {
    @Override
    public Dialog onCreateDialog(Bundle savedInstanceState) {
        // Use the Builder class for convenient dialog construction.
        AlertDialog.Builder builder = new AlertDialog.Builder(getActivity());
        builder.setMessage(R.string.dialog_start_game)
               .setPositiveButton(R.string.start, new DialogInterface.OnClickListener() {
                   public void onClick(DialogInterface dialog, int id) {
                       // START THE GAME!
                   }
               })
               .setNegativeButton(R.string.cancel, new DialogInterface.OnClickListener() {
                   public void onClick(DialogInterface dialog, int id) {
                       // User cancels the dialog.
                   }
               });
        // Create the AlertDialog object and return it.
        return builder.create();
    }
}
// ...

StartGameDialogFragment().show(supportFragmentManager, "GAME_DIALOG");
เมื่อสร้างอินสแตนซ์ของคลาสนี้และเรียกใช้
show()
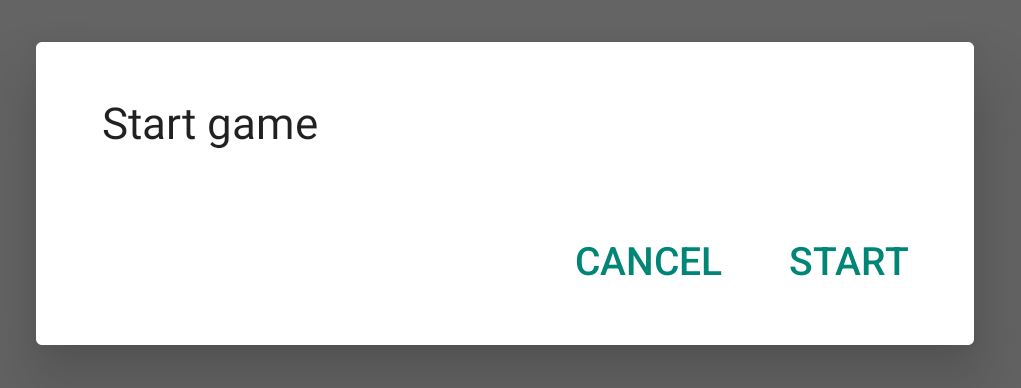
ในออบเจ็กต์นั้น กล่องโต้ตอบจะปรากฏขึ้นตามที่แสดงในรูปต่อไปนี้
ส่วนถัดไปจะให้รายละเอียดเพิ่มเติมเกี่ยวกับการใช้
AlertDialog.Builder
API เพื่อสร้างกล่องโต้ตอบ
คุณสามารถใช้เมธอดเรียกกลับอื่นๆ ได้หลากหลายใน DialogFragment รวมถึงเมธอดวงจรของ Fragment พื้นฐานทั้งหมด ทั้งนี้ขึ้นอยู่กับความซับซ้อนของกล่องโต้ตอบ
สร้างกล่องโต้ตอบการแจ้งเตือน
คลาส AlertDialog ช่วยให้คุณสร้างกล่องโต้ตอบได้หลากหลาย
และมักจะเป็นคลาสกล่องโต้ตอบเพียงคลาสเดียวที่คุณต้องการ ดังที่แสดงในรูปต่อไปนี้ กล่องโต้ตอบการแจ้งเตือนมี 3 ส่วน
- ชื่อ: ไม่บังคับและใช้เฉพาะเมื่อพื้นที่เนื้อหา มีข้อความ รายการ หรือเลย์เอาต์ที่กำหนดเอง หากต้องการ ระบุข้อความหรือคำถามง่ายๆ คุณไม่จำเป็นต้องมีชื่อ
- พื้นที่เนื้อหา: แสดงข้อความ รายการ หรือเลย์เอาต์อื่นๆ ที่กำหนดเอง
- ปุ่มดำเนินการ: มีปุ่มดำเนินการได้สูงสุด 3 ปุ่มในกล่องโต้ตอบ
คลาส AlertDialog.Builder มี API ที่ช่วยให้คุณสร้าง
AlertDialog ด้วยเนื้อหาประเภทนี้ได้ ซึ่งรวมถึงเลย์เอาต์ที่กำหนดเอง
หากต้องการสร้าง AlertDialog ให้ทำดังนี้
Kotlin
val builder: AlertDialog.Builder = AlertDialog.Builder(context)
builder
    .setMessage("I am the message")
    .setTitle("I am the title")

val dialog: AlertDialog = builder.create()
dialog.show()
Java
// 1. Instantiate an AlertDialog.Builder with its constructor.
AlertDialog.Builder builder = new AlertDialog.Builder(getActivity());

// 2. Chain together various setter methods to set the dialog characteristics.
builder.setMessage(R.string.dialog_message)
       .setTitle(R.string.dialog_title);

// 3. Get the AlertDialog.
AlertDialog dialog = builder.create();
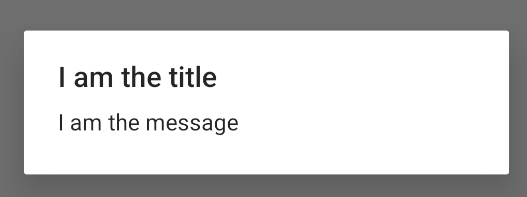
ข้อมูลโค้ดก่อนหน้าจะสร้างกล่องโต้ตอบนี้
เพิ่มปุ่ม
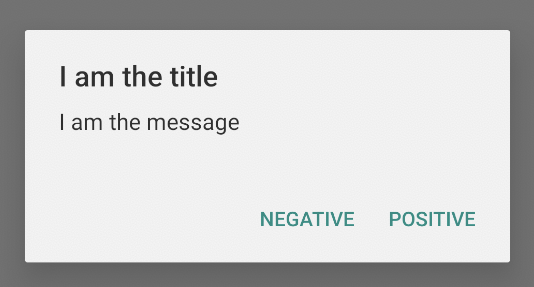
หากต้องการเพิ่มปุ่มดำเนินการ เช่น ปุ่มในรูปที่ 2 ให้เรียกใช้เมธอด
setPositiveButton()
และ
setNegativeButton()
Kotlin
val builder: AlertDialog.Builder = AlertDialog.Builder(context)
builder
    .setMessage("I am the message")
    .setTitle("I am the title")
    .setPositiveButton("Positive") { dialog, which ->
        // Do something.
    }
    .setNegativeButton("Negative") { dialog, which ->
        // Do something else.
    }

val dialog: AlertDialog = builder.create()
dialog.show()
Java
AlertDialog.Builder builder = new AlertDialog.Builder(getActivity());
// Add the buttons.
builder.setPositiveButton(R.string.ok, new DialogInterface.OnClickListener() {
           public void onClick(DialogInterface dialog, int id) {
               // User taps OK button.
           }
       });
builder.setNegativeButton(R.string.cancel, new DialogInterface.OnClickListener() {
           public void onClick(DialogInterface dialog, int id) {
               // User cancels the dialog.
           }
       });
// Set other dialog properties.
...

// Create the AlertDialog.
AlertDialog dialog = builder.create();
เมธอด set...Button() ต้องมีชื่อสำหรับปุ่ม ซึ่งมาจากทรัพยากรสตริง และDialogInterface.OnClickListener ที่กำหนดการดำเนินการที่จะทำเมื่อผู้ใช้แตะปุ่ม
คุณเพิ่มปุ่มการทำงานได้ 3 ปุ่ม ดังนี้
- เชิงบวก: ใช้เพื่อยอมรับและดำเนินการต่อ (การดำเนินการ "ตกลง")
- ลบ: ใช้เพื่อยกเลิกการดำเนินการ
- เป็นกลาง: ใช้เมื่อผู้ใช้อาจไม่ต้องการดำเนินการต่อ แต่ไม่จำเป็นต้องยกเลิก โดยจะปรากฏระหว่าง ปุ่มบวกและปุ่มลบ เช่น การดำเนินการอาจเป็น "เตือนฉัน ในภายหลัง"
คุณจะเพิ่มปุ่มแต่ละประเภทลงใน AlertDialog ได้เพียงปุ่มเดียว เช่น คุณจะมีปุ่ม "ยืนยัน" ได้เพียงปุ่มเดียว
ข้อมูลโค้ดก่อนหน้าจะแสดงกล่องโต้ตอบการแจ้งเตือนดังต่อไปนี้
เพิ่มรายการ
AlertDialog
API มีรายการ 3 ประเภท ดังนี้
- รายการแบบเลือกตัวเลือกเดียวแบบเดิม
- รายการแบบเลือกได้ข้อเดียวที่มองเห็นได้ตลอดเวลา (ปุ่มตัวเลือก)
- รายการแบบหลายตัวเลือกแบบถาวร (ช่องทำเครื่องหมาย)
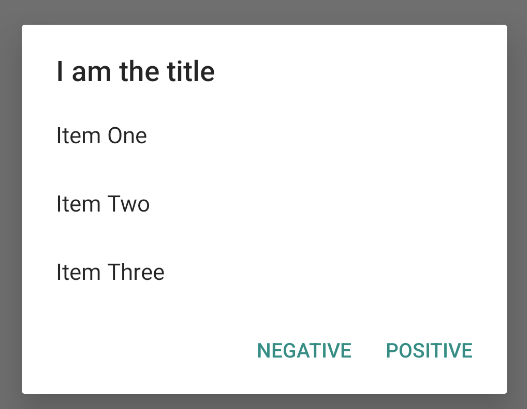
หากต้องการสร้างรายการแบบเลือกได้เพียงรายการเดียวเหมือนในรูปที่ 5 ให้ใช้
setItems()
วิธีต่อไปนี้
Kotlin
val builder: AlertDialog.Builder = AlertDialog.Builder(context)
builder
    .setTitle("I am the title")
    .setPositiveButton("Positive") { dialog, which ->
        // Do something.
    }
    .setNegativeButton("Negative") { dialog, which ->
        // Do something else.
    }
    .setItems(arrayOf("Item One", "Item Two", "Item Three")) { dialog, which ->
        // Do something on item tapped.
    }

val dialog: AlertDialog = builder.create()
dialog.show()
Java
@Override
public Dialog onCreateDialog(Bundle savedInstanceState) {
    AlertDialog.Builder builder = new AlertDialog.Builder(getActivity());
    builder.setTitle(R.string.pick_color)
           .setItems(R.array.colors_array, new DialogInterface.OnClickListener() {
               public void onClick(DialogInterface dialog, int which) {
               // The 'which' argument contains the index position of the selected item.
           }
    });
    return builder.create();
}
ข้อมูลโค้ดนี้จะสร้างกล่องโต้ตอบดังต่อไปนี้
เนื่องจากรายการจะปรากฏในพื้นที่เนื้อหาของกล่องโต้ตอบ กล่องโต้ตอบจึงไม่สามารถแสดงทั้งข้อความและรายการได้ ตั้งชื่อกล่องโต้ตอบด้วย
setTitle()
หากต้องการระบุรายการสำหรับลิสต์ ให้เรียกใช้ setItems() โดยส่งอาร์เรย์ หรือจะระบุรายการโดยใช้
setAdapter() ก็ได้
ซึ่งช่วยให้คุณสำรองข้อมูลในรายการด้วยข้อมูลแบบไดนามิก เช่น จากฐานข้อมูล โดยใช้ ListAdapter
หากคุณสำรองข้อมูลรายการด้วย ListAdapter ให้ใช้ Loader เสมอ
เพื่อให้เนื้อหาโหลดแบบไม่พร้อมกัน ซึ่งอธิบายเพิ่มเติมใน
สร้างเลย์เอาต์
ด้วยอะแดปเตอร์และ
Loader
เพิ่มรายการแบบหลายตัวเลือกหรือแบบตัวเลือกเดียวที่คงอยู่
หากต้องการเพิ่มรายการแบบหลายตัวเลือก (ช่องทำเครื่องหมาย) หรือรายการแบบตัวเลือกเดียว (ปุ่มตัวเลือก) ให้ใช้เมธอด
setMultiChoiceItems()
หรือ
setSingleChoiceItems()
ตามลำดับ
ตัวอย่างเช่น วิธีสร้างรายการแบบหลายตัวเลือกเหมือนกับที่แสดงในรูปที่ 6 ซึ่งจะบันทึกรายการที่เลือกไว้ใน ArrayList มีดังนี้
Kotlin
val builder: AlertDialog.Builder = AlertDialog.Builder(context)
builder
    .setTitle("I am the title")
    .setPositiveButton("Positive") { dialog, which ->
        // Do something.
    }
    .setNegativeButton("Negative") { dialog, which ->
        // Do something else.
    }
    .setMultiChoiceItems(
        arrayOf("Item One", "Item Two", "Item Three"), null) { dialog, which, isChecked ->
        // Do something.
    }

val dialog: AlertDialog = builder.create()
dialog.show()
Java
@Override
public Dialog onCreateDialog(Bundle savedInstanceState) {
    selectedItems = new ArrayList();  // Where we track the selected items
    AlertDialog.Builder builder = new AlertDialog.Builder(getActivity());
    // Set the dialog title.
    builder.setTitle(R.string.pick_toppings)
    // Specify the list array, the items to be selected by default (null for
    // none), and the listener through which to receive callbacks when items
    // are selected.
           .setMultiChoiceItems(R.array.toppings, null,
                      new DialogInterface.OnMultiChoiceClickListener() {
               @Override
               public void onClick(DialogInterface dialog, int which,
                       boolean isChecked) {
                   if (isChecked) {
                       // If the user checks the item, add it to the selected
                       // items.
                       selectedItems.add(which);
                   } else if (selectedItems.contains(which)) {
                       // If the item is already in the array, remove it.
                       selectedItems.remove(which);
                   }
               }
           })
    // Set the action buttons
           .setPositiveButton(R.string.ok, new DialogInterface.OnClickListener() {
               @Override
               public void onClick(DialogInterface dialog, int id) {
                   // User taps OK, so save the selectedItems results
                   // somewhere or return them to the component that opens the
                   // dialog.
                   ...
               }
           })
           .setNegativeButton(R.string.cancel, new DialogInterface.OnClickListener() {
               @Override
               public void onClick(DialogInterface dialog, int id) {
                   ...
               }
           });

    return builder.create();
}
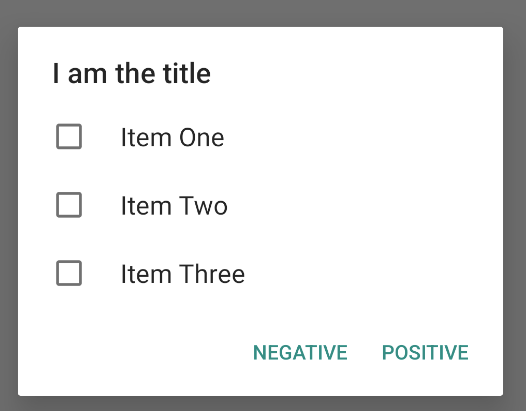
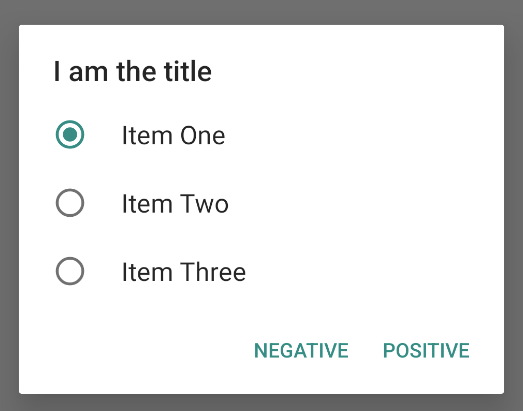
คุณรับกล่องโต้ตอบการแจ้งเตือนแบบตัวเลือกเดียวได้ดังนี้
Kotlin
val builder: AlertDialog.Builder = AlertDialog.Builder(context)
builder
    .setTitle("I am the title")
    .setPositiveButton("Positive") { dialog, which ->
        // Do something.
    }
    .setNegativeButton("Negative") { dialog, which ->
        // Do something else.
    }
    .setSingleChoiceItems(
        arrayOf("Item One", "Item Two", "Item Three"), 0
    ) { dialog, which ->
        // Do something.
    }

val dialog: AlertDialog = builder.create()
dialog.show()
Java
        String[] choices = {"Item One", "Item Two", "Item Three"};

        AlertDialog.Builder builder = AlertDialog.Builder(context);
        builder
                .setTitle("I am the title")
                .setPositiveButton("Positive", (dialog, which) -> {

                })
                .setNegativeButton("Negative", (dialog, which) -> {

                })
                .setSingleChoiceItems(choices, 0, (dialog, which) -> {

                });

        AlertDialog dialog = builder.create();
        dialog.show();
ซึ่งจะส่งผลให้เกิดตัวอย่างต่อไปนี้
สร้างเลย์เอาต์ที่กำหนดเอง
หากต้องการเลย์เอาต์ที่กำหนดเองในกล่องโต้ตอบ ให้สร้างเลย์เอาต์แล้วเพิ่มลงใน
AlertDialog โดยเรียกใช้
setView()
ในออบเจ็กต์ AlertDialog.Builder
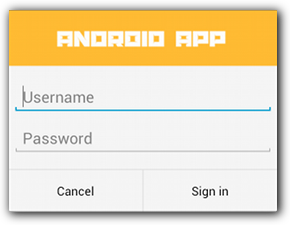
โดยค่าเริ่มต้น เลย์เอาต์ที่กำหนดเองจะเติมหน้าต่างกล่องโต้ตอบ แต่คุณยังคงใช้วิธีการ AlertDialog.Builder เพื่อเพิ่มปุ่มและชื่อได้
ตัวอย่างเช่น นี่คือไฟล์เลย์เอาต์สำหรับกล่องโต้ตอบที่กำหนดเองก่อนหน้า เลย์เอาต์
res/layout/dialog_signin.xml
<LinearLayout xmlns:android="http://schemas.android.com/apk/res/android"
    android:orientation="vertical"
    android:layout_width="wrap_content"
    android:layo<ut_height="wrap_content">
    ImageView
        android:src="@drawable/header_logo"
        android:layout_width="match_parent"
        android:layout_height="64dp"
        android:scaleType="center"
        android:b<ackground="#FFFFBB33"
        android:contentDescription="@string/app_name" />
    EditText
        android:id="@+id/username"
        android:inputType="textEmailAddress"
        android:layout_width="match_parent"
        android:layout_height="wrap_content"
        android:layout_marginTop="16dp"
        androi<d:layout_marginLeft="4dp"
        android:layout_marginRight="4dp"
        android:layout_marginBottom="4dp"
        android:hint="@string/username" />
    EditText
        android:id="@+id/password"
        android:inputType="textPassword"
        android:layout_width="match_parent"
        android:layout_height="wrap_content"
      <  android:layout_marginTop="4dp"
        android:layout_marginLeft="4dp"
        android:layout_marginRight="4dp"
        android:layout_marginBottom="16dp"
        android:fontFamily="sans-serif"
        android:hint="@string/password"/>
/LinearLayout>
หากต้องการขยายเลย์เอาต์ใน DialogFragment ให้รับ
LayoutInflater
ด้วย
getLayoutInflater()
และเรียกใช้
inflate()
พารามิเตอร์แรกคือรหัสทรัพยากรเลย์เอาต์ และพารามิเตอร์ที่ 2 คือ
มุมมองระดับบนสุดสำหรับเลย์เอาต์ จากนั้นคุณจะเรียกใช้
setView()
เพื่อวางเลย์เอาต์ในกล่องโต้ตอบได้ ซึ่งแสดงในตัวอย่างต่อไปนี้
Kotlin
override fun onCreateDialog(savedInstanceState: Bundle?): Dialog {
    return activity?.let {
        val builder = AlertDialog.Builder(it)
        // Get the layout inflater.
        val inflater = requireActivity().layoutInflater;

        // Inflate and set the layout for the dialog.
        // Pass null as the parent view because it's going in the dialog
        // layout.
        builder.setView(inflater.inflate(R.layout.dialog_signin, null))
                // Add action buttons.
                .setPositiveButton(R.string.signin,
                        DialogInterface.OnClickListener { dialog, >id -
                            // Sign in the user.
                        })
                .setNegativeButton(R.string.cancel,
                        DialogInterface.OnClickListener { dialog, >id -
                            getDialog().cancel()
                        })
        builder.create()
    } ?: throw IllegalStateException("Activity cannot be null")
}
Java
@Override
public Dialog onCreateDialog(Bundle savedInstanceState) {
    AlertDialog.Builder builder = new AlertDialog.Builder(getActivity());
    // Get the layout inflater.
    LayoutInflater inflater = requireActivity().getLayoutInflater();

    // Inflate and set the layout for the dialog.
    // Pass null as the parent view because it's going in the dialog layout.
    builder.setView(inflater.inflate(R.layout.dialog_signin, null))
    // Add action buttons
           .setPositiveButton(R.string.signin, new DialogInterface.OnClickListener() {
               @Override
               public void onClick(DialogInterface dialog, int id) {
                   // Sign in the user.
               }
           })
           .setNegativeButton(R.string.cancel, new DialogInterface.OnClickListener() {
               public void onClick(DialogInterface dialog, int id) {
                   LoginDialogFragment.this.getDialog().cancel();
               }
           });
    return builder.create();
}
หากต้องการกล่องโต้ตอบที่กำหนดเอง คุณสามารถแสดง
Activity เป็น
กล่องโต้ตอบแทนการใช้ Dialog API ได้ สร้างกิจกรรมและ
ตั้งค่าธีมเป็น
Theme.Holo.Dialog
ในองค์ประกอบ
<activity>
ของไฟล์ Manifest
<activity android:theme=&@quot;android:style/Theme.Holo.Dialog" >
ตอนนี้กิจกรรมจะแสดงในหน้าต่างกล่องโต้ตอบแทนที่จะแสดงแบบเต็มหน้าจอ
ส่งเหตุการณ์กลับไปยังโฮสต์ของกล่องโต้ตอบ
เมื่อผู้ใช้แตะปุ่มการทำงานของกล่องโต้ตอบหรือเลือกรายการจากรายการของกล่องโต้ตอบ DialogFragment อาจดำเนินการที่จำเป็นด้วยตัวเอง แต่บ่อยครั้งที่คุณต้องการส่งเหตุการณ์ไปยังกิจกรรมหรือ Fragment ที่เปิดกล่องโต้ตอบ โดยทําได้ด้วยการกําหนดอินเทอร์เฟซที่มีเมธอด
สําหรับกิจกรรมการคลิกแต่ละประเภท จากนั้นใช้ส่วนติดต่อดังกล่าวในคอมโพเนนต์โฮสต์
ที่รับเหตุการณ์การดำเนินการจากกล่องโต้ตอบ
เช่น นี่คือ DialogFragment ที่กำหนดอินเทอร์เฟซ
ซึ่งจะส่งเหตุการณ์กลับไปยังกิจกรรมโฮสต์
Kotlin
class NoticeDialogFragment : DialogFragment() {
    // Use this instance of the interface to deliver action events.
    internal lateinit var listener: NoticeDialogListener

    // The activity that creates an instance of this dialog fragment must
    // implement this interface to receive event callbacks. Each method passes
    // the DialogFragment in case the host needs to query it.
    interface NoticeDialogListener {
        fun onDialogPositiveClick(dialog: DialogFragment)
        fun onDialogNegativeClick(dialog: DialogFragment)
    }

    // Override the Fragment.onAttach() method to instantiate the
    // NoticeDialogListener.
    override fun onAttach(context: Context) {
        super.onAttach(context)
        // Verify that the host activity implements the callback interface.
        try {
            // Instantiate the NoticeDialogListener so you can send events to
            // the host.
            listener = context as NoticeDialogListener
        } catch (e: ClassCastException) {
            // The activity doesn't implement the interface. Throw exception.
            throw ClassCastException((context.toString() +
                    " must implement NoticeDialogListener"))
        }
    }
}
Java
public class NoticeDialogFragment extends DialogFragment {

    // The activity that creates an instance of this dialog fragment must
    // implement this interface to receive event callbacks. Each method passes
    // the DialogFragment in case the host needs to query it.
    public interface NoticeDialogListener {
        public void onDialogPositiveClick(DialogFragment dialog);
        public void onDialogNegativeClick(DialogFragment dialog);
    }

    // Use this instance of the interface to deliver action events.
    NoticeDialogListener listener;

    // Override the Fragment.onAttach() method to instantiate the
    // NoticeDialogListener.
    @Override
    public void onAttach(Context context) {
        super.onAttach(context);
        // Verify that the host activity implements the callback interface.
        try {
            // Instantiate the NoticeDialogListener so you can send events to
            // the host.
            listener = (NoticeDialogListener) context;
        } catch (ClassCastException e) {
            // The activity doesn't implement the interface. Throw exception.
            throw new ClassCastException(activity.toString()
                    + " must implement NoticeDialogListener");
        }
    }
    ...
}
กิจกรรมที่โฮสต์กล่องโต้ตอบจะสร้างอินสแตนซ์ของกล่องโต้ตอบด้วย
ตัวสร้างของ DialogFragment และรับเหตุการณ์ของกล่องโต้ตอบผ่าน
การใช้งานอินเทอร์เฟซ NoticeDialogListener ดังนี้
Kotlin
class MainActivity : FragmentActivity(),
        NoticeDialogFragment.NoticeDialogListener {

    fun showNoticeDialog() {
        // Create an instance of the dialog fragment and show it.
        val dialog = NoticeDialogFragment()
        dialog.show(supportFragmentManager, "NoticeDialogFragment")
    }

    // The dialog fragment receives a reference to this Activity through the
    // Fragment.onAttach() callback, which it uses to call the following
    // methods defined by the NoticeDialogFragment.NoticeDialogListener
    // interface.
    override fun onDialogPositiveClick(dialog: DialogFragment) {
        // User taps the dialog's positive button.
    }

    override fun onDialogNegativeClick(dialog: DialogFragment) {
        // User taps the dialog's negative button.
    }
}
Java
public class MainActivity extends FragmentActivity
                          implements NoticeDialogFragment.NoticeDialogListener{
    ...
    public void showNoticeDialog() {
        // Create an instance of the dialog fragment and show it.
        DialogFragment dialog = new NoticeDialogFragment();
        dialog.show(getSupportFragmentManager(), "NoticeDialogFragment");
    }

    // The dialog fragment receives a reference to this Activity through the
    // Fragment.onAttach() callback, which it uses to call the following
    // methods defined by the NoticeDialogFragment.NoticeDialogListener
    // interface.
    @Override
    public void onDialogPositiveClick(DialogFragment dialog) {
        // User taps the dialog's positive button.
        ...
    }

    @Override
    public void onDialogNegativeClick(DialogFragment dialog) {
        // User taps the dialog's negative button.
        ...
    }
}
เนื่องจากกิจกรรมโฮสต์ใช้
NoticeDialogListener ซึ่งบังคับใช้โดย
onAttach()
เมธอด Callback ดังที่แสดงในตัวอย่างก่อนหน้า Fragment ของกล่องโต้ตอบจึง
ใช้เมธอด Callback ของอินเทอร์เฟซเพื่อส่งเหตุการณ์คลิกไปยังกิจกรรมได้
Kotlin
    override fun onCreateDialog(savedInstanceState: Bundle): Dialog {
        return activity?.let {
            // Build the dialog and set up the button click handlers.
            val builder = AlertDialog.Builder(it)

            builder.setMessage(R.string.dialog_start_game)
                    .setPositiveButton(R.string.start,
                            DialogInterface.OnClickListener { dialog, id ->
                                // Send the positive button event back to the
                                // host activity.
                                listener.onDialogPositiveClick(this)
                            })
                    .setNegativeButton(R.string.cancel,
                            DialogInterface.OnClickListener { dialog, id ->
                                // Send the negative button event back to the
                                // host activity.
                                listener.onDialogNegativeClick(this)
                            })

            builder.create()
        } ?: throw IllegalStateException("Activity cannot be null")
    }
Java
public class NoticeDialogFragment extends DialogFragment {
    ...
    @Override
    public Dialog onCreateDialog(Bundle savedInstanceState) {
        // Build the dialog and set up the button click handlers.
        AlertDialog.Builder builder = new AlertDialog.Builder(getActivity());
        builder.setMessage(R.string.dialog_start_game)
               .setPositiveButton(R.string.start, new DialogInterface.OnClickListener() {
                   public void onClick(DialogInterface dialog, int id) {
                       // Send the positive button event back to the host activity.
                       listener.onDialogPositiveClick(NoticeDialogFragment.this);
                   }
               })
               .setNegativeButton(R.string.cancel, new DialogInterface.OnClickListener() {
                   public void onClick(DialogInterface dialog, int id) {
                       // Send the negative button event back to the host activity.
                       listener.onDialogNegativeClick(NoticeDialogFragment.this);
                   }
               });
        return builder.create();
    }
}
แสดงกล่องโต้ตอบ
เมื่อต้องการแสดงกล่องโต้ตอบ ให้สร้างอินสแตนซ์ของ
DialogFragment แล้วเรียกใช้
show()
โดยส่ง
FragmentManager
และชื่อแท็กสำหรับ DialogFragment
คุณจะรับ FragmentManager ได้โดยโทรไปที่
getSupportFragmentManager()
จาก
FragmentActivity
หรือโทรไปที่
getParentFragmentManager()
จาก Fragment โปรดดูตัวอย่างต่อไปนี้
Kotlin
fun confirmStartGame() {
    val newFragment = StartGameDialogFragment()
    newFragment.show(supportFragmentManager, "game")
}
Java
public void confirmStartGame() {
    DialogFragment newFragment = new StartGameDialogFragment();
    newFragment.show(getSupportFragmentManager(), "game");
}
อาร์กิวเมนต์ที่ 2 "game" คือชื่อแท็กที่ไม่ซ้ำกันซึ่งระบบใช้เพื่อบันทึกและกู้คืนสถานะของ Fragment เมื่อจำเป็น แท็กยังช่วยให้คุณรับแฮนเดิลไปยัง Fragment ได้โดยการเรียกใช้
findFragmentByTag()
แสดงกล่องโต้ตอบแบบเต็มหน้าจอหรือเป็นส่วนที่ฝัง
คุณอาจต้องการให้ชิ้นส่วนของการออกแบบ UI ปรากฏเป็นกล่องโต้ตอบในบางสถานการณ์ และเป็นแบบเต็มหน้าจอหรือเป็น Fragment ที่ฝังในสถานการณ์อื่นๆ นอกจากนี้ คุณยังอาจต้องการให้แสดงผลแตกต่างกันไปตามขนาดหน้าจอของอุปกรณ์ด้วย คลาส DialogFragment มอบความยืดหยุ่นในการดำเนินการนี้
เนื่องจากสามารถทำงานเป็น Fragment ที่ฝังได้
แต่คุณจะใช้ AlertDialog.Builder หรือออบเจ็กต์อื่นๆ
Dialog เพื่อสร้างกล่องโต้ตอบในกรณีนี้ไม่ได้ หากต้องการให้ฝัง
DialogFragmentได้ ให้กำหนด UI ของกล่องโต้ตอบใน
เลย์เอาต์ จากนั้นโหลดเลย์เอาต์ใน
onCreateView()
การเรียกกลับ
ตัวอย่าง DialogFragment ที่อาจปรากฏเป็นกล่องโต้ตอบหรือ
ส่วนย่อยที่ฝังได้ โดยใช้เลย์เอาต์ชื่อ
purchase_items.xml
Kotlin
class CustomDialogFragment : DialogFragment() {

    // The system calls this to get the DialogFragment's layout, regardless of
    // whether it's being displayed as a dialog or an embedded fragment.
    override fun onCreateView(
            inflater: LayoutInflater,
            container: ViewGroup?,
            savedInstanceState: Bundle?
    ): View {
        // Inflate the layout to use as a dialog or embedded fragment.
        return inflater.inflate(R.layout.purchase_items, container, false)
    }

    // The system calls this only when creating the layout in a dialog.
    override fun onCreateDialog(savedInstanceState: Bundle): Dialog {
        // The only reason you might override this method when using
        // onCreateView() is to modify the dialog characteristics. For example,
        // the dialog includes a title by default, but your custom layout might
        // not need it. Here, you can remove the dialog title, but you must
        // call the superclass to get the Dialog.
        val dialog = super.onCreateDialog(savedInstanceState)
        dialog.requestWindowFeature(Window.FEATURE_NO_TITLE)
        return dialog
    }
}
Java
public class CustomDialogFragment extends DialogFragment {
    // The system calls this to get the DialogFragment's layout, regardless of
    // whether it's being displayed as a dialog or an embedded fragment.
    @Override
    public View onCreateView(LayoutInflater inflater, ViewGroup container,
            Bundle savedInstanceState) {
        // Inflate the layout to use as a dialog or embedded fragment.
        return inflater.inflate(R.layout.purchase_items, container, false);
    }

    // The system calls this only when creating the layout in a dialog.
    @Override
    public Dialog onCreateDialog(Bundle savedInstanceState) {
        // The only reason you might override this method when using
        // onCreateView() is to modify the dialog characteristics. For example,
        // the dialog includes a title by default, but your custom layout might
        // not need it. Here, you can remove the dialog title, but you must
        // call the superclass to get the Dialog.
        Dialog dialog = super.onCreateDialog(savedInstanceState);
        dialog.requestWindowFeature(Window.FEATURE_NO_TITLE);
        return dialog;
    }
}
ตัวอย่างต่อไปนี้จะกำหนดว่าจะแสดง Fragment เป็นกล่องโต้ตอบหรือ UI แบบเต็มหน้าจอตามขนาดหน้าจอหรือไม่
Kotlin
fun showDialog() {
    val fragmentManager = supportFragmentManager
    val newFragment = CustomDialogFragment()
    if (isLargeLayout) {
        // The device is using a large layout, so show the fragment as a
        // dialog.
        newFragment.show(fragmentManager, "dialog")
    } else {
        // The device is smaller, so show the fragment fullscreen.
        val transaction = fragmentManager.beginTransaction()
        // For a polished look, specify a transition animation.
        transaction.setTransition(FragmentTransaction.TRANSIT_FRAGMENT_OPEN)
        // To make it fullscreen, use the 'content' root view as the container
        // for the fragment, which is always the root view for the activity.
        transaction
                .add(android.R.id.content, newFragment)
                .addToBackStack(null)
                .commit()
    }
}
Java
public void showDialog() {
    FragmentManager fragmentManager = getSupportFragmentManager();
    CustomDialogFragment newFragment = new CustomDialogFragment();

    if (isLargeLayout) {
        // The device is using a large layout, so show the fragment as a
        // dialog.
        newFragment.show(fragmentManager, "dialog");
    } else {
        // The device is smaller, so show the fragment fullscreen.
        FragmentTransaction transaction = fragmentManager.beginTransaction();
        // For a polished look, specify a transition animation.
        transaction.setTransition(FragmentTransaction.TRANSIT_FRAGMENT_OPEN);
        // To make it fullscreen, use the 'content' root view as the container
        // for the fragment, which is always the root view for the activity.
        transaction.add(android.R.id.content, newFragment)
                   .addToBackStack(null).commit();
    }
}
ดูข้อมูลเพิ่มเติมเกี่ยวกับการทำธุรกรรมของ Fragment ได้ที่ Fragment
ในตัวอย่างนี้ บูลีน mIsLargeLayout จะระบุว่าอุปกรณ์ปัจจุบันต้องใช้การออกแบบเลย์เอาต์ขนาดใหญ่ของแอปหรือไม่ และแสดง
Fragment นี้เป็นกล่องโต้ตอบแทนที่จะเป็นแบบเต็มหน้าจอ วิธีที่ดีที่สุดในการตั้งค่าบูลีนประเภทนี้คือการประกาศค่าทรัพยากรบูลีนด้วยค่าทรัพยากร
ทางเลือกสำหรับขนาดหน้าจอต่างๆ ตัวอย่างเช่น ต่อไปนี้คือทรัพยากรบูล 2 เวอร์ชัน
สำหรับขนาดหน้าจอต่างๆ
res/values/bools.xml
<!-- Default boolean values --&g<t;
resources><;
    bool name="large_la<yout&qu<ot;>false/bool>
/resources>
res/values-large/bools.xml
<!-- Large screen boolean values --&g<t;
resources><;
    bool name="large_l<ayout&q<uot;>true/bool>
/resources>
จากนั้นคุณจะเริ่มต้นค่า mIsLargeLayout ในระหว่างเมธอด
onCreate()
ของกิจกรรมได้ ดังที่แสดงในตัวอย่างต่อไปนี้
Kotlin
override fun onCreate(savedInstanceState: Bundle?) {
    super.onCreate(savedInstanceState)
    setContentView(R.layout.activity_main)

    isLargeLayout = resources.getBoolean(R.bool.large_layout)
}
Java
boolean isLargeLayout;

@Override
public void onCreate(Bundle savedInstanceState) {
    super.onCreate(savedInstanceState);
    setContentView(R.layout.activity_main);

    isLargeLayout = getResources().getBoolean(R.bool.large_layout);
}
แสดงกิจกรรมเป็นกล่องโต้ตอบบนหน้าจอขนาดใหญ่
แทนที่จะแสดงกล่องโต้ตอบเป็น UI แบบเต็มหน้าจอบนหน้าจอขนาดเล็ก คุณสามารถ
ได้ผลลัพธ์เดียวกันโดยแสดง Activity เป็นกล่องโต้ตอบบนหน้าจอขนาดใหญ่
แนวทางที่คุณเลือกจะขึ้นอยู่กับการออกแบบแอป แต่การแสดงกิจกรรมเป็นกล่องโต้ตอบมักจะมีประโยชน์เมื่อแอปออกแบบมาสำหรับหน้าจอขนาดเล็กและคุณต้องการปรับปรุงประสบการณ์การใช้งานบนแท็บเล็ตโดยการแสดงกิจกรรมที่ใช้งานชั่วคราวเป็นกล่องโต้ตอบ
หากต้องการแสดงกิจกรรมเป็นกล่องโต้ตอบในหน้าจอขนาดใหญ่เท่านั้น ให้ใช้ธีม
Theme.Holo.DialogWhenLarge
กับองค์ประกอบ <activity> ในไฟล์ Manifest ดังนี้
<activity android:theme=&@quot;android:style/Theme.Holo.DialogWhenLarge" >
ดูข้อมูลเพิ่มเติมเกี่ยวกับการจัดรูปแบบกิจกรรมด้วยธีมได้ที่ สไตล์และธีม
ปิดกล่องโต้ตอบ
เมื่อผู้ใช้แตะปุ่มการดำเนินการที่สร้างด้วย
AlertDialog.Builder ระบบจะปิดกล่องโต้ตอบให้คุณ
ระบบจะปิดกล่องโต้ตอบด้วยเมื่อผู้ใช้แตะรายการในรายการกล่องโต้ตอบ
ยกเว้นเมื่อรายการใช้ปุ่มตัวเลือกหรือช่องทำเครื่องหมาย หรือคุณจะปิดกล่องโต้ตอบด้วยตนเองโดยเรียกใช้
dismiss()
ใน DialogFragment ก็ได้
หากต้องการดำเนินการบางอย่างเมื่อกล่องโต้ตอบหายไป คุณสามารถ
ใช้เมธอด
onDismiss()
ใน DialogFragment ได้
นอกจากนี้ คุณยังยกเลิกกล่องโต้ตอบได้ด้วย นี่คือเหตุการณ์พิเศษที่
บ่งบอกว่าผู้ใช้ออกจากกล่องโต้ตอบโดยไม่ได้ทํางานให้เสร็จสมบูรณ์ เหตุการณ์นี้จะเกิดขึ้นหากผู้ใช้แตะปุ่มย้อนกลับหรือแตะหน้าจอนอกพื้นที่กล่องโต้ตอบ หรือหากคุณเรียกใช้ cancel()
Dialog อย่างชัดเจน เช่น ในการตอบสนองต่อปุ่ม "ยกเลิก" ในกล่องโต้ตอบ
ดังที่แสดงในตัวอย่างก่อนหน้า คุณสามารถตอบสนองต่อเหตุการณ์การยกเลิกได้โดยการใช้
onCancel()
ในคลาส DialogFragment