
This page covers AGSL basics, and different ways to use AGSL in your Android app.
A simple AGSL shader
Your shader code is called for each drawn pixel, and returns the color the pixel
should be painted with. An extremely simple shader is one that always returns
a single color; this example uses red. The shader is defined inside of a String.
Kotlin
private const val COLOR_SHADER_SRC =
   """half4 main(float2 fragCoord) {
      return half4(1,0,0,1);
   }"""
Java
private static final String COLOR_SHADER_SRC =
   "half4 main(float2 fragCoord) {\n" +
      "return half4(1,0,0,1);\n" +
   "}";
The next step is to create a RuntimeShader
object initialized with your shader string. This also compiles the shader.
Kotlin
val fixedColorShader = RuntimeShader(COLOR_SHADER_SRC)
Java
RuntimeShader fixedColorShader = new RuntimeShader(COLOR_SHADER_SRC);
Your RuntimeShader can be used anywhere a standard Android shader can. As an
example, you can use it to draw into a custom View using a
Canvas.
Kotlin
val paint = Paint()
paint.shader = fixedColorShader
override fun onDrawForeground(canvas: Canvas?) {
   canvas?.let {
      canvas.drawPaint(paint) // fill the Canvas with the shader
   }
}
Java
Paint paint = new Paint();
paint.setShader(fixedColorShader);
public void onDrawForeground(@Nullable Canvas canvas) {
   if (canvas != null) {
      canvas.drawPaint(paint); // fill the Canvas with the shader
   }
}
This draws a red View. You can use a uniform to pass a color parameter into
the shader to be drawn. First, add the color uniform to the shader:
Kotlin
private const val COLOR_SHADER_SRC =
"""layout(color) uniform half4 iColor;
   half4 main(float2 fragCoord) {
      return iColor;
   }"""
Java
private static final String COLOR_SHADER_SRC =
   "layout(color) uniform half4 iColor;\n"+
      "half4 main(float2 fragCoord) {\n" +
      "return iColor;\n" +
   "}";
Then, call setColorUniform from your custom View to pass the desired color
into the AGSL shader.
Kotlin
fixedColorShader.setColorUniform("iColor", Color.GREEN )
Java
fixedColorShader.setColorUniform("iColor", Color.GREEN );
Now, you get a green View; the View color is controlled using a
parameter from code in your custom View instead of being embedded in the
shader.
You can create a color gradient effect instead. You'll first need to change
the shader to accept the View resolution as input:
Kotlin
private const val COLOR_SHADER_SRC =
"""uniform float2 iResolution;
   half4 main(float2 fragCoord) {
      float2 scaled = fragCoord/iResolution.xy;
      return half4(scaled, 0, 1);
   }"""
Java
private static final String COLOR_SHADER_SRC =
   "uniform float2 iResolution;\n" +
      "half4 main(float2 fragCoord) {\n" +
      "float2 scaled = fragCoord/iResolution.xy;\n" +
      "return half4(scaled, 0, 1);\n" +
   "}";
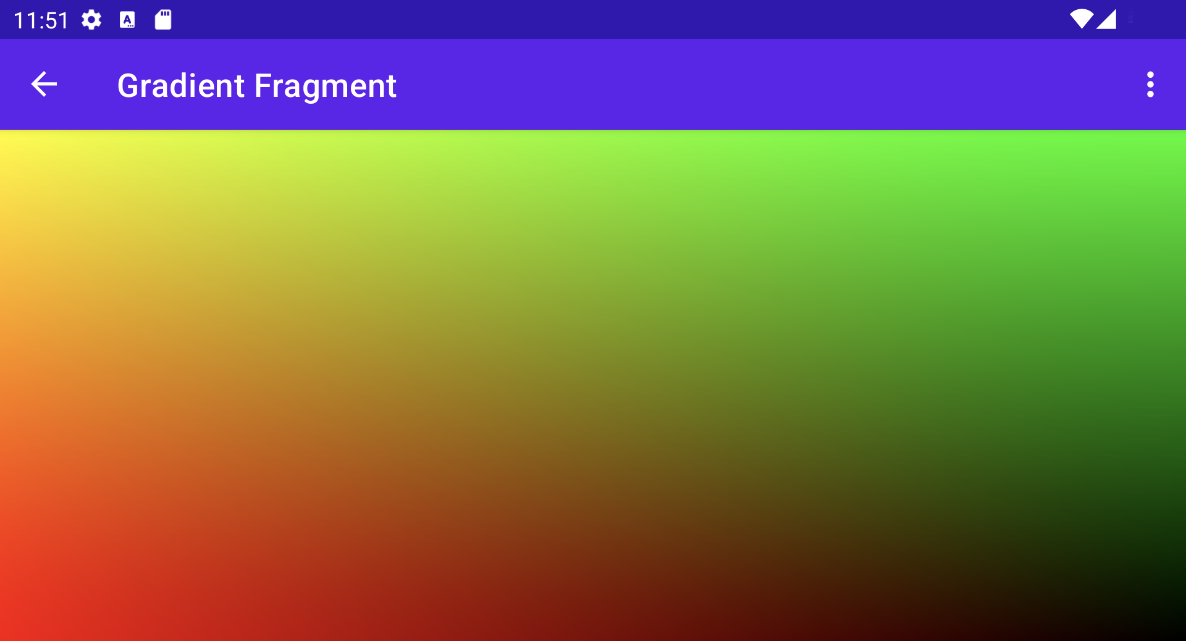
Drawing the gradient
This shader does something slightly fancy. For each pixel, it creates a float2
vector that contains the x and y coordinates divided by the resolution, which
will create a value between zero and one. It then uses that scaled vector to
construct the red and green components of the return color.
You pass the resolution of the View into an AGSL shader uniform by calling
setFloatUniform.
Kotlin
val paint = Paint()
paint.shader = fixedColorShader
override fun onDrawForeground(canvas: Canvas?) {
   canvas?.let {
      fixedColorShader.setFloatUniform("iResolution", width.toFloat(), height.toFloat())
      canvas.drawPaint(paint)
   }
}
Java
Paint paint = new Paint();
paint.setShader(fixedColorShader);
public void onDrawForeground(@Nullable Canvas canvas) {
   if (canvas != null) {
      fixedColorShader.setFloatUniform("iResolution", (float)getWidth(), (float()getHeight()));
      canvas.drawPaint(paint);
   }
}
Animating the shader
You can use a similar technique to animate the shader by modifying it to receive iTime and iDuration uniforms. The shader will use these values to create a
triangular wave for the colors, causing them to cycle back and forth across their gradient values.
Kotlin
private const val DURATION = 4000f
private const val COLOR_SHADER_SRC = """
   uniform float2 iResolution;
   uniform float iTime;
   uniform float iDuration;
   half4 main(in float2 fragCoord) {
      float2 scaled = abs(1.0-mod(fragCoord/iResolution.xy+iTime/(iDuration/2.0),2.0));
      return half4(scaled, 0, 1.0);
   }
"""
Java
private static final float DURATION = 4000f;
private static final String COLOR_SHADER_SRC =
   "uniform float2 iResolution;\n"+
   "uniform float iTime;\n"+
   "uniform float iDuration;\n"+
   "half4 main(in float2 fragCoord) {\n"+
      "float2 scaled = abs(1.0-mod(fragCoord/iResolution.xy+iTime/(iDuration/2.0),2.0));\n"+
      "return half4(scaled, 0, 1.0);\n"+
   "}";
From the custom view source code, a
ValueAnimator updates the
iTime uniform.
Kotlin
// declare the ValueAnimator
private val shaderAnimator = ValueAnimator.ofFloat(0f, DURATION)

// use it to animate the time uniform
shaderAnimator.duration = DURATION.toLong()
shaderAnimator.repeatCount = ValueAnimator.INFINITE
shaderAnimator.repeatMode = ValueAnimator.RESTART
shaderAnimator.interpolator = LinearInterpolator()

animatedShader.setFloatUniform("iDuration", DURATION )
shaderAnimator.addUpdateListener { animation ->
    animatedShader.setFloatUniform("iTime", animation.animatedValue as Float )
}
shaderAnimator.start()
Java
// declare the ValueAnimator
private final ValueAnimator shaderAnimator = ValueAnimator.ofFloat(0f, DURATION);

// use it to animate the time uniform
shaderAnimator.setDuration((long)DURATION);
shaderAnimator.setRepeatCount(ValueAnimator.INFINITE);
shaderAnimator.setRepeatMode(ValueAnimator.RESTART);
shaderAnimator.setInterpolator(new LinearInterpolator());

animatedShader.setFloatUniform("iDuration", DURATION );
shaderAnimator.addUpdateListener(new ValueAnimator.AnimatorUpdateListener() {
   public final void onAnimationUpdate(ValueAnimator animation) {
      animatedShader.setFloatUniform("iTime", (float)animation.getAnimatedValue());
   }
});

Painting complex objects
You don't have to draw the shader to fill the background; it can be
used in any place that accepts a
Paint object, such as
drawText.
Kotlin
canvas.drawText(ANIMATED_TEXT, TEXT_MARGIN_DP, TEXT_MARGIN_DP + bounds.height(),
   paint)
Java
canvas.drawText(ANIMATED_TEXT, TEXT_MARGIN_DP, TEXT_MARGIN_DP + bounds.height(),
   paint);
Shading and Canvas transformations
You can apply additional Canvas transformations on your shaded text, such as
rotation. In the ValueAnimator, you can update a matrix for 3D rotations
using the built-in
android.graphics.Camera class.
Kotlin
// in the ValueAnimator
camera.rotate(0.0f, animation.animatedValue as Float / DURATION * 360f, 0.0f)
Java
// in the ValueAnimator
camera.rotate(0.0f, (Float)animation.getAnimatedValue() / DURATION * 360f, 0.0f);
Since you want to rotate the text from the center axis rather than from the corner,
get the text bounds and then use preTranslate and postTranslate to alter the
matrix to translate the text so that 0,0 is the center of the rotation without
changing the position the text is drawn on the screen.
Kotlin
linearColorPaint.getTextBounds(ANIMATED_TEXT, 0, ANIMATED_TEXT.length, bounds)
camera.getMatrix(rotationMatrix)
val centerX = (bounds.width().toFloat())/2
val centerY = (bounds.height().toFloat())/2
rotationMatrix.preTranslate(-centerX, -centerY)
rotationMatrix.postTranslate(centerX, centerY)
canvas.save()
canvas.concat(rotationMatrix)
canvas.drawText(ANIMATED_TEXT, 0f, 0f + bounds.height(), paint)
canvas.restore()
Java
linearColorPaint.getTextBounds(ANIMATED_TEXT, 0, ANIMATED_TEXT.length(), bounds);
camera.getMatrix(rotationMatrix);
float centerX = (float)bounds.width()/2.0f;
float centerY = (float)bounds.height()/2.0f;
rotationMatrix.preTranslate(-centerX, -centerY);
rotationMatrix.postTranslate(centerX, centerY);
canvas.save();
canvas.concat(rotationMatrix);
canvas.drawText(ANIMATED_TEXT, 0f, 0f + bounds.height(), paint);
canvas.restore();
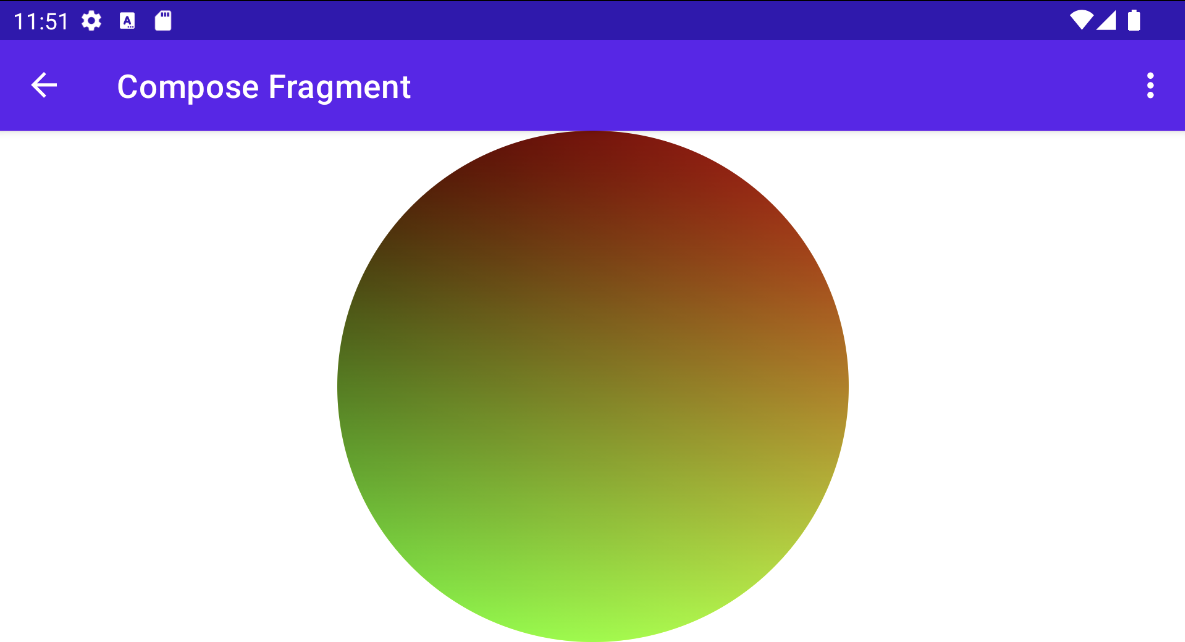
Using RuntimeShader with Jetpack Compose
It's even easier to use RuntimeShader if you're rendering your UI using
Jetpack Compose. Starting with the same gradient shader from
before:
private const val COLOR_SHADER_SRC =
    """uniform float2 iResolution;
   half4 main(float2 fragCoord) {
   float2 scaled = fragCoord/iResolution.xy;
   return half4(scaled, 0, 1);
}"""
You can apply that shader to a
ShaderBrush. You
then use the ShaderBrush as a parameter to the drawing commands within your
Canvas's draw scope.
// created as top level constants
val colorShader = RuntimeShader(COLOR_SHADER_SRC)
val shaderBrush = ShaderBrush(colorShader)

Canvas(
   modifier = Modifier.fillMaxSize()
) {
   colorShader.setFloatUniform("iResolution",
   size.width, size.height)
   drawCircle(brush = shaderBrush)
}
Using RuntimeShader with RenderEffect
You can use
RenderEffect to apply a
RuntimeShader to a parent View
and all child views. This is more expensive than drawing a custom View. but
it allows you to easily create an effect that incorporates what would have
originally been drawn using
createRuntimeShaderEffect.
Kotlin
view.setRenderEffect(RenderEffect.createRuntimeShaderEffect(myShader, "background"))
Java
view.setRenderEffect(RenderEffect.createRuntimeShaderEffect(myShader, "background"));
The second parameter is the name of a shader uniform that you can eval with a
coordinate parameter (such as the passed in fragCoord) to get the original color
of the
RenderNode (the View and its child
views), allowing you to perform all sorts of effects.
uniform shader background;       // Root node of View tree to be altered
return mix(returnColor, background.eval(fragCoord), 0.5);
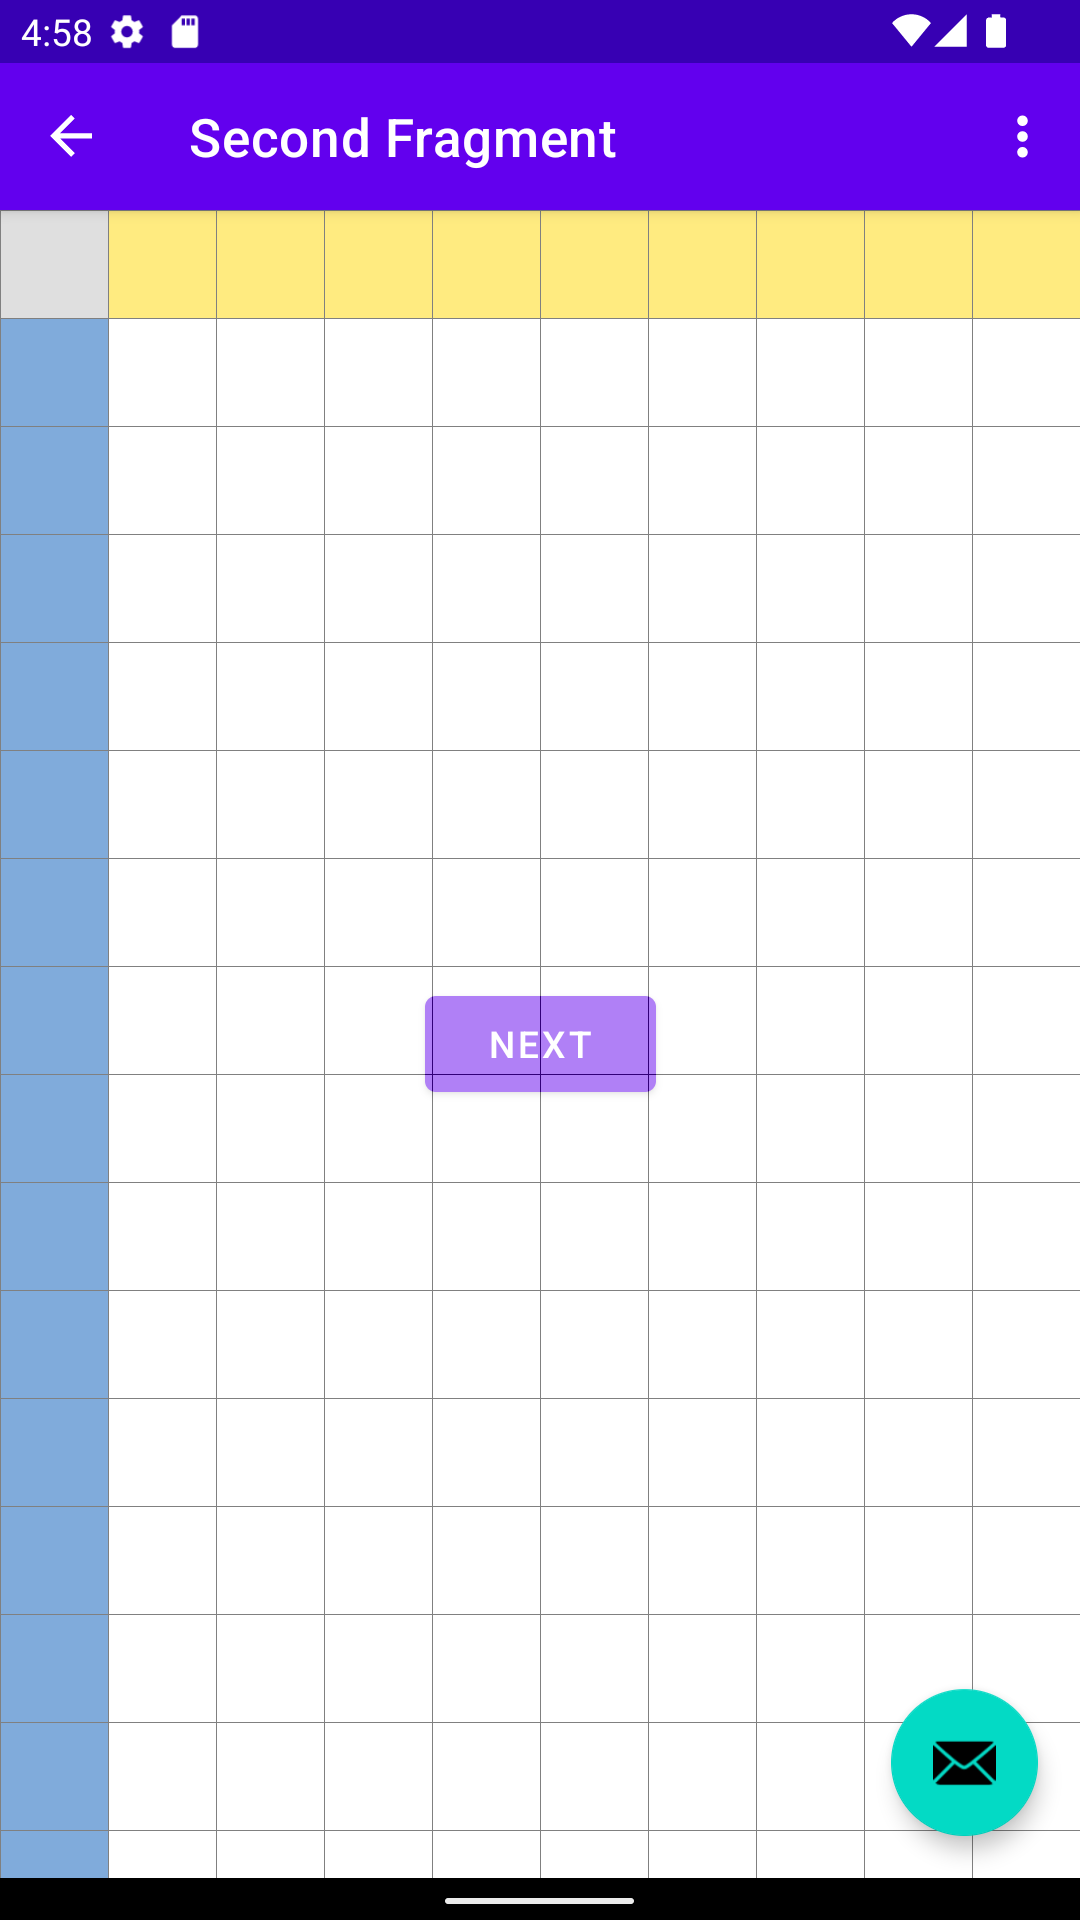
A grid effect mixed over a button, but underneath a floating action button
(since it's in a different View hierarchy).
Content and code samples on this page are subject to the licenses described in the Content License. Java and OpenJDK are trademarks or registered trademarks of Oracle and/or its affiliates.
Last updated 2026-02-26 UTC.