이 페이지에서는 AGSL 기본사항과 Android에서 AGSL을 사용하는 다양한 방법을 다룹니다. 있습니다.
간단한 AGSL 셰이더
그려진 각 픽셀에 대해 셰이더 코드가 호출되고 픽셀의 색상을 반환합니다.
색깔로 칠해야 합니다. 매우 간단한 셰이더는 항상
단일 색상 이 예에서는 빨간색을 사용합니다. 셰이더는 String 내부에 정의됩니다.
Kotlin
private const val COLOR_SHADER_SRC =
   """half4 main(float2 fragCoord) {
      return half4(1,0,0,1);
   }"""
자바
private static final String COLOR_SHADER_SRC =
   "half4 main(float2 fragCoord) {\n" +
      "return half4(1,0,0,1);\n" +
   "}";
다음 단계는 RuntimeShader를 만드는 것입니다.
객체를 셰이더 문자열로 초기화해야 합니다. 이렇게 하면 셰이더도 컴파일됩니다.
Kotlin
val fixedColorShader = RuntimeShader(COLOR_SHADER_SRC)
자바
RuntimeShader fixedColorShader = new RuntimeShader(COLOR_SHADER_SRC);
RuntimeShader는 표준 Android 셰이더가 가능한 모든 곳에서 사용할 수 있습니다.
예를 들면 이를 사용하여 맞춤 View에 그릴 수 있습니다.
Canvas
Kotlin
val paint = Paint()
paint.shader = fixedColorShader
override fun onDrawForeground(canvas: Canvas?) {
   canvas?.let {
      canvas.drawPaint(paint) // fill the Canvas with the shader
   }
}
자바
Paint paint = new Paint();
paint.setShader(fixedColorShader);
public void onDrawForeground(@Nullable Canvas canvas) {
   if (canvas != null) {
      canvas.drawPaint(paint); // fill the Canvas with the shader
   }
}
그러면 빨간색 View가 그려집니다. uniform를 사용하여 색상 매개변수를 전달할 수 있습니다.
그릴 셰이더입니다. 먼저 uniform 색상을 셰이더에 추가합니다.
Kotlin
private const val COLOR_SHADER_SRC =
"""layout(color) uniform half4 iColor;
   half4 main(float2 fragCoord) {
      return iColor;
   }"""
자바
private static final String COLOR_SHADER_SRC =
   "layout(color) uniform half4 iColor;\n"+
      "half4 main(float2 fragCoord) {\n" +
      "return iColor;\n" +
   "}";
그런 다음 맞춤 View에서 setColorUniform를 호출하여 원하는 색상을 전달합니다.
AGSL 셰이더로 옮깁니다
Kotlin
fixedColorShader.setColorUniform("iColor", Color.GREEN )
자바
fixedColorShader.setColorUniform("iColor", Color.GREEN );
이제 녹색 View가 표시됩니다. View 색상은
매개변수를 맞춤 View에 삽입하는 대신
셰이더.
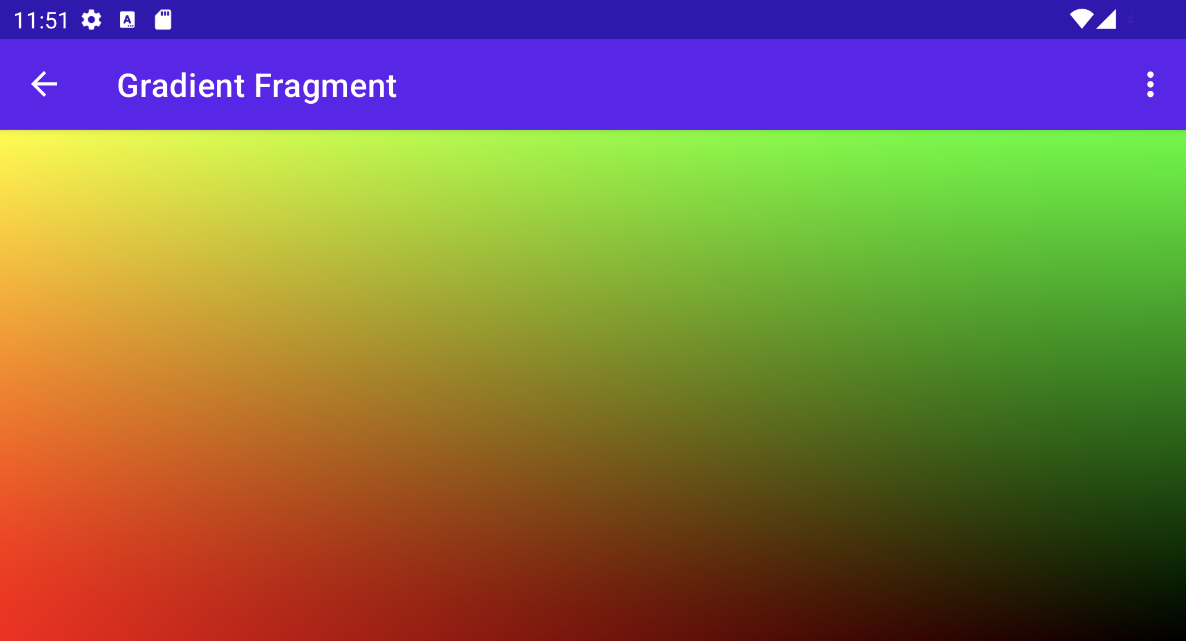
대신 색상 그라디언트 효과를 만들 수 있습니다. 먼저
셰이더가 View 해상도를 입력으로 허용합니다.
Kotlin
private const val COLOR_SHADER_SRC =
"""uniform float2 iResolution;
   half4 main(float2 fragCoord) {
      float2 scaled = fragCoord/iResolution.xy;
      return half4(scaled, 0, 1);
   }"""
자바
private static final String COLOR_SHADER_SRC =
   "uniform float2 iResolution;\n" +
      "half4 main(float2 fragCoord) {\n" +
      "float2 scaled = fragCoord/iResolution.xy;\n" +
      "return half4(scaled, 0, 1);\n" +
   "}";
그라데이션 그리기
이 셰이더는 약간 복잡한 작업을 합니다. 각 픽셀에 대해 float2를 만듭니다.
해상도로 나눈 x 및 y 좌표를 포함하는 벡터입니다.
0과 1 사이의 값을 생성합니다. 그런 다음 조정된 벡터를 사용하여
를 생성합니다.
다음을 호출하여 View의 해상도를 AGSL 셰이더 uniform에 전달합니다.
setFloatUniform입니다.
Kotlin
val paint = Paint()
paint.shader = fixedColorShader
override fun onDrawForeground(canvas: Canvas?) {
   canvas?.let {
      fixedColorShader.setFloatUniform("iResolution", width.toFloat(), height.toFloat())
      canvas.drawPaint(paint)
   }
}
자바
Paint paint = new Paint();
paint.setShader(fixedColorShader);
public void onDrawForeground(@Nullable Canvas canvas) {
   if (canvas != null) {
      fixedColorShader.setFloatUniform("iResolution", (float)getWidth(), (float()getHeight()));
      canvas.drawPaint(paint);
   }
}
셰이더 애니메이션
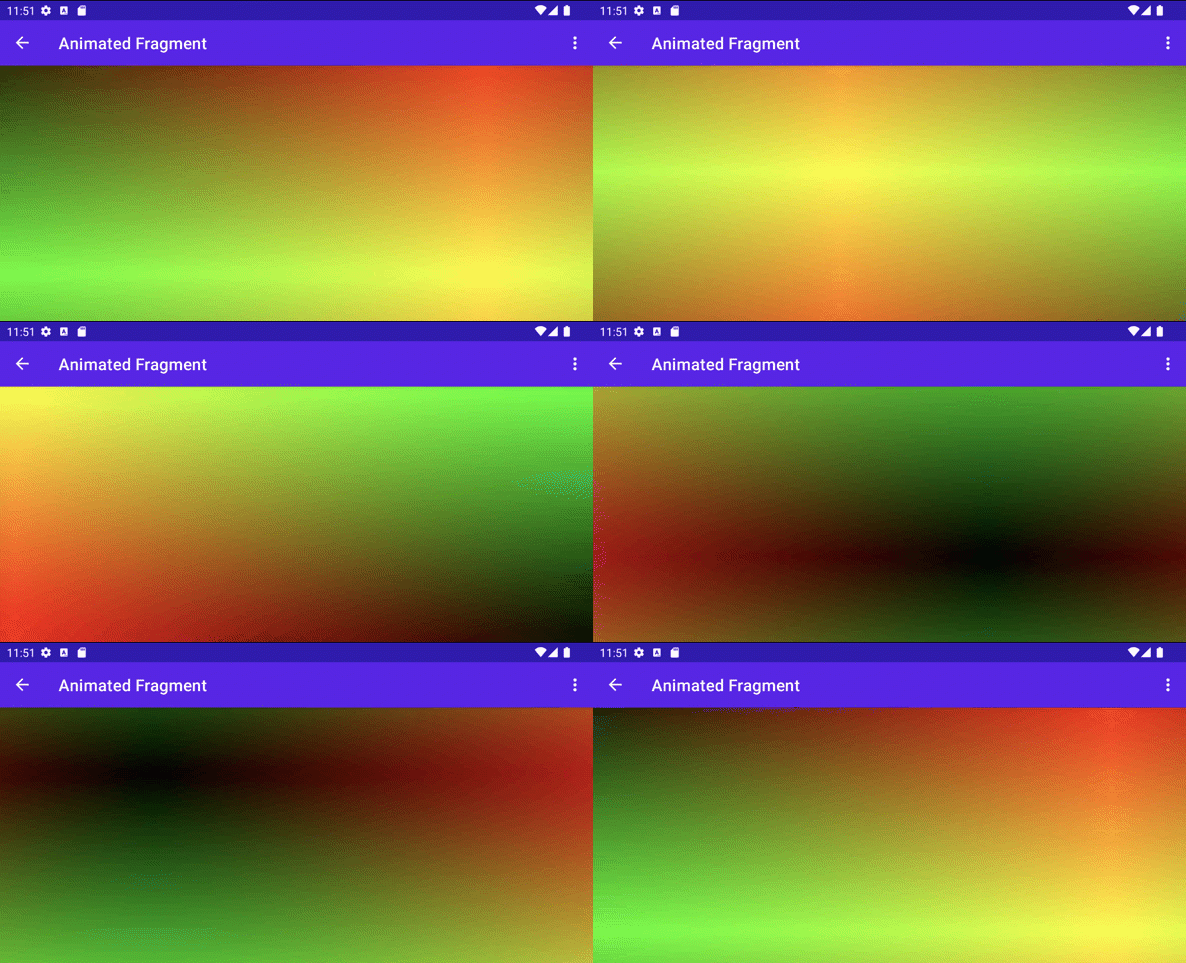
비슷한 기법을 사용하여 iTime 및 iDuration 유니폼을 수신하도록 셰이더를 수정하여 셰이더에 애니메이션을 적용할 수 있습니다. 셰이더는 이러한 값을 사용하여
삼각형을 사용하여 그라데이션 값을 앞뒤로 순환합니다.
Kotlin
private const val DURATION = 4000f
private const val COLOR_SHADER_SRC = """
   uniform float2 iResolution;
   uniform float iTime;
   uniform float iDuration;
   half4 main(in float2 fragCoord) {
      float2 scaled = abs(1.0-mod(fragCoord/iResolution.xy+iTime/(iDuration/2.0),2.0));
      return half4(scaled, 0, 1.0);
   }
"""
자바
private static final float DURATION = 4000f;
private static final String COLOR_SHADER_SRC =
   "uniform float2 iResolution;\n"+
   "uniform float iTime;\n"+
   "uniform float iDuration;\n"+
   "half4 main(in float2 fragCoord) {\n"+
      "float2 scaled = abs(1.0-mod(fragCoord/iResolution.xy+iTime/(iDuration/2.0),2.0));\n"+
      "return half4(scaled, 0, 1.0);\n"+
   "}";
맞춤 뷰 소스 코드에서
ValueAnimator는
iTime 유니폼.
Kotlin
// declare the ValueAnimator
private val shaderAnimator = ValueAnimator.ofFloat(0f, DURATION)

// use it to animate the time uniform
shaderAnimator.duration = DURATION.toLong()
shaderAnimator.repeatCount = ValueAnimator.INFINITE
shaderAnimator.repeatMode = ValueAnimator.RESTART
shaderAnimator.interpolator = LinearInterpolator()

animatedShader.setFloatUniform("iDuration", DURATION )
shaderAnimator.addUpdateListener { animation ->
    animatedShader.setFloatUniform("iTime", animation.animatedValue as Float )
}
shaderAnimator.start()
자바
// declare the ValueAnimator
private final ValueAnimator shaderAnimator = ValueAnimator.ofFloat(0f, DURATION);

// use it to animate the time uniform
shaderAnimator.setDuration((long)DURATION);
shaderAnimator.setRepeatCount(ValueAnimator.INFINITE);
shaderAnimator.setRepeatMode(ValueAnimator.RESTART);
shaderAnimator.setInterpolator(new LinearInterpolator());

animatedShader.setFloatUniform("iDuration", DURATION );
shaderAnimator.addUpdateListener(new ValueAnimator.AnimatorUpdateListener() {
   public final void onAnimationUpdate(ValueAnimator animation) {
      animatedShader.setFloatUniform("iTime", (float)animation.getAnimatedValue());
   }
});
복잡한 물체 칠하기
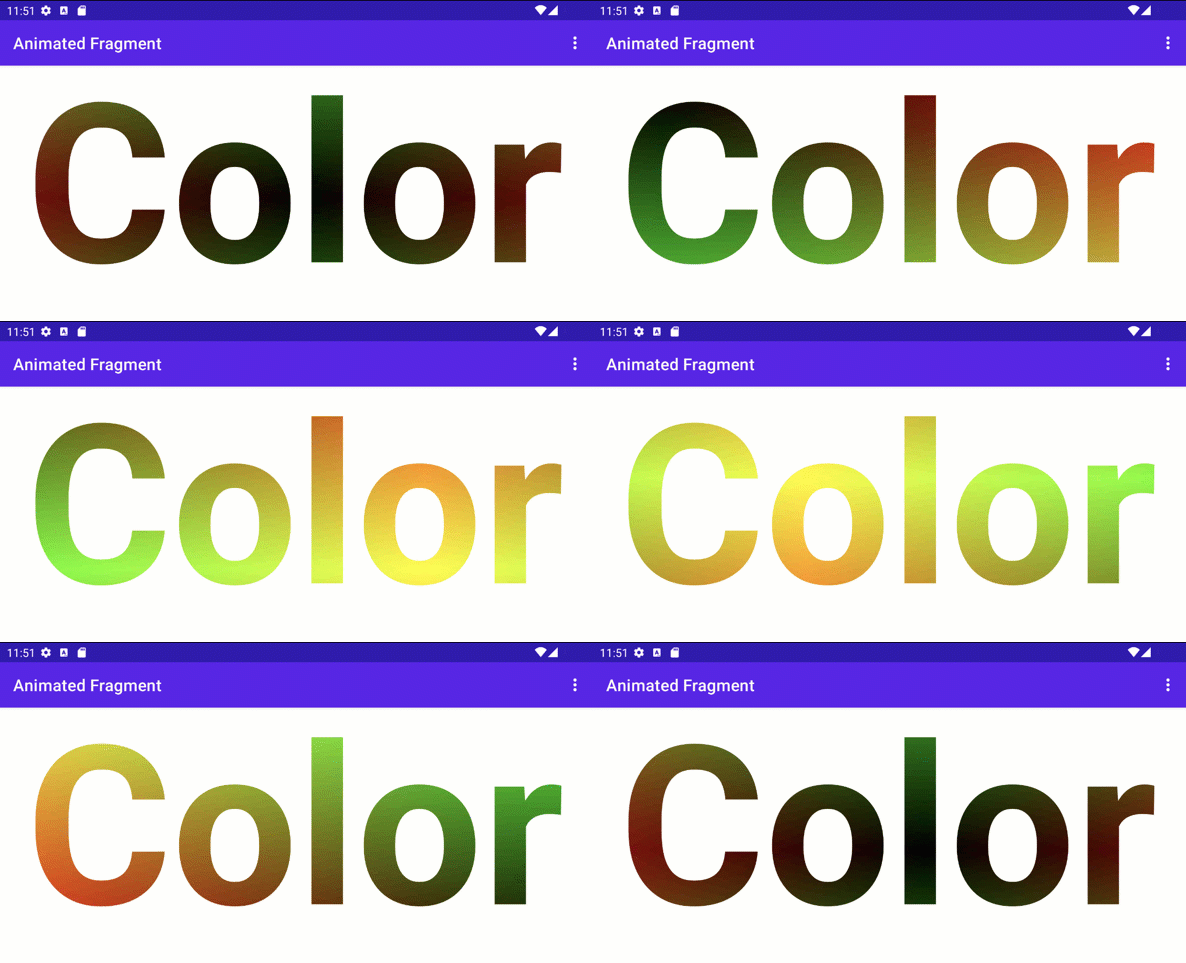
배경을 채우기 위해 셰이더를 그릴 필요가 없습니다. 가능
허용되는 모든 위치에서
Paint 객체. 예:
drawText
Kotlin
canvas.drawText(ANIMATED_TEXT, TEXT_MARGIN_DP, TEXT_MARGIN_DP + bounds.height(),
   paint)
자바
canvas.drawText(ANIMATED_TEXT, TEXT_MARGIN_DP, TEXT_MARGIN_DP + bounds.height(),
   paint);
음영 및 캔버스 변환
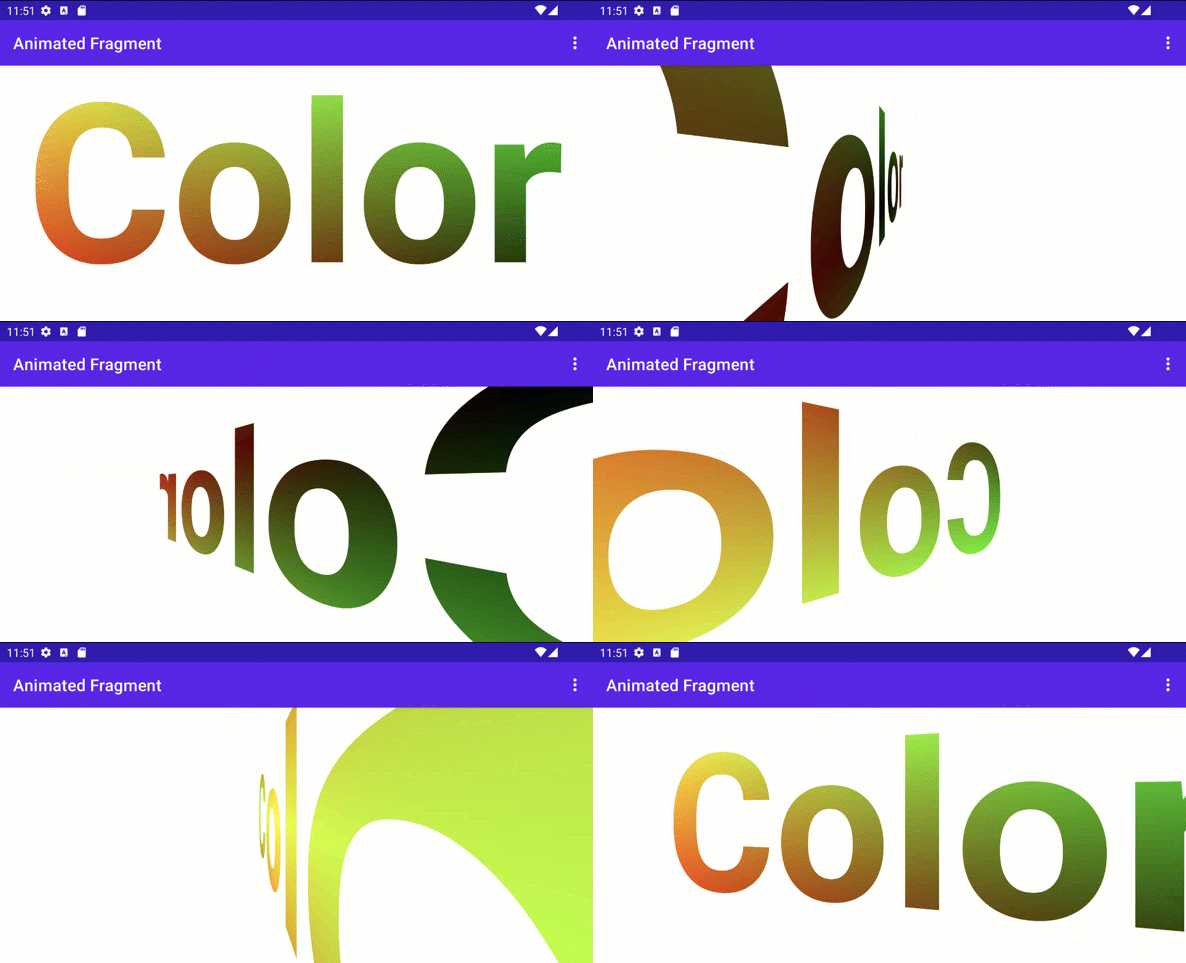
다음과 같이 음영 처리된 텍스트에 Canvas 변환을 추가로 적용할 수 있습니다.
있습니다. ValueAnimator에서 3D 회전을 위한 행렬을 업데이트할 수 있습니다.
기본 제공되는
android.graphics.Camera 클래스
Kotlin
// in the ValueAnimator
camera.rotate(0.0f, animation.animatedValue as Float / DURATION * 360f, 0.0f)
자바
// in the ValueAnimator
camera.rotate(0.0f, (Float)animation.getAnimatedValue() / DURATION * 360f, 0.0f);
모서리가 아닌 중앙 축에서 텍스트를 회전하려고 하므로
텍스트 경계를 가져온 후 preTranslate 및 postTranslate를 사용하여
행렬을 사용하여 0,0이 회전의 중심이 되도록 텍스트를 변환합니다.
화면에 텍스트가 그려지는 위치를 변경합니다.
Kotlin
linearColorPaint.getTextBounds(ANIMATED_TEXT, 0, ANIMATED_TEXT.length, bounds)
camera.getMatrix(rotationMatrix)
val centerX = (bounds.width().toFloat())/2
val centerY = (bounds.height().toFloat())/2
rotationMatrix.preTranslate(-centerX, -centerY)
rotationMatrix.postTranslate(centerX, centerY)
canvas.save()
canvas.concat(rotationMatrix)
canvas.drawText(ANIMATED_TEXT, 0f, 0f + bounds.height(), paint)
canvas.restore()
자바
linearColorPaint.getTextBounds(ANIMATED_TEXT, 0, ANIMATED_TEXT.length(), bounds);
camera.getMatrix(rotationMatrix);
float centerX = (float)bounds.width()/2.0f;
float centerY = (float)bounds.height()/2.0f;
rotationMatrix.preTranslate(-centerX, -centerY);
rotationMatrix.postTranslate(centerX, centerY);
canvas.save();
canvas.concat(rotationMatrix);
canvas.drawText(ANIMATED_TEXT, 0f, 0f + bounds.height(), paint);
canvas.restore();
Jetpack Compose와 함께 RuntimeShader 사용
다음을 사용하여 UI를 렌더링하는 경우 RuntimeShader를 사용하는 것이 훨씬 더 쉽습니다.
Jetpack Compose. 다음에서 동일한 그라데이션 셰이더로 시작
다음 날짜 이전:
private const val COLOR_SHADER_SRC =
    """uniform float2 iResolution;
   half4 main(float2 fragCoord) {
   float2 scaled = fragCoord/iResolution.xy;
   return half4(scaled, 0, 1);
}"""
이 셰이더를
ShaderBrush 나
그런 다음 ShaderBrush를
Canvas의 그리기 범위
// created as top level constants
val colorShader = RuntimeShader(COLOR_SHADER_SRC)
val shaderBrush = ShaderBrush(colorShader)

Canvas(
   modifier = Modifier.fillMaxSize()
) {
   colorShader.setFloatUniform("iResolution",
   size.width, size.height)
   drawCircle(brush = shaderBrush)
}
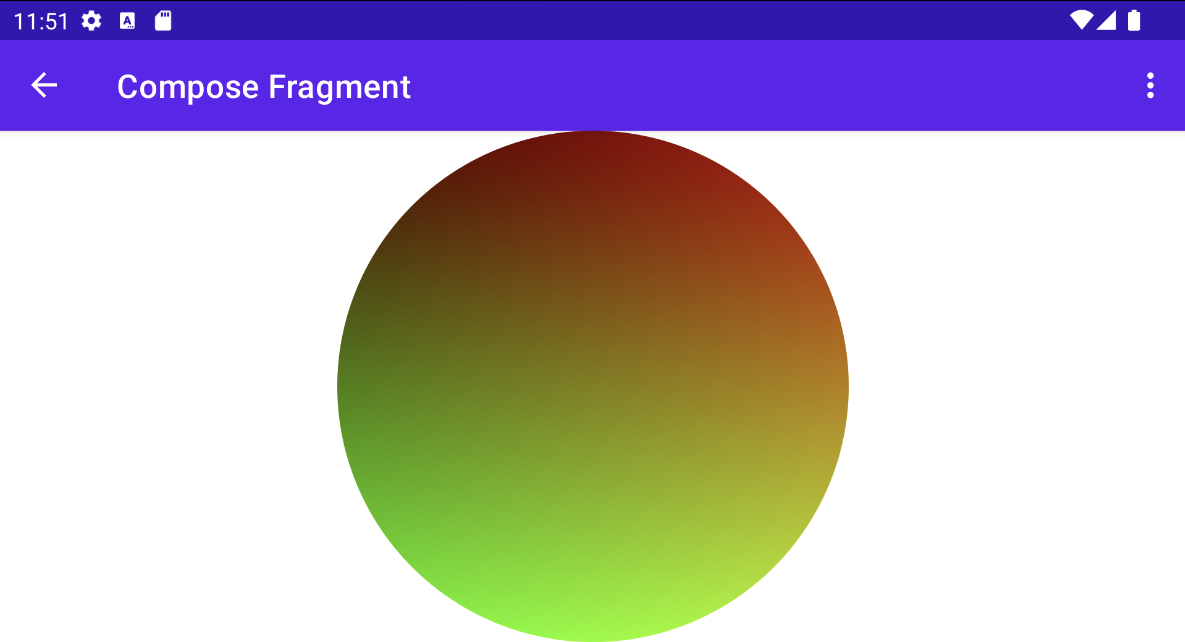
RenderEffect와 함께 RuntimeShader 사용
이때
RenderEffect
상위 게시자 View에 RuntimeShader 전송
및 모든 하위 뷰 이 방법은 맞춤 View를 그리는 것보다 비용이 많이 듭니다. 그러나
이렇게 하면 이전에 했던 것 보다는
인코더-디코더 아키텍처를
createRuntimeShaderEffect
Kotlin
view.setRenderEffect(RenderEffect.createRuntimeShaderEffect(myShader, "background"))
자바
view.setRenderEffect(RenderEffect.createRuntimeShaderEffect(myShader, "background"));
두 번째 매개변수는 셰이더 유니폼의 이름으로, eval
좌표 매개변수 (예: fragCoord에 전달된 )를 사용하여 원래 색상을 가져옵니다.
의
RenderNode (뷰 및 그 하위 요소
뷰)을 사용하여 모든 종류의 효과를 수행할 수 있습니다.
uniform shader background;       // Root node of View tree to be altered
return mix(returnColor, background.eval(fragCoord), 0.5);
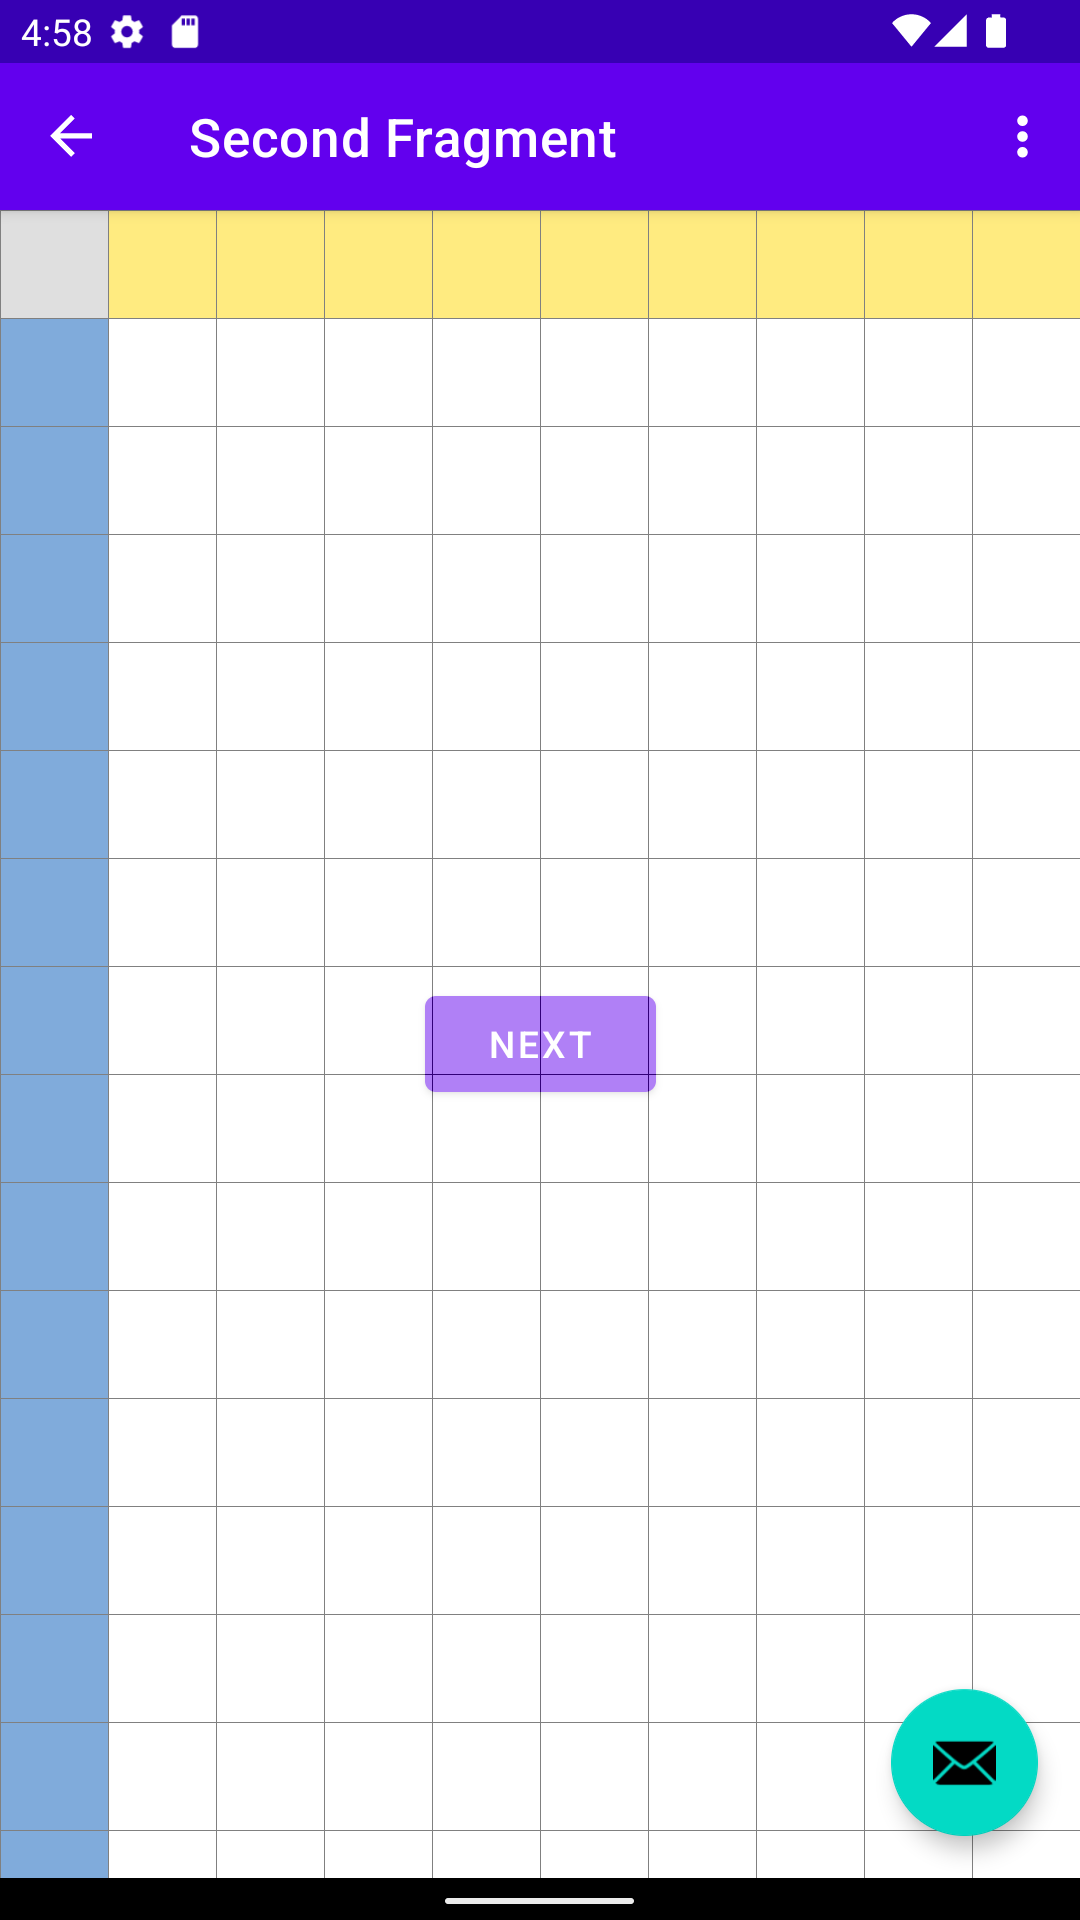
플로팅 작업 버튼 아래 버튼 위에 섞여 있는 그리드 효과
(다른 View 계층 구조에 있으므로)
