
Android Studio содержит графический интерфейс, который позволяет создавать и редактировать граф навигации. По сути, это редактор базового файла ресурсов XML.
Обзор
После того как вы добавили XML-график в свое приложение, Android Studio открывает его в редакторе навигации . В редакторе навигации вы можете визуально редактировать навигационные графики или напрямую редактировать базовый XML.
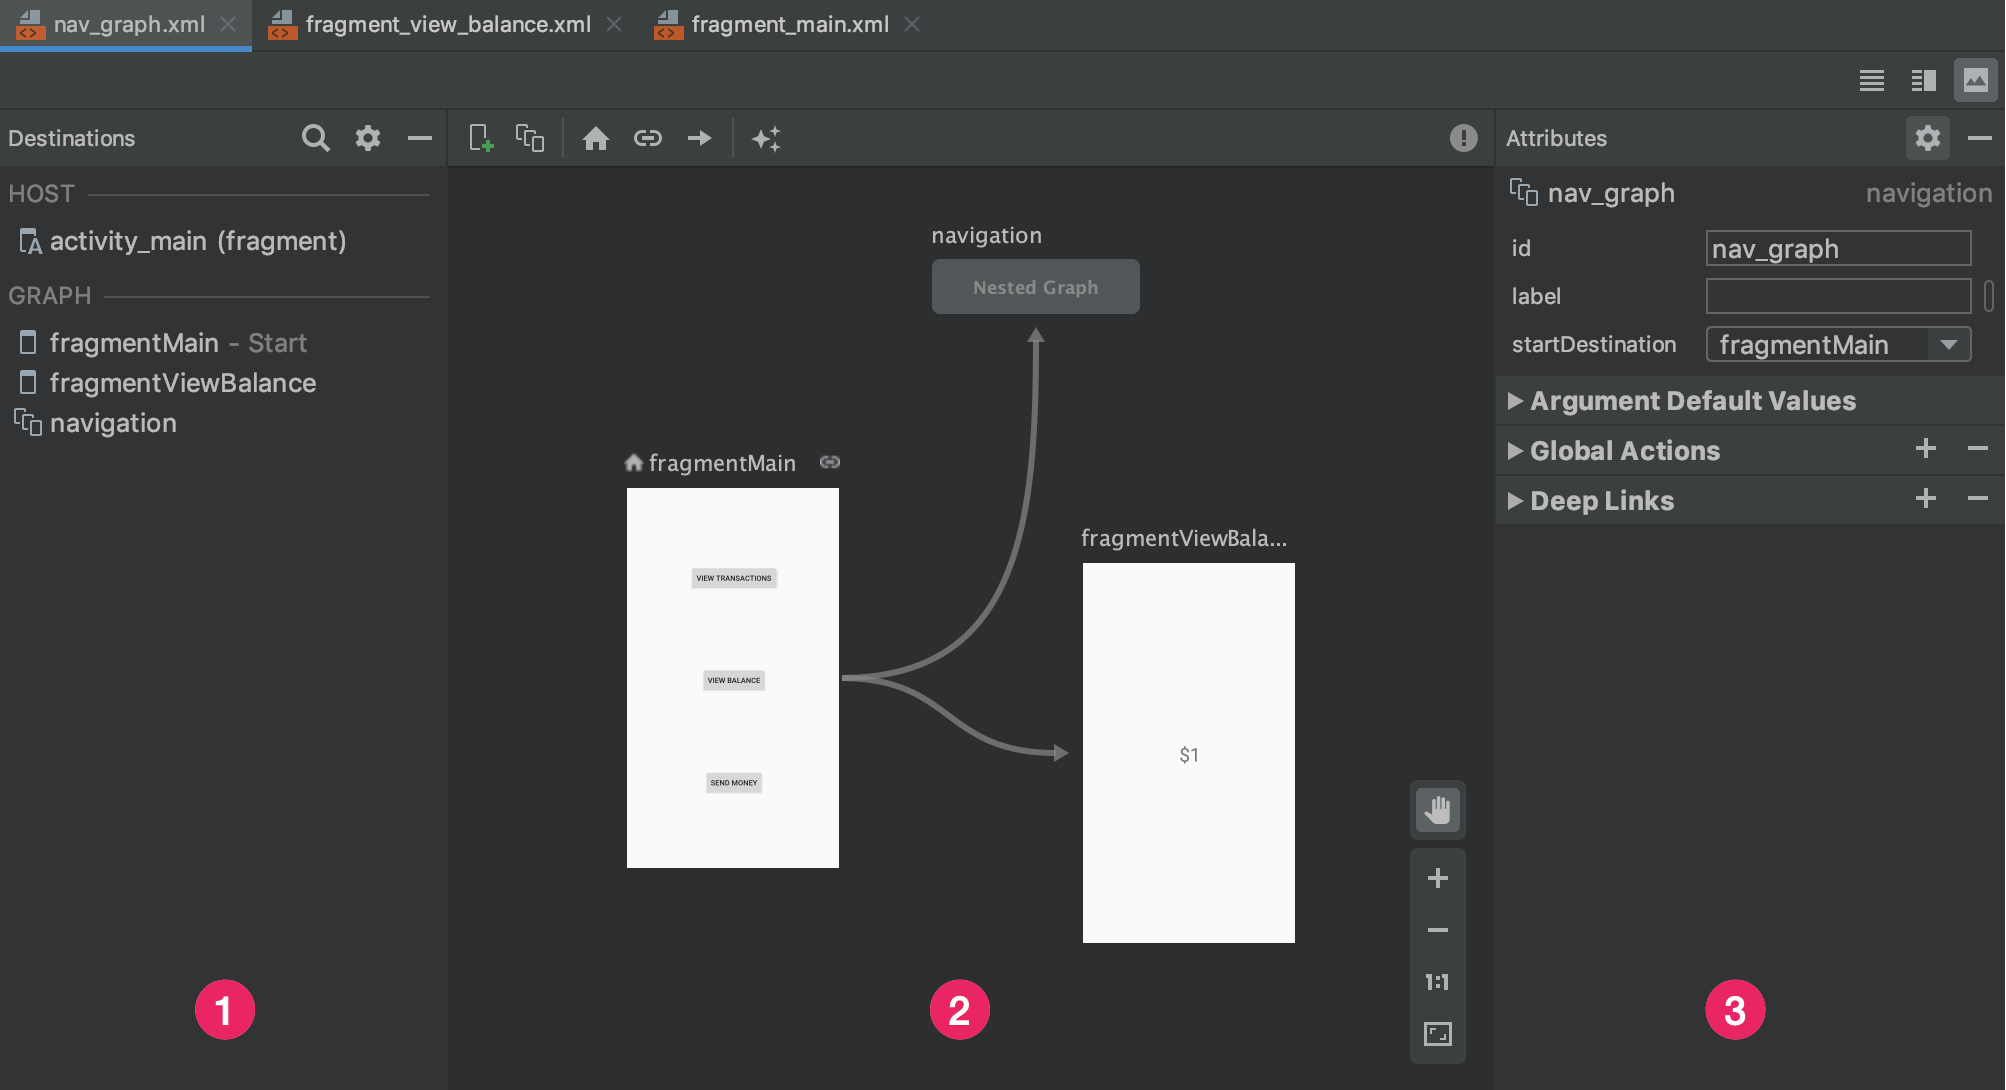
- Панель «Назначения» . В редакторе графиков отображается навигационный хост и все пункты назначения.
- Редактор графиков : содержит визуальное представление вашего навигационного графика. Вы можете переключаться между представлением «Дизайн» и базовым XML-представлением в текстовом представлении.
- Атрибуты : отображает атрибуты выбранного элемента на графике навигации.
Перейдите на вкладку «Текст» , чтобы просмотреть соответствующий XML-код, который должен выглядеть примерно так:
<?xml version="1.0" encoding="utf-8"?>
<navigation xmlns:android="http://schemas.android.com/apk/res/android"
            xmlns:app="http://schemas.android.com/apk/res-auto"
            android:id="@+id/nav_graph">

</navigation>
Элемент <navigation> является корневым элементом графа навигации. Когда вы добавляете пункты назначения и соединительные действия в свой график, вы можете видеть здесь соответствующие элементы <destination> и <action> как дочерние элементы. Если у вас есть вложенные графики , они отображаются как дочерние элементы <navigation> .
Добавить направления
Вы можете создать пункт назначения из существующего фрагмента или действия. Вы также можете использовать редактор навигации, чтобы создать новый пункт назначения или создать заполнитель для последующей замены фрагментом или действием.
В этом примере показано, как создать новое место назначения. Чтобы добавить новый пункт назначения с помощью редактора навигации, выполните следующие действия:
- В редакторе навигации щелкните значок «Новый пункт назначения» .
 , а затем нажмите «Создать новое место назначения» .
 - В появившемся диалоговом окне «Новый компонент Android» создайте свой фрагмент. Дополнительную информацию о фрагментах смотрите в обзоре фрагментов .
Вернувшись в редактор навигации, обратите внимание, что Android Studio добавила этот пункт назначения на график.
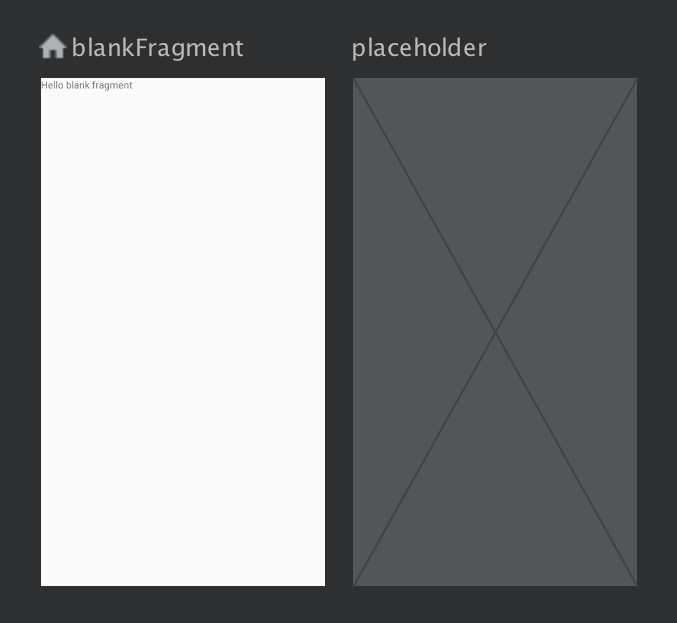
На рис. 2 показан пример пункта назначения и места назначения-заполнителя .
Другие способы добавления пунктов назначения в график навигации см. в разделе Дополнительные пункты назначения .
Создайте пункт назначения из существующего фрагмента или действия.
Если в редакторе навигации у вас есть существующий тип пункта назначения, который вы хотите добавить в график навигации, нажмите «Новый пункт назначения». ![]() .
.
Затем выберите соответствующий пункт назначения в появившемся раскрывающемся списке. Теперь вы можете просмотреть предварительный просмотр пункта назначения в представлении «Дизайн» , а также соответствующий XML-код в представлении «Текст» вашего графа навигации.
Создайте новое место назначения фрагмента
Чтобы добавить новый тип пункта назначения с помощью редактора навигации, выполните следующие действия:
В редакторе навигации щелкните значок «Новый пункт назначения» .
.Далее нажмите «Создать новый пункт назначения» .
В появившемся диалоговом окне «Новый компонент Android» создайте свой фрагмент.
Вернувшись в редактор навигации, обратите внимание, что Android Studio добавила этот пункт назначения на график.
На рис. 3 показан пример пункта назначения и места назначения-заполнителя .
Анатомия пункта назначения
Щелкните пункт назначения, чтобы выбрать его, и обратите внимание на следующие атрибуты на панели «Атрибуты» :
- Поле «Тип» указывает, реализовано ли место назначения в исходном коде как фрагмент, действие или другой пользовательский класс.
- Поле «Метка» содержит читаемое пользователем имя пункта назначения. Это может быть отображено в пользовательском интерфейсе, например, если вы подключаете
NavGraphкToolbarс помощьюsetupWithNavController(). По этой причине используйте для этого значения строки ресурсов. - Поле ID содержит идентификатор пункта назначения, который используется для ссылки на пункт назначения в коде.
- В раскрывающемся списке «Класс» отображается имя класса, связанного с местом назначения. Щелкните этот раскрывающийся список, чтобы изменить связанный класс на другой тип назначения.
Перейдите на вкладку «Текст» , чтобы отобразить XML-представление вашего навигационного графа. XML-файл содержит те же атрибуты id , name , label и layout для места назначения, что и в следующем фрагменте:
<?xml version="1.0" encoding="utf-8"?>
<navigation xmlns:app="http://schemas.android.com/apk/res-auto"
    xmlns:tools="http://schemas.android.com/tools"
    xmlns:android="http://schemas.android.com/apk/res/android"
    app:startDestination="@id/blankFragment">
    <fragment
        android:id="@+id/blankFragment"
        android:name="com.example.cashdog.cashdog.BlankFragment"
        android:label="@string/label_blank"
        tools:layout="@layout/fragment_blank" />
</navigation>
NavHostFragment
Вы также можете использовать редактор макетов , чтобы добавить NavHostFragment к действию, выполнив следующие действия:
- В списке файлов проекта дважды щелкните XML-файл макета вашего действия, чтобы открыть его в редакторе макетов.
- На панели «Палитра» выберите категорию «Контейнеры» ; альтернативно найдите «NavHostFragment».
- Перетащите представление
NavHostFragmentв свою активность. - В появившемся диалоговом окне «Графики навигации» выберите соответствующий граф навигации, который нужно связать с этим
NavHostFragment, а затем нажмите «ОК» .
Подключите направления
Действие — это логическая связь между пунктами назначения. Действия представлены на графике навигации в виде стрелок. Действия обычно соединяют один пункт назначения с другим, хотя вы также можете создавать глобальные действия , которые перенесут вас в определенный пункт назначения из любой точки вашего приложения.
С помощью действий вы представляете различные пути, по которым пользователи могут пройти через ваше приложение. Обратите внимание, что для фактического перехода к пунктам назначения вам все равно необходимо написать код для выполнения навигации.
Вы можете использовать Редактор навигации для соединения двух пунктов назначения, выполнив следующие действия:
На вкладке «Дизайн» наведите указатель на правую часть пункта назначения, из которого вы хотите, чтобы пользователи перешли. Справа от пункта назначения появится кружок, как показано на рисунке 4.
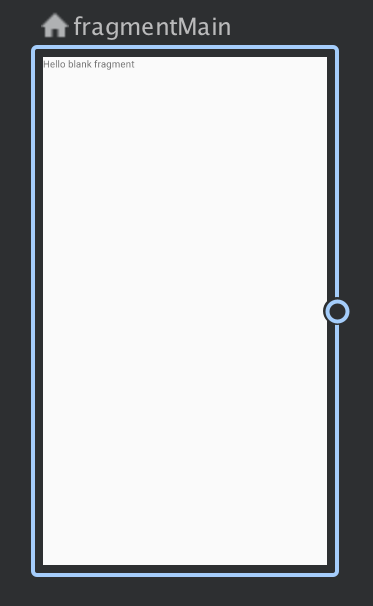
Рисунок 4. Пункт назначения с кругом подключения действий Перетащите курсор на пункт назначения, к которому вы хотите, чтобы пользователи перешли, и отпустите. Результирующая линия между двумя пунктами назначения представляет собой действие, как показано на рисунке 5.
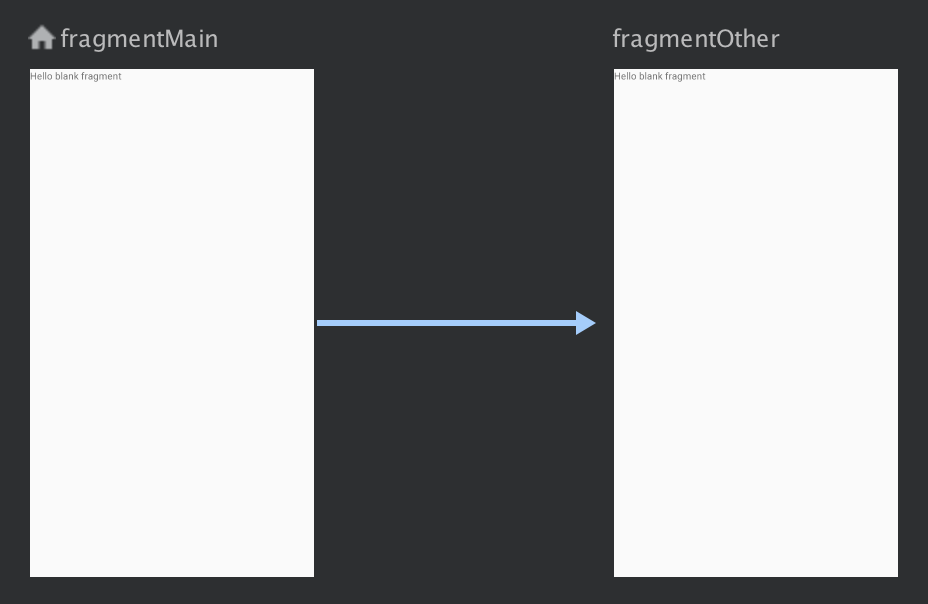
Рисунок 5. Соединение пунктов назначения с помощью действия Нажмите стрелку, чтобы выделить действие. На панели «Атрибуты» отображаются следующие атрибуты:
- Поле Тип содержит «Действие».
- Поле ID содержит идентификатор действия.
- Поле «Назначение» содержит идентификатор целевого фрагмента или действия.
Перейдите на вкладку «Текст» , чтобы переключиться на представление XML. Элемент действия теперь добавлен в исходное место назначения. У действия есть идентификатор и атрибут назначения, который содержит идентификатор следующего пункта назначения, как показано в следующем примере:
<?xml version="1.0" encoding="utf-8"?>
<navigation xmlns:app="http://schemas.android.com/apk/res-auto"
   xmlns:tools="http://schemas.android.com/tools"
   xmlns:android="http://schemas.android.com/apk/res/android"
   app:startDestination="@id/blankFragment">
   <fragment
       android:id="@+id/blankFragment"
       android:name="com.example.cashdog.cashdog.BlankFragment"
       android:label="@string/label_blank"
       tools:layout="@layout/fragment_blank" >
       <action
           android:id="@+id/action_blankFragment_to_blankFragment2"
           app:destination="@id/blankFragment2" />
   </fragment>
   <fragment
       android:id="@+id/blankFragment2"
       android:name="com.example.cashdog.cashdog.BlankFragment2"
       android:label="@string/label_blank_2"
       tools:layout="@layout/fragment_blank_fragment2" />
</navigation>
В графе навигации действия представлены элементами <action> . Как минимум действие содержит собственный идентификатор и идентификатор пункта назначения, в который должен быть перенаправлен пользователь.
Направления-заполнители
Вы можете использовать заполнители для обозначения нереализованных пунктов назначения. Заполнитель служит визуальным представлением пункта назначения. В редакторе навигации вы можете использовать заполнители так же, как и в любом другом пункте назначения.