
1. Antes de comenzar
Captura de pantalla: La app de YouTube para Android, que usa ExoPlayer como su reproductor de video.
ExoPlayer es un reproductor multimedia a nivel de la app integrado sobre las APIs multimedia de bajo nivel en Android. Es un proyecto de código abierto que utilizan las apps de Google, incluidas YouTube y Google TV. ExoPlayer es extensible y se puede personalizar mucho, lo que le permite manejar varios casos de uso avanzados. Admite una variedad de formatos multimedia, incluidos los formatos adaptables como DASH y SmoothStreaming.
Requisitos previos
- Conocimientos moderados del desarrollo de Android y Android Studio
Actividades
- Crearás una instancia de
ExoPlayer, que prepara y reproduce contenido multimedia de una variedad de fuentes. - Integrarás ExoPlayer con el ciclo de vida de la app con el fin de admitir la reproducción en segundo plano y en primer plano, y la reanudación de la reproducción en un entorno de una o varias ventanas.
- Usarás
MediaItempara crear una lista de reproducción. - Reproducirás transmisiones de videos adaptativos por Internet que ajustan la calidad del contenido multimedia al ancho de banda disponible.
- Registrarás objetos de escucha de eventos para supervisar el estado de la reproducción y mostrarás de qué manera se pueden usar esos objetos para medir la calidad de la reproducción.
- Usarás los componentes estándar de la IU de ExoPlayer y, luego, los personalizarás según el estilo de tu app.
Requisitos
- La versión estable más reciente de Android Studio y conocimientos sobre cómo usarla (asegúrate de que Android Studio, el SDK de Android y el complemento de Gradle estén actualizados)
- Un dispositivo Android con JellyBean (4.1) o versiones posteriores, idealmente, con Nougat (7.1) o una versión posterior, ya que admite varias ventanas
2. Prepárate
Obtén el código
Para comenzar, descarga el proyecto de Android Studio:
De manera alternativa, puedes clonar el repositorio de GitHub:
git clone https://github.com/googlecodelabs/exoplayer-intro.git
Estructura del directorio
Al clonar o descomprimir, verás una carpeta raíz (exoplayer-intro), que contiene un solo proyecto de Gradle con varios módulos; un módulo de app y uno por cada paso de este codelab, junto con todos los recursos que necesitarás.
Importa el proyecto
- Inicia Android Studio.
- Selecciona File > New > Import Project*.*
- Selecciona el archivo raíz
build.gradle.
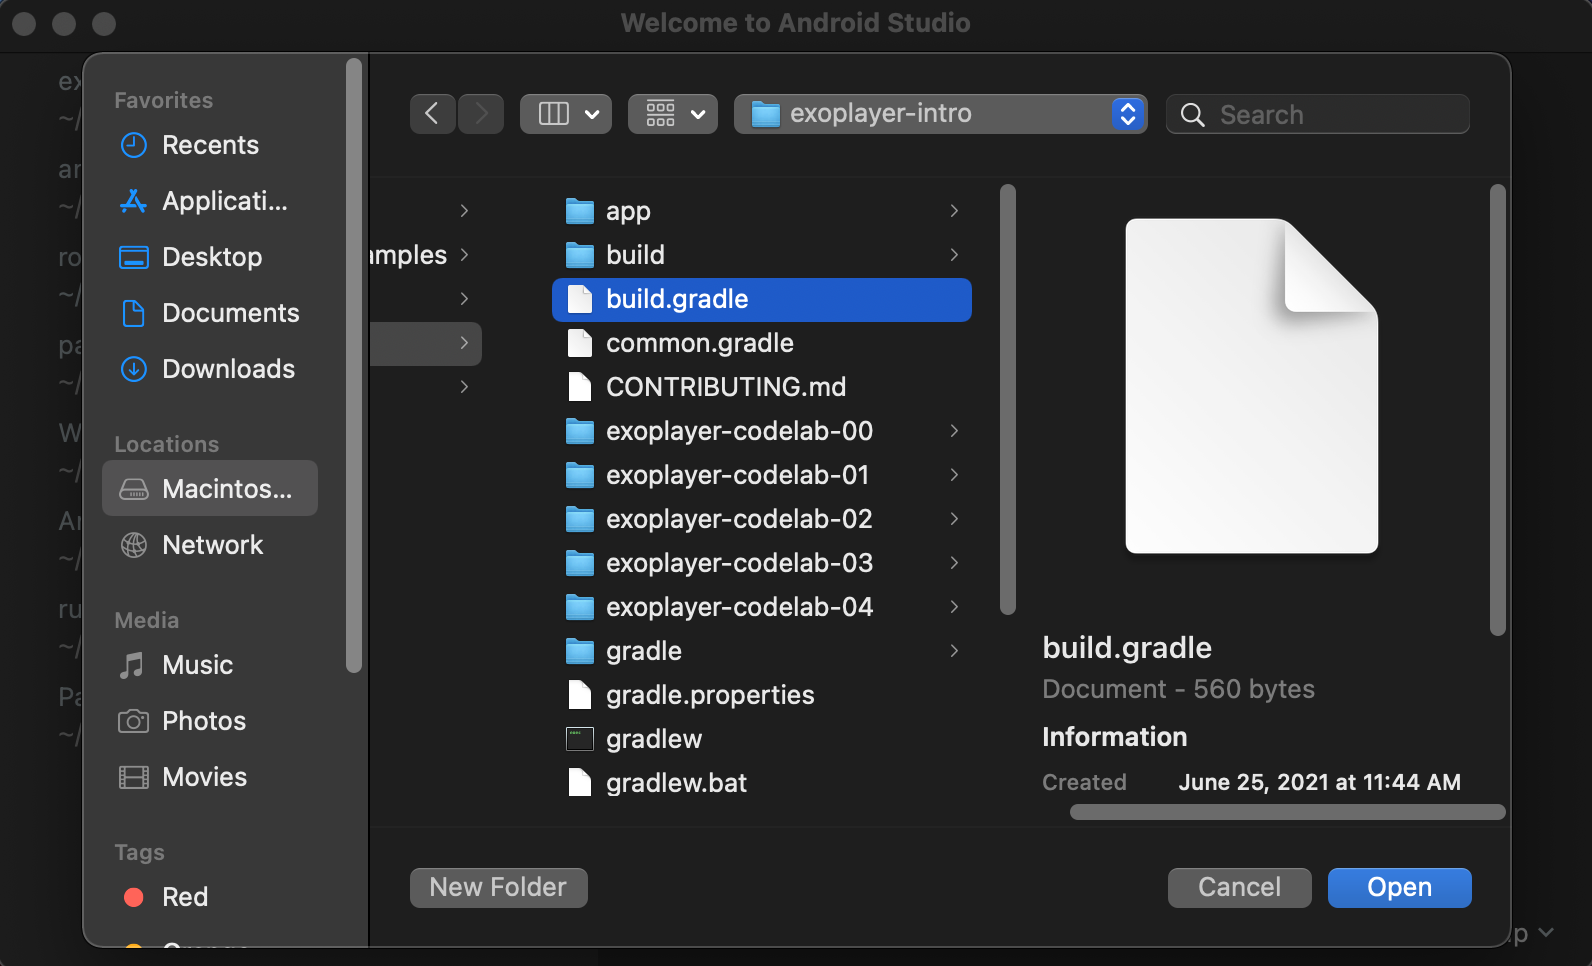
Captura de pantalla: Estructura del proyecto al importar
Una vez finalizada la compilación, verás seis módulos: el módulo app (del tipo aplicación) y cinco módulos con nombres exoplayer-codelab-N (donde N es de 00 a 04,, cada uno un tipo de biblioteca). El módulo app está vacío, solo tiene un manifiesto. Todo o del módulo exoplayer-codelab-N especificado se combina cuando la app se compila con una dependencia de Gradle en app/build.gradle.
app/build.gradle
dependencies {
   implementation project(":exoplayer-codelab-00")
}
El elemento Activity de tu reproductor multimedia se conserva en el módulo exoplayer-codelab-N. Se conserva en un módulo de biblioteca separado para que puedas compartirlo con los APK que se orientan a diferentes plataformas, por ejemplo, un dispositivo móvil y Android TV. También puedes aprovechar funciones como Dynamic Delivery, que permite que la función del reproductor multimedia se instale solo cuando el usuario lo necesita.
- Implementa y ejecuta la app para comprobar que todo esté bien. La app debería completar la pantalla con un fondo negro.
Captura de pantalla: App vacía en ejecución
3. Transmite
Agrega una dependencia de ExoPlayer
ExoPlayer es parte de la biblioteca de Jetpack Media3. Cada actualización se identifica de forma única mediante una string con el siguiente formato:
androidx.media3:media3-exoplayer:X.X.X
Para agregar ExoPlayer a tu proyecto, solo importa sus clases y componentes de IU. Es bastante pequeño, con una huella reducida de alrededor de 70 KB a 300 KB, según las funciones incluidas y los formatos compatibles. La biblioteca de ExoPlayer se divide en módulos para permitir que los desarrolladores importen solo la funcionalidad que necesitan. Para obtener más información sobre la estructura modular de ExoPlayer, consulta Cómo agregar módulos de ExoPlayer.
- Abre el archivo
build.gradledel móduloexoplayer-codelab-00. - Agrega las siguientes líneas a la sección
dependenciesy sincroniza el proyecto.
exoplayer-codelab-00/build.gradle
def mediaVersion = "1.0.0-alpha03"
dependencies {
    [...]

    implementation "androidx.media3:media3-exoplayer:$mediaVersion"
    implementation "androidx.media3:media3-ui:$mediaVersion"
    implementation "androidx.media3:media3-exoplayer-dash:$mediaVersion"
}
Agrega PlayerView element.
- Abre el archivo de recurso de diseño
activity_player.xmldesde el móduloexoplayer-codelab-00. - Coloca el cursor dentro del elemento
FrameLayout. - Comienza escribiendo
<PlayerViewy permite que Android Studio complete automáticamente el elementoPlayerView. - Usa
match_parentparawidthyheight. - Declara la ID como
video_view.
activity_player.xml
<androidx.media3.ui.PlayerView
   android:id="@+id/video_view"
   android:layout_width="match_parent"
   android:layout_height="match_parent"/>
De acá en más, te referirás a este elemento de la IU como la vista de video.
- Ahora, en el elemento
PlayerActivity, puedes obtener una referencia al árbol de vistas creado a partir del archivo en formato XML que acabas de editar.
PlayerActivity.kt
private val viewBinding by lazy(LazyThreadSafetyMode.NONE) {
    ActivityPlayerBinding.inflate(layoutInflater)
}
- Configura la raíz del árbol de vista como la vista de contenido de Activity. Además, comprueba que la propiedad
videoViewse pueda ver en tu referenciaviewBindingy que su tipo seaPlayerView.
override fun onCreate(savedInstanceState: Bundle?) {
    super.onCreate(savedInstanceState)
    setContentView(viewBinding.root)
}
Crea un ExoPlayer
Para reproducir contenido multimedia, necesitas un objeto ExoPlayer. La forma más sencilla de crear uno es usar la clase ExoPlayer.Builder. Como el nombre lo sugiere, usa el patrón del compilador para compilar una instancia de ExoPlayer.
ExoPlayer es una implementación conveniente para muchos fines de la interfaz Player.
Agrega un método privado initializePlayer para crear tu ExoPlayer.
PlayerActivity.kt
private var player: ExoPlayer? = null
[...]
private fun initializePlayer() {
    player = ExoPlayer.Builder(this)
        .build()
        .also { exoPlayer ->
            viewBinding.videoView.player = exoPlayer
        }
}
Usa tu contexto para crear un elemento ExoPlayer.Builder y llama a build para crear tu objeto ExoPlayer. Luego, este se asigna a player, que debes declarar como un campo del miembro. Por último, usa la propiedad mutable viewBinding.videoView.player para vincular player a su vista correspondiente.
Crea un elemento multimedia
Ahora, player necesita contenido para reproducir. Para eso, crea un MediaItem. Existen muchos tipos diferentes de MediaItem, pero comienza creando uno para un archivo MP3 en Internet.
La manera más simple para crear un MediaItem es usar MediaItem.fromUri, que acepta el URI de un archivo multimedia. Agrega MediaItem a player con player.setMediaItem.
- Agrega el siguiente código a
initializePlayerdentro del bloquealso:
PlayerActivity.kt
private fun initializePlayer() {
    [...]
        .also { exoPlayer ->
            [...]
            val mediaItem = MediaItem.fromUri(getString(R.string.media_url_mp3))
            exoPlayer.setMediaItem(mediaItem)
        }
}
Ten en cuenta que R.string.media_url_mp3 se define como https://storage.googleapis.com/exoplayer-test-media-0/play.mp3 en strings.xml.
Funciona bien con el ciclo de vida de la actividad
Nuestro player puede acaparar muchos recursos, entre los que se incluyen la memoria, la CPU, las conexiones de red y los códecs de hardware. Muchos de estos recursos escasean, en especial, los códecs de hardware donde puede haber solo uno. Es importante que liberes esos recursos para que otras apps los usen cuando no los estás usando, por ejemplo, cuando tu app se coloca en segundo plano.
En otras palabras, el ciclo de vida de tu reproductor debe estar vinculado al ciclo de vida de tu app. Para implementarlo, debes anular los cuatro métodos de PlayerActivity: onStart, onResume, onPause y onStop.
- Con
PlayerActivityabierto, haz clic en Code menu > Override methods… - Selecciona
onStart,onResume,onPauseyonStop. - Inicializa el reproductor en la devolución de llamada
onStartoonResumesegún el nivel de API.
PlayerActivity.kt
public override fun onStart() {
    super.onStart()
    if (Util.SDK_INT > 23) {
        initializePlayer()
    }
}

public override fun onResume() {
    super.onResume()
    hideSystemUi()
    if ((Util.SDK_INT <= 23 || player == null)) {
        initializePlayer()
    }
}
A partir del nivel de API 24 de Android, se admiten varias ventanas. Como tu app puede estar visible, pero no activa en el modo de pantalla dividida, debes inicializar el reproductor en onStart. El nivel de API 23 y versiones anteriores de Android requieren que esperes la mayor cantidad de tiempo posible hasta que obtengas recursos, por lo que debes esperar hasta onResume antes de inicializar el reproductor.
- Agrega el método
hideSystemUi.
PlayerActivity.kt
@SuppressLint("InlinedApi")
private fun hideSystemUi() {
    WindowCompat.setDecorFitsSystemWindows(window, false)
    WindowInsetsControllerCompat(window, viewBinding.videoView).let { controller ->
        controller.hide(WindowInsetsCompat.Type.systemBars())
        controller.systemBarsBehavior = WindowInsetsControllerCompat.BEHAVIOR_SHOW_TRANSIENT_BARS_BY_SWIPE
    }
}
hideSystemUi es un método de ayuda al que se llama en onResume, que te permite tener una experiencia en toda la pantalla.
- Libera los recursos con
releasePlayer(que pronto crearás) enonPauseyonStop.
PlayerActivity.kt
public override fun onPause() {
    super.onPause()
    if (Util.SDK_INT <= 23) {
        releasePlayer()
    }
}

public override fun onStop() {
    super.onStop()
    if (Util.SDK_INT > 23) {
        releasePlayer()
    }
}
Con el nivel de API 23 y versiones anteriores, no se garantiza que se llame a onStop, por lo que tienes que liberar al reproductor lo antes posible en onPause. A partir del nivel de API 24 (que incorporó el modo multiventana y de ventana dividida), se garantiza la llamada a onStop. En el estado pausado, tu actividad sigue siendo visible, por lo que debes esperar para liberar el reproductor hasta onStop.
Ahora, debes crear un método releasePlayer, que libera los recursos del reproductor y lo destruye.
- Agrega el siguiente código a la actividad:
PlayerActivity.kt
private var playWhenReady = true
private var currentItem = 0
private var playbackPosition = 0L
[...]

private fun releasePlayer() {
    player?.let { exoPlayer ->
        playbackPosition = exoPlayer.currentPosition
        currentItem = exoPlayer.currentMediaItemIndex
        playWhenReady = exoPlayer.playWhenReady
        exoPlayer.release()
    }
    player = null
}
Antes de liberar y destruir el reproductor, almacena la siguiente información:
- Estado de reproducción/pausa con
playWhenReady - Posición actual de la reproducción con
currentPosition - Índice actual de elementos multimedia con
currentMediaItemIndex
Esto te permite reanudar la reproducción desde donde el usuario la dejó. Lo único que debes hacer es reemplazar la información de estado cuando inicialices el reproductor.
Preparación final
Todo lo que necesitas hacer ahora es proporcionar la información de estado que guardaste en releasePlayer a tu reproductor durante la inicialización.
- Agrega lo siguiente a
initializePlayer:
PlayerActivity.kt
private fun initializePlayer() {
    [...]
    exoPlayer.playWhenReady = playWhenReady
    exoPlayer.seekTo(currentItem, playbackPosition)
    exoPlayer.prepare()
}
Esto es lo que sucede:
playWhenReadyindica al reproductor si debe comenzar a reproducir contenido en cuanto se hayan adquirido todos los recursos para la reproducción. Como, en un principio,playWhenReadyestrue, la reproducción se inicia automáticamente la primera vez que se ejecuta la app.seekTole indica al reproductor que debe buscar una posición determinada dentro de un elemento multimedia específico. TantocurrentItemcomoplaybackPositionse inicializan en cero, por lo que la reproducción comienza desde el inicio la primera vez que se ejecuta la app.prepareindica al reproductor que debe adquirir todos los recursos necesarios para la reproducción.
Reproduce audio
Ya está todo listo. Inicia la app para que reproduzca el archivo MP3 y observa el material gráfico integrado.
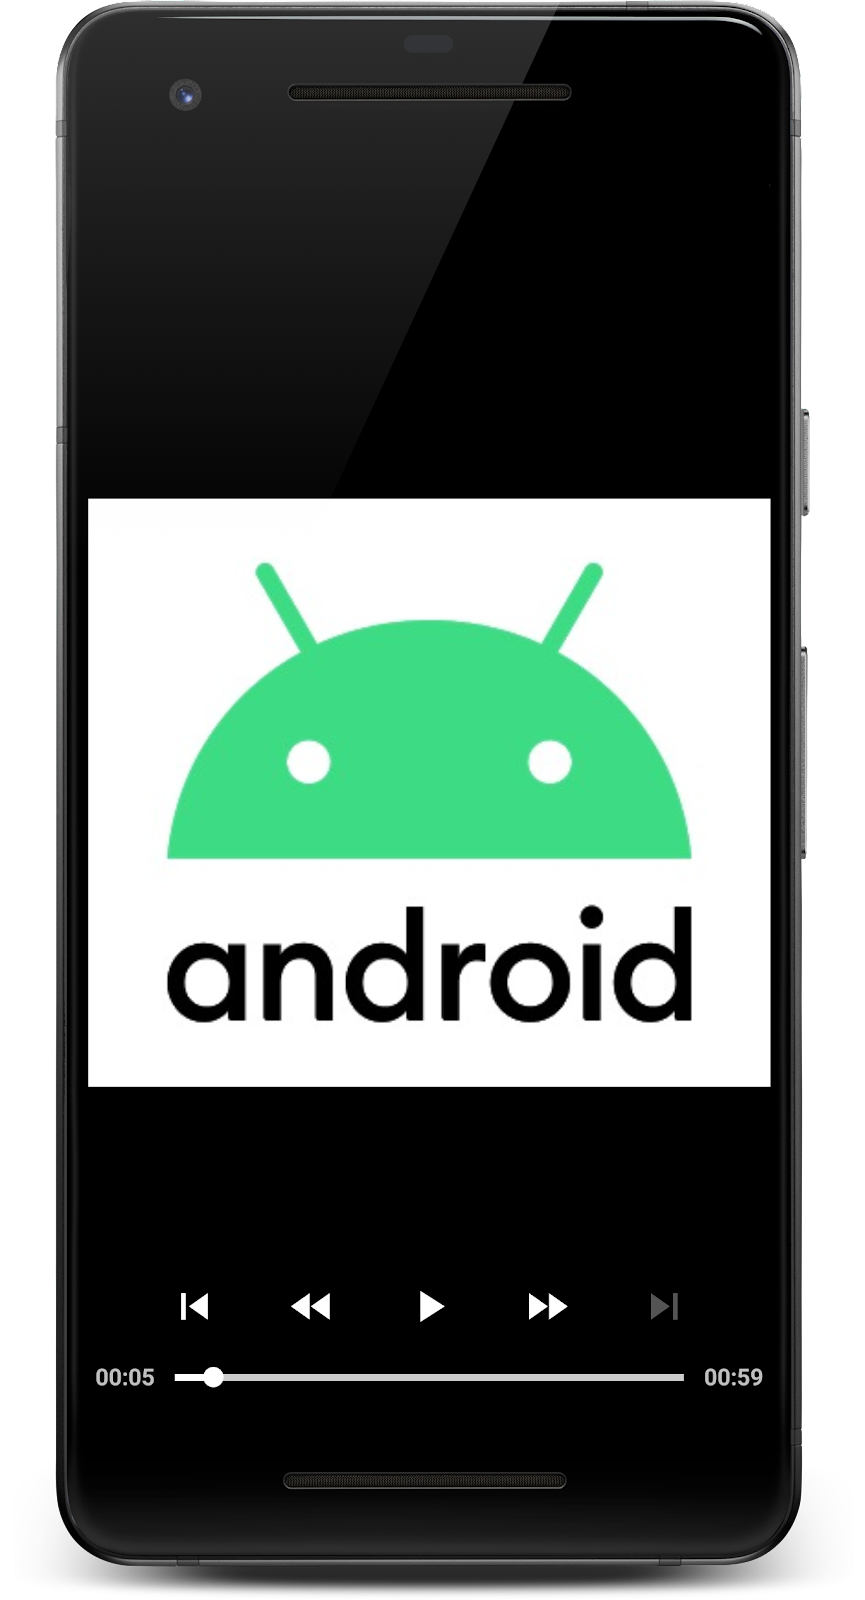
Captura de pantalla: La app reproduciendo una sola pista.
Prueba el ciclo de vida de la actividad
Prueba si la app funciona en todos los estados posibles del ciclo de vida de la actividad.
- Inicia otra app y vuelve a poner tu app en primer plano. ¿Se reanuda en la posición correcta?
- Pausa la app, pásala a segundo plano y, luego, a primer plano otra vez. ¿Sigue en estado de pausa cuando pasa a segundo plano en ese estado?
- Rota la app. ¿Cómo se comporta si cambias la orientación de vertical a horizontal y de horizontal a vertical?
Reproduce video
Si quieres reproducir un video, es tan simple como modificar el URI del elemento multimedia a un archivo MP4.
- Cambia el URI de
initializePlayeraR.string.media_url_mp4. - Vuelve a iniciar la app y prueba el comportamiento luego de que se la coloca en segundo plano con video.
PlayerActivity.kt
private fun initializePlayer() {
    [...]
    val mediaItem = MediaItem.fromUri(getString(R.string.media_url_mp4))
    [...]
}
El elemento PlayerView hace todo. En la pantalla completa, se puede ver el video, en lugar del material gráfico.
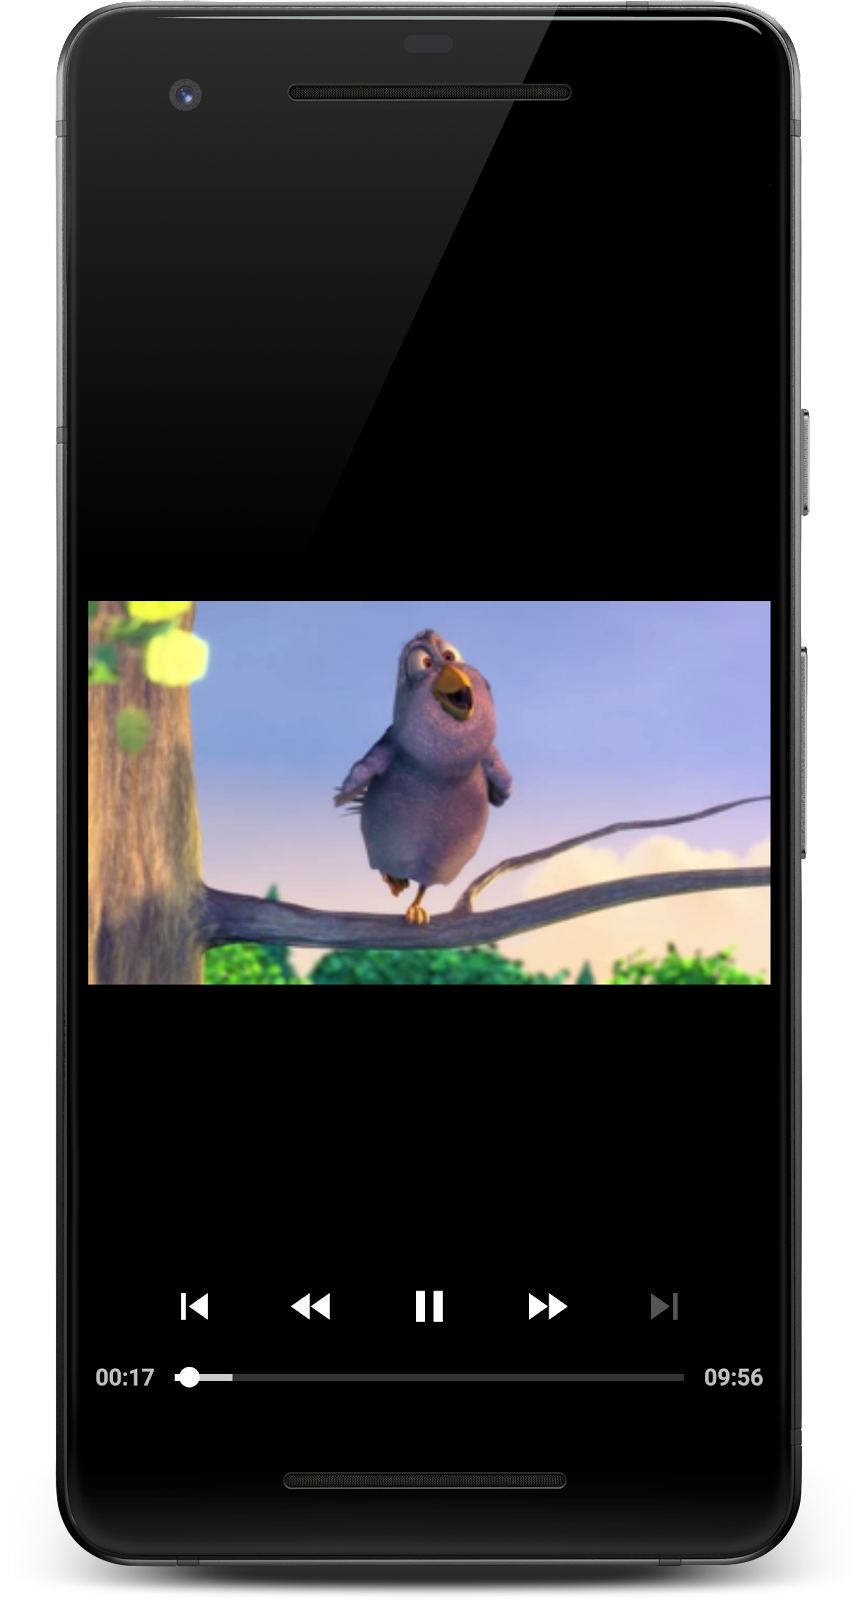
Captura de pantalla: La app reproduciendo video.
¡Así se hace! Acabas de crear una app para transmitir contenido multimedia en la pantalla completa en Android, con administración del ciclo de vida, estado de guardado y controles de IU.
4. Crea una lista de reproducción
Tu app actual reproduce un solo archivo multimedia, pero ¿qué sucede si deseas reproducir más de un archivo multimedia, uno tras otro? Para eso, necesitas una lista de reproducción.
Las lista de reproducción se pueden crear si agregas más MediaItem a player mediante addMediaItem. Esto permite una reproducción fluida, y el almacenamiento en búfer se controla en segundo plano para que el usuario no vea un ícono giratorio de almacenamiento en búfer cuando cambia los elementos multimedia.
- Agrega el siguiente código a
initializePlayer:
PlayerActivity.kt
private void initializePlayer() {
    [...]
    exoPlayer.addMediaItem(mediaItem) // Existing code

    val secondMediaItem = MediaItem.fromUri(getString(R.string.media_url_mp3))
    exoPlayer.addMediaItem(secondMediaItem)
    [...]
}
Verifica cómo se comportan los controles del reproductor. Puedes usar  y
y  para navegar por la secuencia de los elementos multimedia.
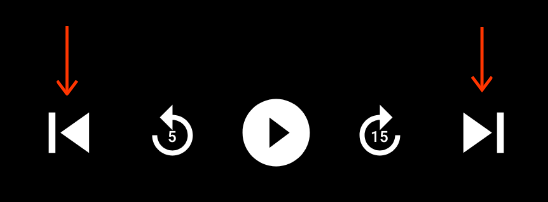
Captura de pantalla: Los controles de reproducción que muestran el botón Siguiente y Anterior
¡Es bastante útil! Para obtener más información, consulta la documentación para desarrolladores sobre elementos multimedia y listas de reproducción, y este artículo sobre la API de lista de reproducción.
5. Transmisión adaptable
La transmisión adaptable es una técnica para transmitir contenido multimedia mediante la variación de la calidad de la transmisión, en función del ancho de banda de red disponible. De esta manera, se le permite al usuario experimentar el contenido con la mejor calidad que permite su ancho de banda.
Por lo general, el mismo contenido multimedia se divide en varias pistas con diferentes calidades (tasas de bits y resoluciones). El reproductor elige una pista en función del ancho de banda de red disponible.
Cada pista se divide en fragmentos de una duración determinada, por lo general, entre 2 y 10 segundos. De esta manera, se le permite al reproductor cambiar con rapidez entre pistas, a medida que cambia el ancho de banda disponible. El reproductor se encarga de unir estos fragmentos para una reproducción perfecta.
Selección de pista adaptable
En el núcleo de la transmisión adaptable, se encuentra la selección de la pista más apropiada para el entorno actual. Actualiza tu app para reproducir contenido multimedia de transmisión adaptable mediante la selección de pista adaptable.
- Actualiza
initializePlayercon el siguiente código:
PlayerActivity.kt
private fun initializePlayer() {
    val trackSelector = DefaultTrackSelector(this).apply {
        setParameters(buildUponParameters().setMaxVideoSizeSd())
    }
    player = ExoPlayer.Builder(this)
        .setTrackSelector(trackSelector)
        .build()
    [...]
}
Primero, crea un DefaultTrackSelector, que se encarga de elegir pistas en el elemento multimedia. Luego, indícale a trackSelector que solo elija pistas de definición estándar o inferior (una buena manera de guardar los datos del usuario a costa de la calidad). Por último, pásale trackSelector al compilador para que se use en la compilación de la instancia de ExoPlayer.
Compila un elemento MediaItem
DASH es un formato de transmisión adaptable que se usa mucho. Para transmitir contenido DASH, tendrás que crear un elemento MediaItem como lo hiciste antes. Sin embargo, esta vez, tenemos que usar un MediaItem.Builder en lugar de fromUri.
Esto se debe a que fromUri usa la extensión del archivo para determinar el formato multimedia subyacente, pero nuestro URI de DASH no tiene una extensión de archivo, por lo que debemos proporcionar un tipo de MIME de APPLICATION_MPD cuando se construye el MediaItem.
- Actualiza
initializePlayerde la siguiente manera:
PlayerActivity.kt
private void initializePlayer() {
    [...]

    // Replace this line...
    val mediaItem = MediaItem.fromUri(getString(R.string.media_url_mp4));

    // ... with this
     val mediaItem = MediaItem.Builder()
         .setUri(getString(R.string.media_url_dash))
         .setMimeType(MimeTypes.APPLICATION_MPD)
         .build()

    // Keep this line
    exoPlayer.setMediaItem(mediaItem)

    // Remove the following lines
    val secondMediaItem = MediaItem.fromUri(getString(R.string.media_url_mp3))
    exoPlayer.addMediaItem(secondMediaItem)
}
- Reinicia la app y observa la transmisión de videos adaptable con DASH en funcionamiento. Con ExoPlayer, es muy sencillo.
Otros formatos de transmisión adaptables
HLS (MimeTypes.APPLICATION_M3U8) y SmoothStreaming (MimeTypes.APPLICATION_SS) son otros formatos de transmisión adaptables de uso general, los cuales son compatibles con ExoPlayer. Para obtener más información sobre la construcción de otras fuentes multimedia adaptables, consulte la app de demostración ExoPlayer.
6. Escucha eventos
En los pasos anteriores, aprendiste a realizar transmisiones multimedia progresivas y adaptables. ExoPlayer hace mucho trabajo detrás de escena para ti, lo que incluye lo siguiente:
- Asignar memoria
- Descargar archivos del contenedor
- Extraer metadatos del contenedor
- Decodificar datos
- Renderizar video, audio y texto en la pantalla y los altoparlantes
Con frecuencia, es útil saber qué hace ExoPlayer en el tiempo de ejecución para comprender y mejorar la experiencia de reproducción de tus usuarios.
Por ejemplo, es posible que desees reflejar los cambios de estado de reproducción en la interfaz de usuario mediante lo siguiente:
- Un ícono giratorio de carga cuando el reproductor entra en un estado de almacenamiento en búfer
- Una superposición con opciones de "ver a continuación" cuando termina la pista
ExoPlayer ofrece varias interfaces de objetos de escucha que brindan devoluciones de llamada para eventos útiles. Utiliza un objeto de escucha para registrar el estado en el que se encuentra el reproductor.
Escucha
- Crea una constante
TAGfuera de la clasePlayerActivity, que usarás para iniciar sesión más tarde.
PlayerActivity.kt
private const val TAG = "PlayerActivity"
- Implementa la interfaz
Player.Listeneren una función de fábrica fuera de la clasePlayerActivity. Se usa para informarte sobre eventos importantes del reproductor, incluidos errores y cambios en el estado de reproducción. - Para anular
onPlaybackStateChanged, agrega el siguiente código:
PlayerActivity.kt
private fun playbackStateListener() = object : Player.Listener {
    override fun onPlaybackStateChanged(playbackState: Int) {
        val stateString: String = when (playbackState) {
            ExoPlayer.STATE_IDLE -> "ExoPlayer.STATE_IDLE      -"
            ExoPlayer.STATE_BUFFERING -> "ExoPlayer.STATE_BUFFERING -"
            ExoPlayer.STATE_READY -> "ExoPlayer.STATE_READY     -"
            ExoPlayer.STATE_ENDED -> "ExoPlayer.STATE_ENDED     -"
            else -> "UNKNOWN_STATE             -"
        }
        Log.d(TAG, "changed state to $stateString")
    }
}
- Declara un miembro privado de tipo
Player.ListenerenPlayerActivity.
PlayerActivity.kt
class PlayerActivity : AppCompatActivity() {
    [...]

    private val playbackStateListener: Player.Listener = playbackStateListener()
}
onPlaybackStateChanged se llama cuando cambia el estado de reproducción. El nuevo estado que brinda el parámetro playbackState.
El reproductor puede estar en uno de los siguientes cuatro estados:
Estado | Descripción |
| Se crea una instancia del reproductor, pero aún no está preparado. |
| El reproductor no puede reproducir desde la posición actual porque no se almacenaron suficientes datos en el búfer. |
| El reproductor puede reproducir de inmediato desde la posición actual. El reproductor comenzará a reproducir medios automáticamente si la propiedad playWhenReady del reproductor es |
| El reproductor terminó de reproducir el contenido multimedia. |
Registra tu objeto de escucha
Para que se realicen devoluciones de llamadas, debes registrar playbackStateListener con el reproductor. Puedes hacerlo en initializePlayer.
- Registra el objeto de escucha antes de preparar el reproductor.
PlayerActivity.kt
private void initializePlayer() {
    [...]
    exoPlayer.seekTo(currentWindow, playbackPosition)
    exoPlayer.addListener(playbackStateListener)
    [...]
}
Nuevamente, debes ordenar para evitar referencias aisladas del reproductor que podrían causar una fuga de memoria.
- Quita el objeto de escucha en
releasePlayer:
PlayerActivity.kt
private void releasePlayer() {
    player?.let { exoPlayer ->
        [...]
        exoPlayer.removeListener(playbackStateListener)
        exoPlayer.release()
    }
    player = null
}
- Abre logcat y ejecuta la app.
- Utiliza los controles de la UI para buscar, pausar y reanudar la reproducción. Deberías ver el cambio de estado de reproducción en los registros.
Más información
ExoPlayer ofrece una serie de otros objetos de escucha, que son útiles para comprender la experiencia de reproducción del usuario. Hay objetos de escucha para audio y video, así como un AnalyticsListener, que incluye las devoluciones de llamada de todos los objetos de escucha. Algunos de los métodos más importantes son los siguientes:
onRenderedFirstFramese llama cuando se renderiza el primer fotograma de un video. Con esto, puedes calcular cuánto tiempo tuvo que esperar el usuario para ver contenido significativo en la pantalla.onDroppedVideoFramesse llama cuando disminuyen los fotogramas de video. La disminución de fotogramas indica que la reproducción tenga bloqueos, y es probable que la experiencia del usuario sea deficiente.onAudioUnderrunse llama cuando se produce un subdesbordamiento de audio. Los subdesbordamiento provocan errores audibles en el sonido y son más notorios que la disminución de los fotogramas de video.
AnalyticsListener se puede agregar a player con addListener. También existen métodos correspondientes para los objetos de escucha de audio y video.
La interfaz Player.Listener también incluye la devolución de llamada más general de onEvents que se activa para cualquier cambio de estado en el reproductor. Algunos casos en los que puede resultarle útil esta situación se dan a la hora de responder a varios cambios de estado al mismo tiempo o responder de la misma manera a varios cambios de estado diferentes. Consulta la documentación de referencia para ver más ejemplos de cuándo se recomienda usar la devolución de llamada onEvents en lugar de las devoluciones de llamada de cambio de estado individuales.
Piensa en los eventos que son importantes para tus usuarios y app. Para obtener más información, consulta Cómo escuchar eventos del reproductor. ¡Eso es todo sobre los objetos de escucha de eventos!
7. Felicitaciones
¡Felicitaciones! Aprendiste mucho sobre la integración de ExoPlayer con tu app.
Más información
Para obtener más información sobre ExoPlayer, consulta la guía para desarrolladores y el código fuente, y suscríbete al blog de ExoPlayer.