
スマートウォッチの通知はスマートフォンと同じ API を使用します。構造も同じです。
スマートウォッチに通知が表示される仕組みは 2 通りあります。
- モバイルアプリが通知を作成し、その通知をシステムがスマートウォッチに自動的にブリッジする。
- ウェアラブル アプリが通知を作成する。
どちらのシナリオでも、NotificationCompat.Builder クラスを使用して通知を作成します。ビルダークラスを使用して通知を作成すると、システムによって通知を適切に表示するための処理が行われます。たとえば、モバイルアプリから通知を発行すると、各通知は通知ストリームにカードとして表示されます。
次の例は、通知がどのように表示されるかを示しています。
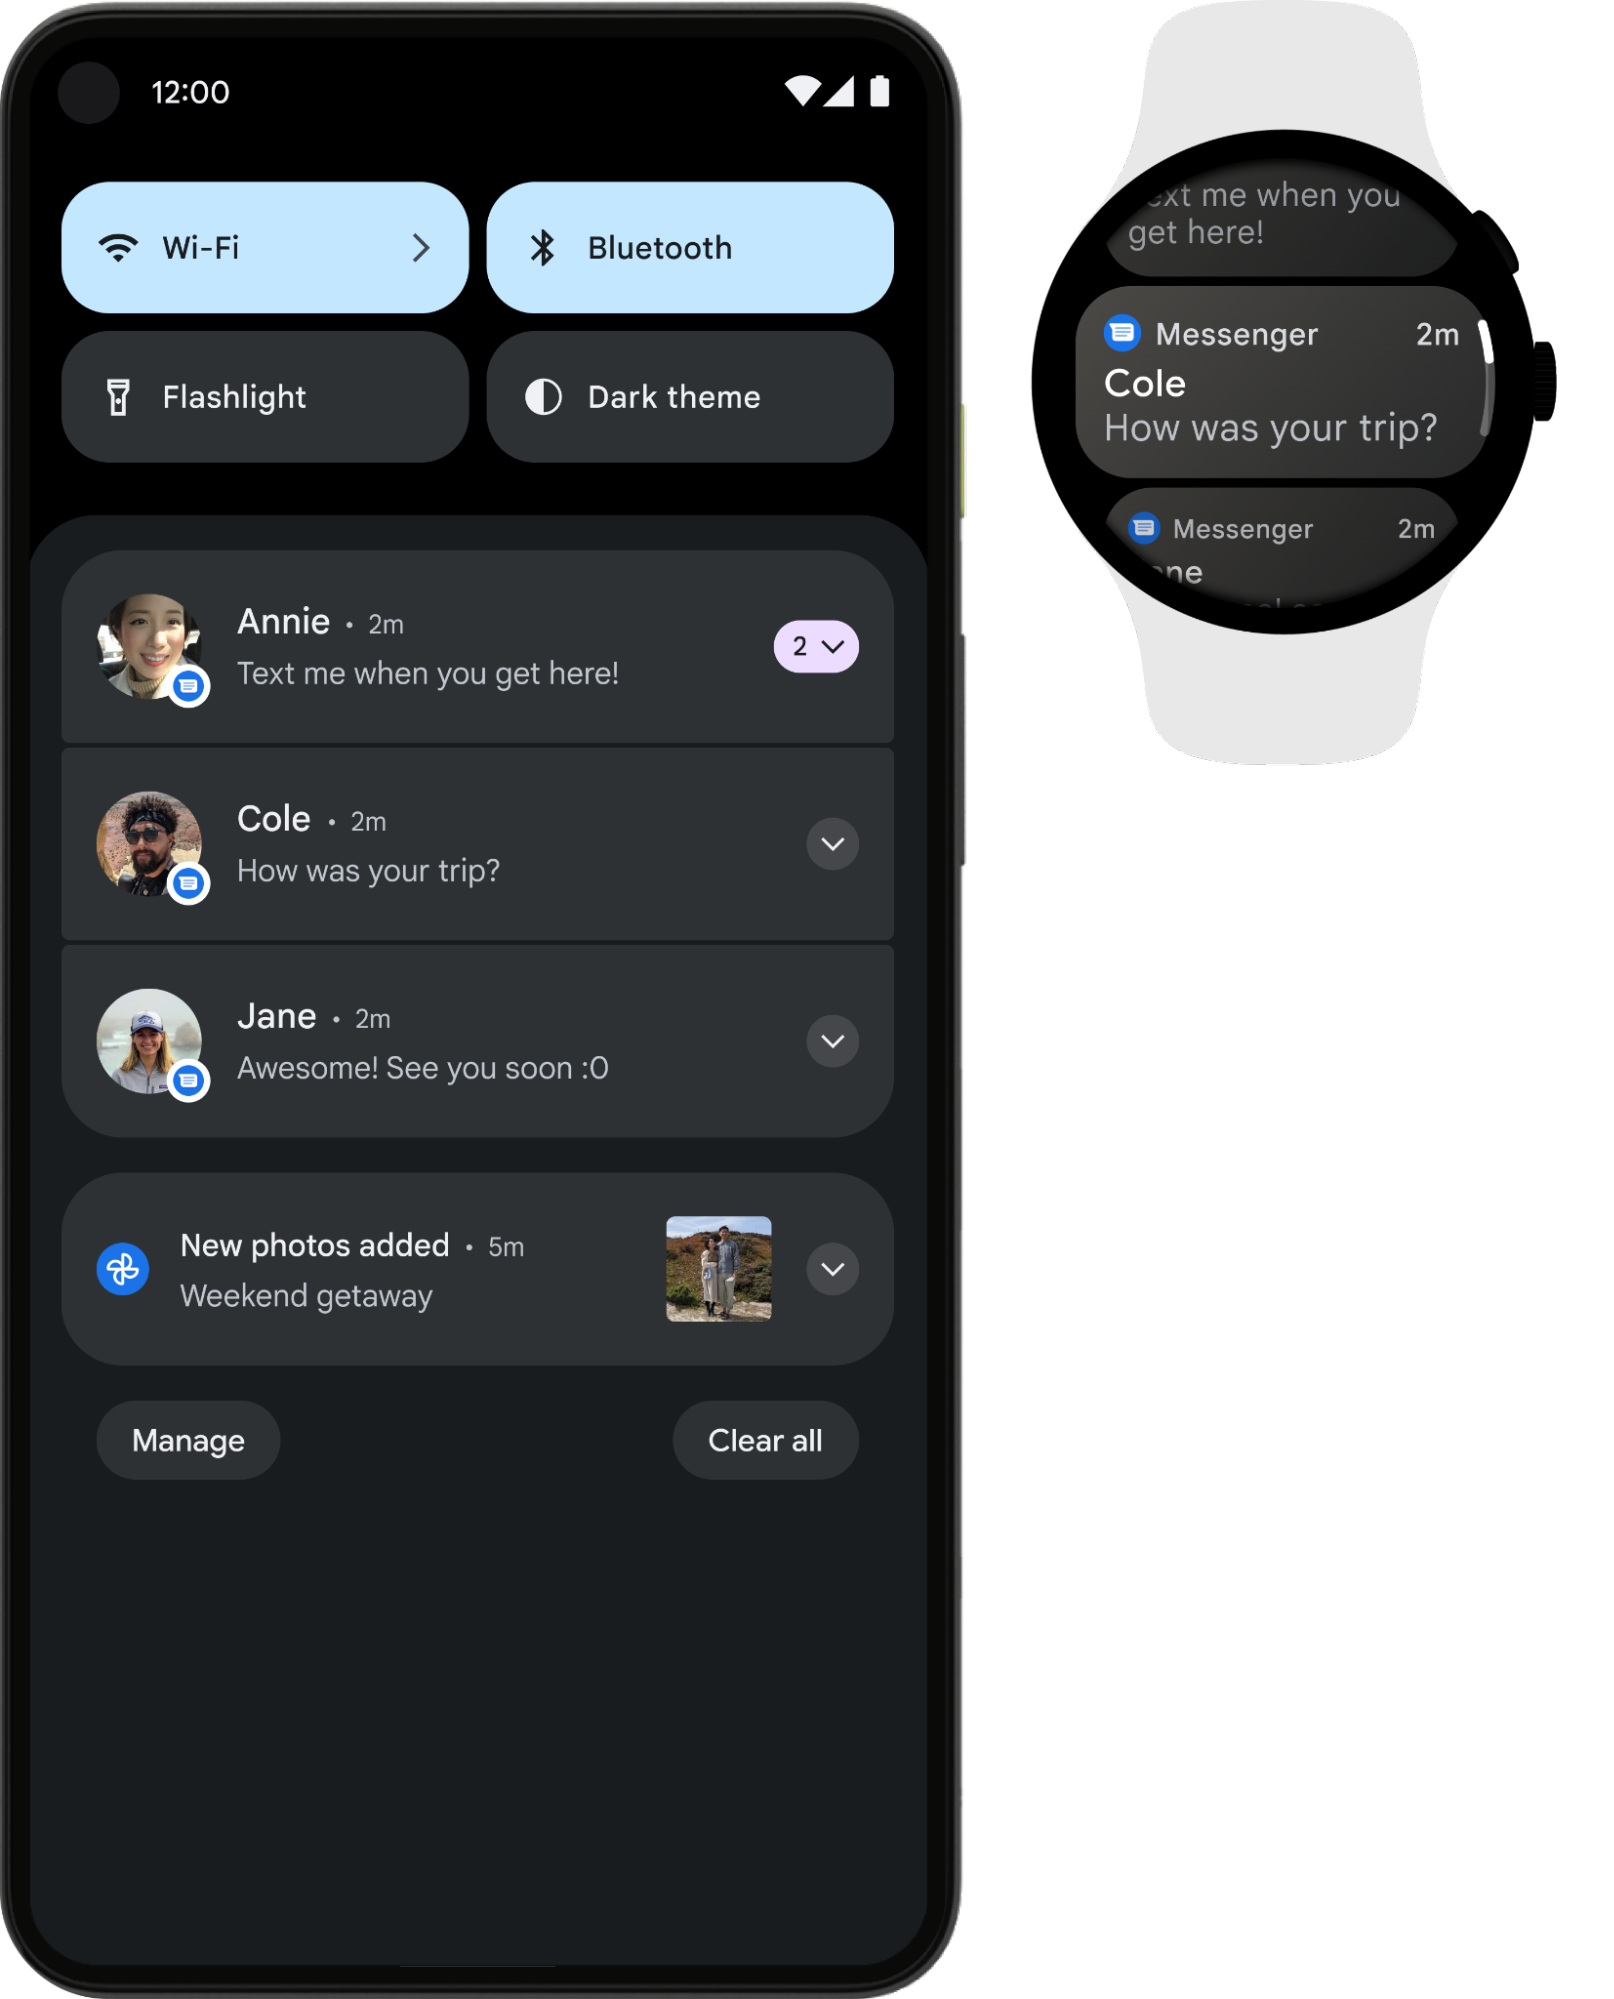
図 1. スマートフォンとスマートウォッチに表示された同じ通知
最良の結果を得るには、いずれかの NotificationCompat.Style サブクラスを使用します。
注:
RemoteViews を使用すると、カスタム レイアウトの通知が取り除かれ、ウェアラブルにはテキストとアイコンだけが表示されます。
おすすめのウェアラブル向け通知
展開可能な通知は、ウェアラブル ユーザーを惹きつける方法として優れているため、すべての通知の出発点として使用します。閉じた状態は、ひと目ですぐわかるよう通知トレイに表示されます。ユーザーがタップすると通知が開き、追加のコンテンツとアクションについて、臨場感のあるスクロール可能な表示が行われます。
いずれかの NotificationCompat.Style サブクラスを使用して、モバイルの場合と同じように展開可能な通知を作成できます。たとえば、NotificationCompat.MessagingStyle を使用した標準的な通知は次のようになります。
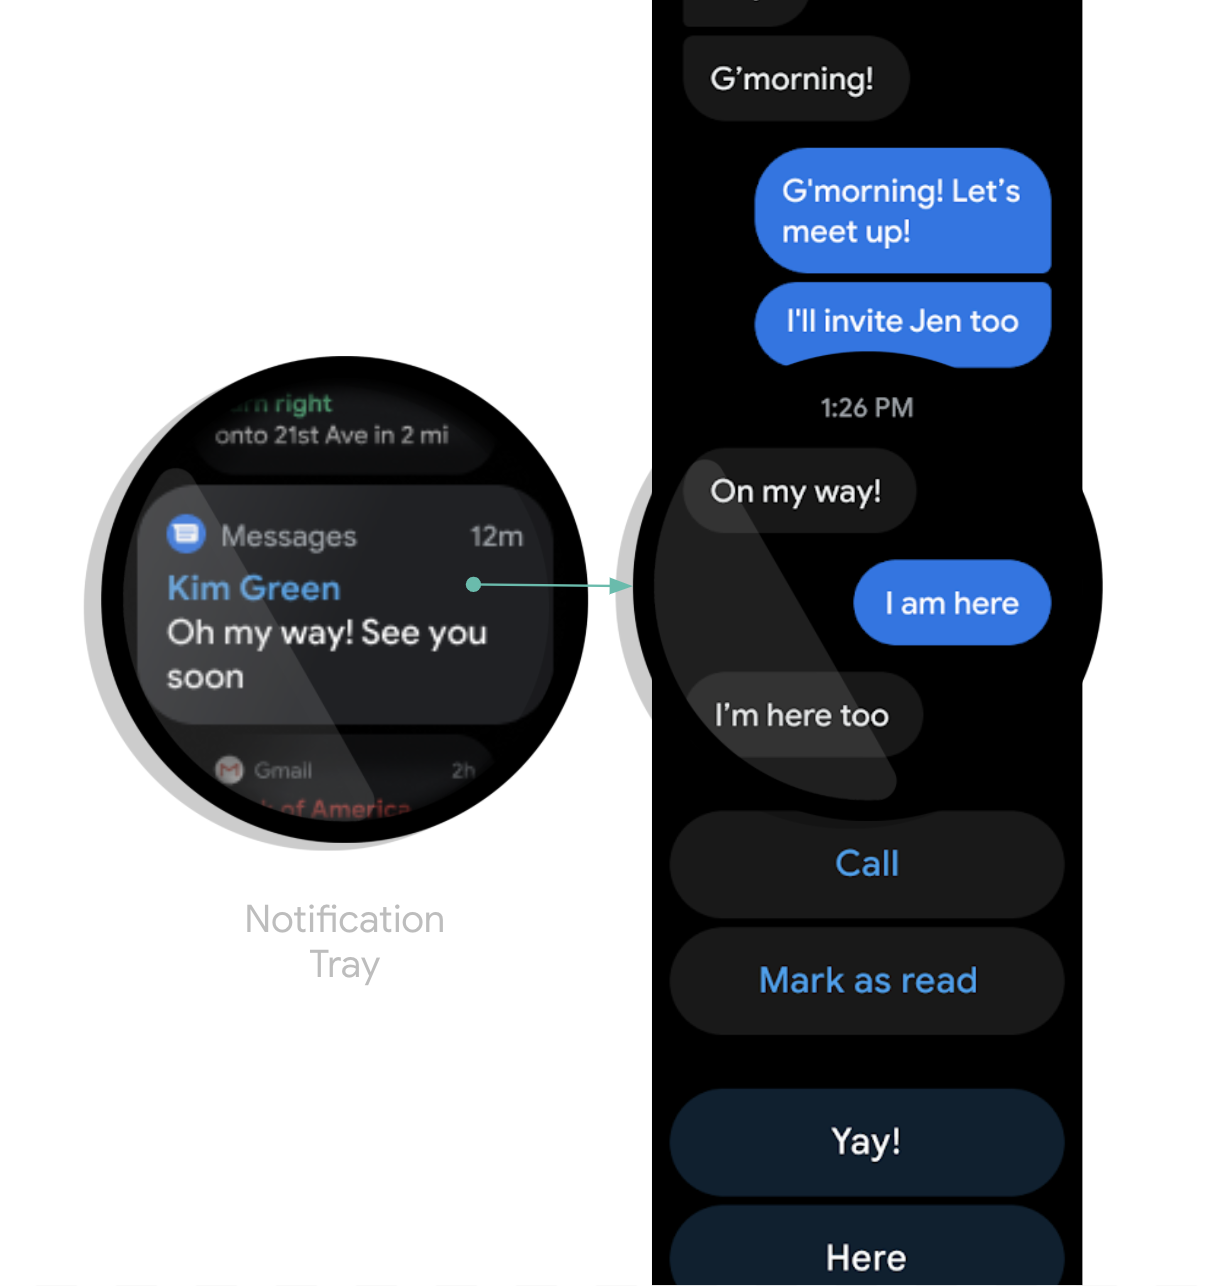
図 2. Wear OS の MessagingStyle 通知の例
開いた状態の通知には、下部に複数のアクションが重ねられています。
ヒント: 通知に「返信」アクションが含まれている場合(メッセージ アプリなど)、通知の動作を拡張できます。たとえば setChoices() を使用して、ウェアラブルから音声入力で直接返信したり、事前定義のテキストで返信したりできるようにします。
詳しくは、返信ボタンを追加するをご覧ください。
通知の重複を避ける
デフォルトでは、通知はコンパニオン スマートフォン アプリからペア設定されているスマートウォッチにブリッジされます。これは、ウェアラブル アプリをインストールしていない場合に最適な方法です。
ただし、スタンドアロンのスマートウォッチ アプリとコンパニオン スマートフォン アプリを作成すると、これらのアプリによって重複する通知が作成されます。
Wear OS では、Bridging API を使用して重複する通知を停止できます。これは、Wear OS 5 以降を搭載したデバイスのアプリでは特に重要です。モバイル デバイスで閉じることができる通知の一部は、Wear OS デバイスでは閉じることができないためです。詳しくは、通知のブリッジ オプションをご覧ください。
ウェアラブル固有の機能を通知に追加する
ウェアラブル固有の機能を通知に追加する必要がある場合は、
NotificationCompat.WearableExtender クラスを使用して目的のオプションを指定できます。この API を使用する手順は次のとおりです。
注: フレームワークの NotificationManager を使用する場合は、NotificationCompat.WearableExtender の一部の機能が動作しないため、必ず NotificationCompat を使用してください。
この例では、通知に Wear 固有のアクションを設定し、
dismissal ID も設定する方法を示します。通知が消去されると、同じ消去 ID を持つ他のすべての通知がスマートウォッチとコンパニオン スマートフォンで消去されます。消去 ID を取得するには、
getDismissalId() を使用します。
// This intent will be fired as a result of the user clicking the "Open on watch" action. // However, it executes on the phone, not on the watch. Typically, the Activity should then use // RemoteActivityHelper to then launch the correct activity on the watch. val intent = Intent(context, LaunchOnWearActivity::class.java) val wearPendingIntent = PendingIntent.getActivity( context, wearRequestCode, intent, PendingIntent.FLAG_UPDATE_CURRENT or PendingIntent.FLAG_IMMUTABLE ) val openOnWatchAction = NotificationCompat.Action.Builder( R.drawable.watch, "Open on watch", wearPendingIntent ) .build() val wearableExtender = NotificationCompat.WearableExtender() // This action will only be shown on the watch, not on the phone. // Actions added to the Notification builder directly will not be shown on the watch, // because one or more actions are defined in the WearableExtender. .addAction(openOnWatchAction) // This synchronizes dismissals between watch and phone. .setDismissalId(chatId) val notification = NotificationCompat.Builder(context, channelId) // ... set other fields ... .extend(wearableExtender) .build()
ウェアラブル デバイスから電話アプリを起動する
ブリッジされた通知を使用している場合、すべての通知にスマートフォンのアプリを起動するボタンが自動的に含まれます。ただし、スマートウォッチで作成されたローカル通知を使用している場合は、次の手順でスマートフォンでアプリを起動するボタンを作成します。
ConfirmationActivityを拡張する新しいActivityを作成します。- 新しい
ActivityでRemoteActivityHelperを使用して、電話アプリを起動します。 - 通知から
Activityを起動するIntentをビルドするときは、EXTRA_ANIMATION_TYPEエクストラをOPEN_ON_PHONE_ANIMATIONに設定します。
注: BroadcastReceiver を通知アクションのターゲットとして使用することはできません。