
After designing individual screens for each user journey, you might have a few vertical or single screens. Next, you have to decide how to design these screens to work together and how to implement the navigation.
Design
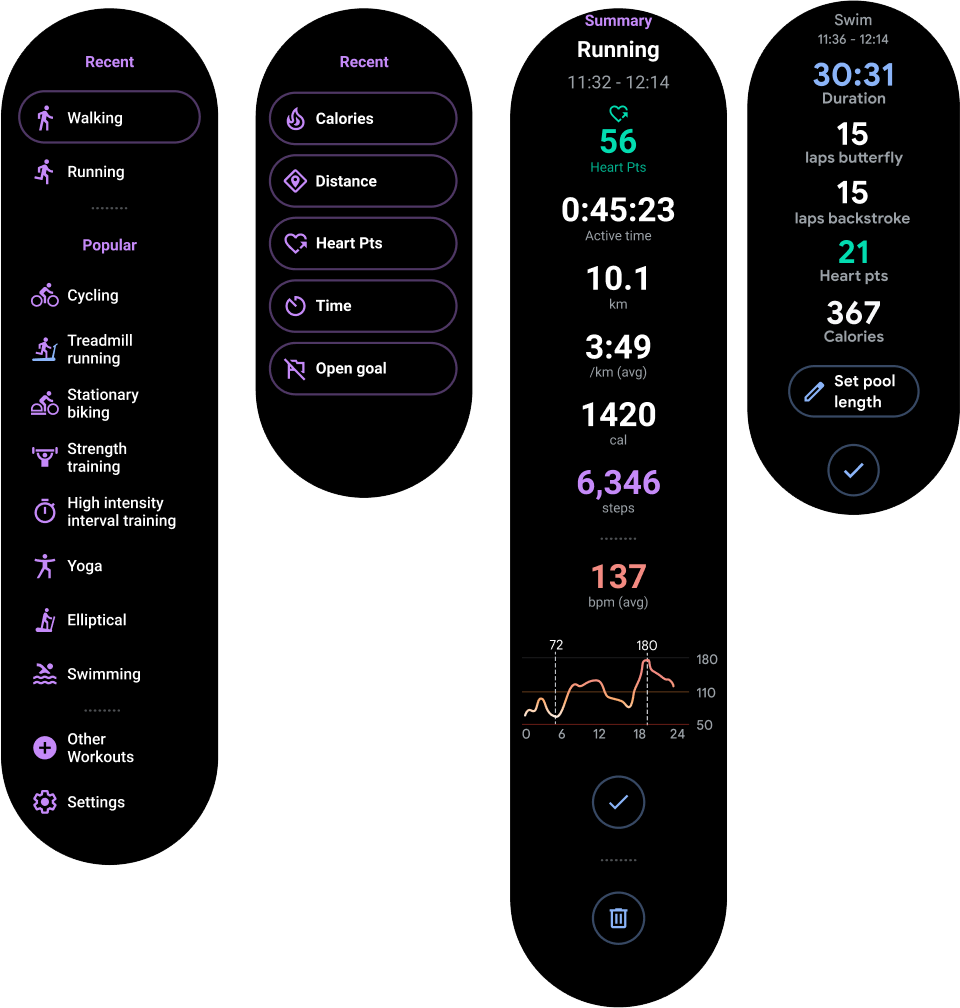
Keep your app's hierarchy shallow and linear, as called out in the app design guidelines.
To start, your app's launcher should open the most common user journey. Design each user journey with the most important content at the top. For vertical containers, use the bottom to link to other, less-common user journeys and the settings.
When users enter one of your screens, make sure they can use the swipe-to-dismiss gesture to navigate down the back stack.
Implement the navigation
When you implement your navigation, you have three options, described in the following sections:
- Activities only, which is the recommended approach
- Activities and fragments
- Jetpack Navigation
Activities only
Since vertical screens are typically one level deep, you can implement all your screens using activities and without using fragments.
We strongly recommend this approach. It simplifies your code, and activities automatically support swipe-to-dismiss. This also makes implementing ambient mode simpler.
Note: Make your activities inherit from a
ComponentActivity if
you are not using fragments. The other activity types use mobile-specific UI elements you don't
need for Wear OS.
Activities and fragments
You can use fragments with activities in your Wear OS app. However, we don't recommend this, as there isn't a clear advantage to using fragments to create a shallow and flat architecture.
Note: If you are using fragments, make them inherit from
FragmentActivity. The
other activity types use mobile-specific UI elements you don't need for Wear OS.
Some of the difficulties with using fragments in your Wear OS app include the following:
- You must implement the swipe-to-dismiss yourself. Otherwise, when the user performs a swipe, they exit the entire app.
-
If you are using
AmbientMode, you must customize it to work properly.AmbientModeis set on the activity, so you have to take that into account when implementing fragments.
To support swipe-to-dismiss with fragments, you must wrap the fragment-containing
view in the
SwipeDismissFrameLayout
class. See
The swipe-to-dismiss gesture
for more information. Doing this provides users a consistent experience with your app.
Note: When using fragments, use
FragmentManager.add
rather than
FragmentManager.replace
to support the swipe-to-dismiss gesture.
This helps ensure that your previous fragment renders under the top fragment while it is being
swiped away.
Jetpack Navigation
Jetpack Navigation can work on Wear OS, but it has the same drawbacks as fragments. It adds development work and, because a Wear OS app's hierarchy is generally shallow and linear, it doesn't offer many advantages. An activity-only approach is best.
To fully leverage Jetpack Navigation, do the following:
-
Make sure every fragment uses a
SwipeDismissFrameLayoutas its root, and manually use the dismiss action to go back in the navigation graph. -
Implement a custom
FragmentNavigatorthat renders fragments on top of each other.