
Tiles are not apps, and so are deployed and launched using different mechanisms.
When a device has developer options enabled (emulators have these features
enabled by default), additional features supporting tile development become
available for use in both Android Studio and adb.
Deploy tiles
To deploy your tile, you can install your app on a physical device or emulator using Android Studio, as described in Build and run your app. Then, following the same steps as regular users, manually add the tile to the tiles carousel.
During active development, you might find it easier and faster to use Android Studio's "Wear OS Tile" Run/Debug Configuration feature. This method deploys and activates your tile automatically, allowing for immediate interaction without additional manual steps.
Create configuration automatically
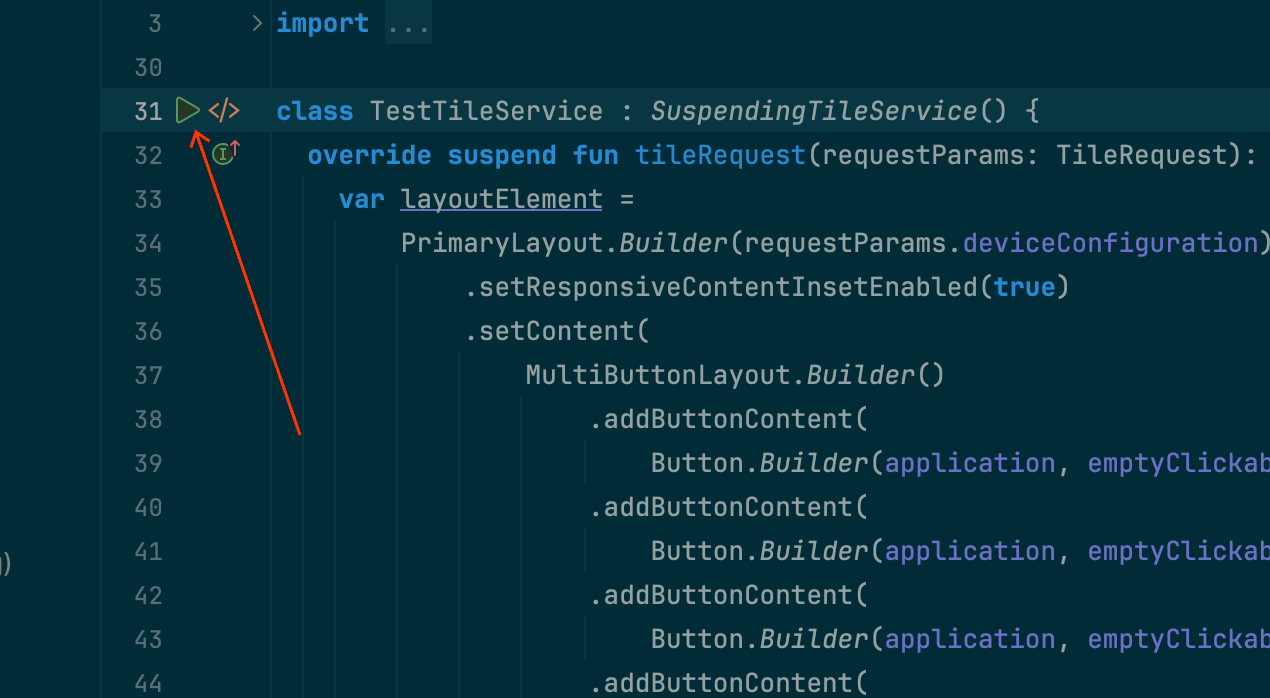
The easiest way to deploy and run a tile is to use the "run service" icon in the gutter. This automatically creates a run configuration if it doesn't already exist. See Wear OS run/debug configurations for more information.
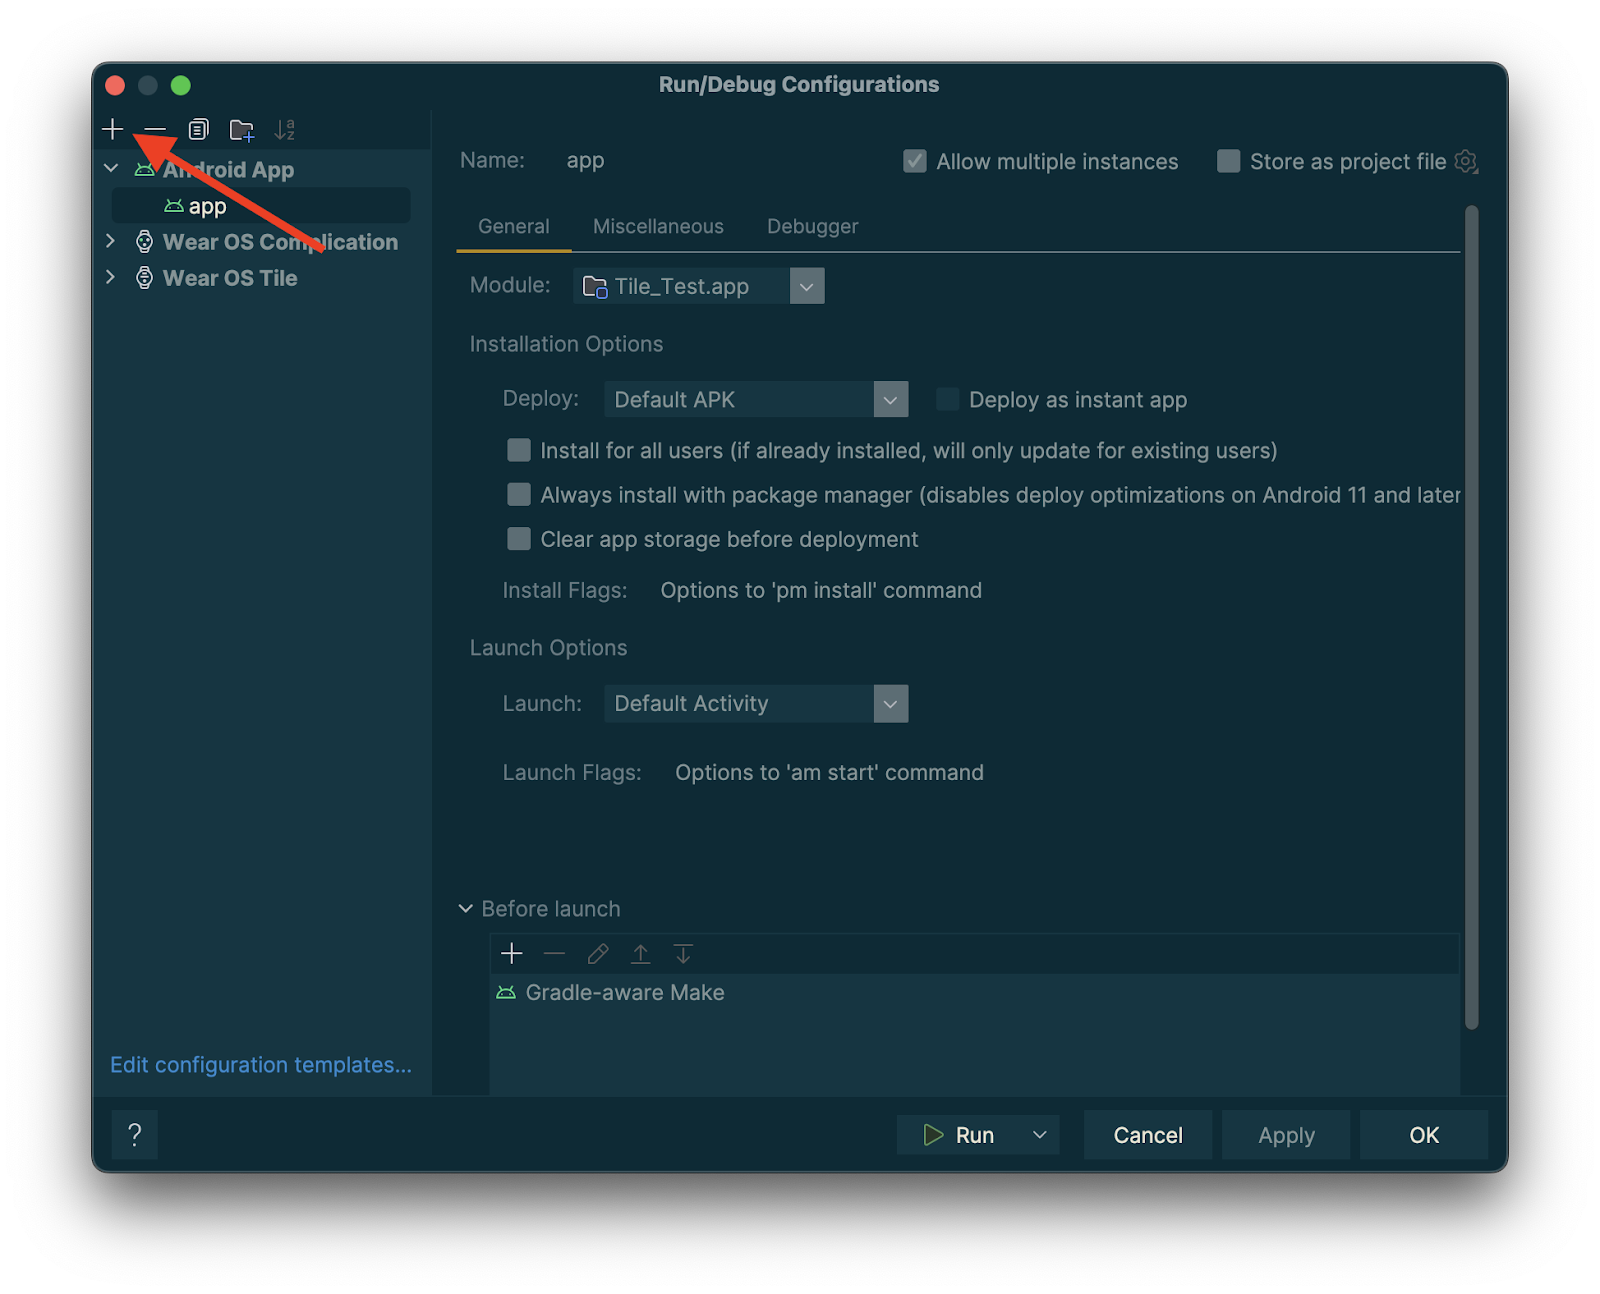
Create configuration manually
If automatic configuration doesn't work, or you want more control over the result, see the following instructions. The screenshots are from Android Studio Meerkat (2024.3.1).
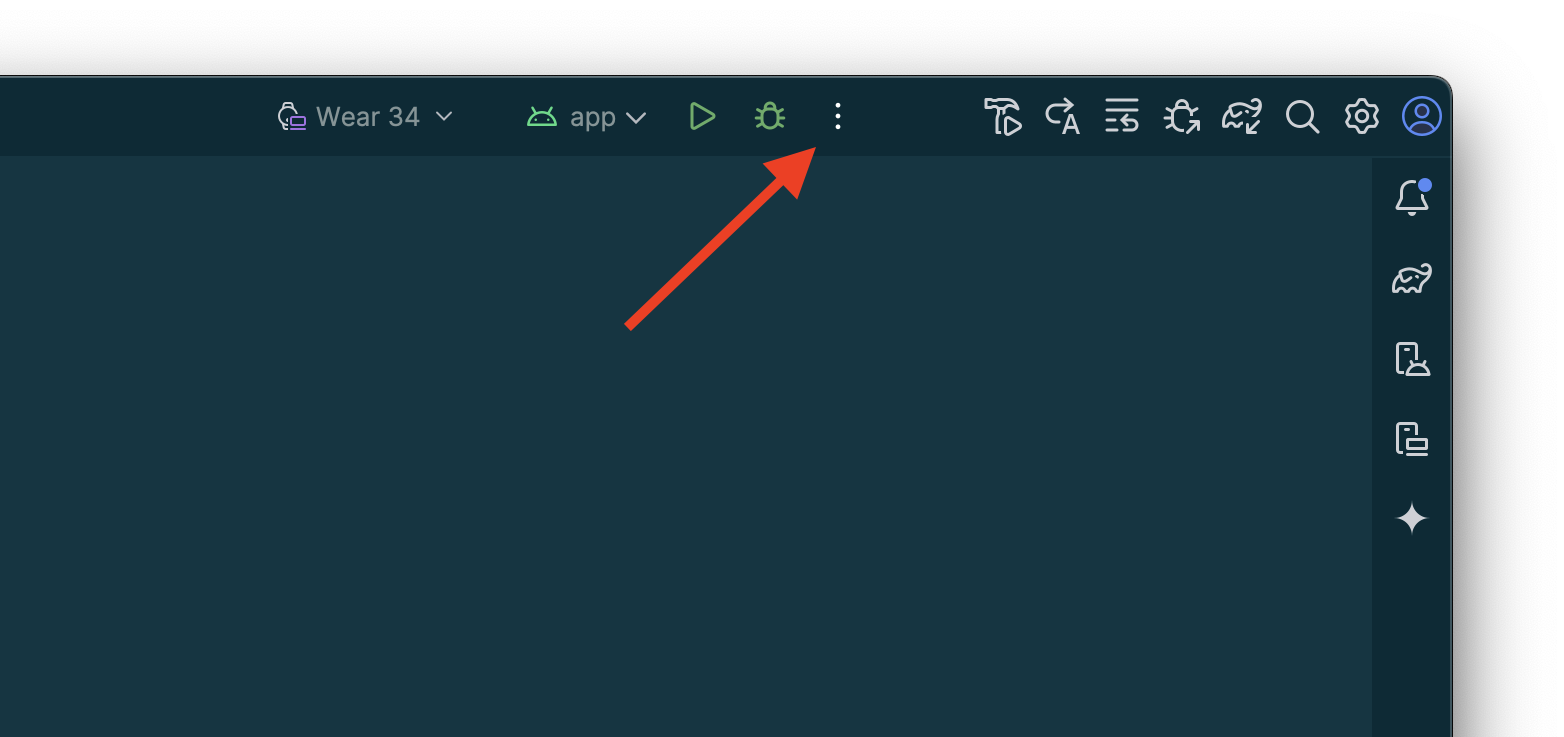
Select the "⋮" ("hamburger") option from the title bar.
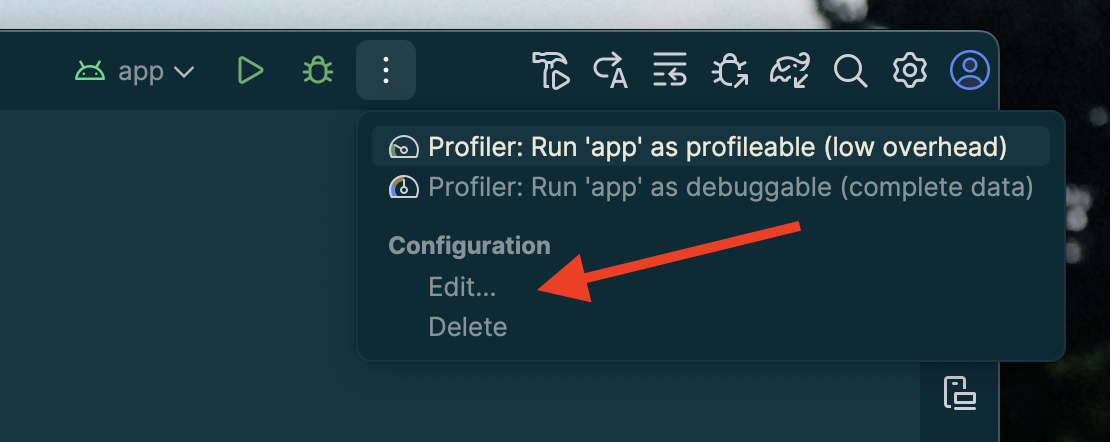
Select "Edit…".
Select "+" to add a configuration on the dialog that appears.
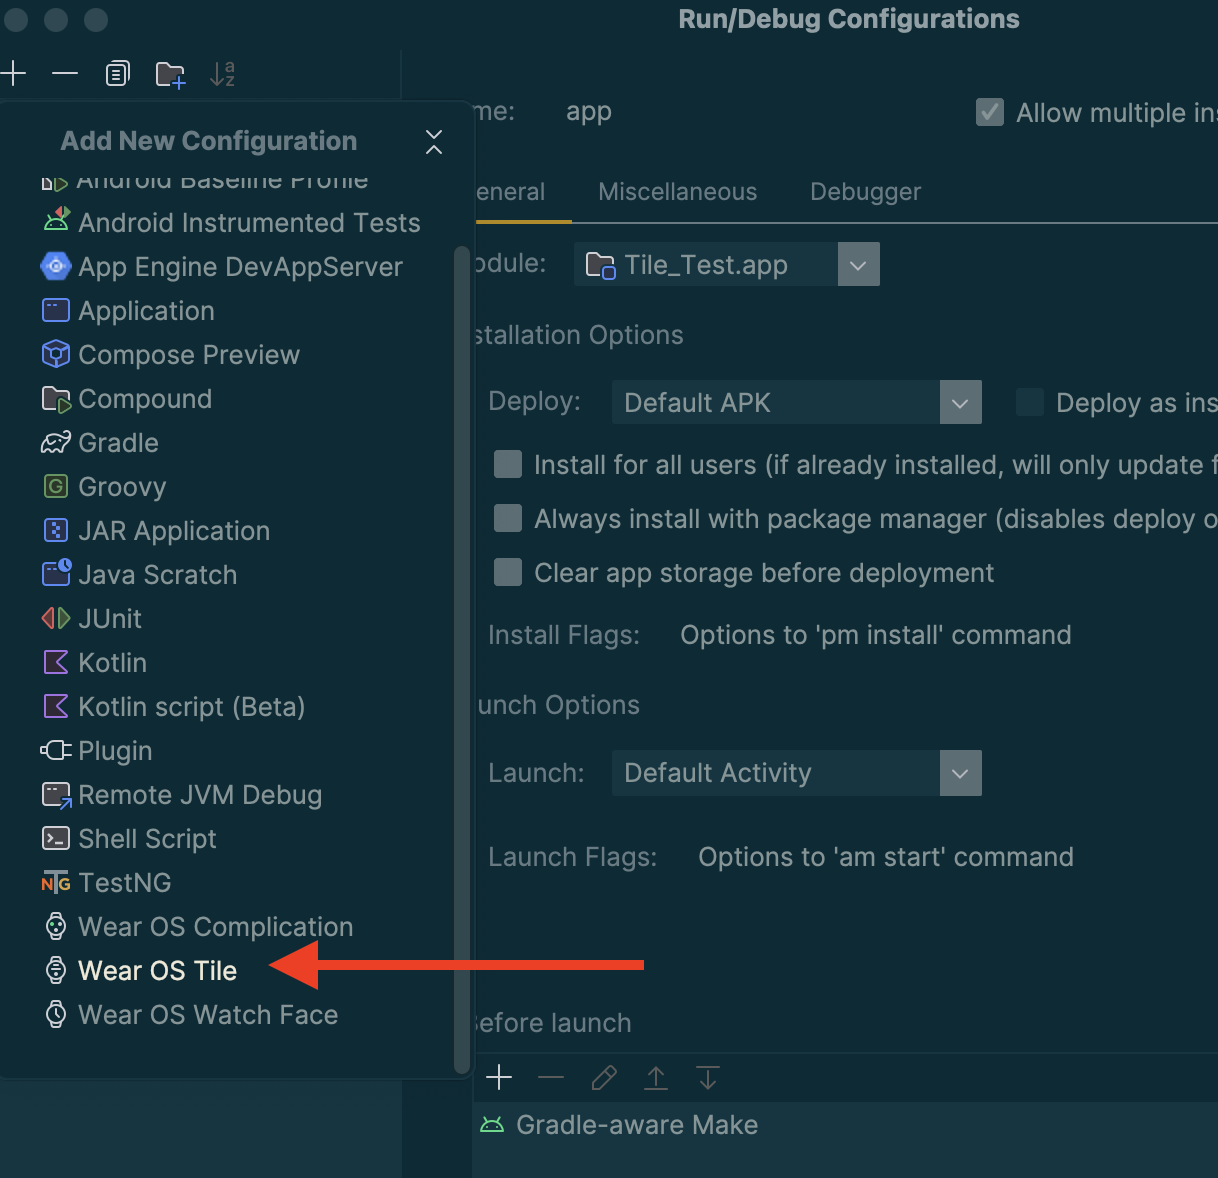
Select "Wear OS Tile" as the type of the new configuration.
Enter a name for your configuration and select the module and tile as appropriate.
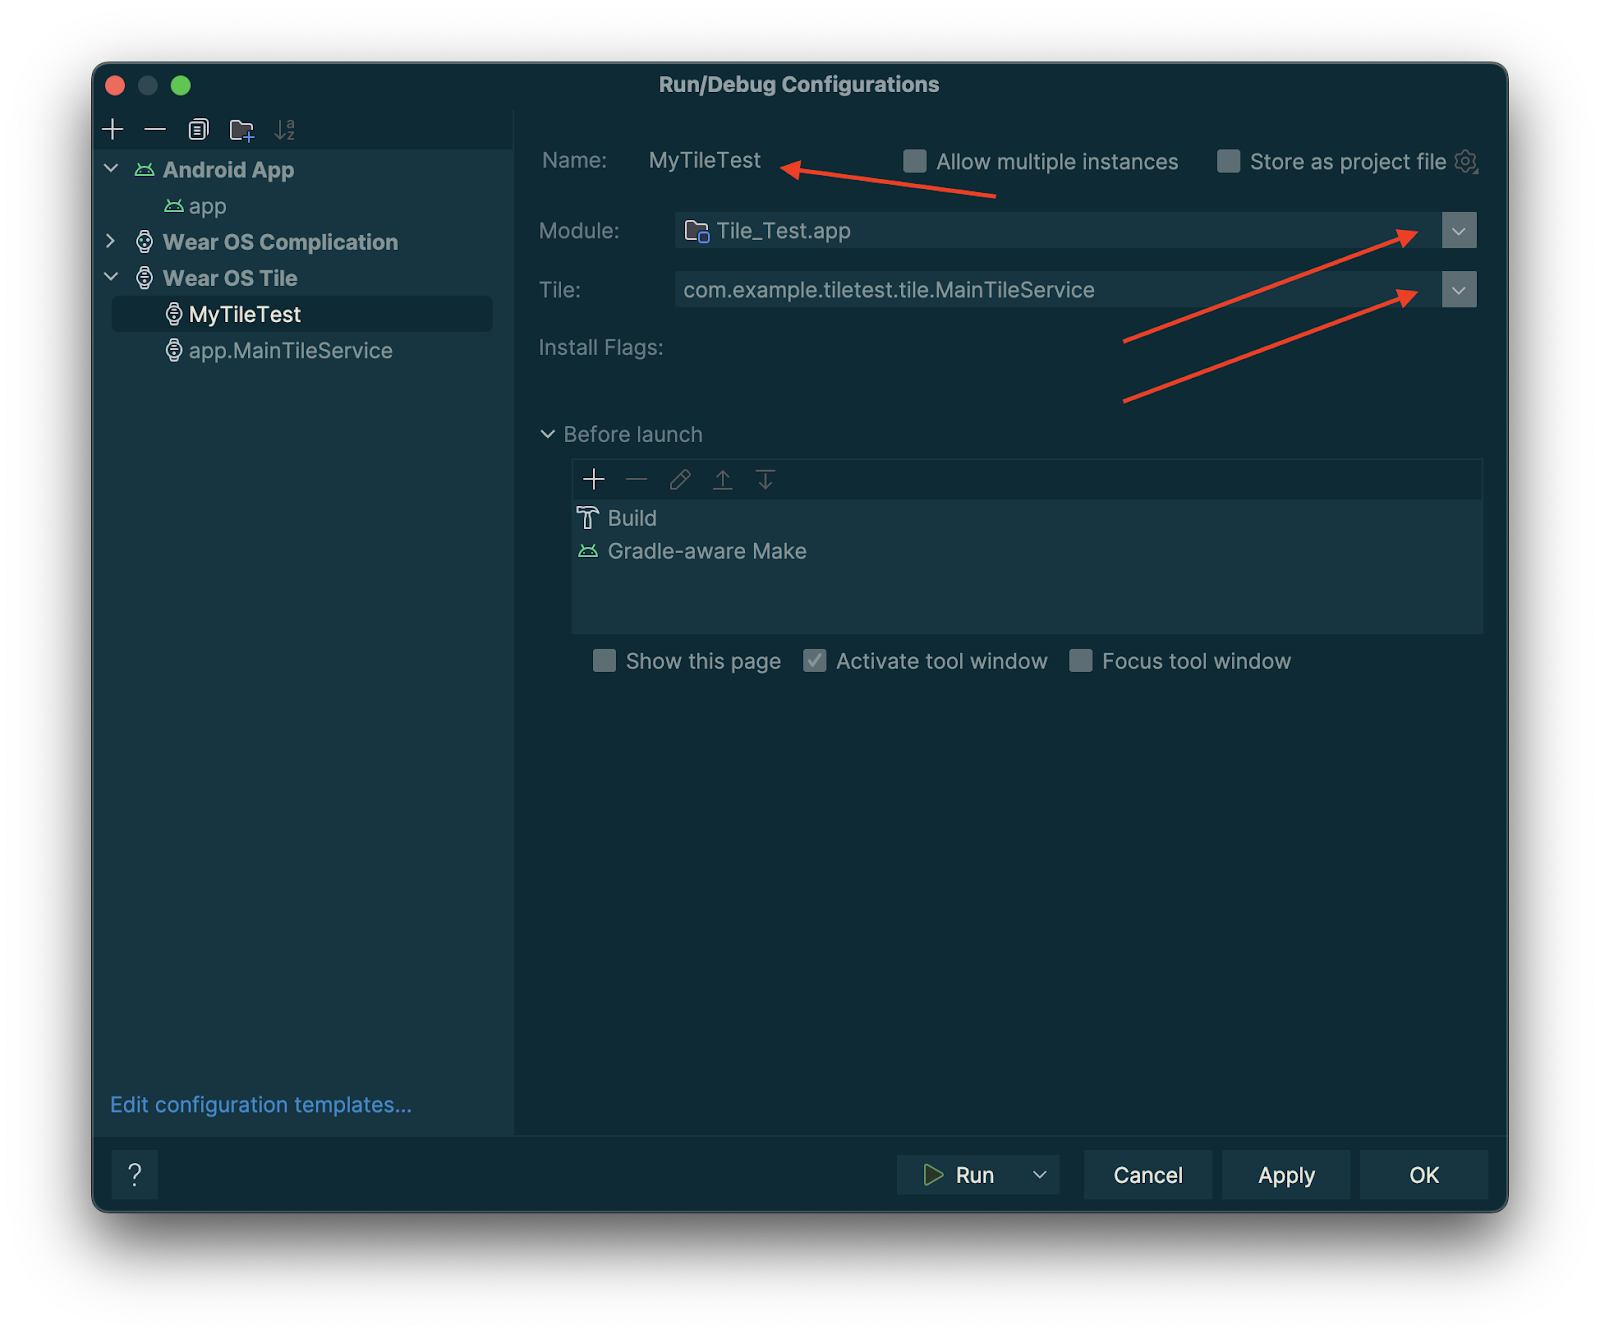
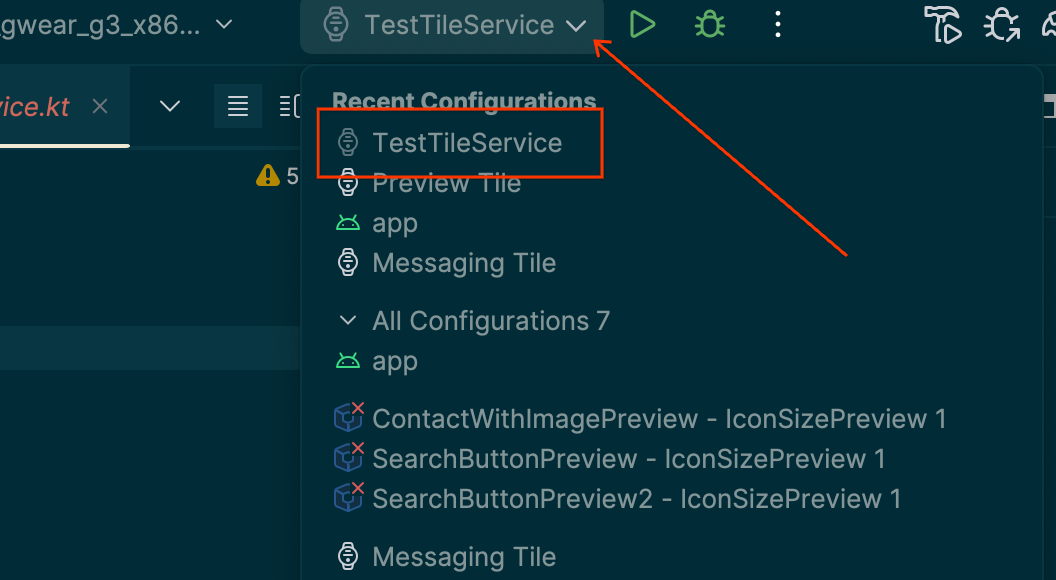
Tap "OK". Your configuration will appear in the title bar. Tap the "▷" ("run") button and your tile will be deployed and activated.
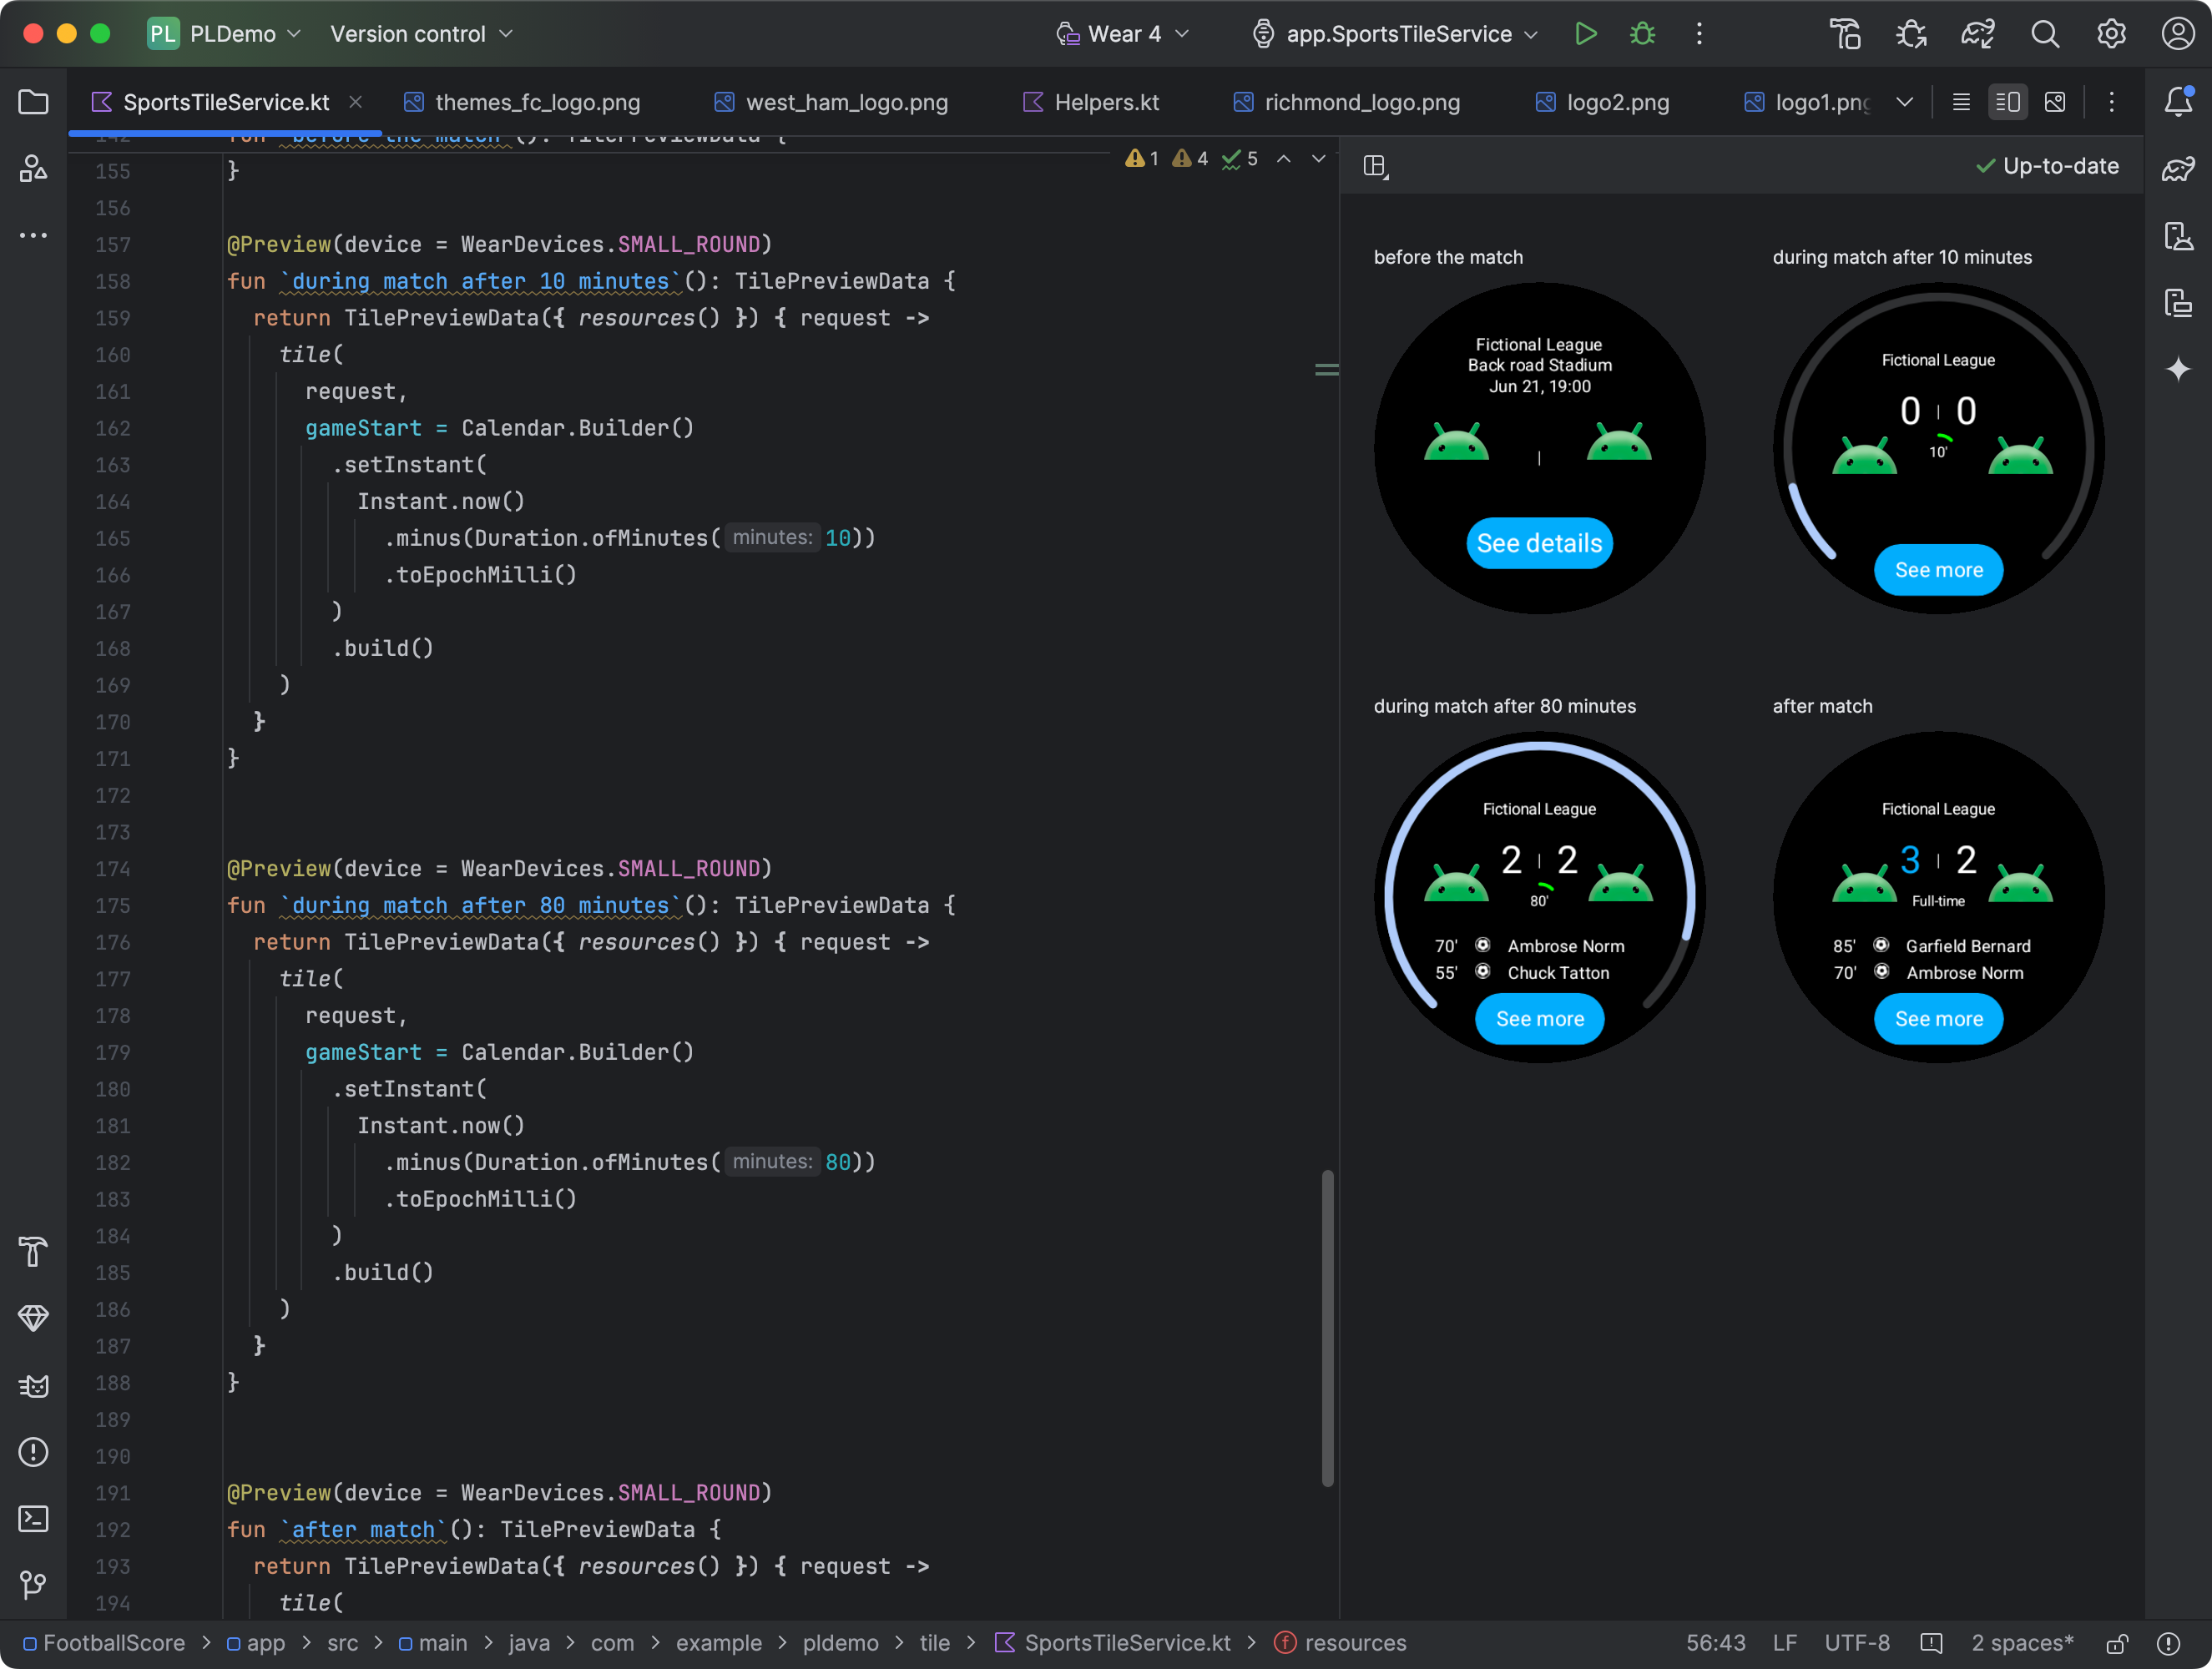
Preview tiles in Android Studio
Starting in Android Studio Koala Feature Drop, you can view snapshots of your Wear OS app's tiles. This panel is particularly useful if your tile's appearance changes in response to conditions, such as different content depending on the device's display size, or a sports event reaching halftime.
Add dependencies
Include the following dependencies in your app's build.gradle.kts or
build.gradle file:
dependencies {
    implementation("androidx.wear.tiles:tiles-tooling-preview:1.6.1")
    debugImplementation("androidx.wear.tiles:tiles-tooling:1.6.1")
    implementation("androidx.wear:wear-tooling-preview:1.0.0")
}
Configure tile previews
To see a preview of your tile's appearance on different Wear OS display sizes,
add the @Preview annotation, and pass in the device parameter. Note that
this @Preview annotation is from a different package than the one you use for
composable previews.
@Preview(device = WearDevices.SMALL_ROUND) @Preview(device = WearDevices.LARGE_ROUND) fun tilePreview(context: Context) = TilePreviewData { request -> TilePreviewHelper.singleTimelineEntryTileBuilder( buildMyTileLayout(context, request.deviceConfiguration) ).build() }
Add and register resources
If your tile uses Android resources, you will need to register them within the
onTileResourceRequest parameter of TilePreviewData, as shown in the
following code snippet:
@Preview(device = WearDevices.SMALL_ROUND) fun previewWithResources(context: Context) = TilePreviewData( onTileResourceRequest = { request -> Resources.Builder() .setVersion(RESOURCES_VERSION) .addIdToImageMapping( myImageId, getImageById(R.drawable.animated_walk) ) .build() }, onTileRequest = { request -> TilePreviewHelper.singleTimelineEntryTileBuilder( buildMyTileLayout(context, request.deviceConfiguration) ).build() } )
Show specific values from platform data sources
If your tile uses platform data—such as heart rate, calories, distance, and steps—the tile shows default values for them.
To show a specific value, set the platformDataValues parameter when creating
the TilePreviewData object, as shown in the following code snippet:
@Preview(device = WearDevices.SMALL_ROUND) fun previewWithPlatformOverride(context: Context) = TilePreviewData( platformDataValues = PlatformDataValues.of( PlatformHealthSources.Keys.HEART_RATE_BPM, DynamicDataBuilders.DynamicDataValue.fromFloat(160f) ), onTileRequest = { request -> TilePreviewHelper.singleTimelineEntryTileBuilder( buildMyTileLayoutDynamic(context, request.deviceConfiguration) ).build() } )
Manipulate tiles using adb
adb can be used to programmatically install, remove and activate tiles
during development.
In the following commands, ComponentName is a string composed of the package
name and a class inside that package, for example
com.example.wear.tiles/com.example.wear.tiles.PreviewTileService.
add-tile
Adds a tile provided by COMPONENT_NAME and returns the index.
adb shell am broadcast -a com.google.android.wearable.app.DEBUG_SURFACE --es operation add-tile --ecn component [COMPONENT_NAME]
Example output:
Broadcast completed: result=1, data="Index=[0]"
If a tile already exists in the carousel, it's removed and reinserted in the
same location. Otherwise, it's inserted at Index[0]. Also, if the carousel is
at its maximum capacity, the last tile is removed to make room for the new tile.
show-tile
Activate tile at index TILE_INDEX.
adb shell am broadcast -a com.google.android.wearable.app.DEBUG_SYSUI --es operation show-tile --ei index [TILE_INDEX]
Example output:
Broadcast completed: result=1
remove-tile
Removes all tile instances on the carousel associated with COMPONENT_NAME.
adb shell am broadcast -a com.google.android.wearable.app.DEBUG_SURFACE --es operation remove-tile --ecn component [COMPONENT_NAME]
Example output:
result=1, data="Tile(s) removed."
Return values
- result=0: No broadcast receiver responded to this command, most likely because the Wear OS version is too old, or the debug process is not running.
- result=1: Success.
- result>1: Error.