


डायलॉग, एक छोटी विंडो होती है. इसमें उपयोगकर्ता से कोई फ़ैसला लेने या अतिरिक्त जानकारी डालने के लिए कहा जाता है. डायलॉग, स्क्रीन पर पूरी जगह नहीं लेता. आम तौर पर, इसका इस्तेमाल मॉडल इवेंट के लिए किया जाता है. इनमें उपयोगकर्ताओं को आगे बढ़ने से पहले कोई कार्रवाई करनी होती है.

Dialog
क्लास, डायलॉग के लिए बेस क्लास है. हालांकि, Dialog
को सीधे तौर पर इंस्टैंशिएट न करें. इसके बजाय, इनमें से किसी एक सबक्लास का इस्तेमाल करें:
AlertDialog- यह डायलॉग, टाइटल, ज़्यादा से ज़्यादा तीन बटन, चुने जा सकने वाले आइटम की सूची या कस्टम लेआउट दिखा सकता है.
DatePickerDialogयाTimePickerDialog- यह डायलॉग, पहले से तय यूज़र इंटरफ़ेस (यूआई) के साथ आता है. इसकी मदद से, उपयोगकर्ता तारीख या समय चुन सकता है.
ये क्लास, आपके डायलॉग के लिए स्टाइल और स्ट्रक्चर तय करती हैं. आपको अपने डायलॉग के लिए, DialogFragment की भी ज़रूरत होती है. यह डायलॉग के लिए कंटेनर का काम करता है. DialogFragment क्लास, आपके डायलॉग को बनाने और उसकी दिखावट को मैनेज करने के लिए ज़रूरी सभी कंट्रोल उपलब्ध कराती है.
इसके लिए, Dialog ऑब्जेक्ट पर तरीकों को कॉल करने की ज़रूरत नहीं होती.
डायलॉग को मैनेज करने के लिए, DialogFragment का इस्तेमाल करने से, लाइफ़साइकल के इवेंट को सही तरीके से हैंडल किया जा सकता है. जैसे, जब उपयोगकर्ता 'वापस जाएं' बटन पर टैप करता है या स्क्रीन को घुमाता है. DialogFragment क्लास की मदद से, डायलॉग के यूज़र इंटरफ़ेस (यूआई) को बड़े यूज़र इंटरफ़ेस (यूआई) में एंबेड किए जा सकने वाले कॉम्पोनेंट के तौर पर फिर से इस्तेमाल किया जा सकता है. यह ठीक उसी तरह काम करता है जैसे पारंपरिक Fragment. उदाहरण के लिए, अगर आपको डायलॉग का यूज़र इंटरफ़ेस (यूआई), बड़ी और छोटी स्क्रीन पर अलग-अलग तरीके से दिखाना है, तो इस क्लास का इस्तेमाल किया जा सकता है.
इस दस्तावेज़ के अगले सेक्शन में, DialogFragment को AlertDialog ऑब्जेक्ट के साथ इस्तेमाल करने का तरीका बताया गया है. अगर आपको तारीख या समय चुनने वाला टूल बनाना है, तो
अपने ऐप्लिकेशन में पिकर जोड़ना
लेख पढ़ें.
डायलॉग फ़्रैगमेंट बनाना
डायलॉग के कई डिज़ाइन बनाए जा सकते हैं. इनमें कस्टम
लेआउट और
Material Design
के डायलॉग में बताए गए डिज़ाइन भी शामिल हैं. इसके लिए, DialogFragment को बढ़ाकर और
AlertDialog को
onCreateDialog()
कॉलबैक के तरीके में बनाकर, ऐसा किया जा सकता है.
उदाहरण के लिए, यहां एक सामान्य AlertDialog दिया गया है, जिसे DialogFragment में मैनेज किया जाता है:
Kotlin
class StartGameDialogFragment : DialogFragment() {
    override fun onCreateDialog(savedInstanceState: Bundle?): Dialog {
        return activity?.let {
            // Use the Builder class for convenient dialog construction.
            val builder = AlertDialog.Builder(it)
            builder.setMessage("Start game")
                .setPositiveButton("Start") { dialog, id ->
                    // START THE GAME!
                }
                .setNegativeButton("Cancel") { dialog, id ->
                    // User cancelled the dialog.
                }
            // Create the AlertDialog object and return it.
            builder.create()
        } ?: throw IllegalStateException("Activity cannot be null")
    }
}

class OldXmlActivity : AppCompatActivity() {
    override fun onCreate(savedInstanceState: Bundle?) {
        super.onCreate(savedInstanceState)
        setContentView(R.layout.activity_old_xml)

        StartGameDialogFragment().show(supportFragmentManager, "GAME_DIALOG")
    }
}
Java
public class StartGameDialogFragment extends DialogFragment {
    @Override
    public Dialog onCreateDialog(Bundle savedInstanceState) {
        // Use the Builder class for convenient dialog construction.
        AlertDialog.Builder builder = new AlertDialog.Builder(getActivity());
        builder.setMessage(R.string.dialog_start_game)
               .setPositiveButton(R.string.start, new DialogInterface.OnClickListener() {
                   public void onClick(DialogInterface dialog, int id) {
                       // START THE GAME!
                   }
               })
               .setNegativeButton(R.string.cancel, new DialogInterface.OnClickListener() {
                   public void onClick(DialogInterface dialog, int id) {
                       // User cancels the dialog.
                   }
               });
        // Create the AlertDialog object and return it.
        return builder.create();
    }
}
// ...

StartGameDialogFragment().show(supportFragmentManager, "GAME_DIALOG");
इस क्लास का इंस्टेंस बनाने और उस ऑब्जेक्ट पर show() को कॉल करने पर, डायलॉग इस तरह दिखता है, जैसा कि यहां दिखाया गया है.
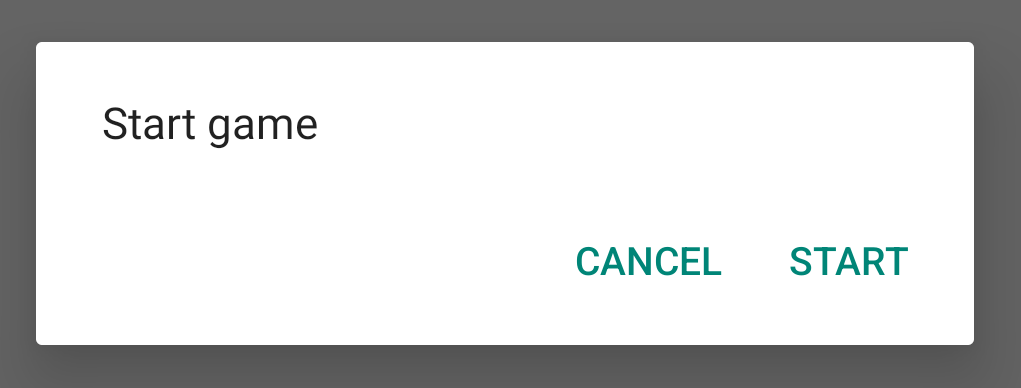
अगले सेक्शन में, डायलॉग बनाने के लिए AlertDialog.Builder एपीआई का इस्तेमाल करने के बारे में ज़्यादा जानकारी दी गई है.
अलर्ट डायलॉग बनाना
AlertDialog क्लास की मदद से, डायलॉग के कई डिज़ाइन बनाए जा सकते हैं. अक्सर, आपको सिर्फ़ इसी डायलॉग क्लास की ज़रूरत होती है. जैसा कि यहां दिखाया गया है, अलर्ट डायलॉग के तीन हिस्से होते हैं:
- टाइटल: यह ज़रूरी नहीं है. इसका इस्तेमाल सिर्फ़ तब किया जाता है, जब कॉन्टेंट वाले सेक्शन में कोई विस्तृत मैसेज, सूची या कस्टम लेआउट दिखाया जाता है. अगर आपको कोई सामान्य मैसेज या सवाल दिखाना है, तो टाइटल की ज़रूरत नहीं है.
- कॉन्टेंट वाला सेक्शन: इसमें कोई मैसेज, सूची या अन्य कस्टम लेआउट दिखाया जा सकता है.
- ऐक्शन बटन: डायलॉग में ज़्यादा से ज़्यादा तीन ऐक्शन बटन हो सकते हैं.
AlertDialog.Builder क्लास, ऐसे एपीआई उपलब्ध कराती है जिनकी मदद से,
इस तरह के कॉन्टेंट वाला AlertDialog बनाया जा सकता है. इसमें कस्टम
लेआउट भी शामिल है.
AlertDialog बनाने के लिए, यह तरीका अपनाएं:
Kotlin
val builder: AlertDialog.Builder = AlertDialog.Builder(context)
builder
    .setMessage("I am the message")
    .setTitle("I am the title")

val dialog: AlertDialog = builder.create()
dialog.show()
Java
// 1. Instantiate an AlertDialog.Builder with its constructor.
AlertDialog.Builder builder = new AlertDialog.Builder(getActivity());

// 2. Chain together various setter methods to set the dialog characteristics.
builder.setMessage(R.string.dialog_message)
       .setTitle(R.string.dialog_title);

// 3. Get the AlertDialog.
AlertDialog dialog = builder.create();
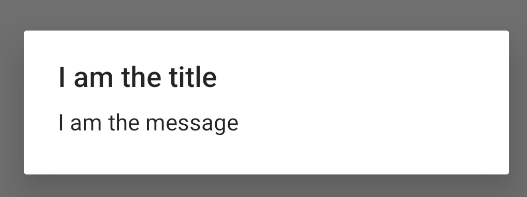
ऊपर दिए गए कोड स्निपेट से यह डायलॉग जनरेट होता है:
बटन जोड़ना
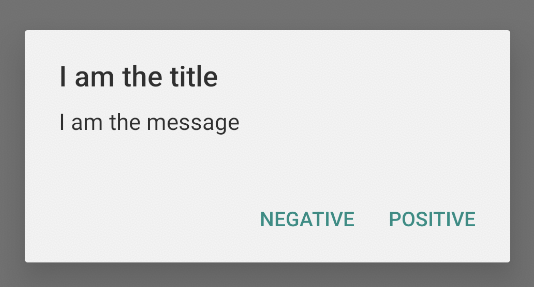
इमेज 2 में दिखाए गए ऐक्शन बटन जोड़ने के लिए, setPositiveButton() और setNegativeButton() तरीकों को कॉल करें:
Kotlin
val builder: AlertDialog.Builder = AlertDialog.Builder(context)
builder
    .setMessage("I am the message")
    .setTitle("I am the title")
    .setPositiveButton("Positive") { dialog, which ->
        // Do something.
    }
    .setNegativeButton("Negative") { dialog, which ->
        // Do something else.
    }

val dialog: AlertDialog = builder.create()
dialog.show()
Java
AlertDialog.Builder builder = new AlertDialog.Builder(getActivity());
// Add the buttons.
builder.setPositiveButton(R.string.ok, new DialogInterface.OnClickListener() {
           public void onClick(DialogInterface dialog, int id) {
               // User taps OK button.
           }
       });
builder.setNegativeButton(R.string.cancel, new DialogInterface.OnClickListener() {
           public void onClick(DialogInterface dialog, int id) {
               // User cancels the dialog.
           }
       });
// Set other dialog properties.
...

// Create the AlertDialog.
AlertDialog dialog = builder.create();
The set...Button() तरीकों के लिए, बटन का टाइटल ज़रूरी है. यह टाइटल, स्ट्रिंग रिसॉर्स से मिलता है. साथ ही, DialogInterface.OnClickListener
भी ज़रूरी है. इससे यह तय होता है कि उपयोगकर्ता के बटन पर टैप करने पर कौनसी कार्रवाई की जाएगी.
तीन ऐक्शन बटन जोड़े जा सकते हैं:
- पॉज़िटिव: इसका इस्तेमाल, कार्रवाई को स्वीकार करने और जारी रखने के लिए करें. इसे "ठीक है" कार्रवाई भी कहा जाता है.
- नेगेटिव: इसका इस्तेमाल, कार्रवाई रद्द करने के लिए करें.
- न्यूट्रल: इसका इस्तेमाल तब करें, जब उपयोगकर्ता कार्रवाई को जारी न रखना चाहे, लेकिन उसे रद्द न करना हो. यह पॉज़िटिव और नेगेटिव बटन के बीच दिखता है. उदाहरण के लिए, कार्रवाई "मुझे बाद में याद दिलाएं " हो सकती है.
AlertDialog में, हर तरह का सिर्फ़ एक बटन जोड़ा जा सकता है. उदाहरण के लिए, एक से ज़्यादा "पॉज़िटिव" बटन नहीं हो सकते.
ऊपर दिए गए कोड स्निपेट से, आपको इस तरह का अलर्ट डायलॉग मिलता है:
सूची जोड़ें
AlertDialog एपीआई के साथ, तीन तरह की सूची उपलब्ध हैं:
- एक पारंपरिक सिंगल-चॉइस सूची.
- एक परसिस्टेंट सिंगल-चॉइस सूची (रेडियो बटन).
- एक परसिस्टेंट मल्टीपल-चॉइस सूची (चेकबॉक्स).
इमेज 5 में दिखाई गई सिंगल-चॉइस सूची बनाने के लिए, setItems() तरीके का इस्तेमाल करें:
Kotlin
val builder: AlertDialog.Builder = AlertDialog.Builder(context)
builder
    .setTitle("I am the title")
    .setPositiveButton("Positive") { dialog, which ->
        // Do something.
    }
    .setNegativeButton("Negative") { dialog, which ->
        // Do something else.
    }
    .setItems(arrayOf("Item One", "Item Two", "Item Three")) { dialog, which ->
        // Do something on item tapped.
    }

val dialog: AlertDialog = builder.create()
dialog.show()
Java
@Override
public Dialog onCreateDialog(Bundle savedInstanceState) {
    AlertDialog.Builder builder = new AlertDialog.Builder(getActivity());
    builder.setTitle(R.string.pick_color)
           .setItems(R.array.colors_array, new DialogInterface.OnClickListener() {
               public void onClick(DialogInterface dialog, int which) {
               // The 'which' argument contains the index position of the selected item.
           }
    });
    return builder.create();
}
इस कोड स्निपेट से, इस तरह का डायलॉग जनरेट होता है:
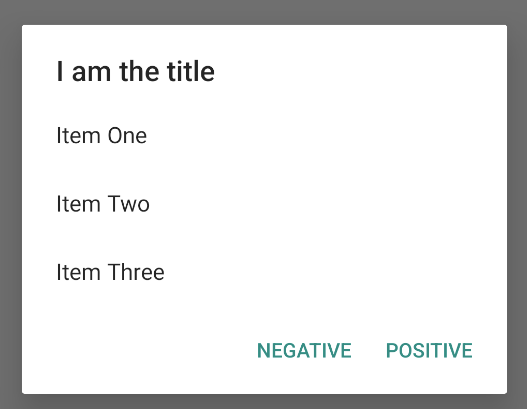
सूची, डायलॉग के कॉन्टेंट वाले सेक्शन में दिखती है. इसलिए, डायलॉग में मैसेज और सूची, दोनों नहीं दिखाए जा सकते. setTitle() की मदद से, डायलॉग के लिए टाइटल सेट करें.
सूची के लिए आइटम तय करने के लिए, setItems() को कॉल करें और एक कलेक्शन पास करें. इसके अलावा, setAdapter() का इस्तेमाल करके भी सूची तय की जा सकती है.
इससे, ListAdapter का इस्तेमाल करके, सूची को डाइनैमिक डेटा से बैक किया जा सकता है. जैसे, डेटाबेस से.
अगर सूची को ListAdapter से बैक किया जाता है, तो हमेशा Loader का इस्तेमाल करें, ताकि कॉन्टेंट एसिंक्रोनस तरीके से लोड हो. इसके बारे में ज़्यादा जानकारी के लिए,
अडैप्टर और
लोड करने वाले टूल की मदद से लेआउट बनाना लेख पढ़ें.
परसिस्टेंट मल्टीपल-चॉइस या सिंगल-चॉइस सूची जोड़ना
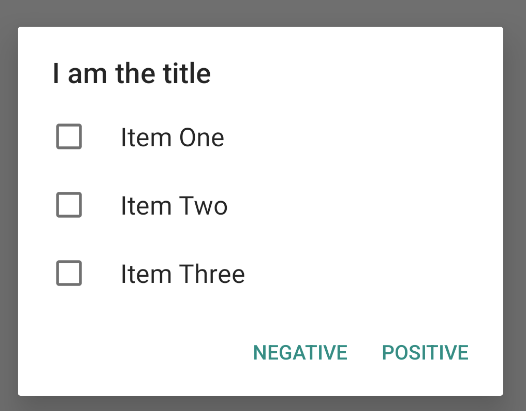
मल्टीपल-चॉइस आइटम (चेकबॉक्स) या सिंगल-चॉइस आइटम (रेडियो बटन) की सूची जोड़ने के लिए, क्रमशः setMultiChoiceItems() या setSingleChoiceItems() तरीकों का इस्तेमाल करें.
उदाहरण के लिए, यहां मल्टीपल-चॉइस सूची बनाने का तरीका बताया गया है. यह सूची, इमेज 6 में दिखाई गई सूची की तरह है. इसमें चुने गए आइटम, ArrayList में सेव किए जाते हैं:
Kotlin
val builder: AlertDialog.Builder = AlertDialog.Builder(context)
builder
    .setTitle("I am the title")
    .setPositiveButton("Positive") { dialog, which ->
        // Do something.
    }
    .setNegativeButton("Negative") { dialog, which ->
        // Do something else.
    }
    .setMultiChoiceItems(
        arrayOf("Item One", "Item Two", "Item Three"), null) { dialog, which, isChecked ->
        // Do something.
    }

val dialog: AlertDialog = builder.create()
dialog.show()
Java
@Override
public Dialog onCreateDialog(Bundle savedInstanceState) {
    selectedItems = new ArrayList();  // Where we track the selected items
    AlertDialog.Builder builder = new AlertDialog.Builder(getActivity());
    // Set the dialog title.
    builder.setTitle(R.string.pick_toppings)
    // Specify the list array, the items to be selected by default (null for
    // none), and the listener through which to receive callbacks when items
    // are selected.
           .setMultiChoiceItems(R.array.toppings, null,
                      new DialogInterface.OnMultiChoiceClickListener() {
               @Override
               public void onClick(DialogInterface dialog, int which,
                       boolean isChecked) {
                   if (isChecked) {
                       // If the user checks the item, add it to the selected
                       // items.
                       selectedItems.add(which);
                   } else if (selectedItems.contains(which)) {
                       // If the item is already in the array, remove it.
                       selectedItems.remove(which);
                   }
               }
           })
    // Set the action buttons
           .setPositiveButton(R.string.ok, new DialogInterface.OnClickListener() {
               @Override
               public void onClick(DialogInterface dialog, int id) {
                   // User taps OK, so save the selectedItems results
                   // somewhere or return them to the component that opens the
                   // dialog.
                   ...
               }
           })
           .setNegativeButton(R.string.cancel, new DialogInterface.OnClickListener() {
               @Override
               public void onClick(DialogInterface dialog, int id) {
                   ...
               }
           });

    return builder.create();
}
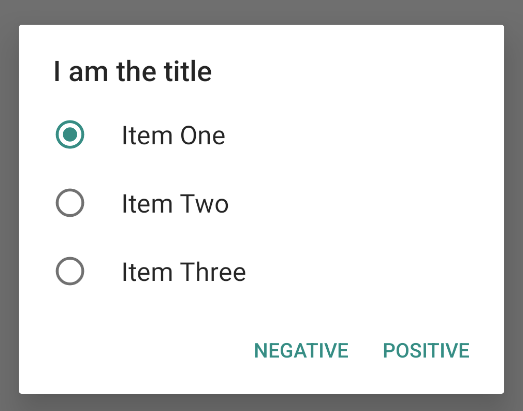
सिंगल-चॉइस अलर्ट डायलॉग इस तरह पाया जा सकता है:
Kotlin
val builder: AlertDialog.Builder = AlertDialog.Builder(context)
builder
    .setTitle("I am the title")
    .setPositiveButton("Positive") { dialog, which ->
        // Do something.
    }
    .setNegativeButton("Negative") { dialog, which ->
        // Do something else.
    }
    .setSingleChoiceItems(
        arrayOf("Item One", "Item Two", "Item Three"), 0
    ) { dialog, which ->
        // Do something.
    }

val dialog: AlertDialog = builder.create()
dialog.show()
Java
        String[] choices = {"Item One", "Item Two", "Item Three"};

        AlertDialog.Builder builder = AlertDialog.Builder(context);
        builder
                .setTitle("I am the title")
                .setPositiveButton("Positive", (dialog, which) -> {

                })
                .setNegativeButton("Negative", (dialog, which) -> {

                })
                .setSingleChoiceItems(choices, 0, (dialog, which) -> {

                });

        AlertDialog dialog = builder.create();
        dialog.show();
इससे यह उदाहरण मिलता है:
कस्टम लेआउट बनाना
अगर आपको डायलॉग में कस्टम लेआउट चाहिए, तो एक लेआउट बनाएं और उसे an
AlertDialog में जोड़ें. इसके लिए,
setView()
को अपने AlertDialog.Builder ऑब्जेक्ट पर कॉल करें.
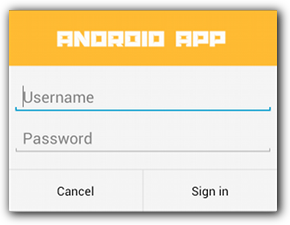
डिफ़ॉल्ट रूप से, कस्टम लेआउट, डायलॉग विंडो में पूरी जगह लेता है. हालांकि, बटन और टाइटल जोड़ने के लिए, अब भी AlertDialog.Builder के तरीकों का इस्तेमाल किया जा सकता है.
उदाहरण के लिए, यहां ऊपर दिए गए कस्टम डायलॉग लेआउट के लिए लेआउट फ़ाइल दी गई है:
res/layout/dialog_signin.xml
<LinearLayout xmlns:android="http://schemas.android.com/apk/res/android"
    android:orientation="vertical"
    android:layout_width="wrap_content"
    android:layout_height="wrap_content">
    <ImageView
        android:src="@drawable/header_logo"
        android:layout_width="match_parent"
        android:layout_height="64dp"
        android:scaleType="center"
        android:background="#FFFFBB33"
        android:contentDescription="@string/app_name" />
    <EditText
        android:id="@+id/username"
        android:inputType="textEmailAddress"
        android:layout_width="match_parent"
        android:layout_height="wrap_content"
        android:layout_marginTop="16dp"
        android:layout_marginLeft="4dp"
        android:layout_marginRight="4dp"
        android:layout_marginBottom="4dp"
        android:hint="@string/username" />
    <EditText
        android:id="@+id/password"
        android:inputType="textPassword"
        android:layout_width="match_parent"
        android:layout_height="wrap_content"
        android:layout_marginTop="4dp"
        android:layout_marginLeft="4dp"
        android:layout_marginRight="4dp"
        android:layout_marginBottom="16dp"
        android:fontFamily="sans-serif"
        android:hint="@string/password"/>
</LinearLayout>
अपने DialogFragment में लेआउट को इनफ़्लेट करने के लिए, LayoutInflater
की मदद से
getLayoutInflater()
पाएं और
inflate()को कॉल करें.
पहला पैरामीटर, लेआउट रिसॉर्स आईडी है. दूसरा पैरामीटर, लेआउट के लिए पैरंट व्यू है. इसके बाद, डायलॉग में लेआउट को प्लेस करने के लिए, setView() को कॉल किया जा सकता है. यह तरीका, यहां दिए गए उदाहरण में दिखाया गया है.
Kotlin
override fun onCreateDialog(savedInstanceState: Bundle?): Dialog {
    return activity?.let {
        val builder = AlertDialog.Builder(it)
        // Get the layout inflater.
        val inflater = requireActivity().layoutInflater;

        // Inflate and set the layout for the dialog.
        // Pass null as the parent view because it's going in the dialog
        // layout.
        builder.setView(inflater.inflate(R.layout.dialog_signin, null))
                // Add action buttons.
                .setPositiveButton(R.string.signin,
                        DialogInterface.OnClickListener { dialog, id ->
                            // Sign in the user.
                        })
                .setNegativeButton(R.string.cancel,
                        DialogInterface.OnClickListener { dialog, id ->
                            getDialog().cancel()
                        })
        builder.create()
    } ?: throw IllegalStateException("Activity cannot be null")
}
Java
@Override
public Dialog onCreateDialog(Bundle savedInstanceState) {
    AlertDialog.Builder builder = new AlertDialog.Builder(getActivity());
    // Get the layout inflater.
    LayoutInflater inflater = requireActivity().getLayoutInflater();

    // Inflate and set the layout for the dialog.
    // Pass null as the parent view because it's going in the dialog layout.
    builder.setView(inflater.inflate(R.layout.dialog_signin, null))
    // Add action buttons
           .setPositiveButton(R.string.signin, new DialogInterface.OnClickListener() {
               @Override
               public void onClick(DialogInterface dialog, int id) {
                   // Sign in the user.
               }
           })
           .setNegativeButton(R.string.cancel, new DialogInterface.OnClickListener() {
               public void onClick(DialogInterface dialog, int id) {
                   LoginDialogFragment.this.getDialog().cancel();
               }
           });
    return builder.create();
}
अगर आपको कस्टम डायलॉग चाहिए, तो Dialog एपीआई का इस्तेमाल करने के बजाय, Activity को डायलॉग के तौर पर दिखाया जा सकता है. एक गतिविधि बनाएं और
मेनिफ़ेस्ट के
<activity>
एलिमेंट में उसकी थीम को
Theme.Holo.Dialog
पर सेट करें:
<activity android:theme="@android:style/Theme.Holo.Dialog" >
अब गतिविधि, फ़ुलस्क्रीन के बजाय डायलॉग विंडो में दिखती है.
डायलॉग के होस्ट को इवेंट पास करना
जब उपयोगकर्ता, डायलॉग के किसी ऐक्शन बटन पर टैप करता है या उसकी सूची से कोई आइटम चुनता है, तो हो सकता है कि आपका DialogFragment ज़रूरी कार्रवाई खुद ही कर ले. हालांकि, अक्सर आपको डायलॉग खोलने वाली गतिविधि या फ़्रैगमेंट को इवेंट डिलीवर करना होता है. इसके लिए, हर तरह के क्लिक इवेंट के लिए एक तरीके वाला इंटरफ़ेस तय करें. इसके बाद, डायलॉग से ऐक्शन इवेंट पाने वाले होस्ट कॉम्पोनेंट में उस इंटरफ़ेस को लागू करें.
उदाहरण के लिए, यहां एक DialogFragment दिया गया है. यह एक इंटरफ़ेस तय करता है, जिसकी मदद से यह इवेंट को वापस होस्ट गतिविधि को डिलीवर करता है:
Kotlin
class NoticeDialogFragment : DialogFragment() {
    // Use this instance of the interface to deliver action events.
    internal lateinit var listener: NoticeDialogListener

    // The activity that creates an instance of this dialog fragment must
    // implement this interface to receive event callbacks. Each method passes
    // the DialogFragment in case the host needs to query it.
    interface NoticeDialogListener {
        fun onDialogPositiveClick(dialog: DialogFragment)
        fun onDialogNegativeClick(dialog: DialogFragment)
    }

    // Override the Fragment.onAttach() method to instantiate the
    // NoticeDialogListener.
    override fun onAttach(context: Context) {
        super.onAttach(context)
        // Verify that the host activity implements the callback interface.
        try {
            // Instantiate the NoticeDialogListener so you can send events to
            // the host.
            listener = context as NoticeDialogListener
        } catch (e: ClassCastException) {
            // The activity doesn't implement the interface. Throw exception.
            throw ClassCastException((context.toString() +
                    " must implement NoticeDialogListener"))
        }
    }
}
Java
public class NoticeDialogFragment extends DialogFragment {

    // The activity that creates an instance of this dialog fragment must
    // implement this interface to receive event callbacks. Each method passes
    // the DialogFragment in case the host needs to query it.
    public interface NoticeDialogListener {
        public void onDialogPositiveClick(DialogFragment dialog);
        public void onDialogNegativeClick(DialogFragment dialog);
    }

    // Use this instance of the interface to deliver action events.
    NoticeDialogListener listener;

    // Override the Fragment.onAttach() method to instantiate the
    // NoticeDialogListener.
    @Override
    public void onAttach(Context context) {
        super.onAttach(context);
        // Verify that the host activity implements the callback interface.
        try {
            // Instantiate the NoticeDialogListener so you can send events to
            // the host.
            listener = (NoticeDialogListener) context;
        } catch (ClassCastException e) {
            // The activity doesn't implement the interface. Throw exception.
            throw new ClassCastException(activity.toString()
                    + " must implement NoticeDialogListener");
        }
    }
    ...
}
डायलॉग को होस्ट करने वाली गतिविधि, डायलॉग फ़्रैगमेंट के कंस्ट्रक्टर की मदद से डायलॉग का एक इंस्टेंस बनाती है. साथ ही, NoticeDialogListener इंटरफ़ेस को लागू करके, डायलॉग के इवेंट को रिसीव करती है:
Kotlin
class MainActivity : FragmentActivity(),
        NoticeDialogFragment.NoticeDialogListener {

    fun showNoticeDialog() {
        // Create an instance of the dialog fragment and show it.
        val dialog = NoticeDialogFragment()
        dialog.show(supportFragmentManager, "NoticeDialogFragment")
    }

    // The dialog fragment receives a reference to this Activity through the
    // Fragment.onAttach() callback, which it uses to call the following
    // methods defined by the NoticeDialogFragment.NoticeDialogListener
    // interface.
    override fun onDialogPositiveClick(dialog: DialogFragment) {
        // User taps the dialog's positive button.
    }

    override fun onDialogNegativeClick(dialog: DialogFragment) {
        // User taps the dialog's negative button.
    }
}
Java
public class MainActivity extends FragmentActivity
                          implements NoticeDialogFragment.NoticeDialogListener{
    ...
    public void showNoticeDialog() {
        // Create an instance of the dialog fragment and show it.
        DialogFragment dialog = new NoticeDialogFragment();
        dialog.show(getSupportFragmentManager(), "NoticeDialogFragment");
    }

    // The dialog fragment receives a reference to this Activity through the
    // Fragment.onAttach() callback, which it uses to call the following
    // methods defined by the NoticeDialogFragment.NoticeDialogListener
    // interface.
    @Override
    public void onDialogPositiveClick(DialogFragment dialog) {
        // User taps the dialog's positive button.
        ...
    }

    @Override
    public void onDialogNegativeClick(DialogFragment dialog) {
        // User taps the dialog's negative button.
        ...
    }
}
होस्ट गतिविधि, NoticeDialogListener को लागू करती है. इसे ऊपर दिए गए उदाहरण में दिखाए गए onAttach() कॉलबैक के तरीके से लागू किया जाता है. इसलिए, डायलॉग फ़्रैगमेंट, इंटरफ़ेस के कॉलबैक के तरीकों का इस्तेमाल करके, गतिविधि को क्लिक इवेंट डिलीवर कर सकता है:
Kotlin
    override fun onCreateDialog(savedInstanceState: Bundle): Dialog {
        return activity?.let {
            // Build the dialog and set up the button click handlers.
            val builder = AlertDialog.Builder(it)

            builder.setMessage(R.string.dialog_start_game)
                    .setPositiveButton(R.string.start,
                            DialogInterface.OnClickListener { dialog, id ->
                                // Send the positive button event back to the
                                // host activity.
                                listener.onDialogPositiveClick(this)
                            })
                    .setNegativeButton(R.string.cancel,
                            DialogInterface.OnClickListener { dialog, id ->
                                // Send the negative button event back to the
                                // host activity.
                                listener.onDialogNegativeClick(this)
                            })

            builder.create()
        } ?: throw IllegalStateException("Activity cannot be null")
    }
Java
public class NoticeDialogFragment extends DialogFragment {
    ...
    @Override
    public Dialog onCreateDialog(Bundle savedInstanceState) {
        // Build the dialog and set up the button click handlers.
        AlertDialog.Builder builder = new AlertDialog.Builder(getActivity());
        builder.setMessage(R.string.dialog_start_game)
               .setPositiveButton(R.string.start, new DialogInterface.OnClickListener() {
                   public void onClick(DialogInterface dialog, int id) {
                       // Send the positive button event back to the host activity.
                       listener.onDialogPositiveClick(NoticeDialogFragment.this);
                   }
               })
               .setNegativeButton(R.string.cancel, new DialogInterface.OnClickListener() {
                   public void onClick(DialogInterface dialog, int id) {
                       // Send the negative button event back to the host activity.
                       listener.onDialogNegativeClick(NoticeDialogFragment.this);
                   }
               });
        return builder.create();
    }
}
डायलॉग दिखाना
डायलॉग दिखाने के लिए, अपने DialogFragment का एक इंस्टेंस बनाएं और show() को कॉल करें. इसमें FragmentManager और डायलॉग फ़्रैगमेंट के लिए एक टैग का नाम पास करें.
FragmentActivity से getParentFragmentManager() को कॉल करके या Fragment से FragmentManager को कॉल करके, getSupportFragmentManager() पाया जा सकता है. उदाहरण के लिए, यह देखें:
Kotlin
fun confirmStartGame() {
    val newFragment = StartGameDialogFragment()
    newFragment.show(supportFragmentManager, "game")
}
Java
public void confirmStartGame() {
    DialogFragment newFragment = new StartGameDialogFragment();
    newFragment.show(getSupportFragmentManager(), "game");
}
दूसरा आर्ग्युमेंट, "game", एक यूनीक टैग का नाम है. इसका इस्तेमाल, ज़रूरत पड़ने पर फ़्रैगमेंट की स्थिति को सेव और रीस्टोर करने के लिए किया जाता है. टैग की मदद से, findFragmentByTag() को कॉल करके, फ़्रैगमेंट का हैंडल भी पाया जा सकता है.
डायलॉग को फ़ुलस्क्रीन में दिखाना या उसे एंबेड किए गए फ़्रैगमेंट के तौर पर दिखाना
ऐसा हो सकता है कि आपको अपने यूज़र इंटरफ़ेस (यूआई) डिज़ाइन का कोई हिस्सा, कुछ स्थितियों में डायलॉग के तौर पर और अन्य स्थितियों में फ़ुलस्क्रीन या एंबेड किए गए फ़्रैगमेंट के तौर पर दिखाना हो. ऐसा भी हो सकता है कि आपको डिवाइस के स्क्रीन साइज़ के हिसाब से, उसे अलग-अलग तरीके से दिखाना हो. The
DialogFragment क्लास, ऐसा करने की सुविधा देती है,
क्योंकि यह एंबेड किए जा सकने वाले Fragment के तौर पर काम कर सकती है.
हालांकि, इस मामले में डायलॉग बनाने के लिए, AlertDialog.Builder या अन्य
Dialog ऑब्जेक्ट का इस्तेमाल नहीं किया जा सकता. अगर आपको DialogFragment को एंबेड किए जा सकने वाला बनाना है, तो डायलॉग के यूज़र इंटरफ़ेस (यूआई) को लेआउट में तय करें. इसके बाद, onCreateView() कॉलबैक में लेआउट लोड करें.
यहां एक DialogFragment का उदाहरण दिया गया है. इसे डायलॉग या एंबेड किए जा सकने वाले फ़्रैगमेंट के तौर पर दिखाया जा सकता है. इसके लिए, purchase_items.xml नाम के लेआउट का इस्तेमाल किया गया है:
Kotlin
class CustomDialogFragment : DialogFragment() {

    // The system calls this to get the DialogFragment's layout, regardless of
    // whether it's being displayed as a dialog or an embedded fragment.
    override fun onCreateView(
            inflater: LayoutInflater,
            container: ViewGroup?,
            savedInstanceState: Bundle?
    ): View {
        // Inflate the layout to use as a dialog or embedded fragment.
        return inflater.inflate(R.layout.purchase_items, container, false)
    }

    // The system calls this only when creating the layout in a dialog.
    override fun onCreateDialog(savedInstanceState: Bundle): Dialog {
        // The only reason you might override this method when using
        // onCreateView() is to modify the dialog characteristics. For example,
        // the dialog includes a title by default, but your custom layout might
        // not need it. Here, you can remove the dialog title, but you must
        // call the superclass to get the Dialog.
        val dialog = super.onCreateDialog(savedInstanceState)
        dialog.requestWindowFeature(Window.FEATURE_NO_TITLE)
        return dialog
    }
}
Java
public class CustomDialogFragment extends DialogFragment {
    // The system calls this to get the DialogFragment's layout, regardless of
    // whether it's being displayed as a dialog or an embedded fragment.
    @Override
    public View onCreateView(LayoutInflater inflater, ViewGroup container,
            Bundle savedInstanceState) {
        // Inflate the layout to use as a dialog or embedded fragment.
        return inflater.inflate(R.layout.purchase_items, container, false);
    }

    // The system calls this only when creating the layout in a dialog.
    @Override
    public Dialog onCreateDialog(Bundle savedInstanceState) {
        // The only reason you might override this method when using
        // onCreateView() is to modify the dialog characteristics. For example,
        // the dialog includes a title by default, but your custom layout might
        // not need it. Here, you can remove the dialog title, but you must
        // call the superclass to get the Dialog.
        Dialog dialog = super.onCreateDialog(savedInstanceState);
        dialog.requestWindowFeature(Window.FEATURE_NO_TITLE);
        return dialog;
    }
}
यहां दिए गए उदाहरण में, स्क्रीन साइज़ के आधार पर यह तय किया जाता है कि फ़्रैगमेंट को डायलॉग के तौर पर दिखाया जाए या फ़ुलस्क्रीन यूज़र इंटरफ़ेस (यूआई) के तौर पर:
Kotlin
fun showDialog() {
    val fragmentManager = supportFragmentManager
    val newFragment = CustomDialogFragment()
    if (isLargeLayout) {
        // The device is using a large layout, so show the fragment as a
        // dialog.
        newFragment.show(fragmentManager, "dialog")
    } else {
        // The device is smaller, so show the fragment fullscreen.
        val transaction = fragmentManager.beginTransaction()
        // For a polished look, specify a transition animation.
        transaction.setTransition(FragmentTransaction.TRANSIT_FRAGMENT_OPEN)
        // To make it fullscreen, use the 'content' root view as the container
        // for the fragment, which is always the root view for the activity.
        transaction
                .add(android.R.id.content, newFragment)
                .addToBackStack(null)
                .commit()
    }
}
Java
public void showDialog() {
    FragmentManager fragmentManager = getSupportFragmentManager();
    CustomDialogFragment newFragment = new CustomDialogFragment();

    if (isLargeLayout) {
        // The device is using a large layout, so show the fragment as a
        // dialog.
        newFragment.show(fragmentManager, "dialog");
    } else {
        // The device is smaller, so show the fragment fullscreen.
        FragmentTransaction transaction = fragmentManager.beginTransaction();
        // For a polished look, specify a transition animation.
        transaction.setTransition(FragmentTransaction.TRANSIT_FRAGMENT_OPEN);
        // To make it fullscreen, use the 'content' root view as the container
        // for the fragment, which is always the root view for the activity.
        transaction.add(android.R.id.content, newFragment)
                   .addToBackStack(null).commit();
    }
}
फ़्रैगमेंट के लेन-देन करने के बारे में ज़्यादा जानकारी के लिए, फ़्रैगमेंट लेख पढ़ें.
इस उदाहरण में, mIsLargeLayout बूलियन से यह तय होता है कि मौजूदा डिवाइस को ऐप्लिकेशन के बड़े लेआउट डिज़ाइन का इस्तेमाल करना है या नहीं. अगर करना है, तो इस फ़्रैगमेंट को फ़ुलस्क्रीन के बजाय डायलॉग के तौर पर दिखाया जाएगा. इस तरह के
बूलियन को सेट करने का सबसे अच्छा तरीका है कि
बूल रिसॉर्स
वैल्यू को अलग-अलग स्क्रीन साइज़ के लिए, वैकल्पिक रिसॉर्स वैल्यू के साथ तय किया जाए. उदाहरण के लिए, यहां अलग-अलग स्क्रीन साइज़ के लिए, बूल रिसॉर्स के दो वर्शन दिए गए हैं:
res/values/bools.xml
<!-- Default boolean values -->
<resources>
    <bool name="large_layout">false</bool>
</resources>
res/values-large/bools.xml
<!-- Large screen boolean values -->
<resources>
    <bool name="large_layout">true</bool>
</resources>
इसके बाद, गतिविधि के onCreate() तरीके के दौरान, mIsLargeLayout वैल्यू को शुरू किया जा सकता है. यह तरीका, यहां दिए गए उदाहरण में दिखाया गया है:
Kotlin
override fun onCreate(savedInstanceState: Bundle?) {
    super.onCreate(savedInstanceState)
    setContentView(R.layout.activity_main)

    isLargeLayout = resources.getBoolean(R.bool.large_layout)
}
Java
boolean isLargeLayout;

@Override
public void onCreate(Bundle savedInstanceState) {
    super.onCreate(savedInstanceState);
    setContentView(R.layout.activity_main);

    isLargeLayout = getResources().getBoolean(R.bool.large_layout);
}
बड़ी स्क्रीन पर, किसी गतिविधि को डायलॉग के तौर पर दिखाना
छोटी स्क्रीन पर, डायलॉग को फ़ुलस्क्रीन यूज़र इंटरफ़ेस (यूआई) के तौर पर दिखाने के बजाय, बड़ी स्क्रीन पर किसी Activity को डायलॉग के तौर पर दिखाकर भी वही नतीजा पाया जा सकता है. आपके ऐप्लिकेशन के डिज़ाइन के हिसाब से, यह तरीका अलग-अलग हो सकता है. हालांकि, जब आपका ऐप्लिकेशन छोटी स्क्रीन के लिए डिज़ाइन किया गया हो और आपको टैबलेट पर बेहतर अनुभव देना हो, तो गतिविधि को डायलॉग के तौर पर दिखाना अक्सर काम आता है. इसके लिए, कम समय के लिए दिखने वाली गतिविधि को डायलॉग के तौर पर दिखाया जाता है.
किसी गतिविधि को सिर्फ़ बड़ी स्क्रीन पर डायलॉग के तौर पर दिखाने के लिए, मेनिफ़ेस्ट के <activity> एलिमेंट पर
Theme.Holo.DialogWhenLarge
थीम लागू करें:
<activity android:theme="@android:style/Theme.Holo.DialogWhenLarge" >
थीम की मदद से अपनी गतिविधियों को स्टाइल करने के बारे में ज़्यादा जानकारी के लिए, स्टाइल और थीम लेख पढ़ें.
डायलॉग खारिज करना
जब उपयोगकर्ता, AlertDialog.Builder की मदद से बनाए गए किसी ऐक्शन बटन पर टैप करता है, तो सिस्टम डायलॉग को खारिज कर देता है.
जब उपयोगकर्ता, डायलॉग सूची में किसी आइटम पर टैप करता है, तब भी सिस्टम डायलॉग को खारिज कर देता है. हालांकि, अगर सूची में रेडियो बटन या चेकबॉक्स का इस्तेमाल किया जाता है, तो ऐसा नहीं होता. इसके अलावा, अपने DialogFragment पर dismiss() को कॉल करके, डायलॉग को मैन्युअल तरीके से खारिज किया जा सकता है.
अगर डायलॉग के बंद होने पर, आपको कुछ कार्रवाइयां करनी हैं, तो अपने DialogFragment में onDismiss() तरीका लागू करें.
डायलॉग को रद्द भी किया जा सकता है. यह एक खास इवेंट है. इससे पता चलता है कि उपयोगकर्ता, टास्क पूरा किए बिना डायलॉग छोड़ रहा है. ऐसा तब होता है, जब उपयोगकर्ता 'वापस जाएं' बटन पर टैप करता है या डायलॉग वाले सेक्शन के बाहर स्क्रीन पर टैप करता है. इसके अलावा, अगर डायलॉग में "रद्द करें" बटन के जवाब में, Dialog पर साफ़ तौर पर cancel() को कॉल किया जाता है, तब भी ऐसा होता है.
ऊपर दिए गए उदाहरण में दिखाए गए तरीके से, अपने DialogFragment क्लास में onCancel() को लागू करके, रद्द करने के इवेंट का जवाब दिया जा सकता है.