בדיקת כוונות של אפליקציות ניווט ב-Android Automotive OS
קל לארגן דפים בעזרת אוספים
אפשר לשמור ולסווג תוכן על סמך ההעדפות שלך.
בדיקת יכולת פעולה הדדית של Google Assistant ומפות Google עם אפליקציות מותאמות אישית ב-Android Automotive OS.
סקירה כללית
במדריך הזה נסביר איך להגדיר ולהריץ מכונה של Android Automotive עם שירותי Google מובנים. במדריך הזה מוסבר גם איך לבדוק את ממשקי Google API של צד שלישי לשימוש עם פתרונות ניווט ופתרונות קוליים.
כפי שמוצג, אפשר להשתמש בשלושה סוגים של כוונות כדי לתאר את האינטראקציה בין העוזר הדיגיטלי לבין הניווט: ניווט, חיפוש ופעולות מותאמות אישית.
במאמר הזה מוסבר איך לבדוק את הכוונות באמצעות מפות Google. בנוסף, אנחנו מסבירים איך לשלב אפליקציית ניווט בהתאמה אישית כדי לקבל כוונות מ-Google Assistant.
כדי לציין את אפליקציית ההדגמה כמקבלת של הכוונות שהופעלו על ידי Google Assistant:
עוברים אל הגדרות > Google > Google Assistant > אפליקציית הניווט שמוגדרת כברירת מחדל.
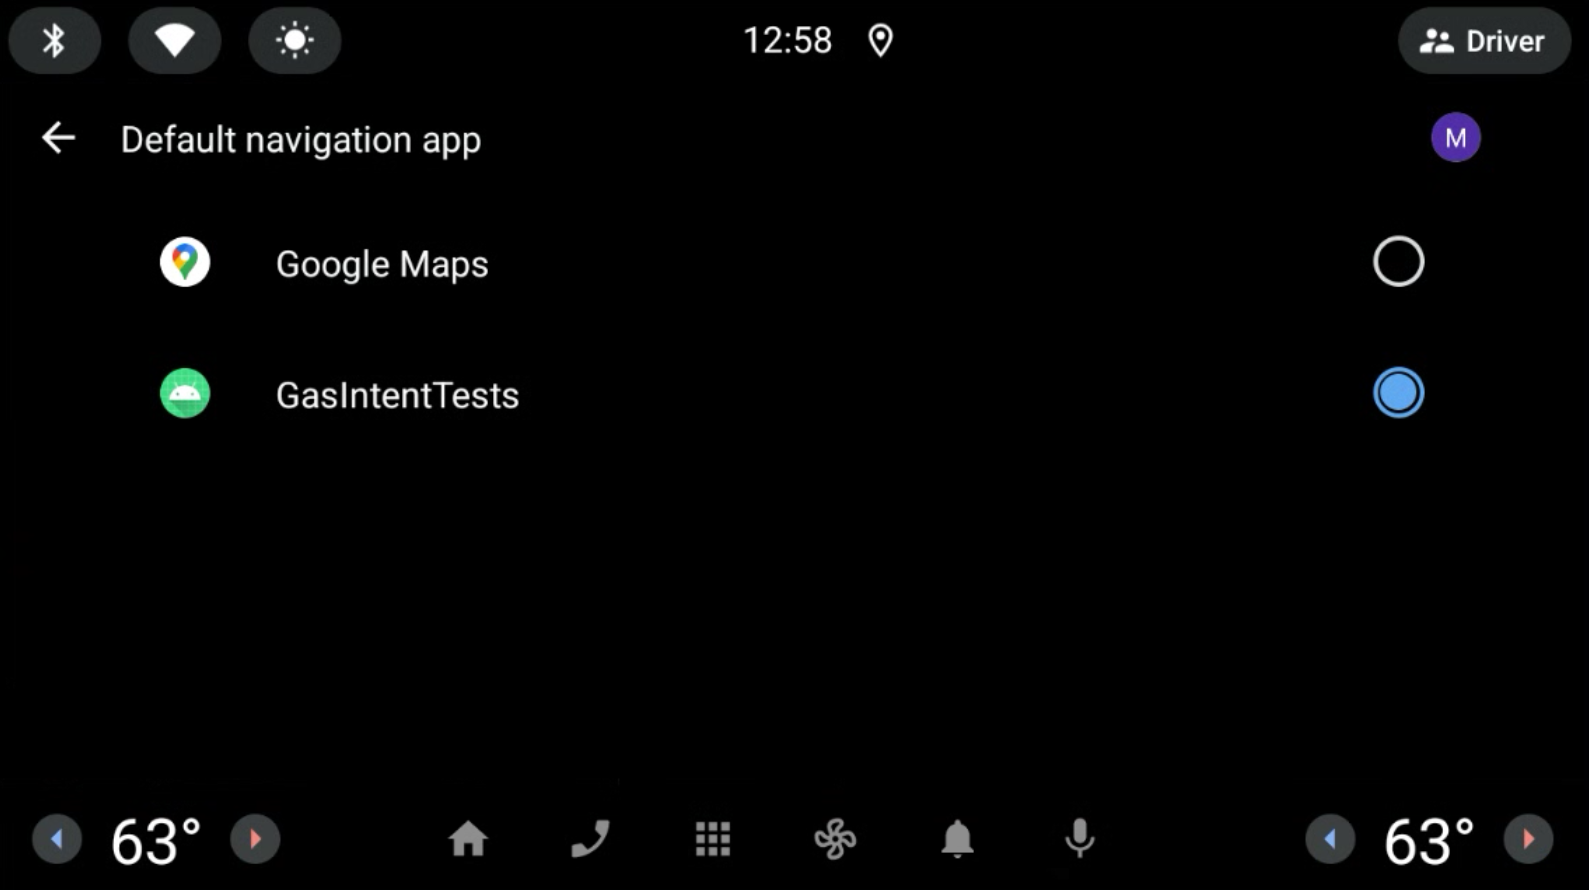
איור 1. בוחרים את אפליקציית הניווט שמוגדרת כברירת מחדל.
לוחצים על סמל המיקרופון ואומרים שאילתה. לדוגמה, "מסעדות בקרבת מקום". אם המיקרופון לא פועל כמצופה, אפשר לעיין במאמר בנושא אמצעי בקרה, הגדרות ועזרה נוספים.
כתובת ה-URI של הכוונה נשלחת על ידי Google Assistant לאפליקציית הניווט לעיבוד נוסף.
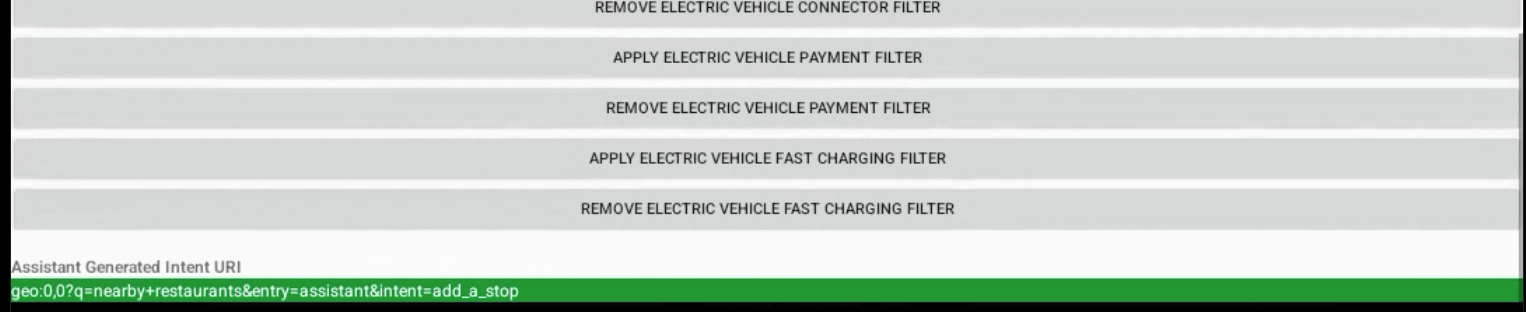
איור 2. פלט של כוונת משתמש שנוצרה על ידי Google Assistant.
פרטים טכניים
אפשר להשתמש בממשק הגישור של Android (adb) כדי להפעיל כוונות מהמסוף.
מידע נוסף זמין במאמר gas-intents-console-tests.txt.
כדי לציין שאפליקציה יכולה לקבל כוונות מ-Google Assistant, צריך לכלול את הקוד הזה בקובץ AndroidManifest.xml של אפליקציית הניווט:
דוגמאות התוכן והקוד שבדף הזה כפופות לרישיונות המפורטים בקטע רישיון לתוכן. Java ו-OpenJDK הם סימנים מסחריים או סימנים מסחריים רשומים של חברת Oracle ו/או של השותפים העצמאיים שלה.
עדכון אחרון: 2025-08-27 (שעון UTC).
[[["התוכן קל להבנה","easyToUnderstand","thumb-up"],["התוכן עזר לי לפתור בעיה","solvedMyProblem","thumb-up"],["סיבה אחרת","otherUp","thumb-up"]],[["חסרים לי מידע או פרטים","missingTheInformationINeed","thumb-down"],["התוכן מורכב מדי או עם יותר מדי שלבים","tooComplicatedTooManySteps","thumb-down"],["התוכן לא עדכני","outOfDate","thumb-down"],["בעיה בתרגום","translationIssue","thumb-down"],["בעיה בדוגמאות/בקוד","samplesCodeIssue","thumb-down"],["סיבה אחרת","otherDown","thumb-down"]],["עדכון אחרון: 2025-08-27 (שעון UTC)."],[],[],null,["Test interoperability of Google Assistant and Google Maps with custom Apps on\nAndroid Automotive OS.\n\nOverview\n\nThis guide describes how to set up and run an Android Automotive instance with\nGoogle built-in. This guide also describes how to test the third-party\nGoogle APIs for use with navigation and voice solutions.\n\nTo learn more about these APIs, see [Implement navigation app intents](/develop/devices/assistant/intents-assistant-nav-app)\nand [Google Maps for Android Automotive Intents](/training/cars/platforms/automotive-os/android-intents-automotive).\n\nAs shown, you can use three types of intents to describe the interaction between\nassistant and navigation: navigation, search and custom actions.\nThis content describes how to test the intents with Google Maps. We also\ndescribe how integrate a custom navigation application to receive intents\nfrom Google Assistant.\n\nSetup\n\nTo get started:\n\n1. Download and install [Android Studio](/studio).\n2. Open **Tools \\\u003e Device Manager** and add the **Automotive (1408p landscape) with Google Play** image.\n3. Start the emulator image and sign in to Google Play. Search for and update Google Assistant.\n4. Extract the contents of our [demo application project](/static/training/cars/testing/gas-intents/GasIntentTests.tgz) and open the project in Android Studio (**File \\\u003e Open...**).\n5. Select **Run \\\u003e Run automotive** to install and start the demo application in the emulator.\n\nDemo\n\n[Implement navigation app intents](/develop/devices/assistant/intents-assistant-nav-app) and\n[Google Maps for Android Automotive Intents](/training/cars/platforms/automotive-os/android-intents-automotive) describe the three types of\nintents you can execute: Navigation, Search, and Custom Action.\nMain activity of demo application\n\nGoogle Maps executes the triggered operations.\n\nTo specify the demo application as the receiver of the intents triggered\nby Google Assistant:\n\n1. Go to **Settings \\\u003e Google \\\u003e Google Assistant \\\u003e Default navigation app.**\n\n Figure 1. Select the default navigation App.\n2. Click the **Microphone** icon and speak a query. For example \"Nearby\n restaurants.\". See [Extended controls, settings, and help](/studio/run/emulator-extended-controls#microphone) if the microphone\n does not work as expected.\n The intent URI is sent by Google Assistant to the navigation app to process\n further.\n\n Figure 2. Output of Google Assistant generated Intent.\n\nTechnical Details\n\nYou can use the Android Debug Bridge (adb) to trigger intents from the console.\nTo learn more, see [gas-intents-console-tests.txt](/static/training/cars/testing/gas-intents/gas-intents-console-tests.txt).\n\nTo designate that an application can receive intents from\nGoogle Assistant, include this code in the `AndroidManifest.xml` file of the\nnavigation application: \n\n \u003c!-- Navigation Intent --\u003e\n \u003cintent-filter\u003e\n \u003caction android:name=\"androidx.car.app.action.NAVIGATE\" /\u003e\n \u003ccategory android:name=\"android.intent.category.DEFAULT\"/\u003e\n \u003cdata android:scheme=\"geo\" /\u003e\n \u003c/intent-filter\u003e\n\n \u003c!-- Search Intent --\u003e\n \u003cintent-filter\u003e\n \u003caction android:name=\"android.intent.action.VIEW\" /\u003e\n \u003ccategory android:name=\"android.intent.category.DEFAULT\"/\u003e\n \u003cdata android:scheme=\"geo\" /\u003e\n \u003c/intent-filter\u003e\n\n \u003c!-- Custom Action Intents --\u003e\n \u003cintent-filter\u003e\n \u003caction android:name=\"android.intent.action.VIEW\" /\u003e\n \u003ccategory android:name=\"android.intent.category.DEFAULT\"/\u003e\n \u003cdata android:scheme=\"geo.action\" /\u003e\n \u003c/intent-filter\u003e\n\nTo add the app to\n**Settings \\\u003e Google \\\u003e Google Assistant \\\u003e Default navigation app**\nso that it can be seen and selected, add: \n\n \u003cintent-filter\u003e\n \u003caction android:name=\"android.intent.action.MAIN\" /\u003e\n \u003ccategory android:name=\"android.intent.category.APP_MAPS\" /\u003e\n \u003c/intent-filter\u003e"]]