
Il flash dello schermo, chiamato anche flash anteriore o flash selfie, utilizza la luminosità dello schermo dello smartphone per illuminare il soggetto quando si scattano foto con la fotocamera anteriore in condizioni di scarsa illuminazione. È disponibile in molte app fotocamera native e app di social media. Poiché la maggior parte delle persone tiene lo smartphone abbastanza vicino quando inquadra un autoritratto, questo approccio è efficace.
Tuttavia, è difficile per gli sviluppatori implementare correttamente la funzionalità e mantenere una buona qualità di acquisizione in modo coerente su tutti i dispositivi. Questa guida mostra come implementare correttamente questa funzionalità utilizzando Camera2, l'API del framework della fotocamera Android di basso livello.
Flusso di lavoro generale
Per implementare correttamente la funzionalità, i due fattori chiave sono l'utilizzo della sequenza di misurazione della preacquisizione (preacquisizione dell'esposizione automatica) e la tempistica delle operazioni. Il workflow generale è illustrato nella Figura 1.
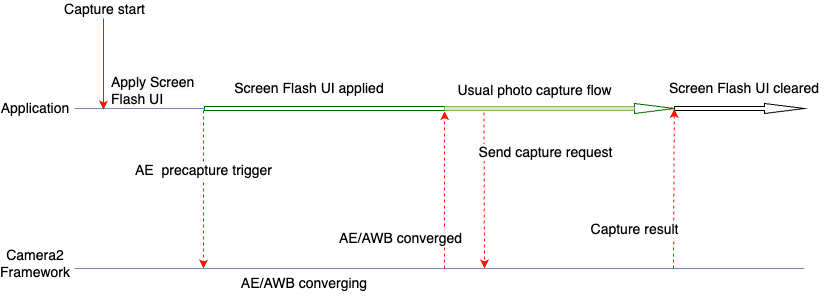
I seguenti passaggi vengono utilizzati quando è necessario acquisire un'immagine con la funzionalità flash dello schermo.
- Applica le modifiche alla UI necessarie per il flash dello schermo, che può fornire luce sufficiente per scattare foto utilizzando lo schermo del dispositivo. Per i casi d'uso generali, Google
suggerisce le seguenti modifiche all'interfaccia utente, come utilizzato nei nostri test:
- La schermata dell'app è coperta da un overlay di colore bianco.
- La luminosità dello schermo è al massimo.
- Imposta la modalità di esposizione automatica (AE) su
CONTROL_AE_MODE_ON_EXTERNAL_FLASH, se supportata. - Attiva una sequenza di misurazione preacquisizione utilizzando
CONTROL_AE_PRECAPTURE_TRIGGER. Attendi la convergenza dell'esposizione automatica (AE) e del bilanciamento del bianco automatico (AWB).
Una volta eseguita la convergenza, viene utilizzato il normale flusso di acquisizione delle foto dell'app.
Invia la richiesta di acquisizione al framework.
Attendi di ricevere il risultato dell'acquisizione.
Reimposta la modalità AE se è stata impostata
CONTROL_AE_MODE_ON_EXTERNAL_FLASH.Cancella le modifiche alla UI per il flash dello schermo.
Codici di esempio di Camera2
Copri la schermata dell'app con un overlay di colore bianco
Aggiungi una visualizzazione nel file XML di layout dell'applicazione. La visualizzazione ha un'elevazione sufficiente per trovarsi sopra tutti gli altri elementi UI durante l'acquisizione del flash dello schermo. Per impostazione predefinita, è invisibile e viene reso visibile solo quando vengono applicate le modifiche all'interfaccia utente del flash dello schermo.
Nel seguente esempio di codice, il colore bianco (#FFFFFF) viene utilizzato come esempio per la visualizzazione. Le applicazioni possono scegliere il colore o offrire più colori agli utenti,
in base ai loro requisiti.
<View
    android:id="@+id/white_color_overlay"
    android:layout_width="match_parent"
    android:layout_height="match_parent"
    android:background="#FFFFFF"
    android:visibility="invisible"
    android:elevation="8dp" />
Massimizzare la luminosità dello schermo
Esistono diversi modi per modificare la luminosità dello schermo in un'app per Android. Un modo diretto è modificare il parametro screenBrightness di WindowManager nel riferimento Finestra attività.
Kotlin
private var previousBrightness: Float = -1.0f

private fun maximizeScreenBrightness() {
    activity?.window?.let { window ->
        window.attributes?.apply {
            previousBrightness = screenBrightness
            screenBrightness = 1f
            window.attributes = this
        }
    }
}

private fun restoreScreenBrightness() {
    activity?.window?.let { window ->
        window.attributes?.apply {
            screenBrightness = previousBrightness
            window.attributes = this
        }
    }
}
Java
private float mPreviousBrightness = -1.0f;

private void maximizeScreenBrightness() {
    if (getActivity() == null || getActivity().getWindow() == null) {
        return;
    }

    Window window = getActivity().getWindow();
    WindowManager.LayoutParams attributes = window.getAttributes();

    mPreviousBrightness = attributes.screenBrightness;
    attributes.screenBrightness = 1f;
    window.setAttributes(attributes);
}

private void restoreScreenBrightness() {
    if (getActivity() == null || getActivity().getWindow() == null) {
        return;
    }

    Window window = getActivity().getWindow();
    WindowManager.LayoutParams attributes = window.getAttributes();

    attributes.screenBrightness = mPreviousBrightness;
    window.setAttributes(attributes);
}
Imposta la modalità AE su CONTROL_AE_MODE_ON_EXTERNAL_FLASH
CONTROL_AE_MODE_ON_EXTERNAL_FLASH è disponibile con il livello API 28 o versioni successive.
Tuttavia, questa modalità AE non è disponibile su tutti i dispositivi, quindi verifica se la modalità AE è
disponibile e imposta il valore di conseguenza. Per verificare la disponibilità, utilizza CameraCharacteristics#CONTROL_AE_AVAILABLE_MODES.
Kotlin
private val characteristics: CameraCharacteristics by lazy {
    cameraManager.getCameraCharacteristics(cameraId)
}

@RequiresApi(Build.VERSION_CODES.P)
private fun isExternalFlashAeModeAvailable() =
    characteristics.get(CameraCharacteristics.CONTROL_AE_AVAILABLE_MODES)
        ?.contains(CaptureRequest.CONTROL_AE_MODE_ON_EXTERNAL_FLASH) ?: false
Java
try {
    mCharacteristics = mCameraManager.getCameraCharacteristics(mCameraId);
} catch (CameraAccessException e) {
    e.printStackTrace();
}

@RequiresApi(Build.VERSION_CODES.P)
private boolean isExternalFlashAeModeAvailable() {
    int[] availableAeModes = mCharacteristics.get(CameraCharacteristics.CONTROL_AE_AVAILABLE_MODES);

    for (int aeMode : availableAeModes) {
        if (aeMode == CaptureRequest.CONTROL_AE_MODE_ON_EXTERNAL_FLASH) {
            return true;
        }
    }
    return false;
}
Se l'applicazione ha impostato una richiesta di acquisizione ripetuta (è obbligatoria per l'anteprima), la modalità AE deve essere impostata sulla richiesta ripetuta. In caso contrario, potrebbe essere sostituito da una modalità AE predefinita o impostata dall'utente nella successiva acquisizione ripetuta. In questo caso, la fotocamera potrebbe non avere tempo sufficiente per eseguire tutte le operazioni che normalmente esegue per una modalità AE flash esterno.
Per assicurarti che la videocamera elabori completamente la richiesta di aggiornamento della modalità AE, controlla il risultato dell'acquisizione nel callback dell'acquisizione ripetuta e attendi che la modalità AE venga aggiornata nel risultato.
Acquisizione del callback che può attendere l'aggiornamento della modalità AE
Il seguente snippet di codice mostra come eseguire questa operazione.
Kotlin
private val repeatingCaptureCallback = object : CameraCaptureSession.CaptureCallback() {
    private var targetAeMode: Int? = null
    private var aeModeUpdateDeferred: CompletableDeferred? = null

    suspend fun awaitAeModeUpdate(targetAeMode: Int) {
        this.targetAeMode = targetAeMode
        aeModeUpdateDeferred = CompletableDeferred()
        // Makes the current coroutine wait until aeModeUpdateDeferred is completed. It is
        // completed once targetAeMode is found in the following capture callbacks
        aeModeUpdateDeferred?.await()
    }

    private fun process(result: CaptureResult) {
        // Checks if AE mode is updated and completes any awaiting Deferred
        aeModeUpdateDeferred?.let {
            val aeMode = result[CaptureResult.CONTROL_AE_MODE]
            if (aeMode == targetAeMode) {
                it.complete(Unit)
            }
        }
    }

    override fun onCaptureCompleted(
        session: CameraCaptureSession,
        request: CaptureRequest,
        result: TotalCaptureResult
    ) {
        super.onCaptureCompleted(session, request, result)
        process(result)
    }
}
Java
static class AwaitingCaptureCallback extends CameraCaptureSession.CaptureCallback {
    private int mTargetAeMode;
    private CountDownLatch mAeModeUpdateLatch = null;

    public void awaitAeModeUpdate(int targetAeMode) {
        mTargetAeMode = targetAeMode;
        mAeModeUpdateLatch = new CountDownLatch(1);
        // Makes the current thread wait until mAeModeUpdateLatch is released, it will be
        // released once targetAeMode is found in the capture callbacks below
        try {
            mAeModeUpdateLatch.await();
        } catch (InterruptedException e) {
            e.printStackTrace();
        }
    }

    private void process(CaptureResult result) {
        // Checks if AE mode is updated and decrements the count of any awaiting latch
        if (mAeModeUpdateLatch != null) {
            int aeMode = result.get(CaptureResult.CONTROL_AE_MODE);
            if (aeMode == mTargetAeMode) {
                mAeModeUpdateLatch.countDown();
            }
        }
    }

    @Override
    public void onCaptureCompleted(@NonNull CameraCaptureSession session,
            @NonNull CaptureRequest request,
            @NonNull TotalCaptureResult result) {
        super.onCaptureCompleted(session, request, result);
        process(result);
    }
}

private final AwaitingCaptureCallback mRepeatingCaptureCallback = new AwaitingCaptureCallback();
Impostare una richiesta ripetuta per attivare o disattivare la modalità AE
Con il callback di acquisizione in posizione, i seguenti esempi di codice mostrano come impostare una richiesta ripetuta.
Kotlin
/** [HandlerThread] where all camera operations run */
private val cameraThread = HandlerThread("CameraThread").apply { start() }

/** [Handler] corresponding to [cameraThread] */
private val cameraHandler = Handler(cameraThread.looper)

private suspend fun enableExternalFlashAeMode() {
    if (Build.VERSION.SDK_INT >= 28 && isExternalFlashAeModeAvailable()) {
        session.setRepeatingRequest(
            camera.createCaptureRequest(CameraDevice.TEMPLATE_PREVIEW).apply {
                addTarget(previewSurface)
                set(
                    CaptureRequest.CONTROL_AE_MODE,
                    CaptureRequest.CONTROL_AE_MODE_ON_EXTERNAL_FLASH
                )
            }.build(), repeatingCaptureCallback, cameraHandler
        )

        // Wait for the request to be processed by camera
        repeatingCaptureCallback.awaitAeModeUpdate(CaptureRequest.CONTROL_AE_MODE_ON_EXTERNAL_FLASH)
    }
}

private fun disableExternalFlashAeMode() {
    if (Build.VERSION.SDK_INT >= 28 && isExternalFlashAeModeAvailable()) {
        session.setRepeatingRequest(
            camera.createCaptureRequest(CameraDevice.TEMPLATE_PREVIEW).apply {
                addTarget(previewSurface)
            }.build(), repeatingCaptureCallback, cameraHandler
        )
    }
}
Java
private void setupCameraThread() {
    // HandlerThread where all camera operations run
    HandlerThread cameraThread = new HandlerThread("CameraThread");
    cameraThread.start();

    // Handler corresponding to cameraThread
    mCameraHandler = new Handler(cameraThread.getLooper());
}

private void enableExternalFlashAeMode() {
    if (Build.VERSION.SDK_INT >= 28 && isExternalFlashAeModeAvailable()) {
        try {
            CaptureRequest.Builder requestBuilder = mCamera.createCaptureRequest(CameraDevice.TEMPLATE_PREVIEW);
            requestBuilder.addTarget(mPreviewSurface);
            requestBuilder.set(CaptureRequest.CONTROL_AE_MODE, CaptureRequest.CONTROL_AE_MODE_ON_EXTERNAL_FLASH);
            mSession.setRepeatingRequest(requestBuilder.build(), mRepeatingCaptureCallback, mCameraHandler);
        } catch (CameraAccessException e) {
            e.printStackTrace();
        }

        // Wait for the request to be processed by camera
        mRepeatingCaptureCallback.awaitAeModeUpdate(CaptureRequest.CONTROL_AE_MODE_ON_EXTERNAL_FLASH);
    }
}

private void disableExternalFlashAeMode() {
    if (Build.VERSION.SDK_INT >= 28 && isExternalFlashAeModeAvailable()) {
        try {
            CaptureRequest.Builder requestBuilder = mCamera.createCaptureRequest(CameraDevice.TEMPLATE_PREVIEW);
            requestBuilder.addTarget(mPreviewSurface);
            mSession.setRepeatingRequest(requestBuilder.build(), mRepeatingCaptureCallback, mCameraHandler);
        } catch (CameraAccessException e) {
            e.printStackTrace();
        }
    }
}
Attivare una sequenza di preacquisizione
Per attivare una sequenza di misurazione precattura, puoi inviare un
CaptureRequest con il valore CONTROL_AE_PRECAPTURE_TRIGGER_START impostato sulla richiesta. Devi
attendere l'elaborazione della richiesta e poi attendere la convergenza di AE e AWB.
Sebbene i trigger di preacquisizione con una singola richiesta di acquisizione, l'attesa della convergenza AE e AWB richieda maggiore complessità. Puoi monitorare lo stato della richiesta di estrazione e lo stato della richiesta di estrazione utilizzando un callback di acquisizione impostato su una richiesta ripetuta.
L'aggiornamento della stessa richiamata ripetuta consente di semplificare il codice. Le applicazioni spesso richiedono un'anteprima per la quale configurano una richiesta ripetuta durante la configurazione della videocamera. Pertanto, puoi impostare il callback di acquisizione ripetuta su quella richiesta ripetuta iniziale una sola volta e poi riutilizzarla per il controllo dei risultati e per l'attesa.
Acquisire l'aggiornamento del codice di callback per attendere la convergenza
Per aggiornare il callback di acquisizione ripetuta, utilizza il seguente snippet di codice.
Kotlin
private val repeatingCaptureCallback = object : CameraCaptureSession.CaptureCallback() {
    private var targetAeMode: Int? = null
    private var aeModeUpdateDeferred: CompletableDeferred? = null

    private var convergenceDeferred: CompletableDeferred? = null

    suspend fun awaitAeModeUpdate(targetAeMode: Int) {
        this.targetAeMode = targetAeMode
        aeModeUpdateDeferred = CompletableDeferred()
        // Makes the current coroutine wait until aeModeUpdateDeferred is completed. It is
        // completed once targetAeMode is found in the following capture callbacks
        aeModeUpdateDeferred?.await()
    }

    suspend fun awaitAeAwbConvergence() {
        convergenceDeferred = CompletableDeferred()
        // Makes the current coroutine wait until convergenceDeferred is completed, it will be
        // completed once both AE & AWB are reported as converged in the capture callbacks below
        convergenceDeferred?.await()
    }

    private fun process(result: CaptureResult) {
        // Checks if AE mode is updated and completes any awaiting Deferred
        aeModeUpdateDeferred?.let {
            val aeMode = result[CaptureResult.CONTROL_AE_MODE]
            if (aeMode == targetAeMode) {
                it.complete(Unit)
            }
        }

        // Checks for convergence and completes any awaiting Deferred
        convergenceDeferred?.let {
            val aeState = result[CaptureResult.CONTROL_AE_STATE]
            val awbState = result[CaptureResult.CONTROL_AWB_STATE]

            val isAeReady = (
                    aeState == null // May be null in some devices (e.g. legacy camera HW level)
                            || aeState == CaptureResult.CONTROL_AE_STATE_CONVERGED
                            || aeState == CaptureResult.CONTROL_AE_STATE_FLASH_REQUIRED
                    )

            val isAwbReady = (
                    awbState == null // May be null in some devices (e.g. legacy camera HW level)
                            || awbState == CaptureResult.CONTROL_AWB_STATE_CONVERGED
                    )

            if (isAeReady && isAwbReady) {
                // if any non-null convergenceDeferred is set, complete it
                it.complete(Unit)
            }
        }
    }

    override fun onCaptureCompleted(
        session: CameraCaptureSession,
        request: CaptureRequest,
        result: TotalCaptureResult
    ) {
        super.onCaptureCompleted(session, request, result)
        process(result)
    }
}
Java
static class AwaitingCaptureCallback extends CameraCaptureSession.CaptureCallback {
    private int mTargetAeMode;
    private CountDownLatch mAeModeUpdateLatch = null;

    private CountDownLatch mConvergenceLatch = null;

    public void awaitAeModeUpdate(int targetAeMode) {
        mTargetAeMode = targetAeMode;
        mAeModeUpdateLatch = new CountDownLatch(1);
        // Makes the current thread wait until mAeModeUpdateLatch is released, it will be
        // released once targetAeMode is found in the capture callbacks below
        try {
            mAeModeUpdateLatch.await();
        } catch (InterruptedException e) {
            e.printStackTrace();
        }
    }

    public void awaitAeAwbConvergence() {
        mConvergenceLatch = new CountDownLatch(1);
        // Makes the current coroutine wait until mConvergenceLatch is released, it will be
        // released once both AE & AWB are reported as converged in the capture callbacks below
        try {
            mConvergenceLatch.await();
        } catch (InterruptedException e) {
            e.printStackTrace();
        }
    }

    private void process(CaptureResult result) {
        // Checks if AE mode is updated and decrements the count of any awaiting latch
        if (mAeModeUpdateLatch != null) {
            int aeMode = result.get(CaptureResult.CONTROL_AE_MODE);
            if (aeMode == mTargetAeMode) {
                mAeModeUpdateLatch.countDown();
            }
        }

        // Checks for convergence and decrements the count of any awaiting latch
        if (mConvergenceLatch != null) {
            Integer aeState = result.get(CaptureResult.CONTROL_AE_STATE);
            Integer awbState = result.get(CaptureResult.CONTROL_AWB_STATE);

            boolean isAeReady = (
                    aeState == null // May be null in some devices (e.g. legacy camera HW level)
                            || aeState == CaptureResult.CONTROL_AE_STATE_CONVERGED
                            || aeState == CaptureResult.CONTROL_AE_STATE_FLASH_REQUIRED
            );

            boolean isAwbReady = (
                    awbState == null // May be null in some devices (e.g. legacy camera HW level)
                            || awbState == CaptureResult.CONTROL_AWB_STATE_CONVERGED
            );

            if (isAeReady && isAwbReady) {
                mConvergenceLatch.countDown();
                mConvergenceLatch = null;
            }
        }
    }

    @Override
    public void onCaptureCompleted(@NonNull CameraCaptureSession session,
            @NonNull CaptureRequest request,
            @NonNull TotalCaptureResult result) {
        super.onCaptureCompleted(session, request, result);
        process(result);
    }
}
Imposta il callback su una richiesta ripetuta durante la configurazione della videocamera
Il seguente esempio di codice consente di impostare il callback su una richiesta ripetuta durante l'inizializzazione.
Kotlin
// Open the selected camera
camera = openCamera(cameraManager, cameraId, cameraHandler)

// Creates list of Surfaces where the camera will output frames
val targets = listOf(previewSurface, imageReaderSurface)

// Start a capture session using our open camera and list of Surfaces where frames will go
session = createCameraCaptureSession(camera, targets, cameraHandler)

val captureRequest = camera.createCaptureRequest(
        CameraDevice.TEMPLATE_PREVIEW).apply { addTarget(previewSurface) }

// This will keep sending the capture request as frequently as possible until the
// session is torn down or session.stopRepeating() is called
session.setRepeatingRequest(captureRequest.build(), repeatingCaptureCallback, cameraHandler)
Java
// Open the selected camera mCamera = openCamera(mCameraManager, mCameraId, mCameraHandler); // Creates list of Surfaces where the camera will output frames Listtargets = new ArrayList<>(Arrays.asList(mPreviewSurface, mImageReaderSurface)); // Start a capture session using our open camera and list of Surfaces where frames will go mSession = createCaptureSession(mCamera, targets, mCameraHandler); try { CaptureRequest.Builder requestBuilder = mCamera.createCaptureRequest(CameraDevice.TEMPLATE_PREVIEW); requestBuilder.addTarget(mPreviewSurface); // This will keep sending the capture request as frequently as possible until the // session is torn down or session.stopRepeating() is called mSession.setRepeatingRequest(requestBuilder.build(), mRepeatingCaptureCallback, mCameraHandler); } catch (CameraAccessException e) { e.printStackTrace(); }
Attivazione e attesa della sequenza di preacquisizione
Con il callback impostato, puoi utilizzare il seguente esempio di codice per l'attivazione e l'attesa di una sequenza di preacquisizione.
Kotlin
private suspend fun runPrecaptureSequence() {
    // Creates a new capture request with CONTROL_AE_PRECAPTURE_TRIGGER_START
    val captureRequest = session.device.createCaptureRequest(
        CameraDevice.TEMPLATE_PREVIEW
    ).apply {
        addTarget(previewSurface)
        set(
            CaptureRequest.CONTROL_AE_PRECAPTURE_TRIGGER,
            CaptureRequest.CONTROL_AE_PRECAPTURE_TRIGGER_START
        )
    }

    val precaptureDeferred = CompletableDeferred()
    session.capture(captureRequest.build(), object: CameraCaptureSession.CaptureCallback() {
        override fun onCaptureCompleted(
            session: CameraCaptureSession,
            request: CaptureRequest,
            result: TotalCaptureResult
        ) {
            // Waiting for this callback ensures the precapture request has been processed
            precaptureDeferred.complete(Unit)
        }
    }, cameraHandler)

    precaptureDeferred.await()

    // Precapture trigger request has been processed, we can wait for AE & AWB convergence now
    repeatingCaptureCallback.awaitAeAwbConvergence()
}
Java
private void runPrecaptureSequence() {
    // Creates a new capture request with CONTROL_AE_PRECAPTURE_TRIGGER_START
    try {
        CaptureRequest.Builder requestBuilder =
                mSession.getDevice().createCaptureRequest(CameraDevice.TEMPLATE_PREVIEW);
        requestBuilder.addTarget(mPreviewSurface);
        requestBuilder.set(CaptureRequest.CONTROL_AE_PRECAPTURE_TRIGGER,
                CaptureRequest.CONTROL_AE_PRECAPTURE_TRIGGER_START);

        CountDownLatch precaptureLatch = new CountDownLatch(1);
        mSession.capture(requestBuilder.build(), new CameraCaptureSession.CaptureCallback() {
            @Override
            public void onCaptureCompleted(@NonNull CameraCaptureSession session,
                                           @NonNull CaptureRequest request,
                                           @NonNull TotalCaptureResult result) {
                Log.d(TAG, "CONTROL_AE_PRECAPTURE_TRIGGER_START processed");
                // Waiting for this callback ensures the precapture request has been processed
                precaptureLatch.countDown();
            }
        }, mCameraHandler);

        precaptureLatch.await();

        // Precapture trigger request has been processed, we can wait for AE & AWB convergence now
        mRepeatingCaptureCallback.awaitAeAwbConvergence();
    } catch (CameraAccessException | InterruptedException e) {
        e.printStackTrace();
    }
}
Unire tutto
Con tutti i componenti principali pronti, ogni volta che è necessario scattare una foto, ad esempio quando un utente fa clic sul pulsante di acquisizione, tutti i passaggi possono essere eseguiti nell'ordine indicato nella discussione e negli esempi di codice precedenti.
Kotlin
// User clicks captureButton to take picture
captureButton.setOnClickListener { v ->
    // Apply the screen flash related UI changes
    whiteColorOverlayView.visibility = View.VISIBLE
    maximizeScreenBrightness()

    // Perform I/O heavy operations in a different scope
    lifecycleScope.launch(Dispatchers.IO) {
        // Enable external flash AE mode and wait for it to be processed
        enableExternalFlashAeMode()

        // Run precapture sequence and wait for it to complete
        runPrecaptureSequence()

        // Start taking picture and wait for it to complete
        takePhoto()

        disableExternalFlashAeMode()
        v.post {
            // Clear the screen flash related UI changes
            restoreScreenBrightness()
            whiteColorOverlayView.visibility = View.INVISIBLE
        }
    }
}
Java
// User clicks captureButton to take picture
mCaptureButton.setOnClickListener(new View.OnClickListener() {
    @Override
    public void onClick(View v) {
        // Apply the screen flash related UI changes
        mWhiteColorOverlayView.setVisibility(View.VISIBLE);
        maximizeScreenBrightness();

        // Perform heavy operations in a different thread
        Executors.newSingleThreadExecutor().execute(() -> {
            // Enable external flash AE mode and wait for it to be processed
            enableExternalFlashAeMode();

            // Run precapture sequence and wait for it to complete
            runPrecaptureSequence();

            // Start taking picture and wait for it to complete
            takePhoto();

            disableExternalFlashAeMode();

            v.post(() -> {
                // Clear the screen flash related UI changes
                restoreScreenBrightness();
                mWhiteColorOverlayView.setVisibility(View.INVISIBLE);
            });
        });
    }
});
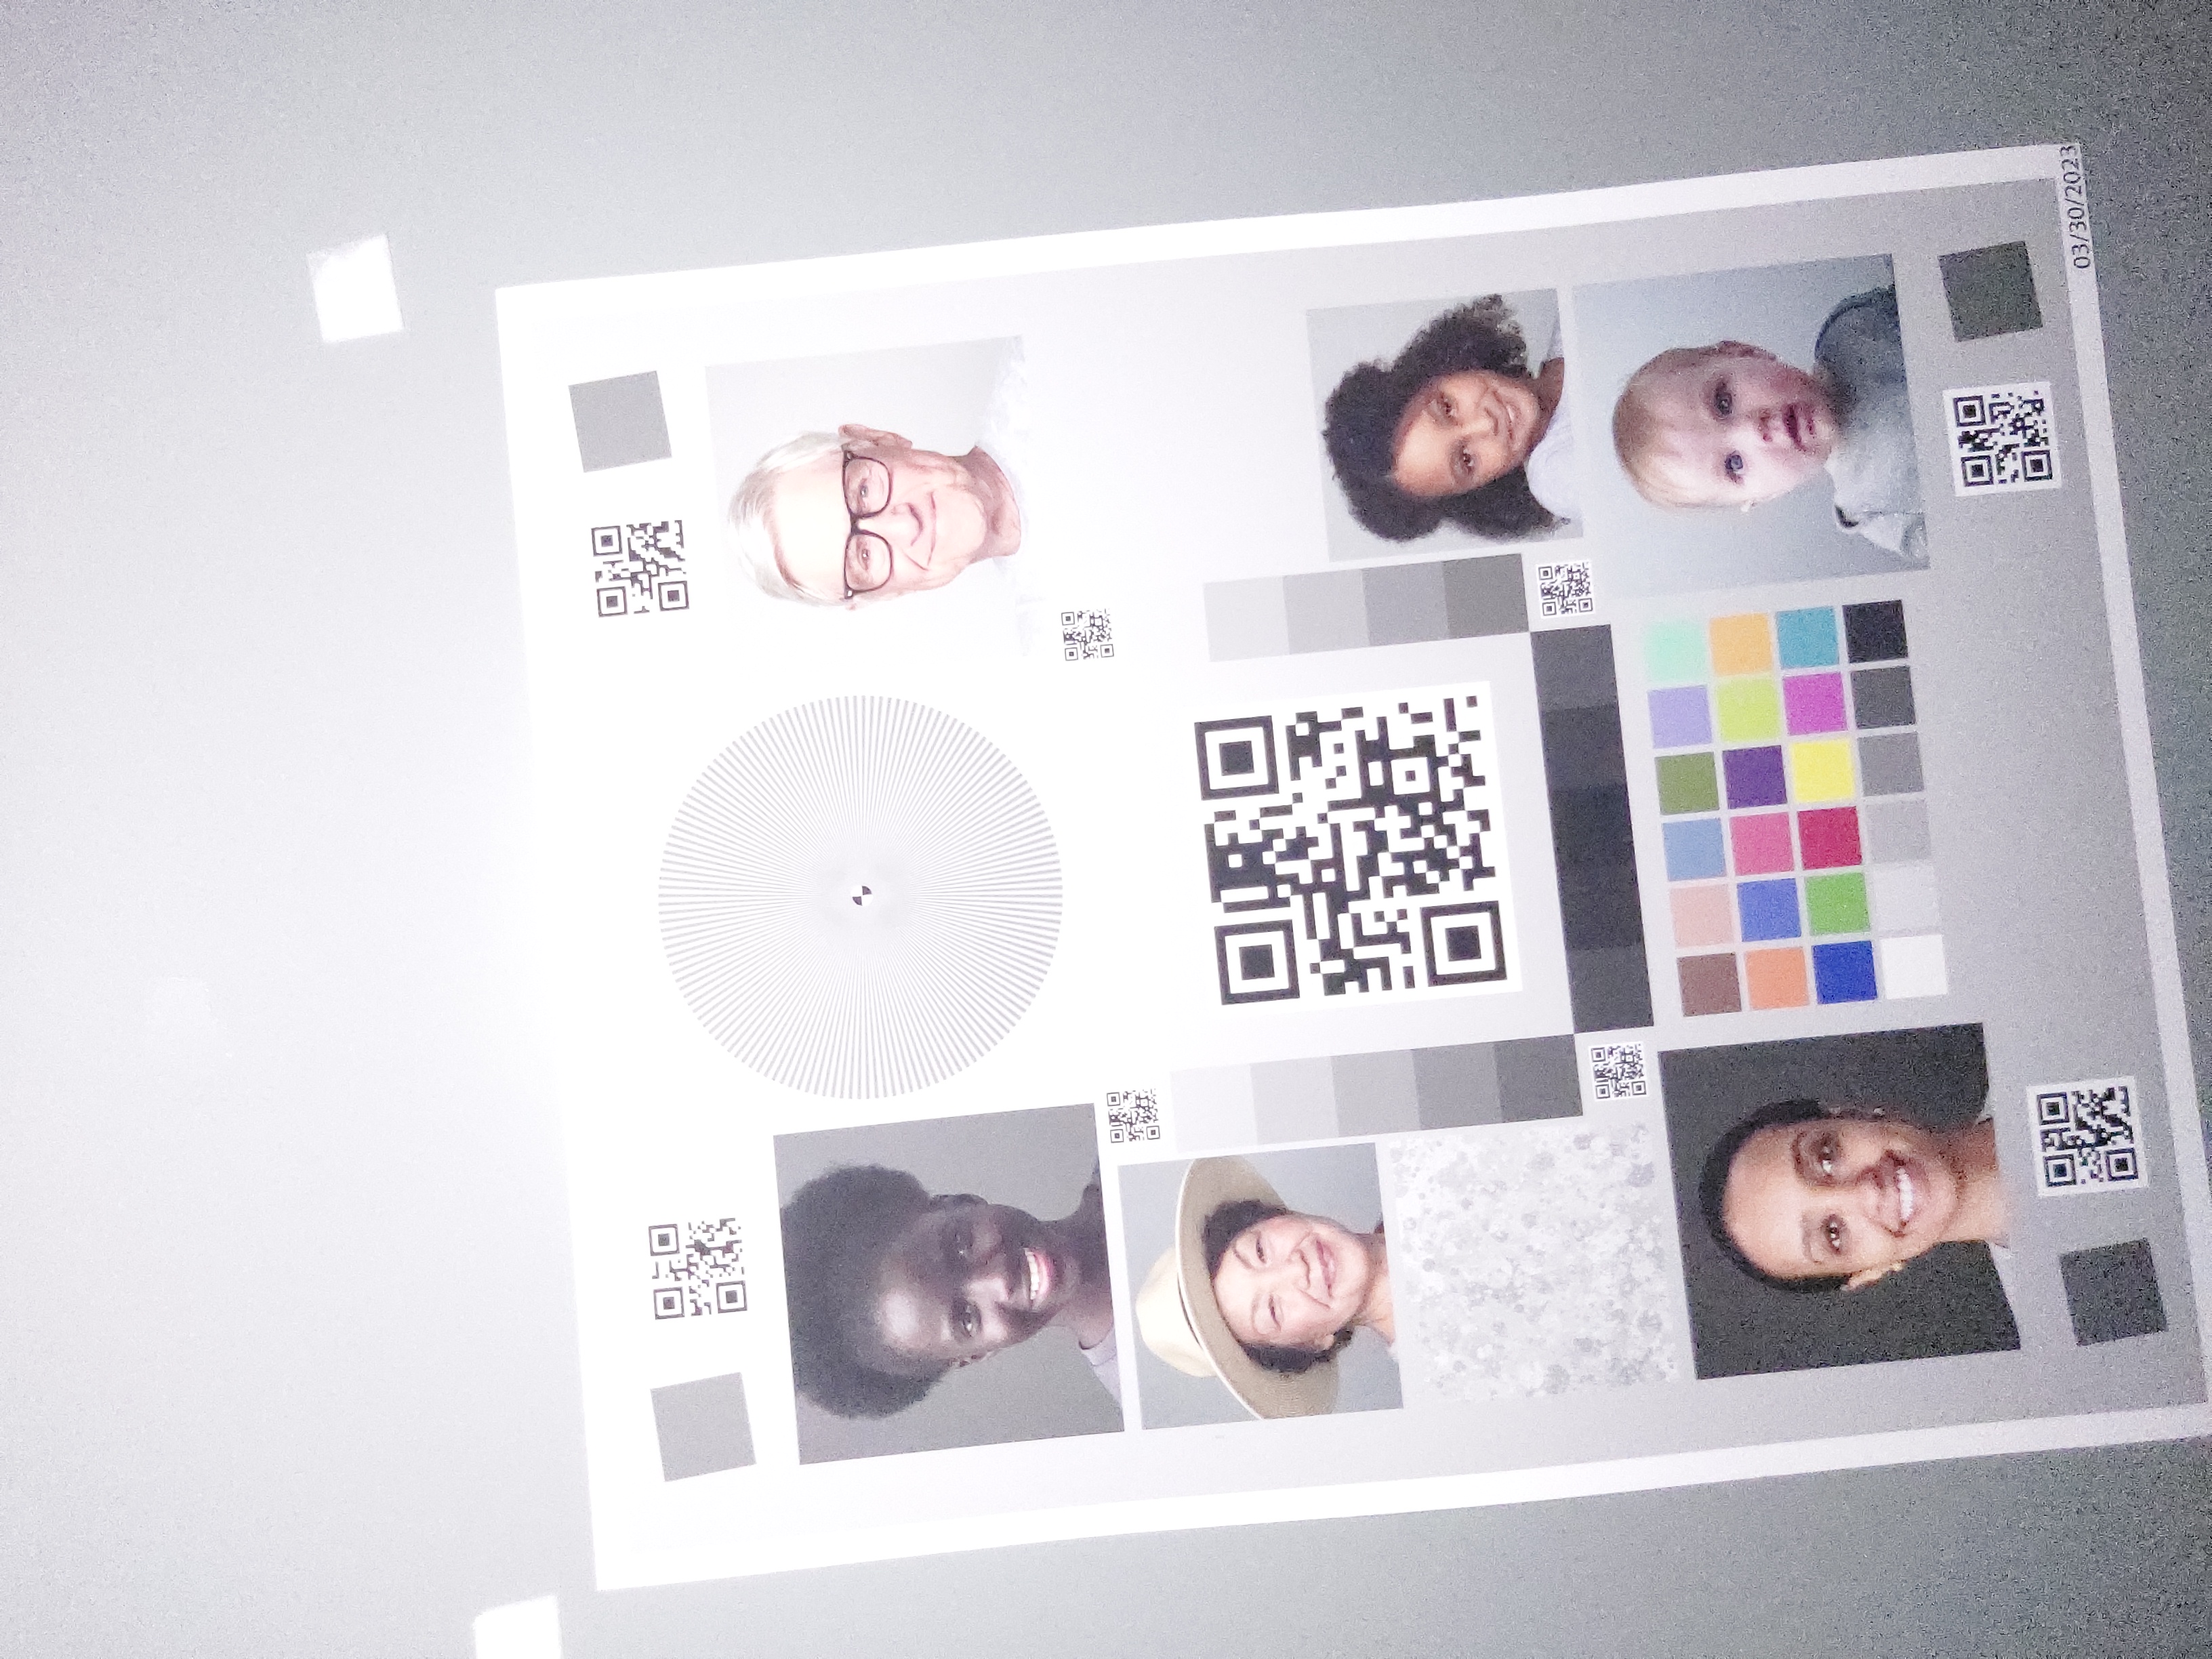
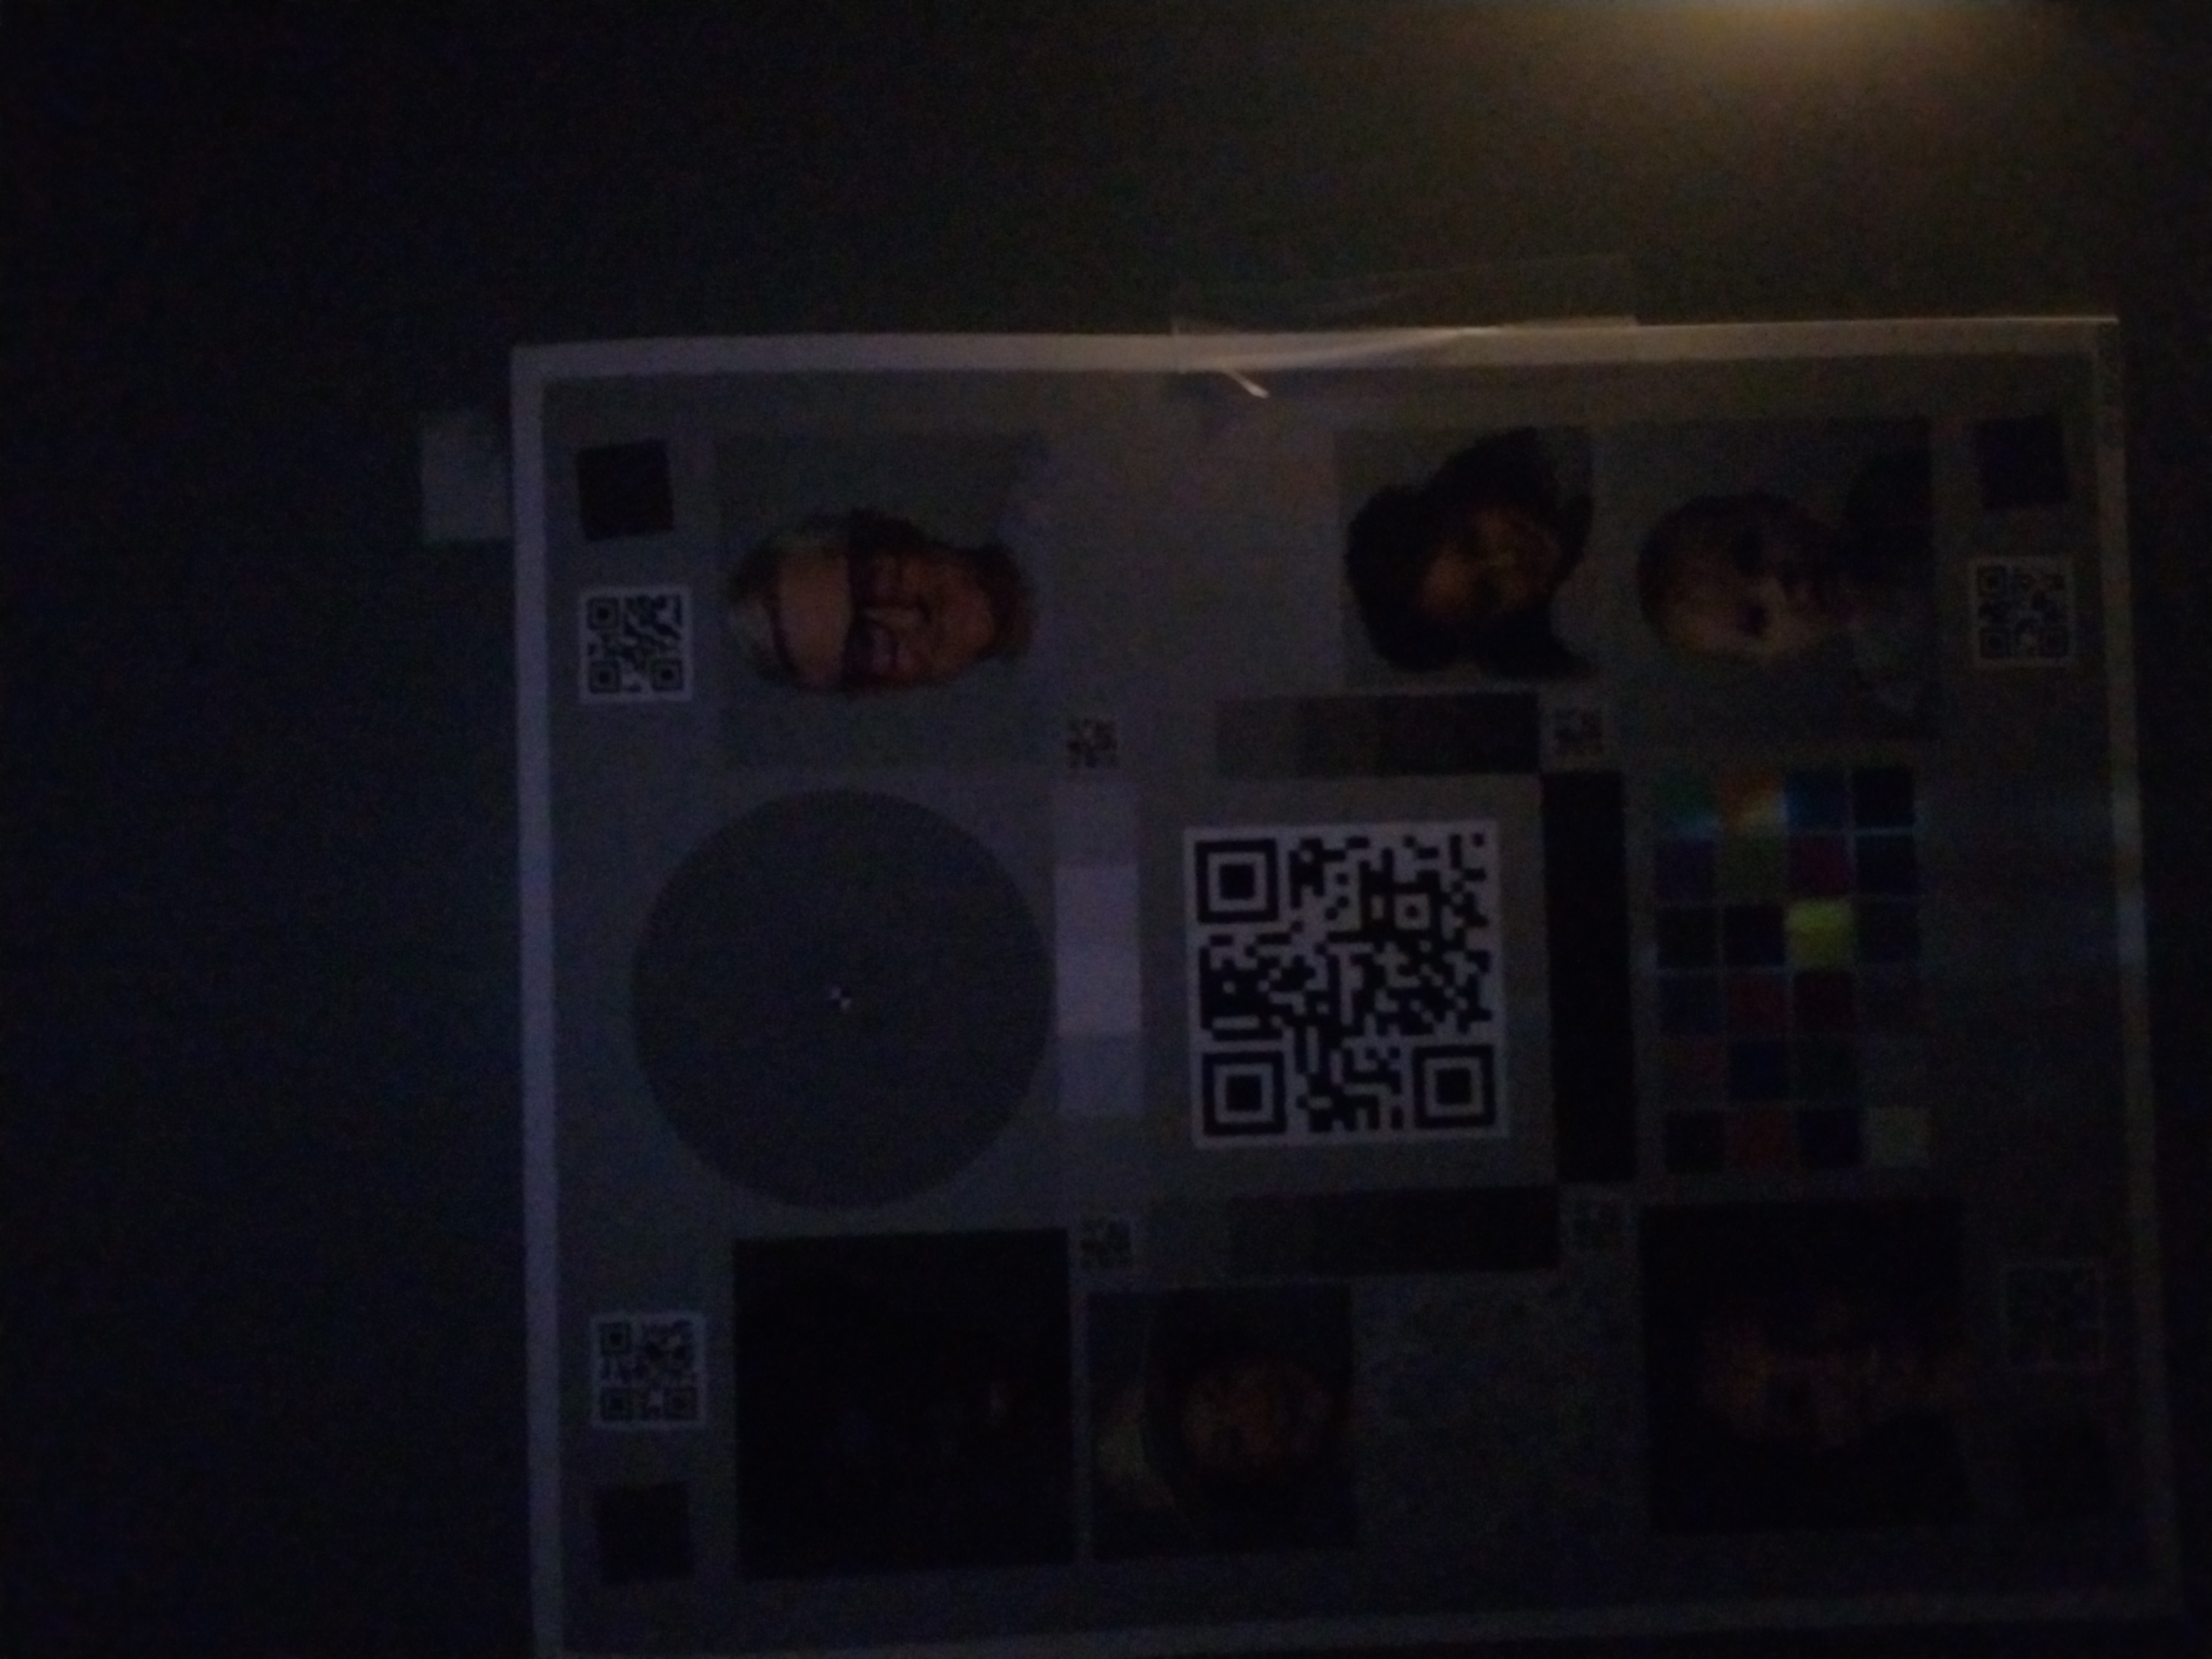
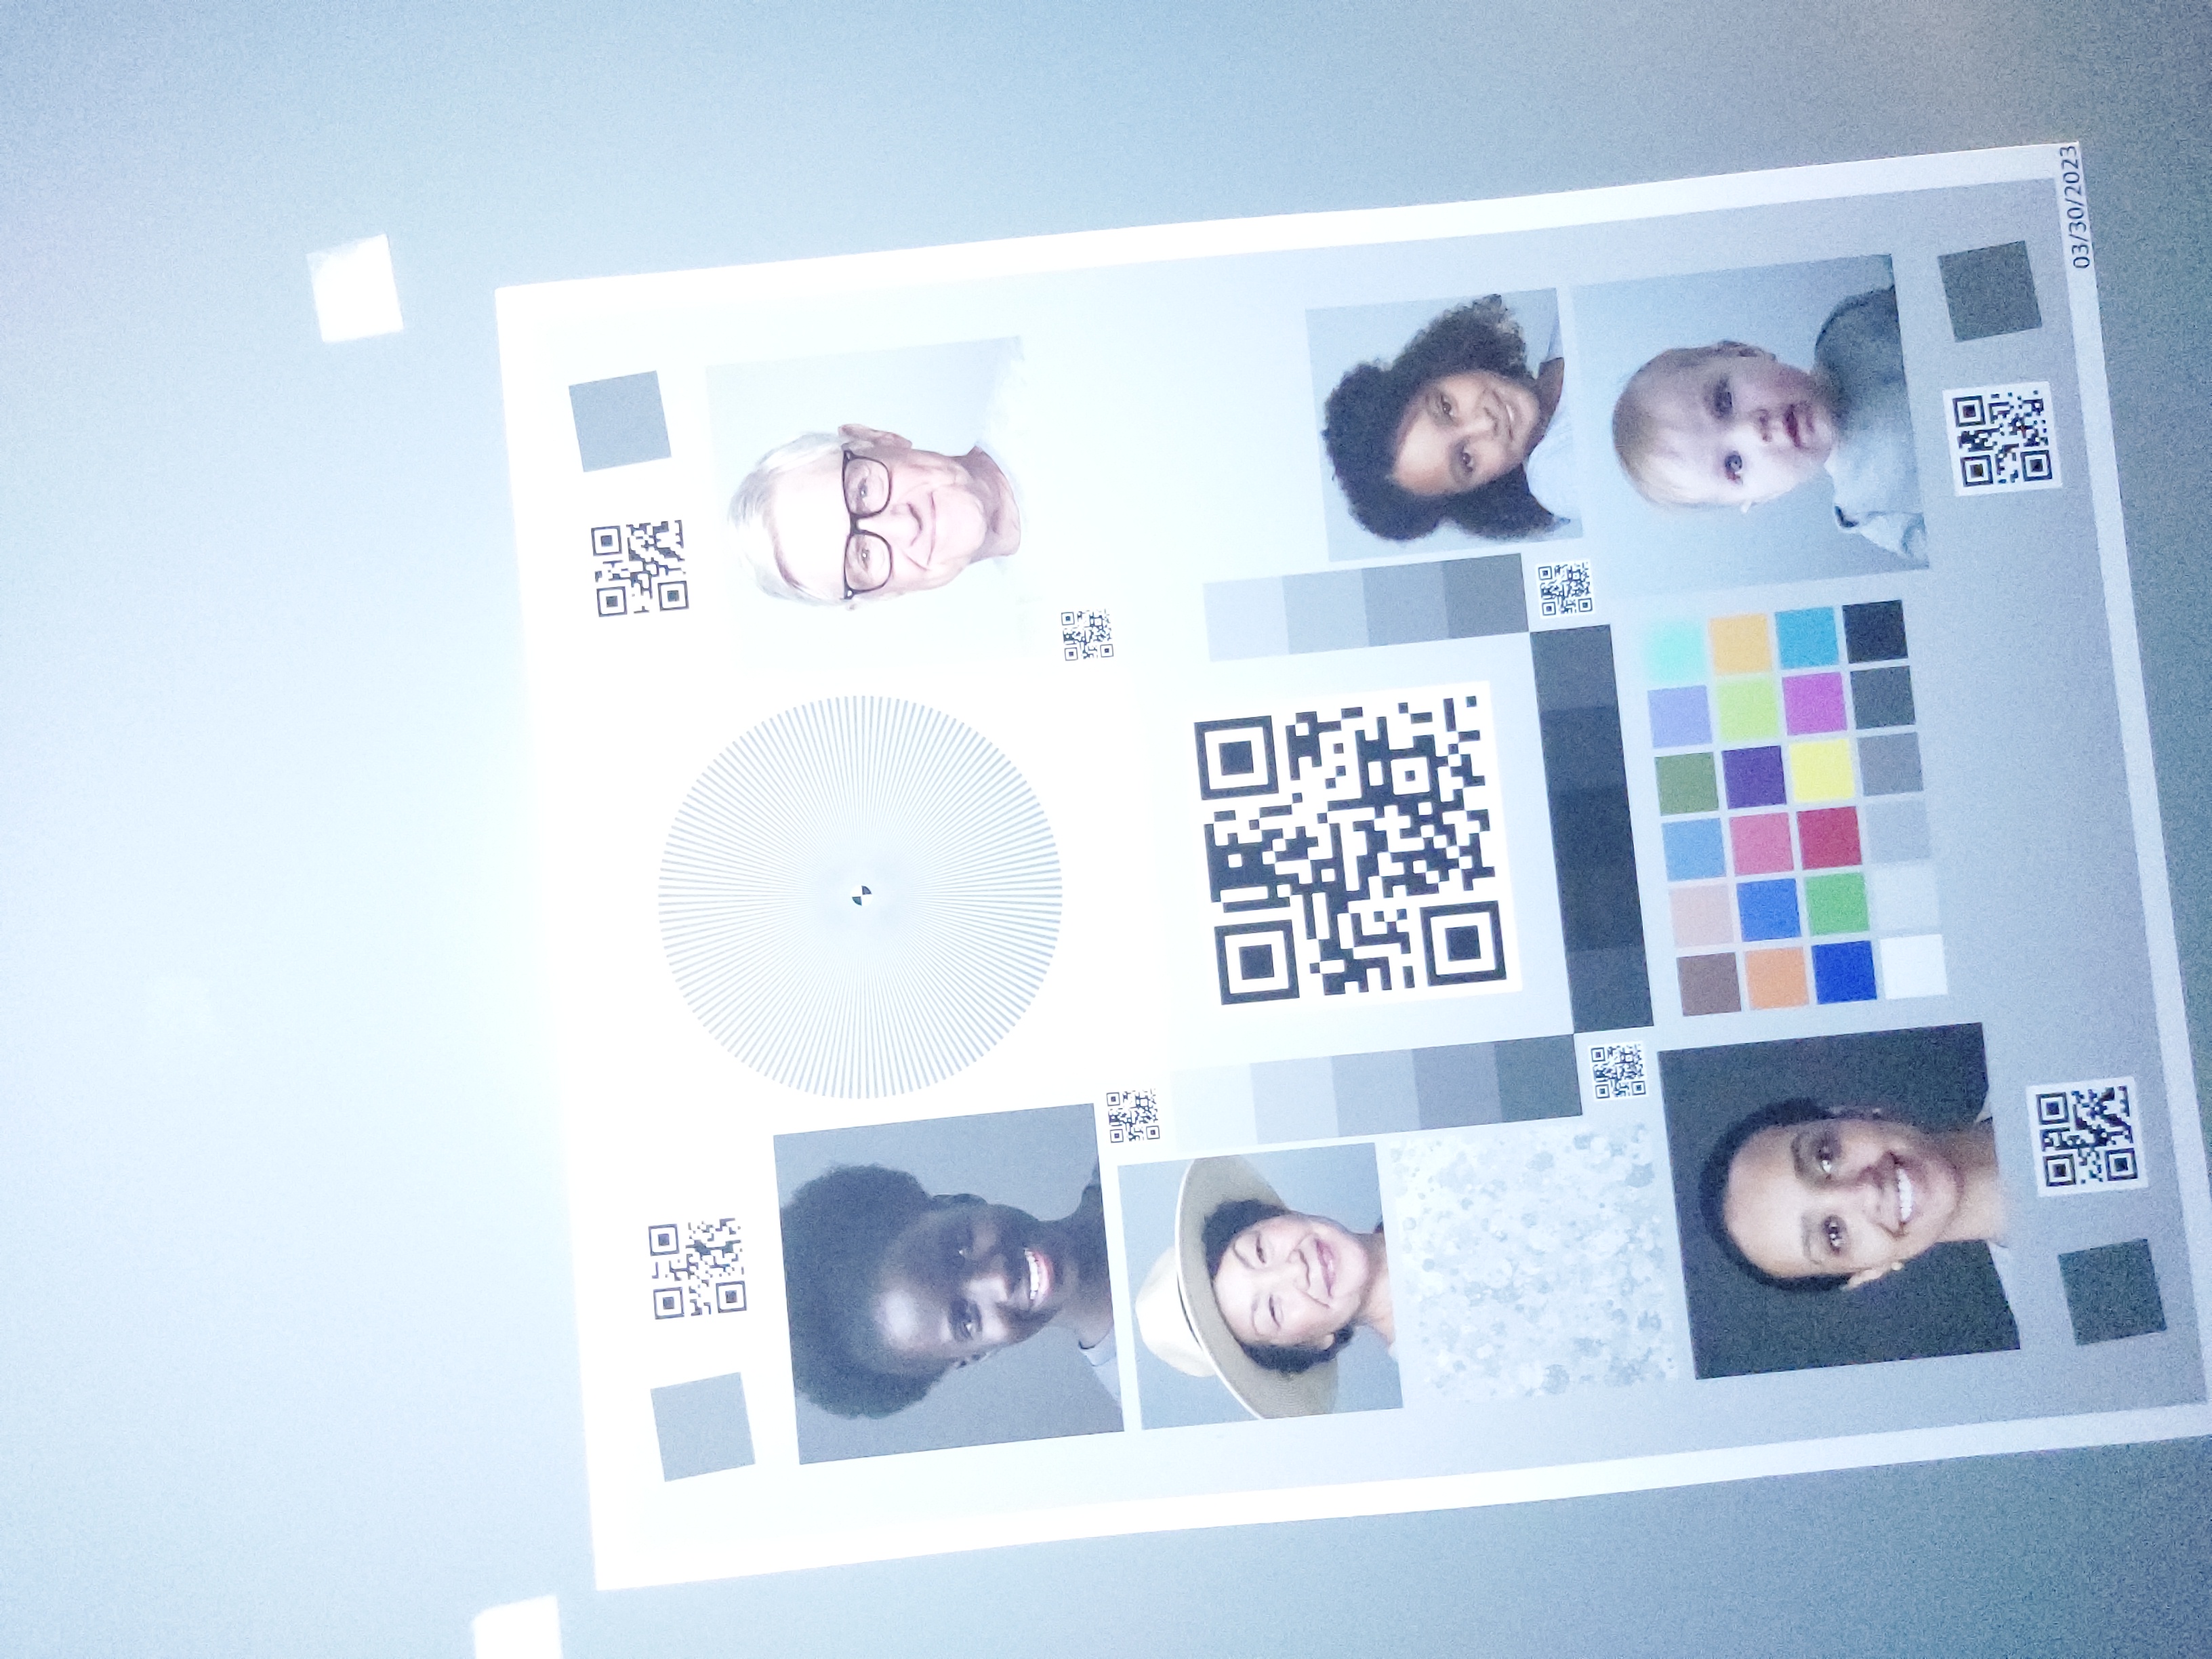
Foto di esempio
Dai seguenti esempi puoi vedere cosa succede quando il flash dello schermo viene implementato in modo errato e quando viene implementato correttamente.
Quando non viene eseguita correttamente
Se il flash dello schermo non è implementato correttamente, i risultati sono incoerenti tra più acquisizioni, dispositivi e condizioni di illuminazione. Spesso le immagini acquisite presentano problemi di esposizione o tonalità di colore. Per alcuni dispositivi, questi tipi di bug diventano più evidenti in una condizione di illuminazione specifica, ad esempio in un ambiente con scarsa illuminazione anziché in uno completamente buio.
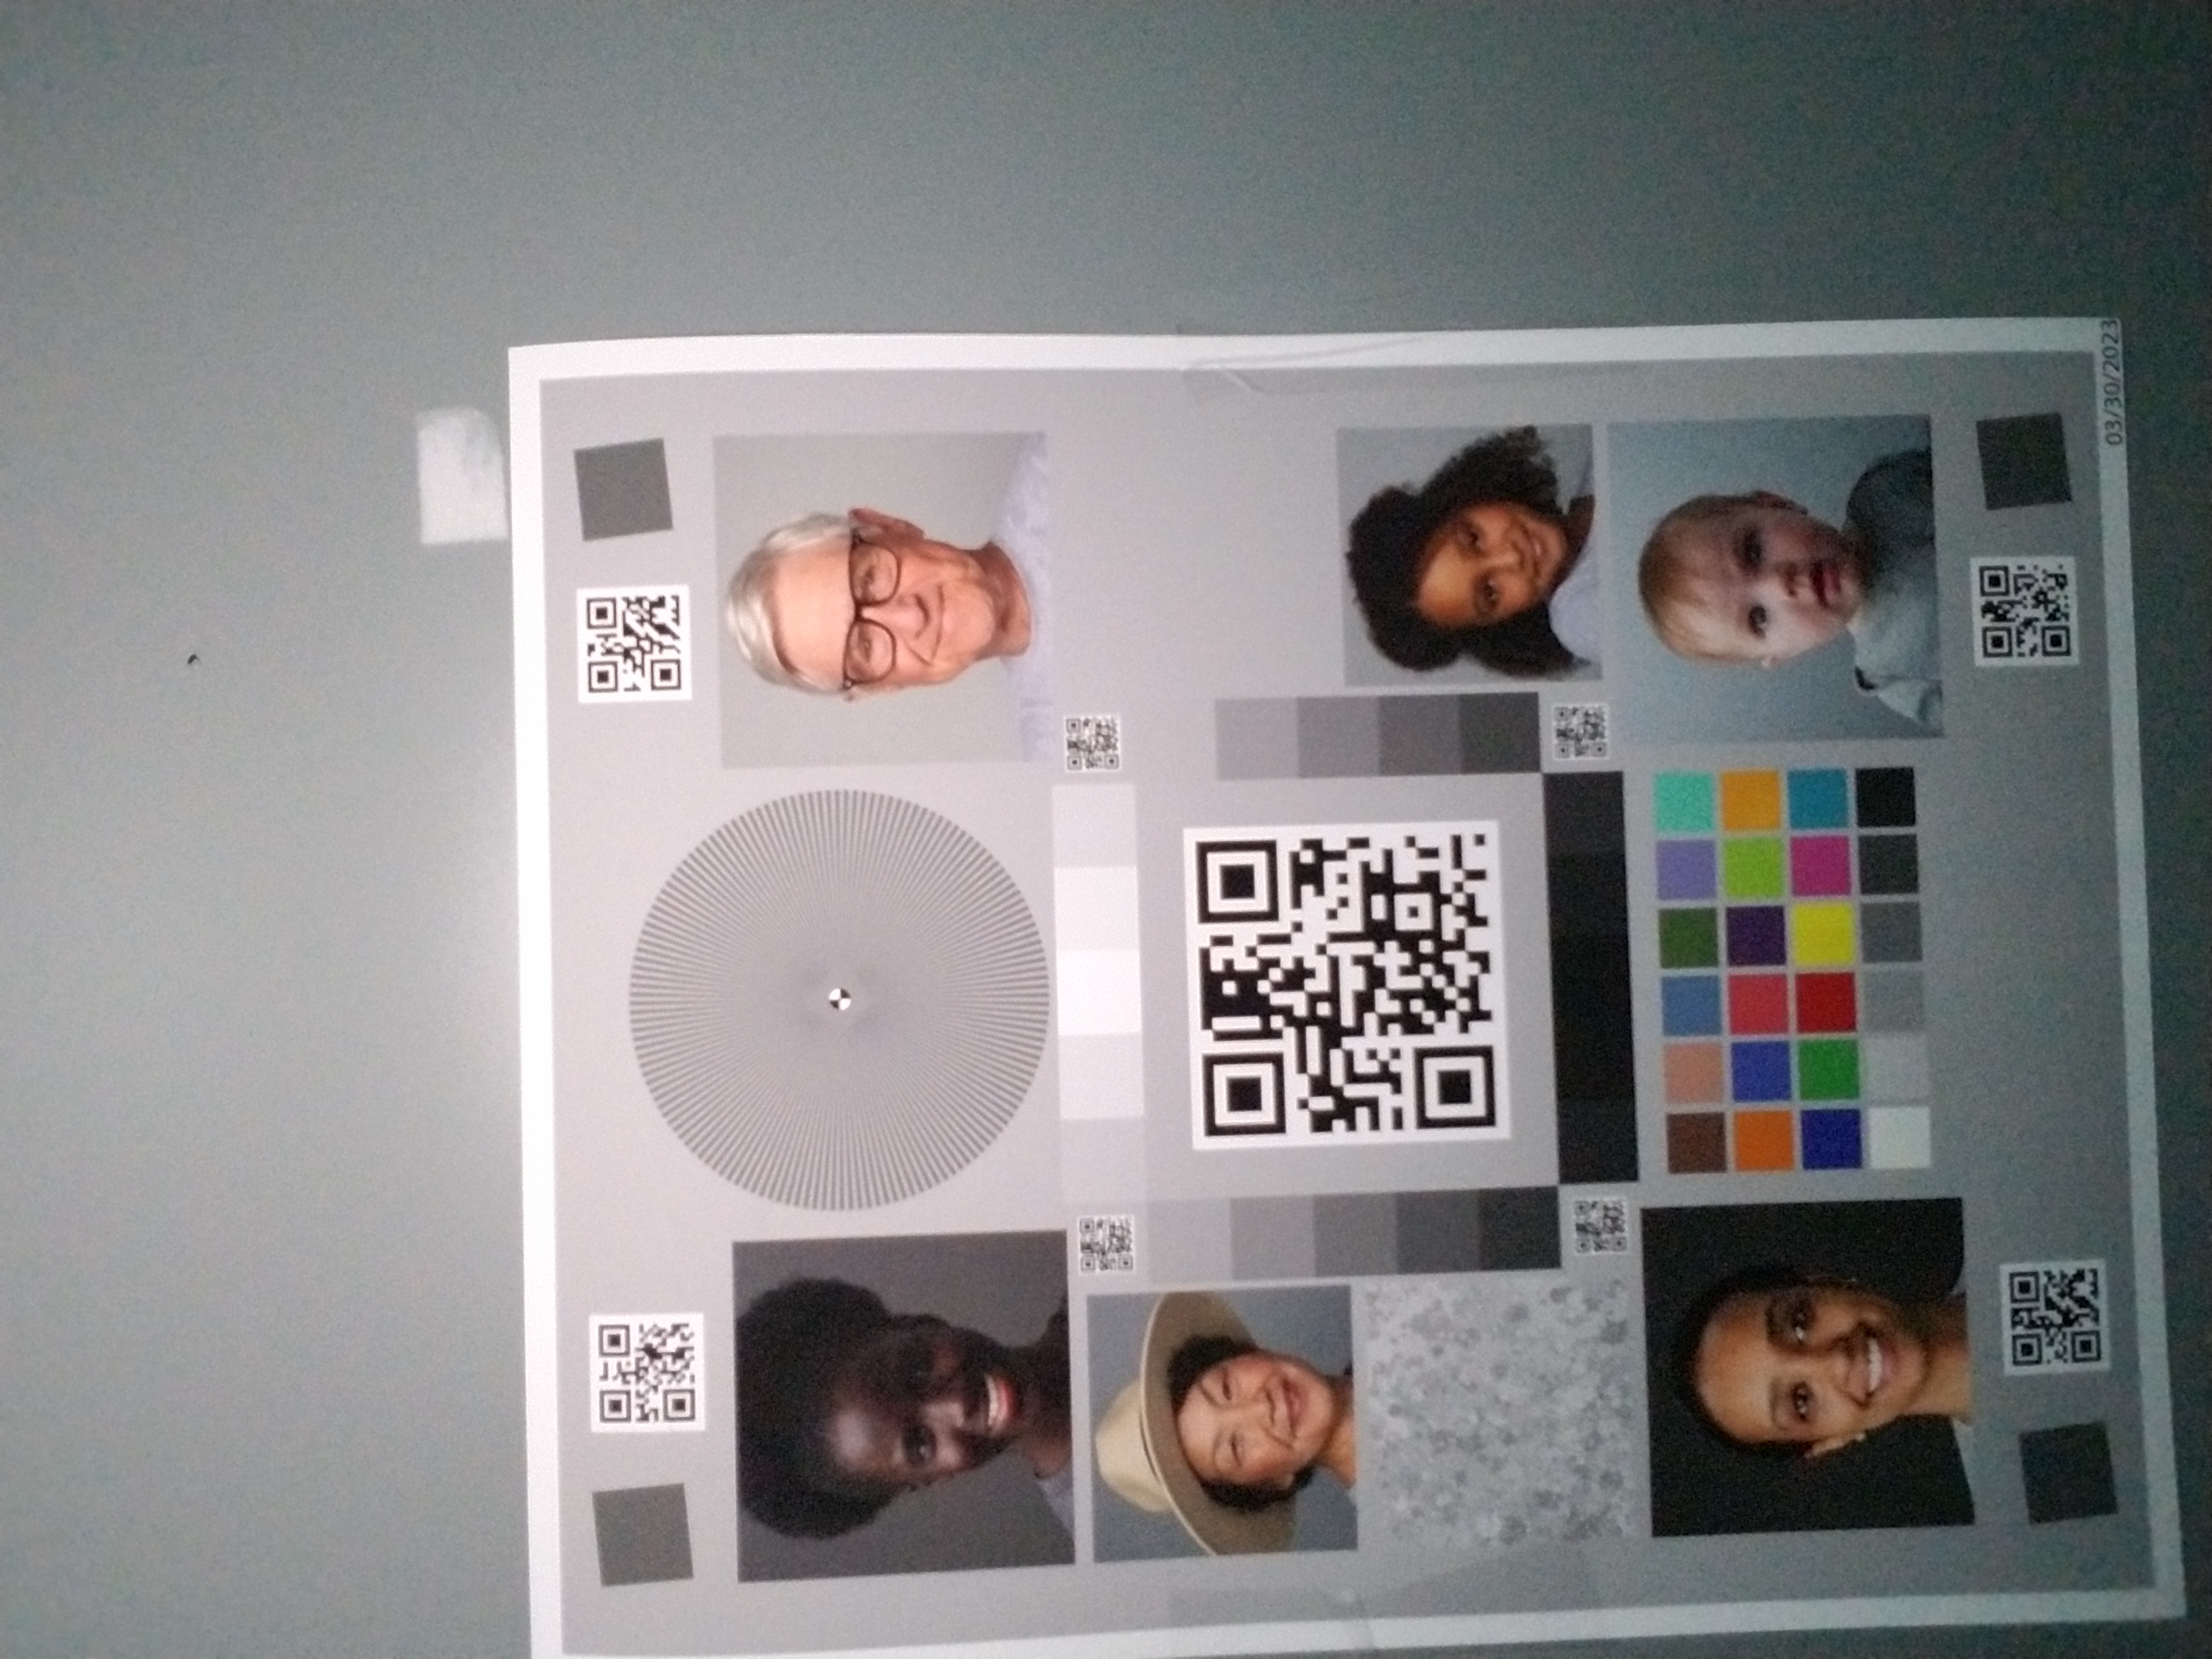
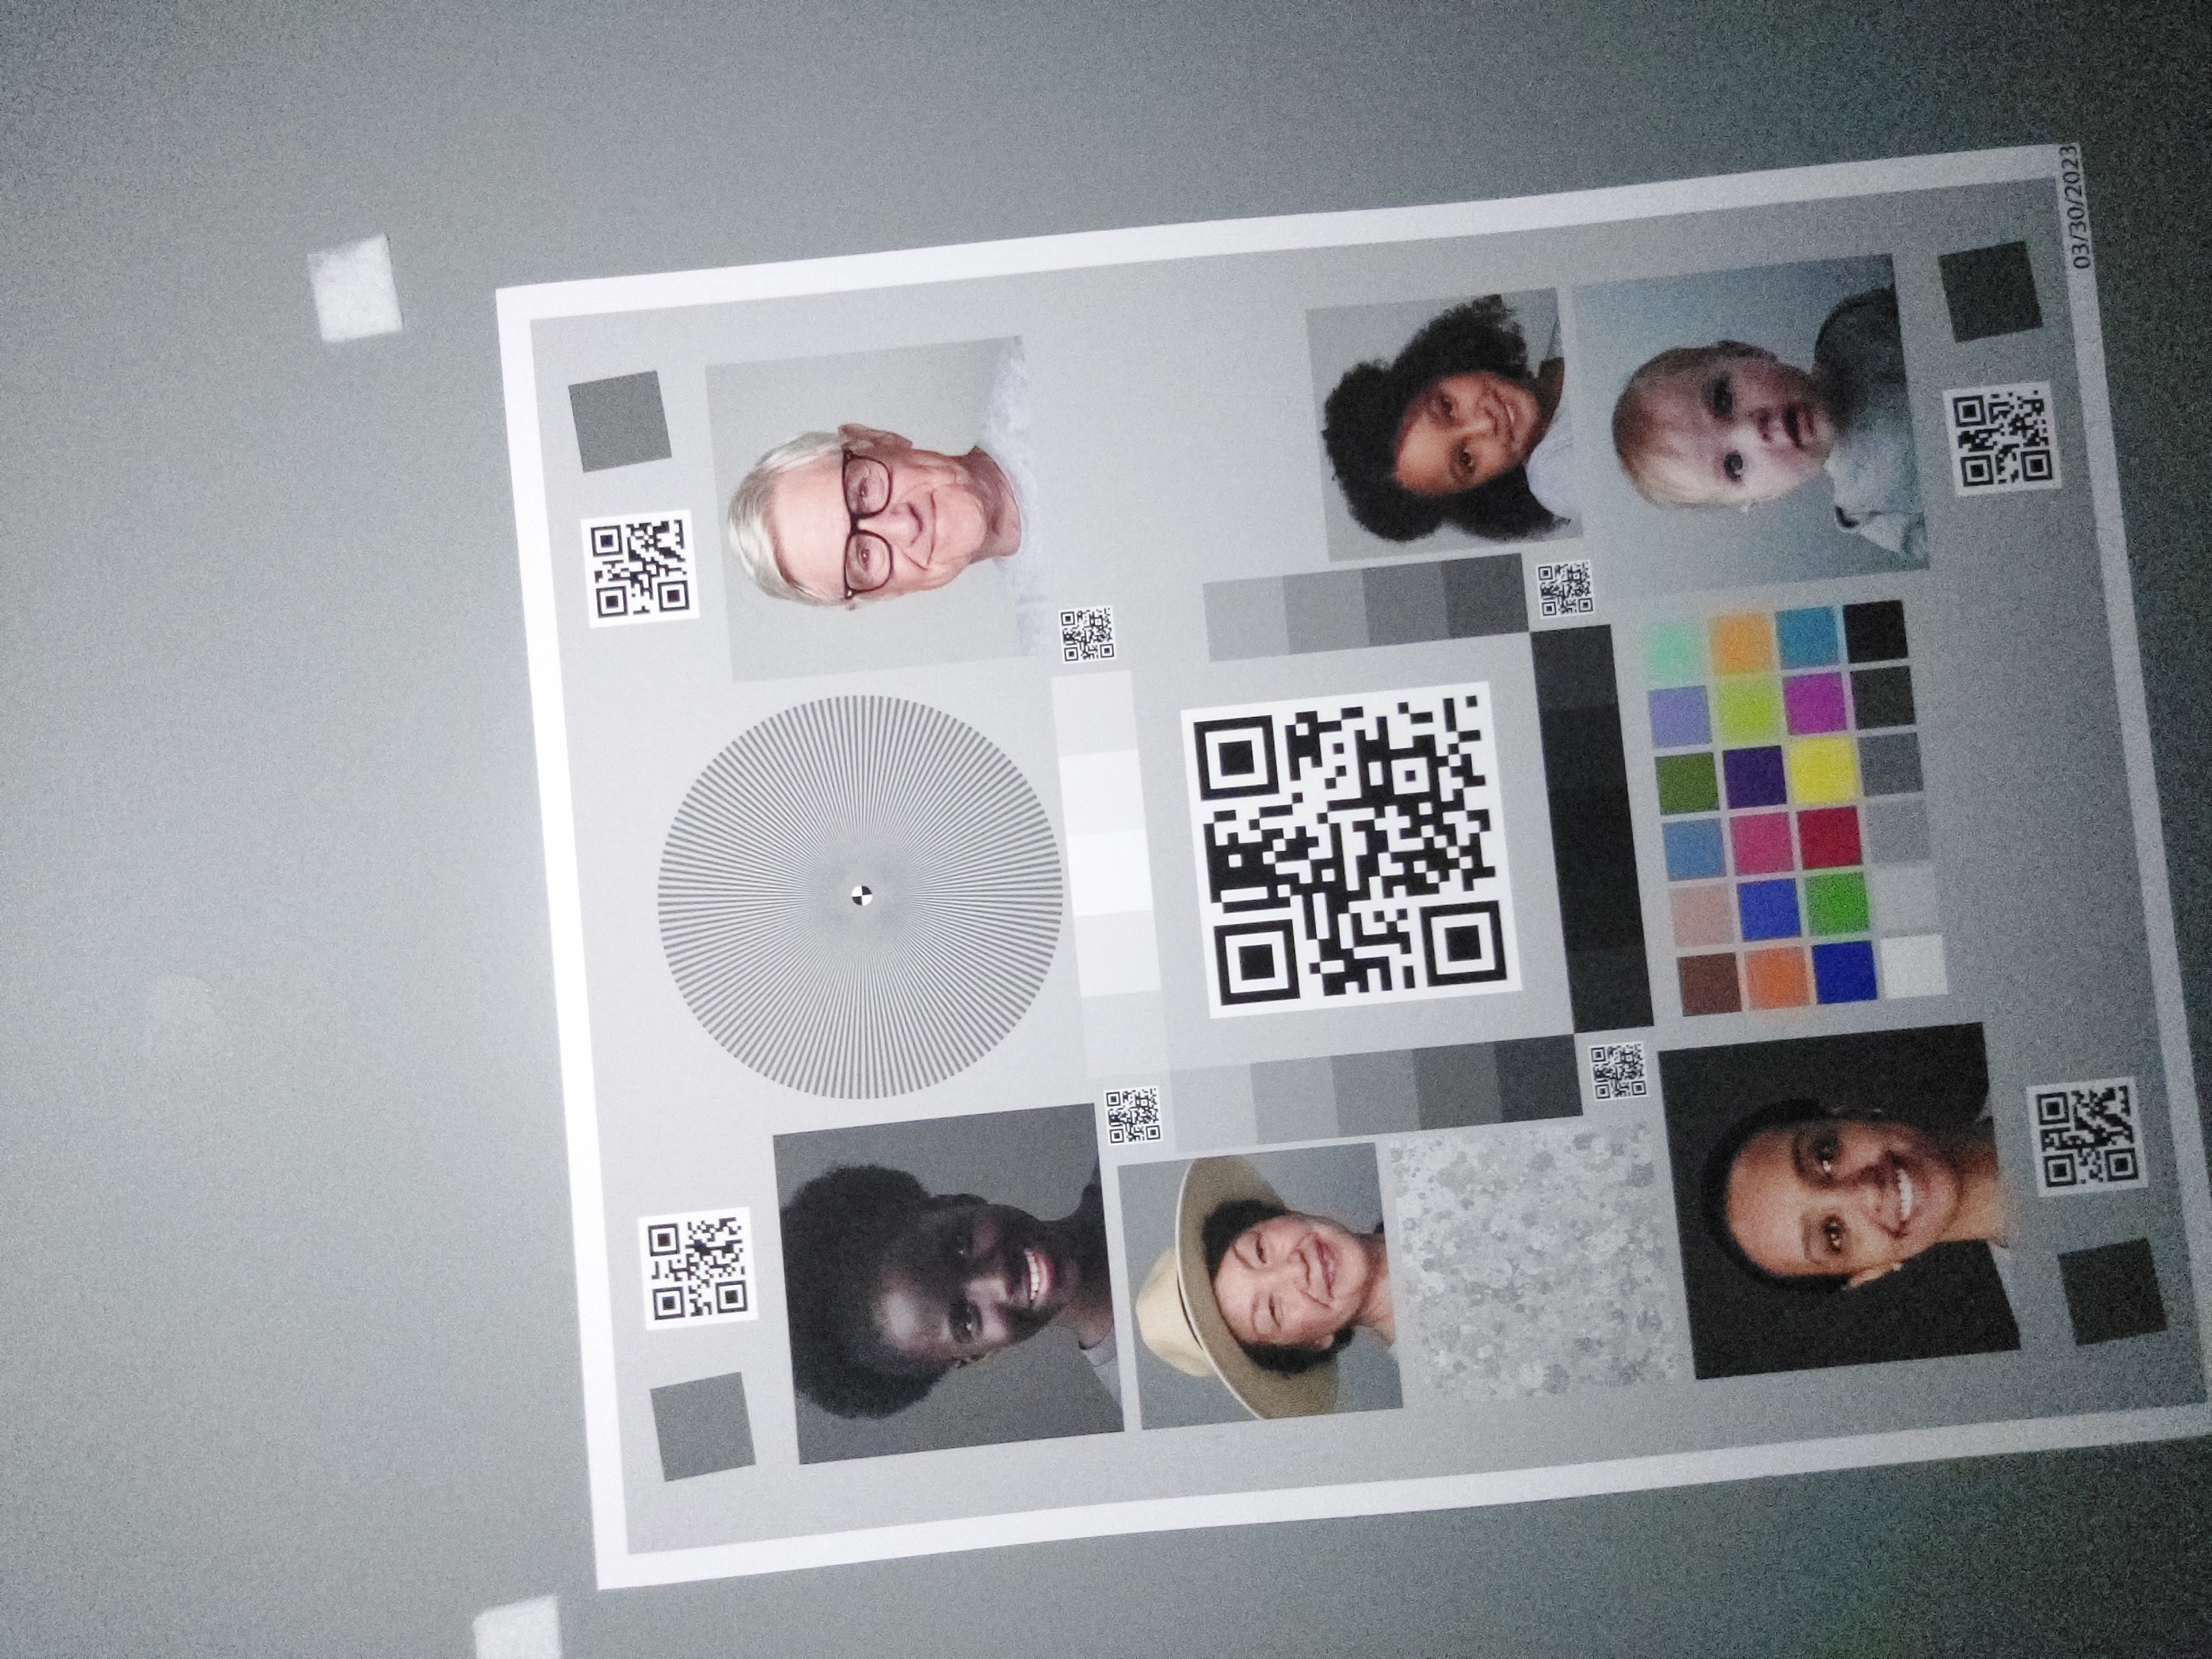
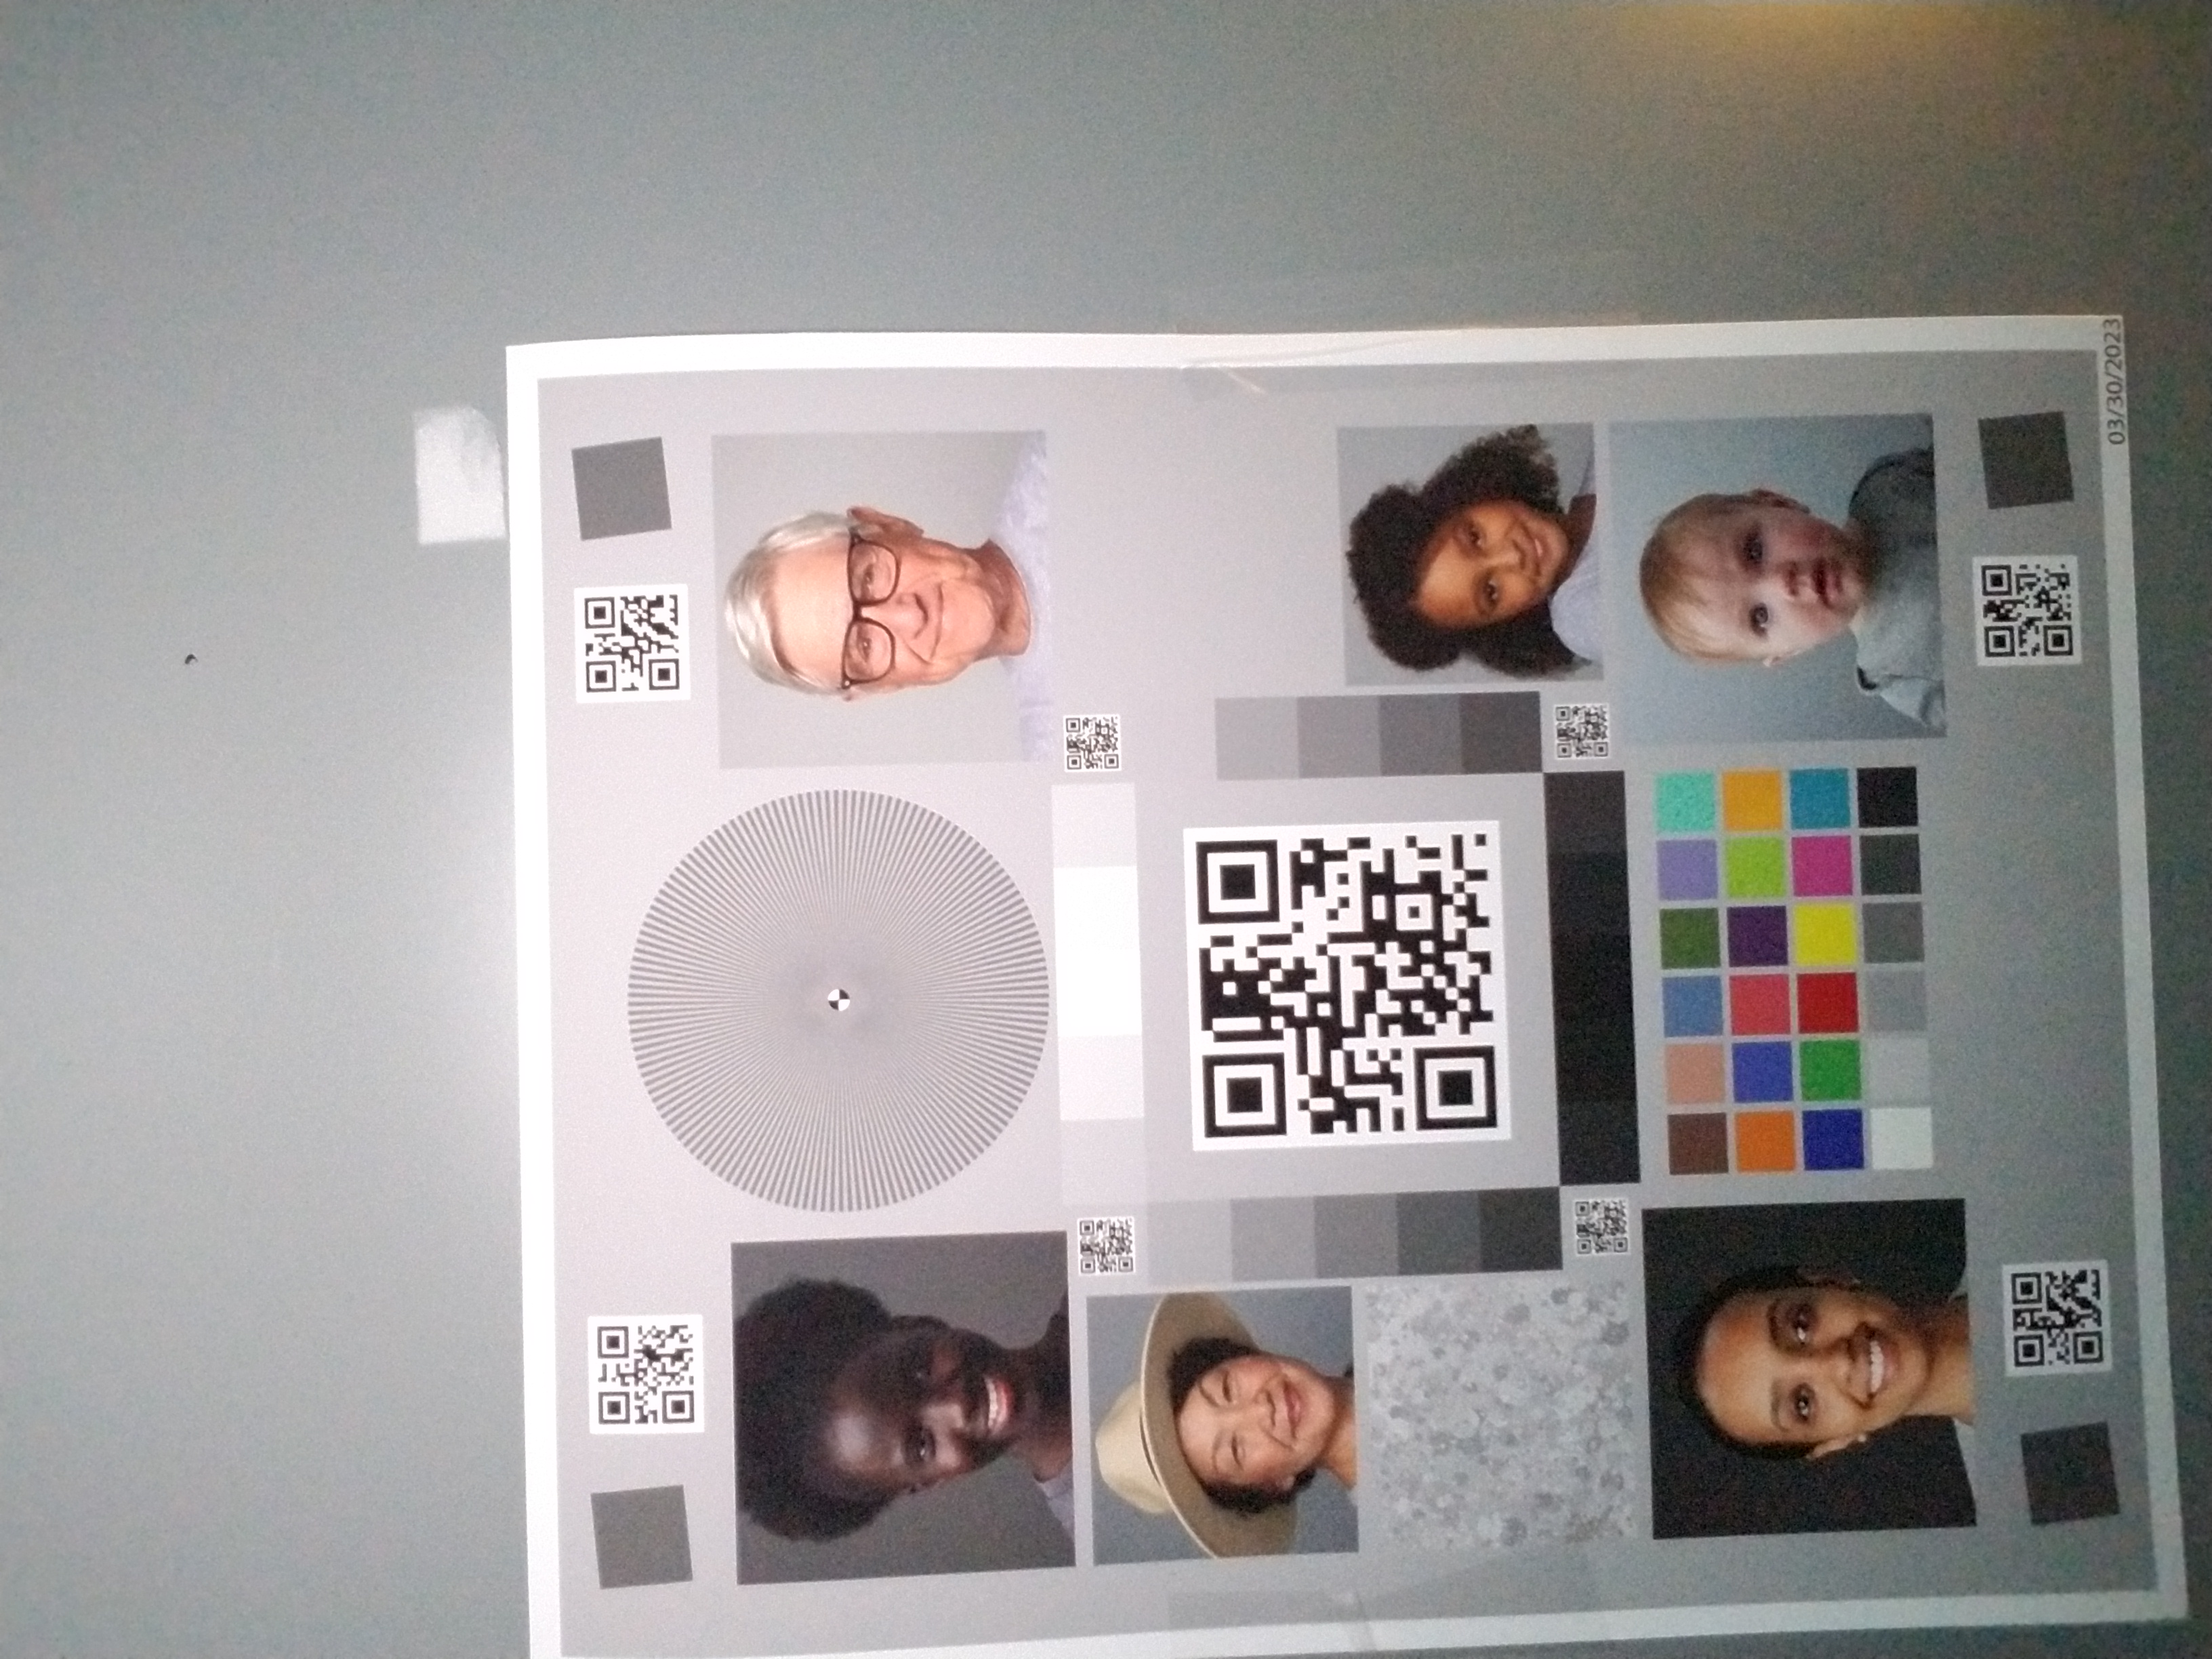
La seguente tabella mostra alcuni esempi di questi problemi. Sono state scattate nell'infrastruttura del laboratorio CameraX, con fonti di luce di colore bianco caldo. Questa sorgente luminosa bianco caldo ti consente di vedere come la tonalità di colore blu sia un problema reale, non un effetto collaterale di una sorgente luminosa.
| Ambiente | Sottoesposizione | Sovraesposizione | Tinta colore |
|---|---|---|---|
| Ambiente buio (nessuna fonte di luce tranne lo smartphone) |

|
|

|
| Luce scarsa (sorgente luminosa aggiuntiva di circa 3 lux) |
|
|

|
Se fatto bene
Quando viene utilizzata l'implementazione standard per gli stessi dispositivi e condizioni, puoi visualizzare i risultati nella tabella seguente.
| Ambiente | Sottoesposizione (fissa) | Sovraesposizione (corretta) | Tinta colore (fissa) |
|---|---|---|---|
| Ambiente buio (nessuna fonte di luce tranne lo smartphone) |
|
|
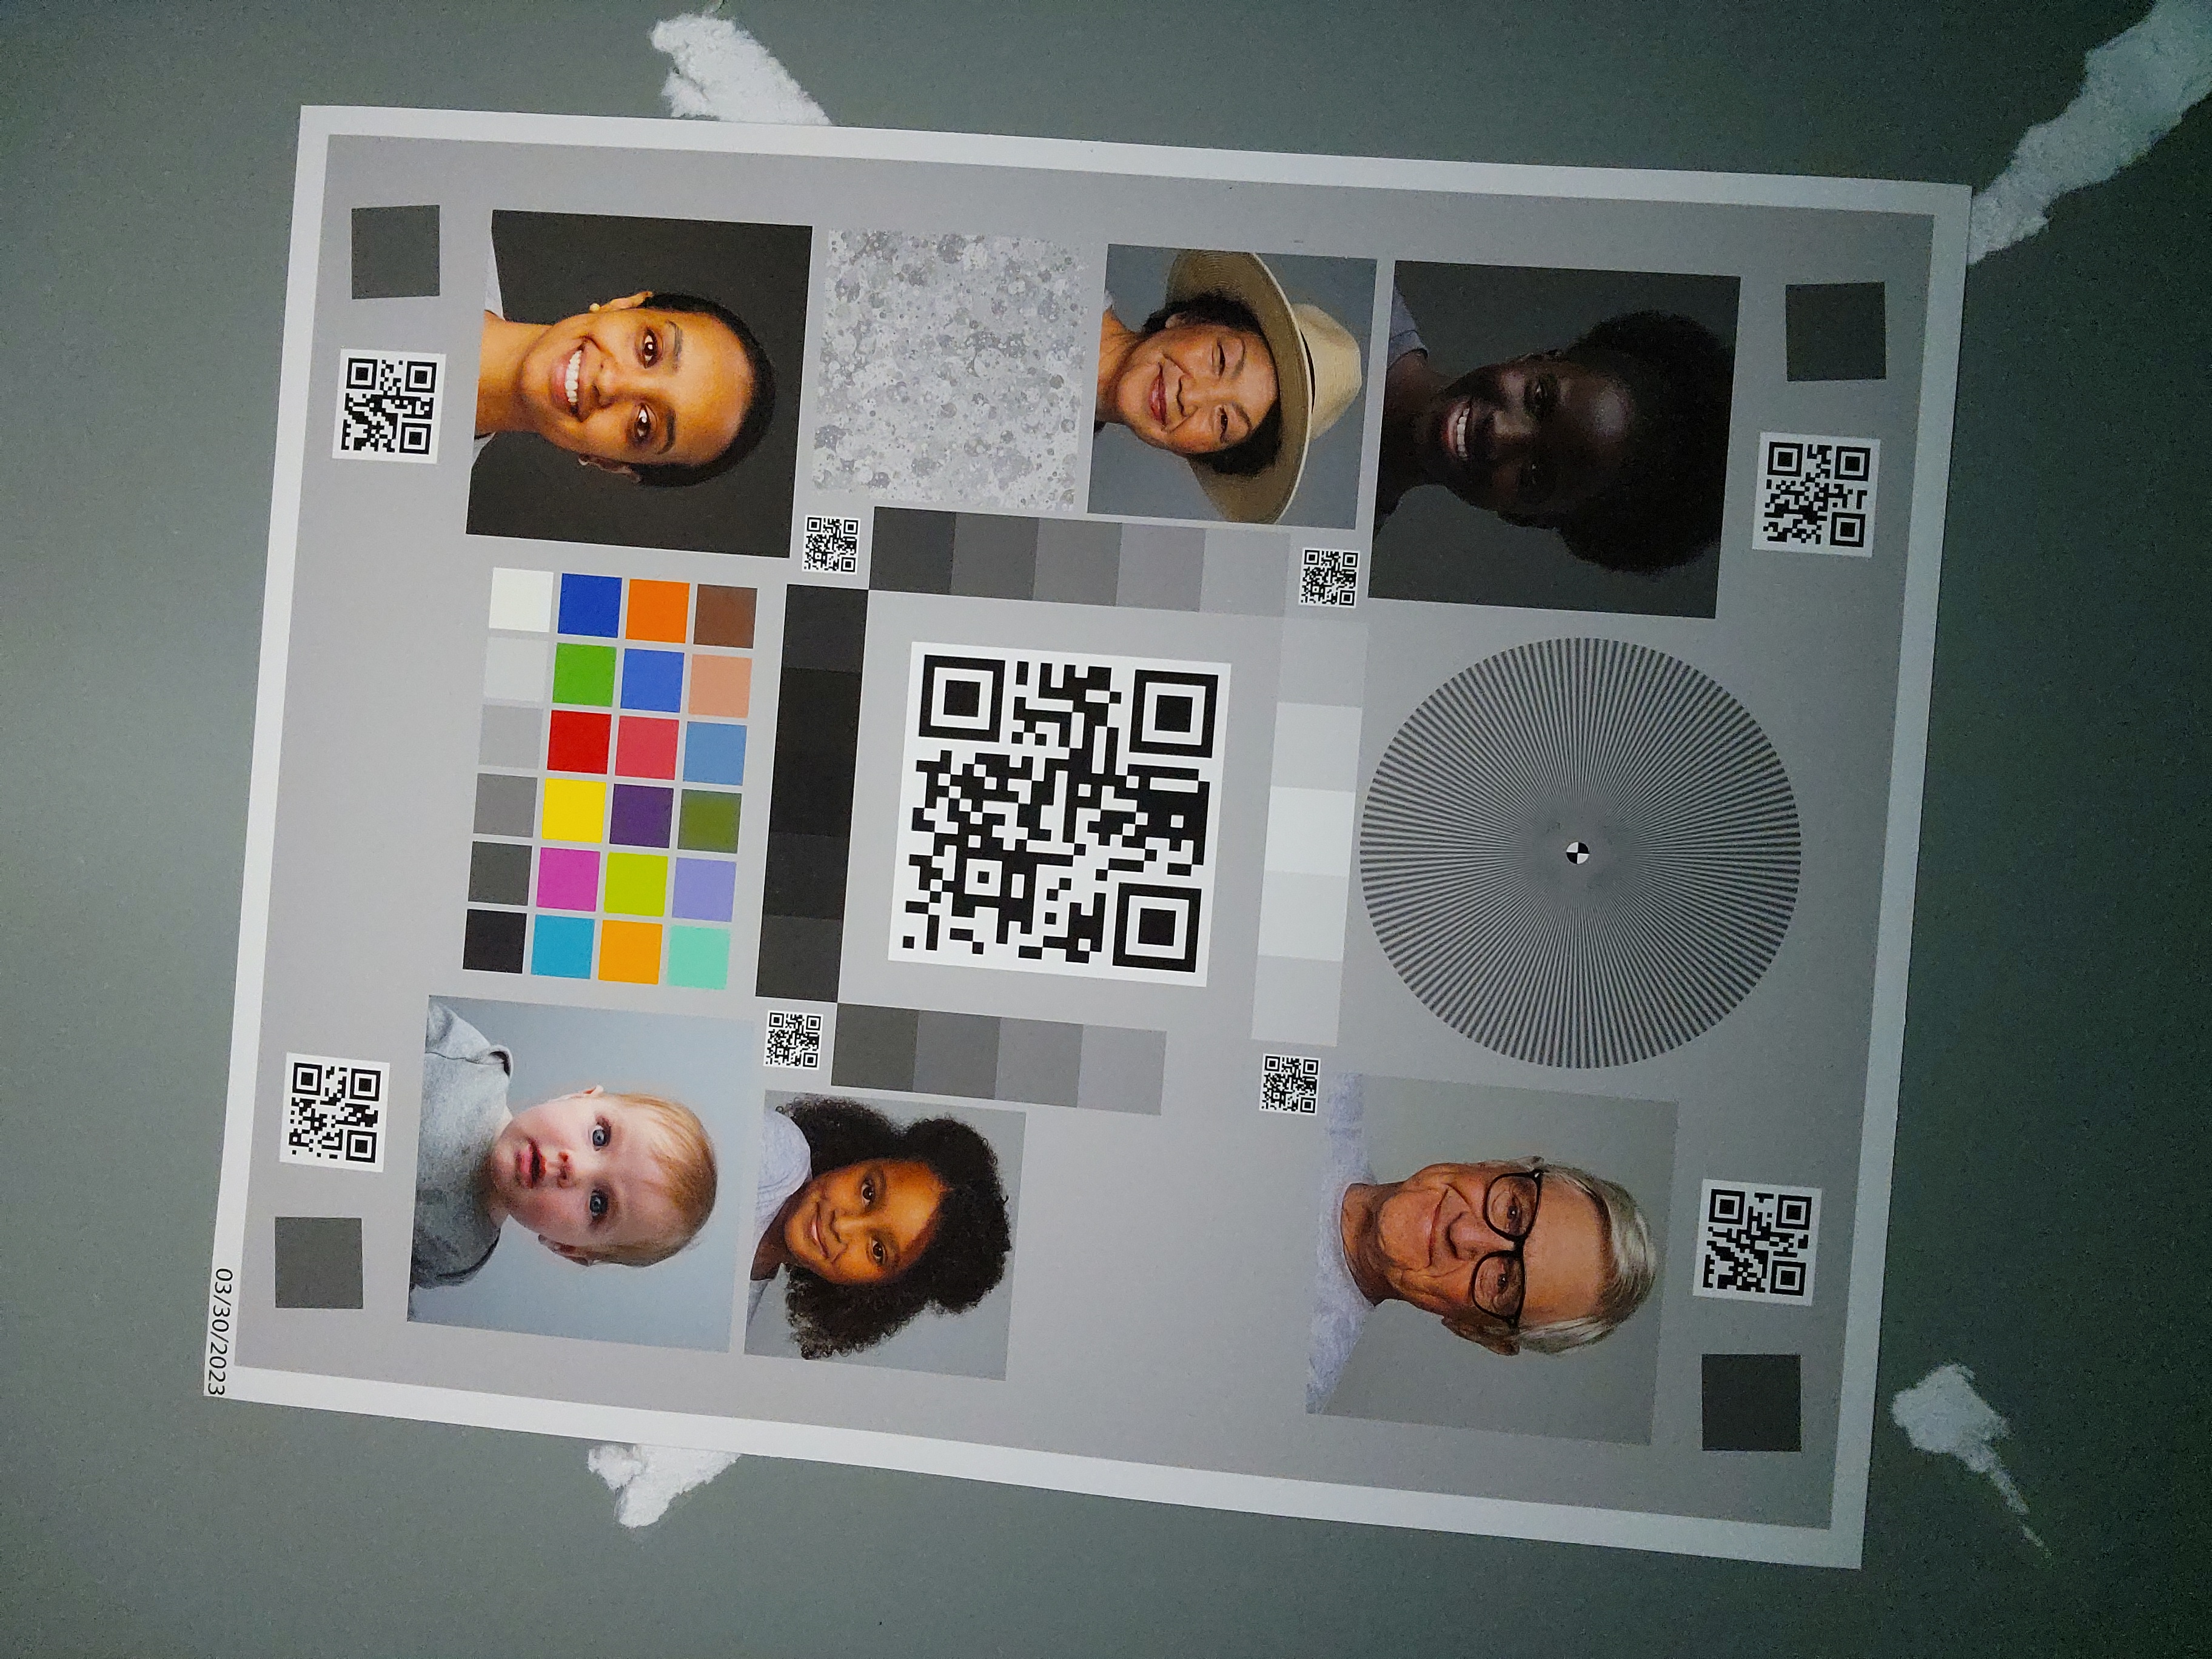
|
| Luce scarsa (sorgente luminosa aggiuntiva di circa 3 lux) |
|
|
|
Come osservato, la qualità dell'immagine migliora notevolmente con l'implementazione standard.