

折りたたみ式デバイスのユーザーは、アプリが大きな内部画面を最大限に活用していることを視覚的に確認したいと考えています。スマートフォンのスクリーンショットのみのストアの掲載情報では、アプリが引き伸ばされたり、黒いバーで囲まれたりする印象を与え、コンバージョン率が低下する可能性があります。
Google Play Console では、一般的な内側画面のアスペクト比 1:1 と 4:3 をカバーする 3 ~ 8 枚の折りたたみ式デバイスのスクリーンショットと、外側画面のアスペクト比 10:16 の縦向きのスクリーンショットを 1 枚以上アップロードできます。
まず、Android CLI と Android Emulator を使用して、スマートフォン、折りたたみ式デバイス、タブレット、デスクトップのフォーム ファクタで、Google Play Console で必要なサイズとアスペクト比のスクリーンショットをキャプチャします。
このガイドに沿って、次のタスクを完了します。
- Google Play で必要なフォーム ファクタに一致するエミュレータ プロファイルを作成します。
- スクリーンショットの出力ディレクトリを作成します。
- スマートフォン、折りたたみ式デバイス、タブレット、デスクトップのスクリーンショットをキャプチャします。
- スクリーンショットのサイズを確認し、一般的な問題のトラブルシューティングを行います。
エージェントに質問する
Follow https://d.android.com/google/play/requirements/screenshots-android-cli to build my app and use the Android CLI to capture all required Google Play Store screenshots across phone, foldable (1:1 and 4:3), tablet, and desktop into ./play_screenshotsエミュレータ プロファイルを作成する
次の表は、Google Play Console の各スクリーンショット セクションと、対応する Android Emulator のプロファイル、姿勢、向き、出力解像度をマッピングしたものです。
| Google Play Console のセクション | 必要なスクリーンショット | 許可されるアスペクト比と境界 | Android CLI プロファイル(create、start、stop) |
姿勢と向き | 出力解像度(px) |
|---|---|---|---|---|---|
| 電話 | 2 ~ 8 枚(プロモーションの場合は 1080p+ で 4 枚以上、ゲームの場合は 16:9 または 9:16 で 3 枚以上) | 最大 2.3:1(9:16、16:9、20:9)、320 ~ 3,840 ピクセル | medium_phone |
縦向きまたは横向き | 1080 x 2400(20:9)または 2400 x 1080 |
| スマートフォン(9:16 または 16:9) | 任意(ゲームのプロモーションの場合は 3 つ以上) | 9:16 または 16:9、320 ~ 3,840 ピクセル | foldable_1_1 |
折りたたみ(adb emu fold)、縦向き、横向き | 1,053 x 1,872(9:16)または 1,872 x 1,053(16:9) |
| 折りたたみ式(1:1、開いた状態) | 1 枚以上(折りたたみ式デバイスのスクリーンショットを 3 ~ 8 枚アップロードする場合) | 1:1(320 ~ 3,840 ピクセル) | foldable_1_1 |
開いた状態(adb emu unfold) | 2106 x 2106(1:1) |
| 折りたたみ式(4:3、広げた状態) | 1 枚以上(折りたたみ式デバイスのスクリーンショットを 3 ~ 8 枚アップロードする場合) | 4:3(幅 427 ~ 3,840 ピクセル) | foldable_4_3 |
開いた状態(adb emu unfold)、横向き | 2688 x 2016(4:3) |
| 折りたたみ式(4:3 折りたたみ、縦向き) | 1 枚以上(折りたたみ式デバイスのスクリーンショットを 3 ~ 8 枚アップロードする場合) | 10:16(幅 320 ~ 2,400 ピクセル) | foldable_4_3 |
折りたたみ(adb emu fold)、縦向き | 1,260 x 2,016(10:16) |
| 折りたたみ式(4:3 折りたたみ、横向き) | 任意(折りたたみ式デバイスのスクリーンショットを最大 5 枚追加可能) | 16:10(幅 512 ~ 3,840 ピクセル) | foldable_4_3 |
折りたたみ(adb emu fold)、横向き | 2016 x 1260(16:10) |
| タブレット(7 インチ、10 インチ) | それぞれ最大 8 個 | 最大 2.3:1(16:10、10:16、16:9、9:16)、1,080 ~ 3,840 ピクセル | medium_tablet |
横向きまたは縦向き | 2,560 x 1,600(16:10)または 1,600 x 2,560 |
| ノートパソコンとデスクトップ(Chromebook とデスクトップ) | 4 ~ 8 | 16:9(幅 1,920 ~ 7,680 ピクセル)または 9:16(幅 1,080 ~ 4,320 ピクセル) | create: large_desktop または medium_desktop。start と stop: desktop_large または desktop_medium |
横向き | 1,920 x 1,080(16:9)または 3,840 x 2,160(16:9) |
キャプチャ コマンドを実行する際は、次のオプションに注意してください。
- クリーン キャプチャで
--annotateを省略する:--annotateまたは-aをandroid screen captureに渡さないでください。PNG ファイルに境界ボックスと数値ラベルが描画されるためです。 - 同時実行エミュレータの曖昧さを解消する: 複数のエミュレータを同時に実行する場合は、
--device=serialとandroid、または-s serialとadbを使用してデバイスのシリアル番号を指定し、曖昧さを解消します。
仮想デバイスをセットアップする
Android Emulator と Android CLI が最新の状態であることを確認します。出力ディレクトリを作成し、ターゲット フォーム ファクタ用の AVD を作成します。
Android Emulator のバージョンが 37.3.10 以降であることを確認します。
android sdk update emulatorandroidが最新であることを確認します。android update出力ディレクトリを作成します。
mkdir -p play_screenshots/phone play_screenshots/foldable play_screenshots/tablet play_screenshots/desktop仮想デバイスを作成します。これにより、不足している SDK
emulator、platform-tools、システム イメージ パッケージが自動的にインストールされます。android emulator create medium_phone android emulator create foldable_1_1 android emulator create foldable_4_3 android emulator create medium_tablet android emulator create large_desktop
スマートフォンのスクリーンショットをキャプチャする
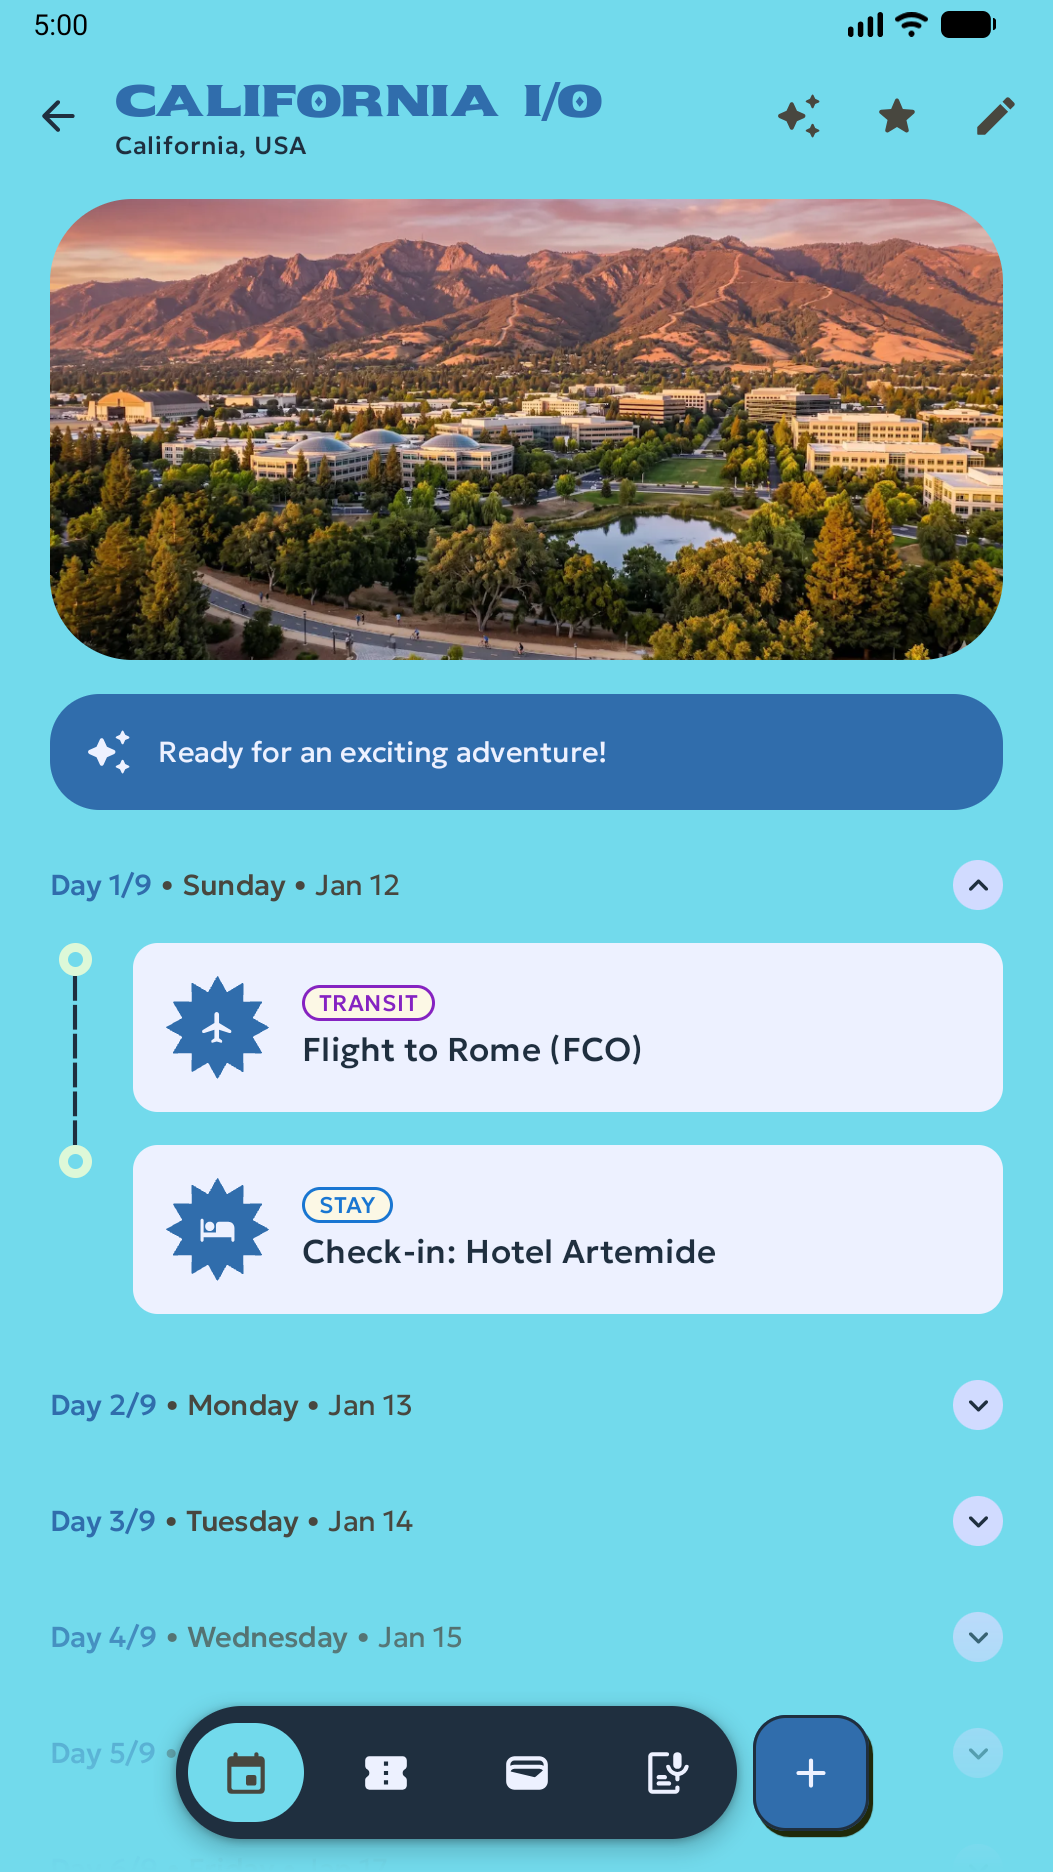
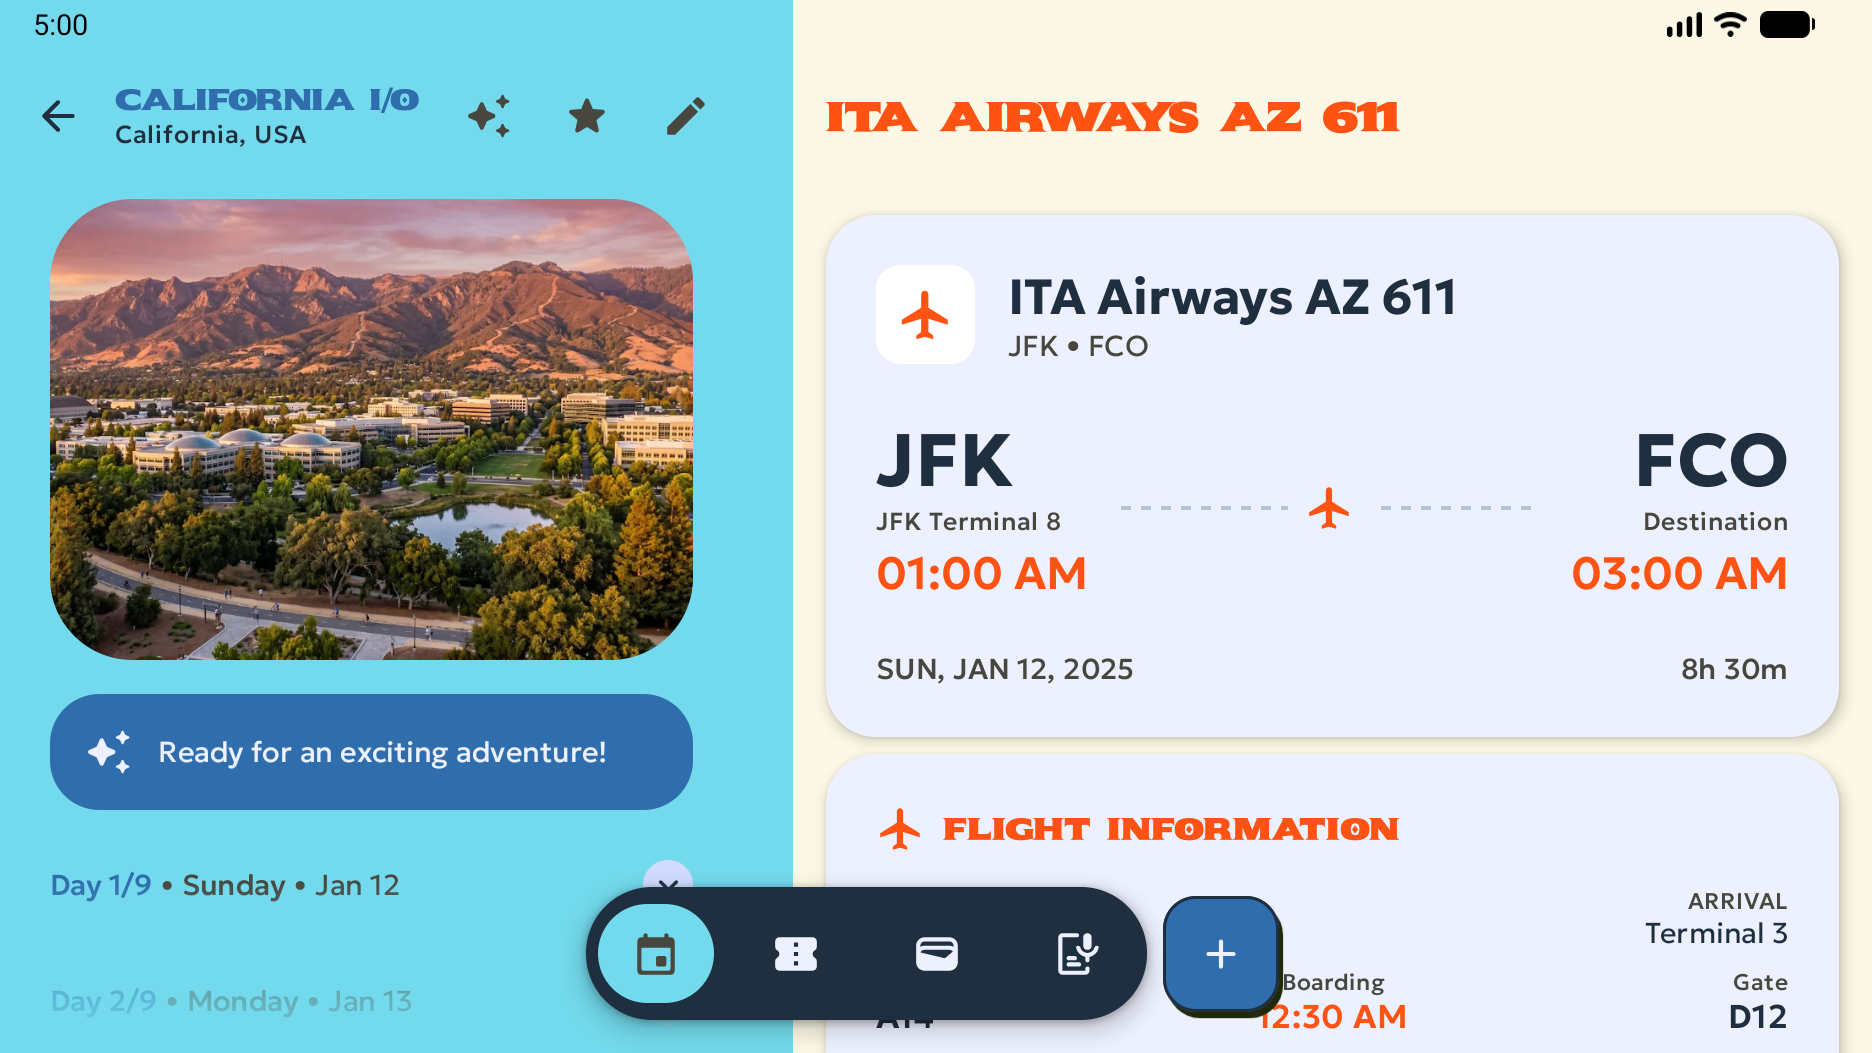
medium_phone を起動してアプリをデプロイし、縦向き(1,080 x 2,400 ピクセル)と横向き(2,400 x 1,080 ピクセル)のスクリーンショットをキャプチャします。
android emulator start medium_phone
android run ./app/build/outputs/apk/debug/app-debug.apk

# Portrait
adb shell wm user-rotation lock 0
android screen capture --output=play_screenshots/phone/phone_portrait_1.png

# Landscape
adb shell wm user-rotation lock 1
sleep 2
android screen capture --output=play_screenshots/phone/phone_landscape_1.png

android emulator stop medium_phone
次の画像は、エミュレータからキャプチャした、スマートフォンの縦向きと横向きの未加工のスクリーンショットの例を示しています。
折りたたみ式デバイスのスクリーンショットをキャプチャする
foldable_1_1 プロファイルと foldable_4_3 プロファイルを使用して、インナー ディスプレイとアウター ディスプレイの未加工の UI スクリーンショットをキャプチャします。adb shell screencap と adb shell dumpsys SurfaceFlinger --display-id を使用して、内側の画面または外側の画面を指定します。
1:1 の開いた状態と 9:16 の折りたたんだ状態のスクリーンショットをキャプチャする
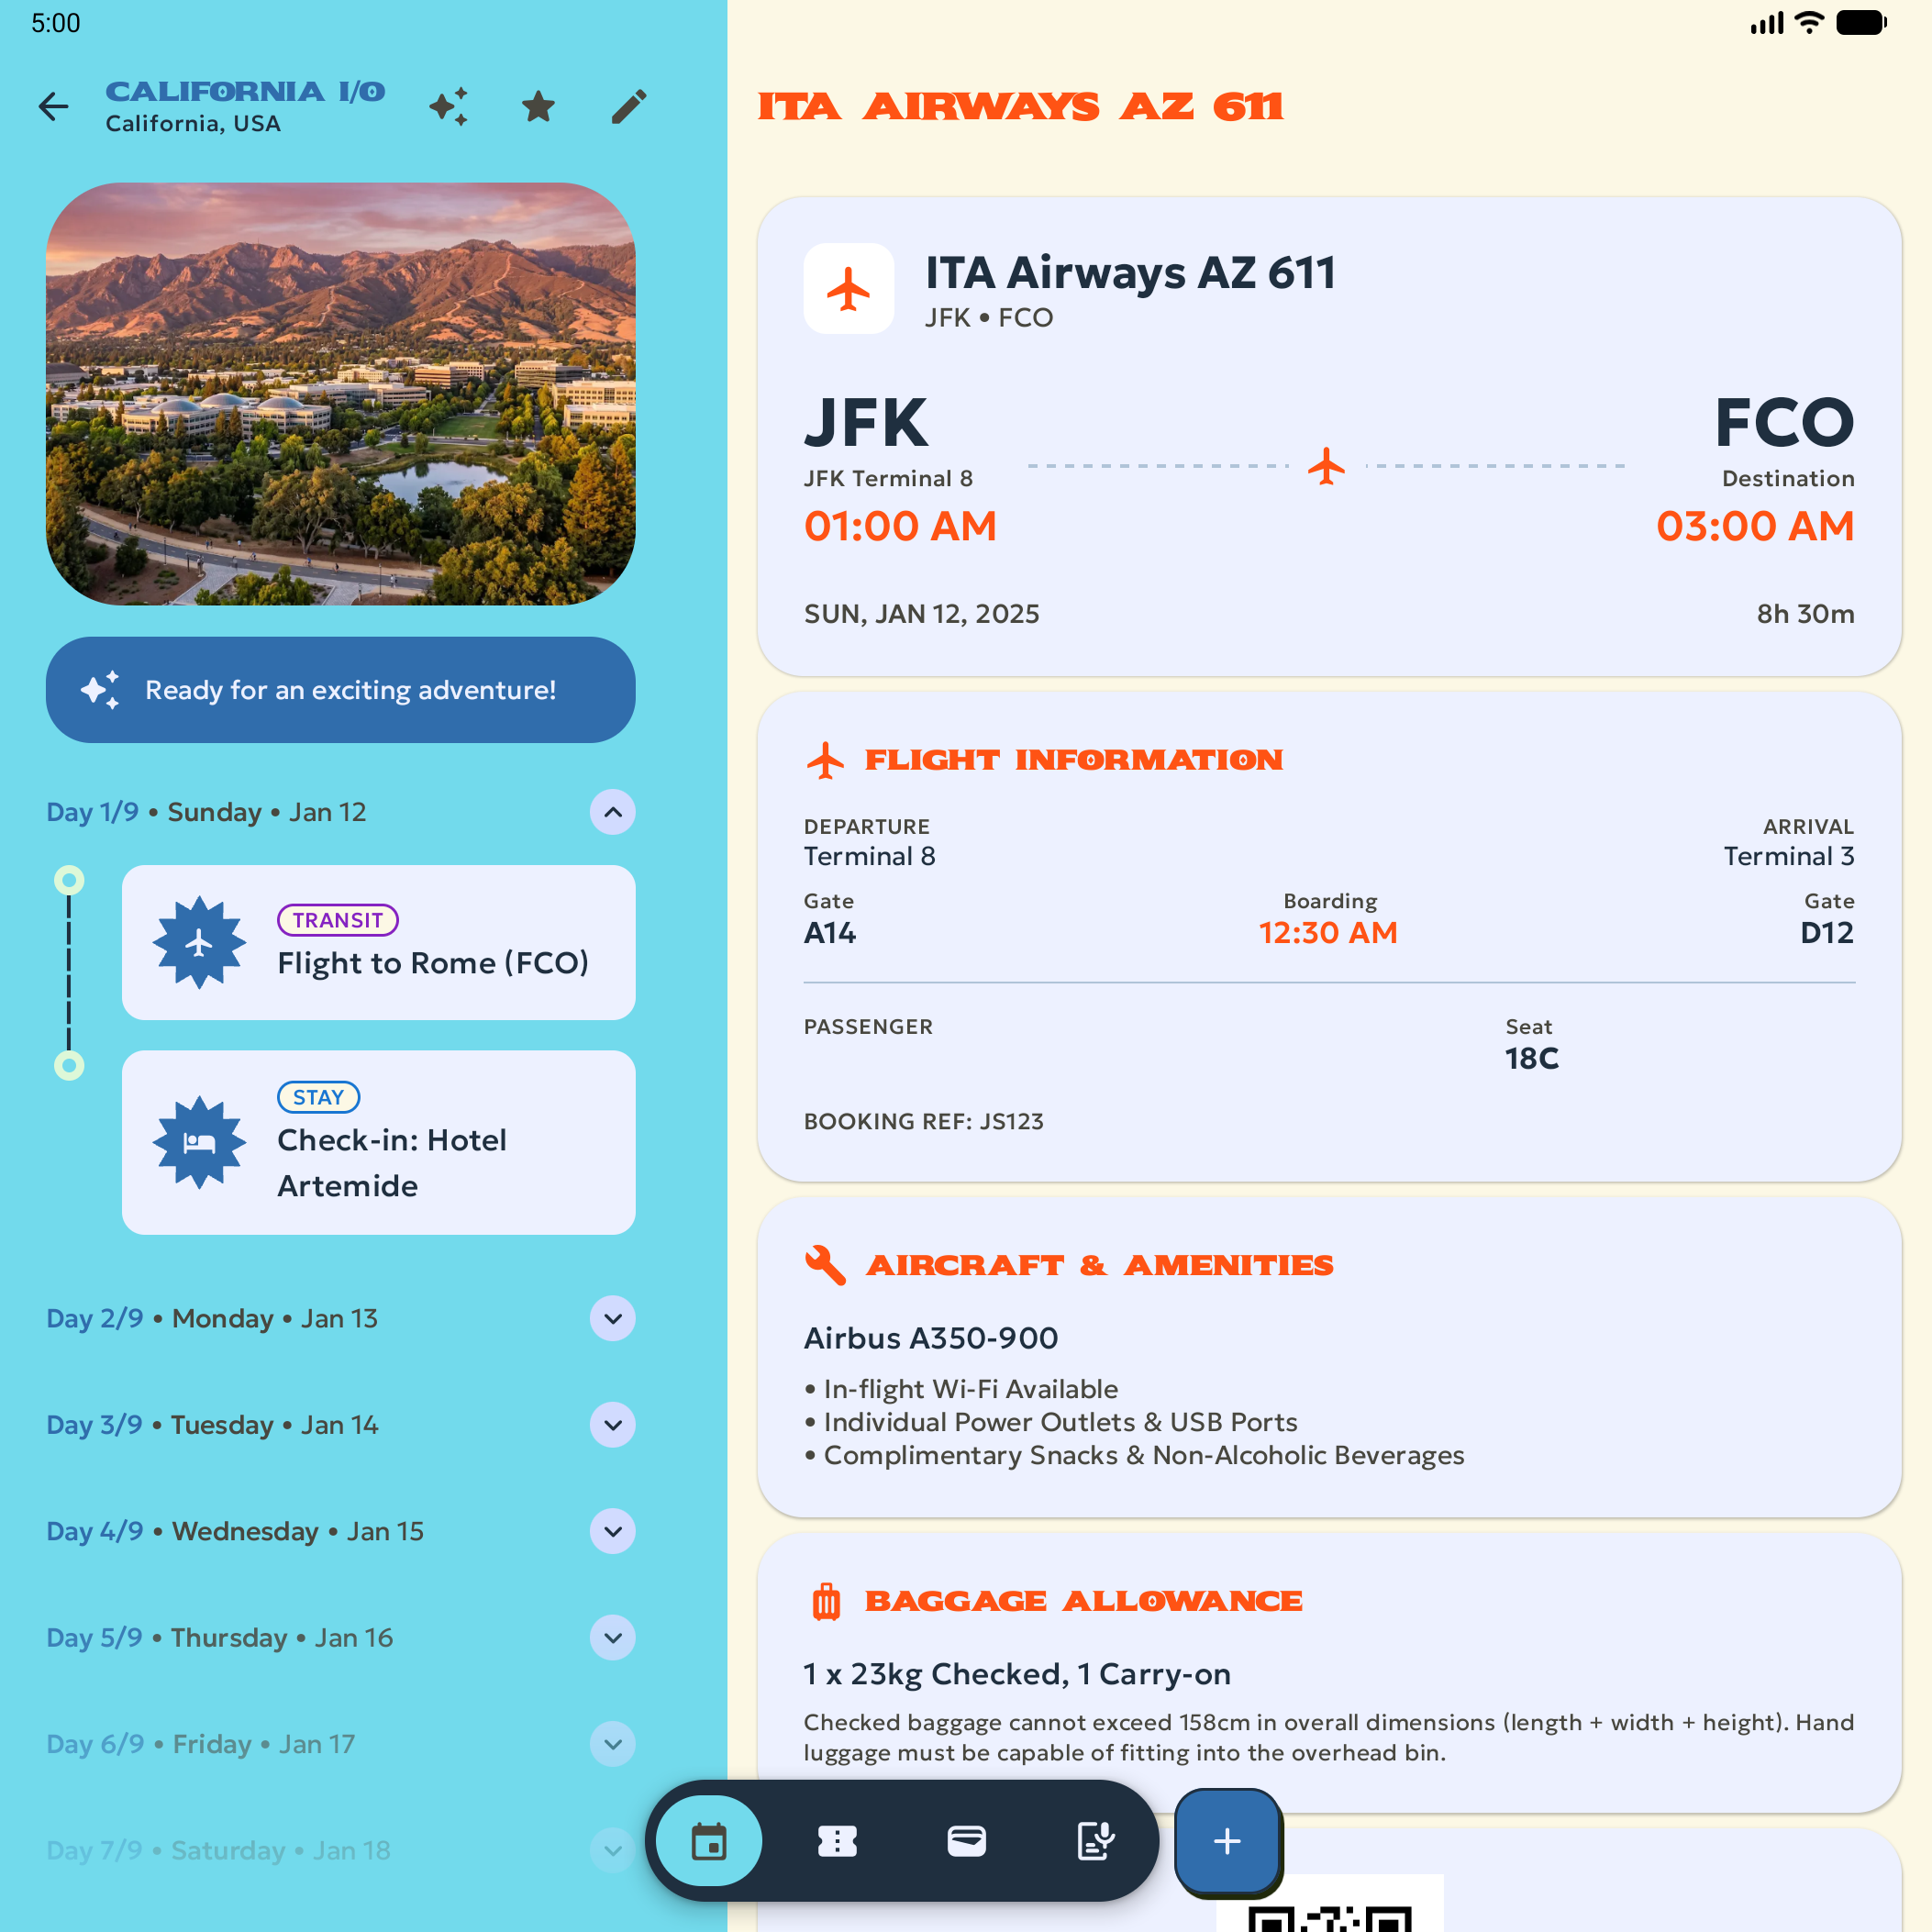
foldable_1_1 を起動して、折りたたみ式セクションの 1:1 の展開されたスクリーンショット(2,106 x 2,106 ピクセル)と、スマートフォン セクションの 9:16 の折りたたまれたスクリーンショット(1,053 x 1,872 ピクセル、省略可)をキャプチャします。
出力ディレクトリは、スクリーンショットをキャプチャしたエミュレータ プロファイルではなく、各スクリーンショットを受け入れる Google Play Console のセクションと一致します。[折りたたみ式] セクションでは、1:1、4:3、10:16、16:10 のスクリーンショットのみが受け入れられるため、折りたたんだ foldable_1_1 の外側画面の 9:16 のスクリーンショットは phone/ に保存され、[スマートフォン] セクションにアップロードされます。折りたたんだ foldable_4_3 の外側画面は 10:16 で、折りたたみ式セクションで受け入れられるため、これらのスクリーンショットは foldable/ に保存されます。
次のコマンドを実行します。
android emulator start foldable_1_1
android run ./app/build/outputs/apk/debug/app-debug.apk

# Keep the screen on when the emulator is folded
adb shell settings put system fold_lock_behavior_setting stay_awake_on_fold_key

# 1:1 unfolded inner display
adb emu unfold
sleep 2
adb shell screencap -d "$(adb shell dumpsys SurfaceFlinger --display-id | awk 'NR==1 {print $2}')" -p > play_screenshots/foldable/foldable_1_1_unfolded.png

# Optional: 9:16 folded outer display - this is suitable for uploading to the
# Play Console's Phone section so is saved in the phone/ directory.
adb emu fold

# Turn the screen on and dismiss the lock screen
adb shell input keyevent KEYCODE_WAKEUP
adb shell wm dismiss-keyguard

sleep 2
adb shell screencap -d "$(adb shell dumpsys SurfaceFlinger --display-id | awk 'NR==2 {print $2}')" -p > play_screenshots/phone/phone_9_16_folded_portrait.png

android emulator stop foldable_1_1
次の画像は、1:1 の展開されたインナー ディスプレイの未加工のスクリーンショットの例を示しています。
4:3 の開いた状態と折りたたんだ状態のスクリーンショットをキャプチャする
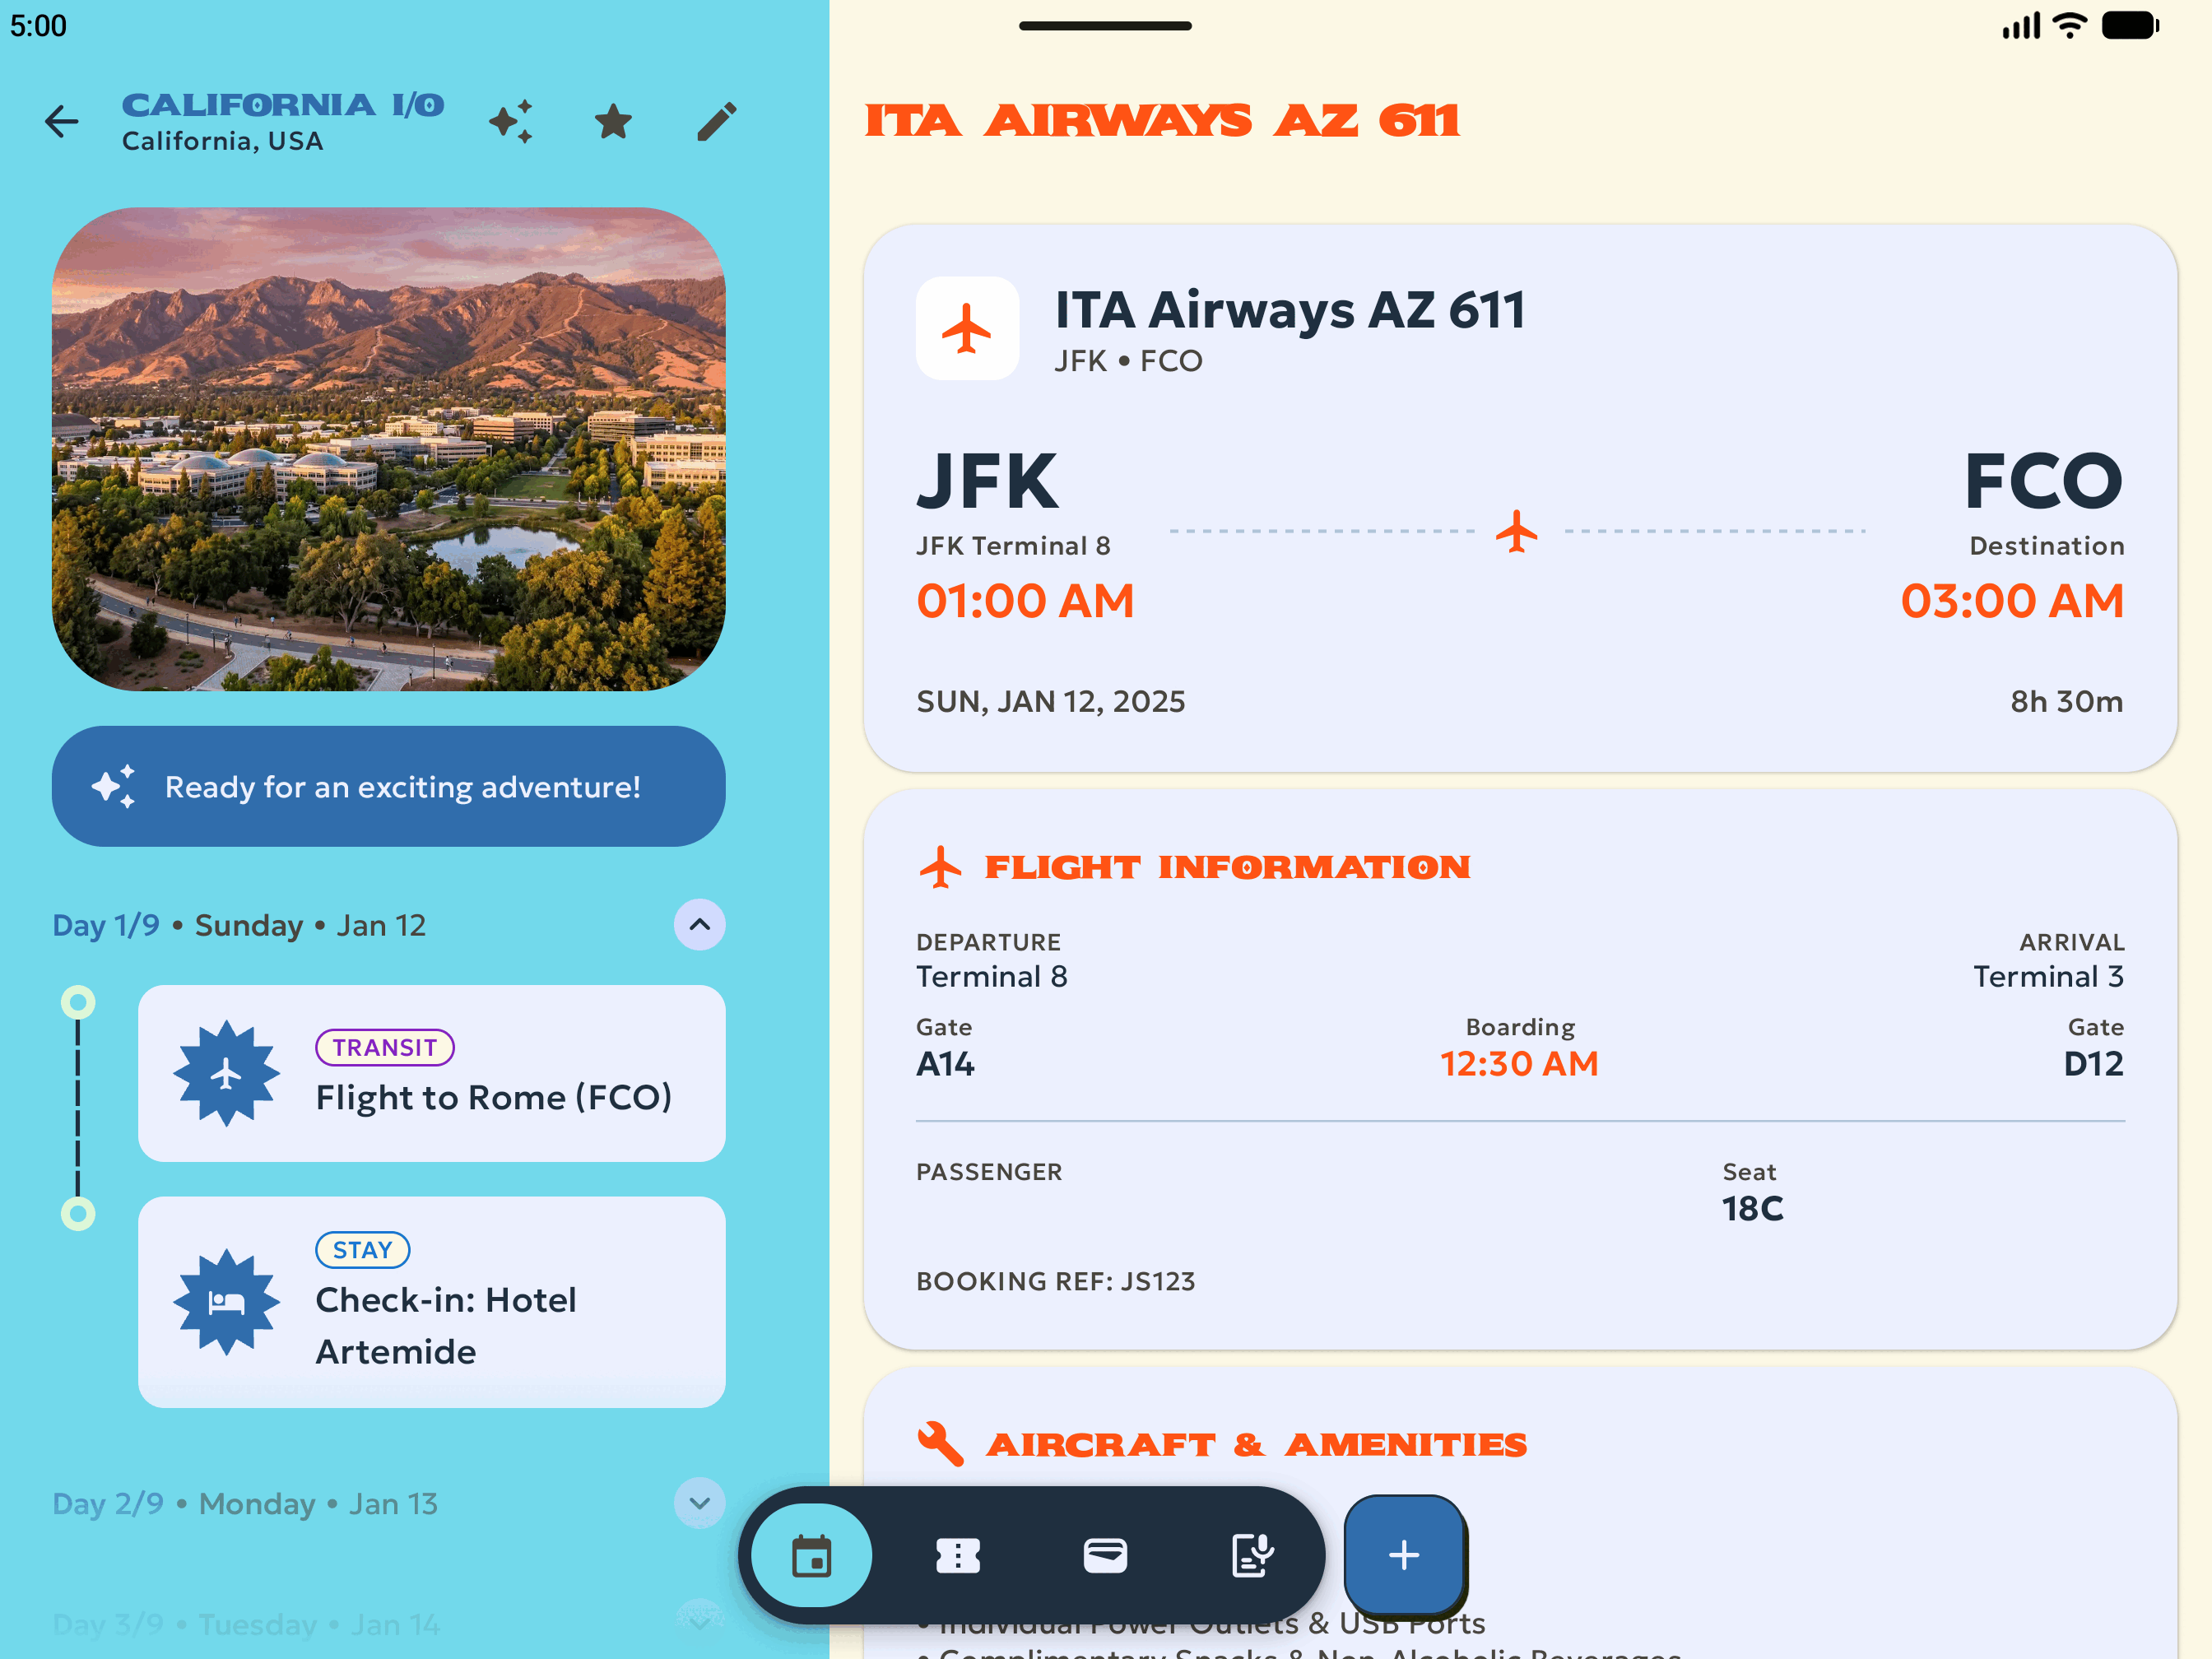
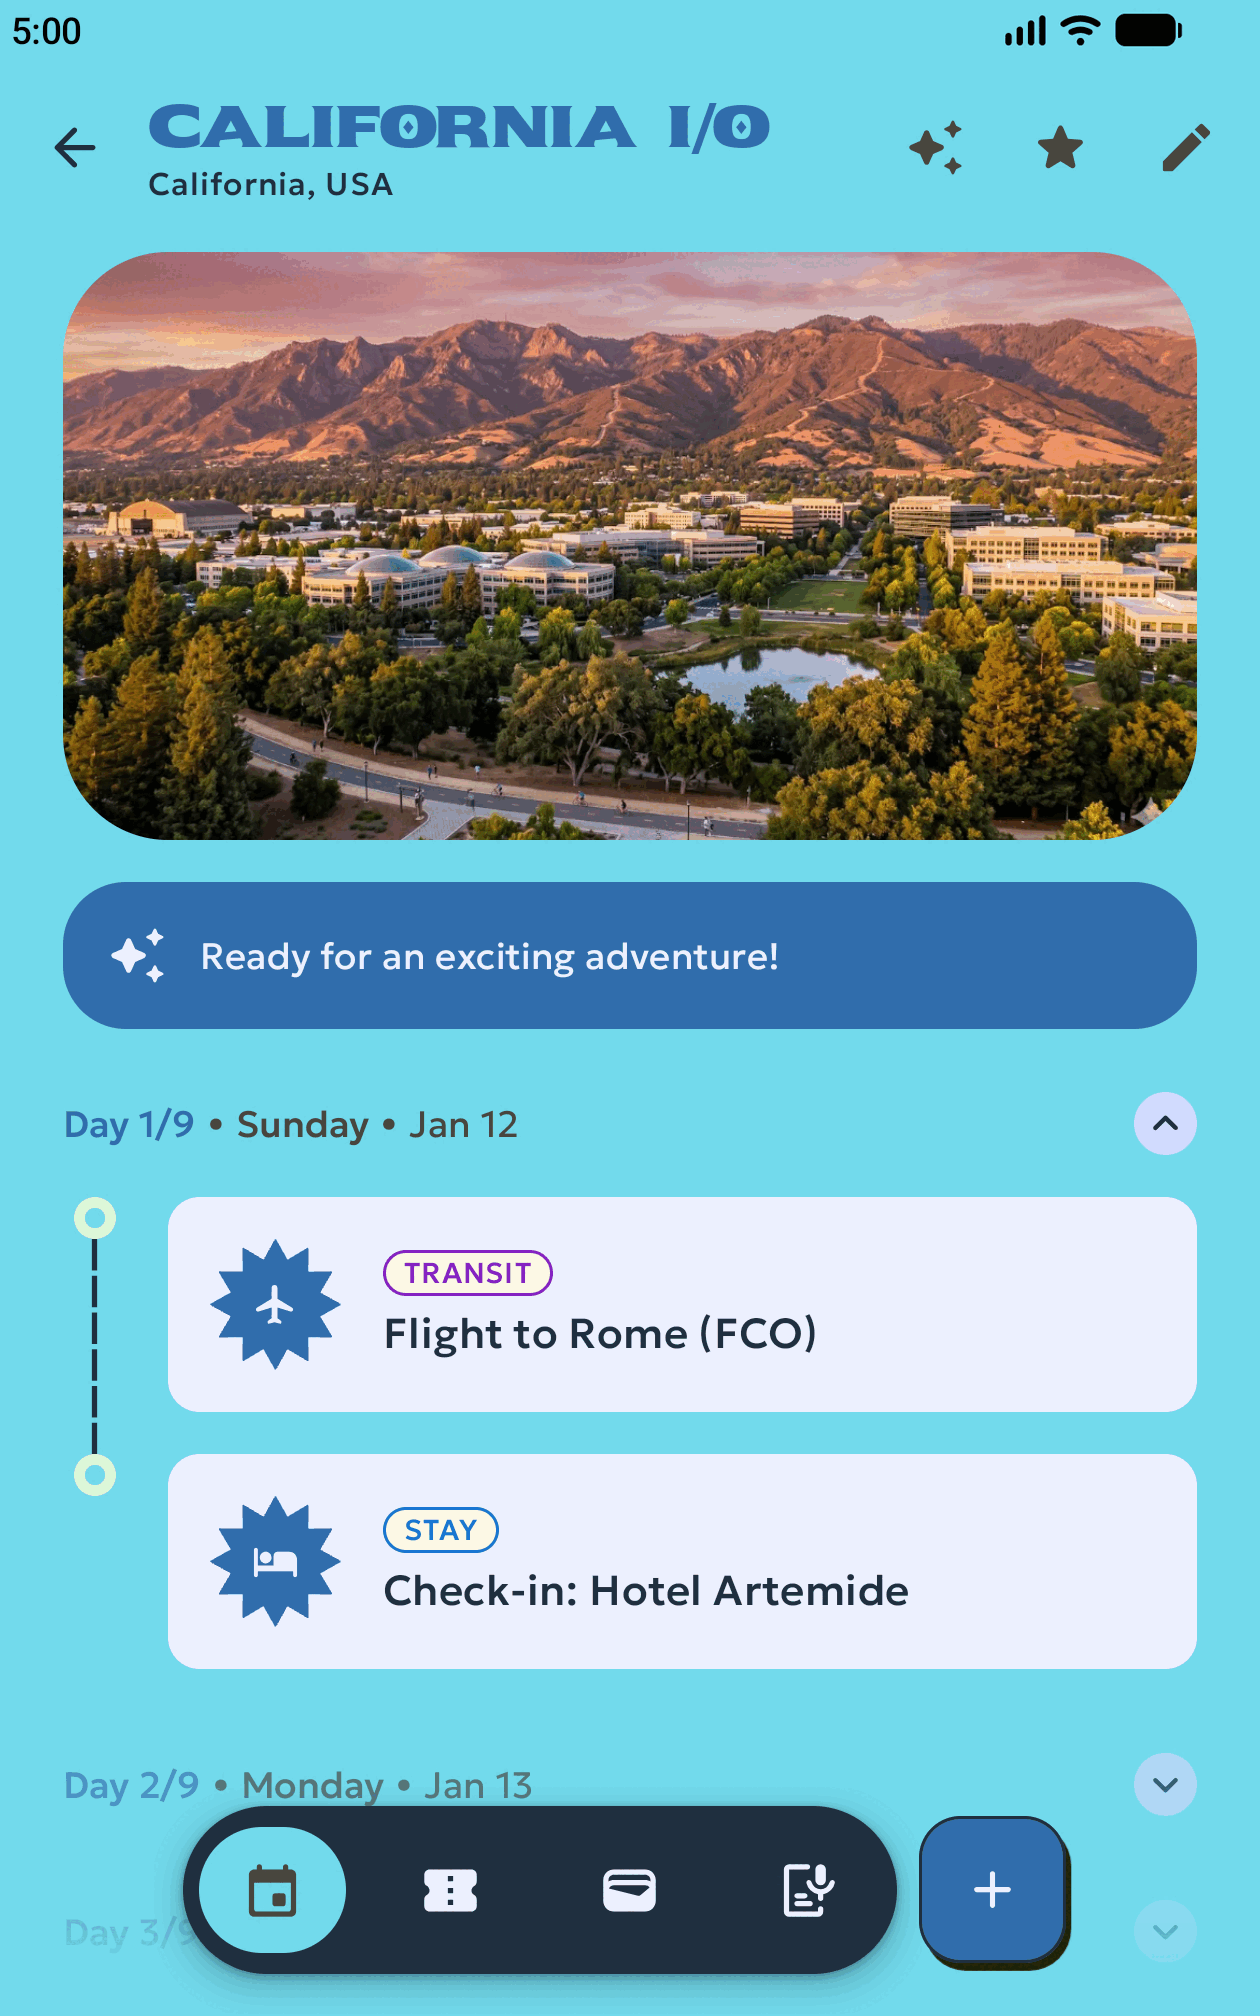
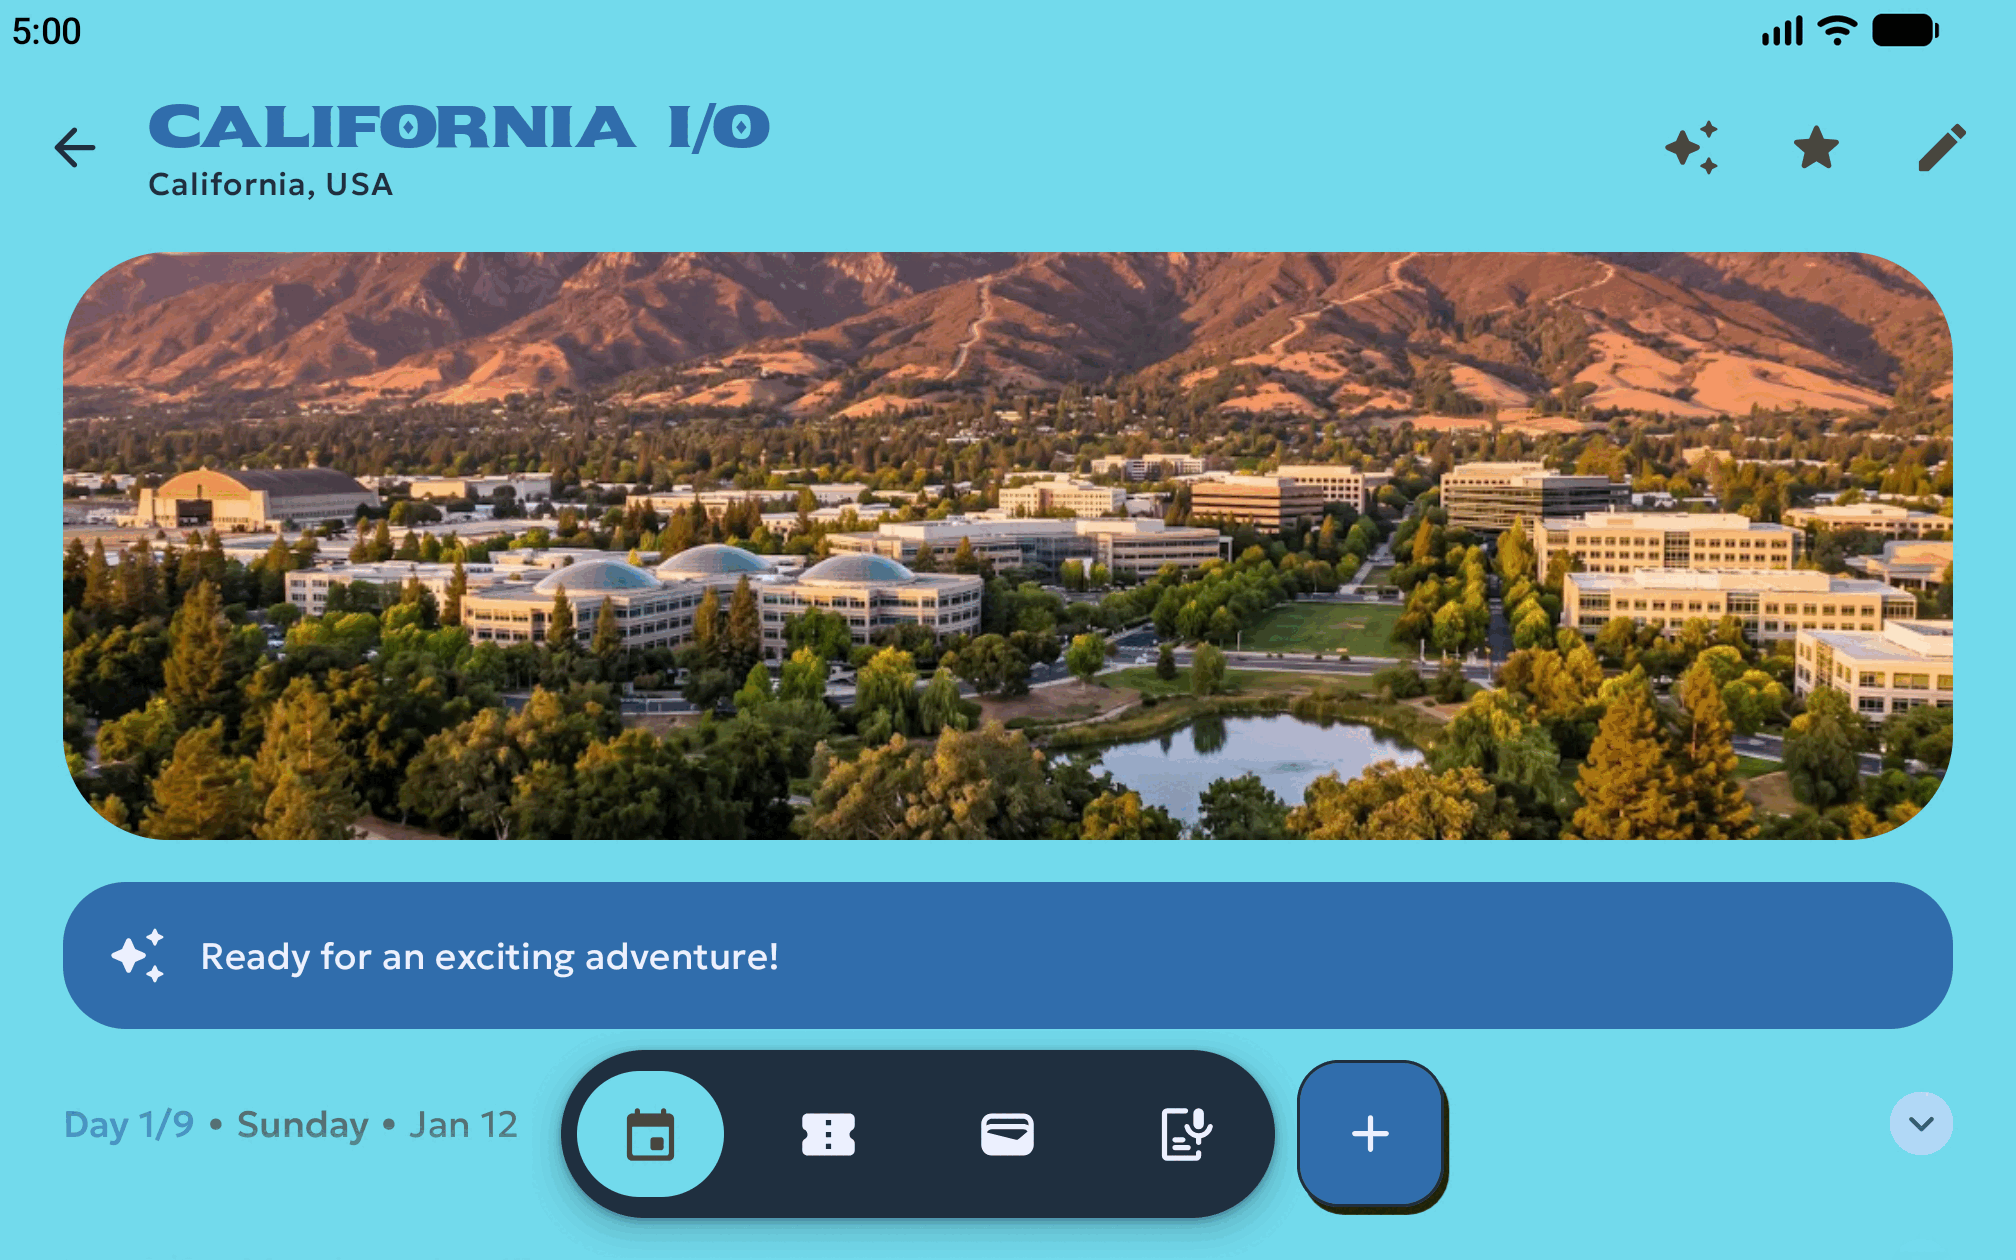
foldable_4_3 を起動して、4:3 の折りたたまれていない横向きのスクリーンショット(2,688 x 2,016 ピクセル)、10:16 の折りたたまれた縦向きのスクリーンショット(1,260 x 2,016 ピクセル)、オプションの 16:10 の折りたたまれた横向きのスクリーンショット(2,016 x 1,260 ピクセル)をキャプチャします。
android emulator start foldable_4_3
android run ./app/build/outputs/apk/debug/app-debug.apk

# Keep the screen on when the emulator is folded
adb shell settings put system fold_lock_behavior_setting stay_awake_on_fold_key

# 4:3 unfolded landscape inner display
adb emu unfold
adb shell wm user-rotation lock 0
sleep 2
adb shell screencap -d "$(adb shell dumpsys SurfaceFlinger --display-id | awk 'NR==1 {print $2}')" -p > play_screenshots/foldable/foldable_4_3_unfolded_landscape.png

# 10:16 folded portrait outer display
adb emu fold

# Turn the screen on and dismiss the lock screen
adb shell input keyevent KEYCODE_WAKEUP
adb shell wm dismiss-keyguard
sleep 2
adb shell screencap -d "$(adb shell dumpsys SurfaceFlinger --display-id | awk 'NR==2 {print $2}')" -p > play_screenshots/foldable/foldable_4_3_folded_portrait.png

# Optional: 16:10 folded landscape outer display
adb shell wm user-rotation lock 1
sleep 2
adb shell screencap -d "$(adb shell dumpsys SurfaceFlinger --display-id | awk 'NR==2 {print $2}')" -p > play_screenshots/foldable/foldable_4_3_folded_landscape.png

android emulator stop foldable_4_3
次の画像は、foldable_4_3 の姿勢で撮影された未加工のスクリーンショットの例を示しています。
タブレットとデスクトップのスクリーンショットをキャプチャする
medium_tablet と desktop_large を使用して、大画面とデスクトップのスクリーンショットをキャプチャします。
medium_tablet(2,560 x 1,600 ピクセル)で 16:10 のタブレットのスクリーンショットをキャプチャします。これは、Google Play Console の 7 インチと 10 インチのタブレット セクションの両方に適合します。android emulator start medium_tablet android run ./app/build/outputs/apk/debug/app-debug.apk sleep 2 android screen capture --output=play_screenshots/tablet/tablet_landscape_1.png android emulator stop medium_tabletdesktop_large(1920 x 1080 ピクセル)で 16:9 の Chromebook とデスクトップのスクリーンショットをキャプチャします(large_desktopプロファイルから作成)。android emulator start desktop_large android run ./app/build/outputs/apk/debug/app-debug.apk android screen capture --output=play_screenshots/desktop/desktop_1.png android emulator stop desktop_large
スクリーンショットを確認してトラブルシューティングを行う
スクリーンショットを撮影したら、各ファイルが Google Play Console のサイズ制限と 8 MB のファイルサイズ制限を満たしていることを確認します。
file play_screenshots/*/*.png
各画像に、システム ダイアログのない完全に読み込まれた UI が表示されていることを確認します。その後、未加工のキャプチャをデザインチームに渡すか、Google Play Console の [成長] > [ストアでの表示] > [ストアの掲載情報] で、要件に準拠したアセットをアップロードします。
次の表に、撮影とアップロードに関する一般的な問題の解決方法を示します。
| 問題 | 原因 | 修正 |
|---|---|---|
android emulator start の実行時に「デバイス large_desktop が存在しません」と表示される |
android emulator create large_desktop は、AVD ID を desktop_large に設定します。 |
android emulator start desktop_large(または medium_desktop の場合は desktop_medium)を実行します。 |
| Google Play Console で、折りたたみ式デバイスのスクリーンショットがサイズが無効であるというエラーで拒否される | 折りたたみ式デバイスのセクションに、折りたたみ式デバイス 1_1 の折りたたんだ状態のスクリーンショット(1053 x 1872 ピクセル、9:16)がアップロードされました。 | foldable_1_1 の折りたたみ時(9:16 または 16:9)のスクリーンショットを [スマートフォン] セクションに移動します。1:1、4:3、10:16、16:10 のスクリーンショットは [折りたたみ式] セクションに残します。 |
| Google Play Console で「アスペクト比 1:1、4:3、10:16 のスクリーンショットをそれぞれ 1 枚以上アップロードしてください」と表示される | 折りたたみ式デバイスに必要な 3 つのアスペクト比のうち 1 つがありません。 | play_screenshots/foldable/ に、2106 x 2106(1:1)、2688 x 2016(4:3)、1260 x 2016(10:16)の PNG ファイルがそれぞれ 1 つ以上含まれていることを確認します。 |
| Google Play Console で、デスクトップのスクリーンショットのサイズが拒否される | スクリーンショットは small_desktop(1,366 x 768 ピクセル)で撮影されました。 | AVD を再作成し、large_desktop(1,920 x 1,080 ピクセル)または medium_desktop(3,840 x 2,160 ピクセル)でスクリーンショットをキャプチャします。 |
複数のエミュレータが接続されていると、android screen capture または adb が失敗する |
複数の AVD が実行されているときに --device が省略されました。 |
android コマンドに --device=serial を、adb コマンドに -s serial を渡すか、android emulator stop を使用して未使用の AVD を停止してください。 |