
این راهنما نحوه راهاندازی و اجرای نمونه Android Automotive را با Google داخلی توضیح میدهد. این راهنما همچنین نحوه آزمایش Google APIهای شخص ثالث را برای استفاده با راهحلهای ناوبری و صوتی شرح میدهد.
برای کسب اطلاعات بیشتر در مورد این APIها، به پیادهسازی اهداف برنامه پیمایش و Google Maps برای Android Automotive Intent مراجعه کنید.

همانطور که نشان داده شده است، می توانید از سه نوع intent برای توصیف تعامل بین یک برنامه دستیار و Google Maps استفاده کنید: ناوبری، جستجو و اقدام سفارشی. به همین ترتیب، این مقاصد تعامل بین دستیار Google و یک برنامه ناوبری را توصیف می کنند.

این محتوا نحوه آزمایش مقاصد یک برنامه دستیار با Google Maps را توضیح می دهد. همچنین نحوه ادغام یک برنامه ناوبری برای دریافت هدف از دستیار Google یا سایر برنامه های دستیار را توضیح می دهیم.
راه اندازی
برای شروع:
- اندروید استودیو را دانلود و نصب کنید.
- Tools > Device Manager را باز کنید و Automotive (منظره 1408p) را با تصویر Google Play اضافه کنید.
- تصویر شبیه ساز را شروع کنید و وارد Google Play شوید. دستیار Google را جستجو و به روز کنید.
- محتویات پروژه برنامه آزمایشی ما را استخراج کنید و پروژه را در Android Studio باز کنید ( File > Open... ).
- برای نصب و راه اندازی برنامه آزمایشی در شبیه ساز، Run > Run automotive را انتخاب کنید.
نسخه ی نمایشی
پیادهسازی اهداف برنامه ناوبری و Google Maps برای Android Automotive Intent سه نوع هدفی را که میتوانید اجرا کنید شرح میدهند: پیمایش، جستجو، و اقدام سفارشی.
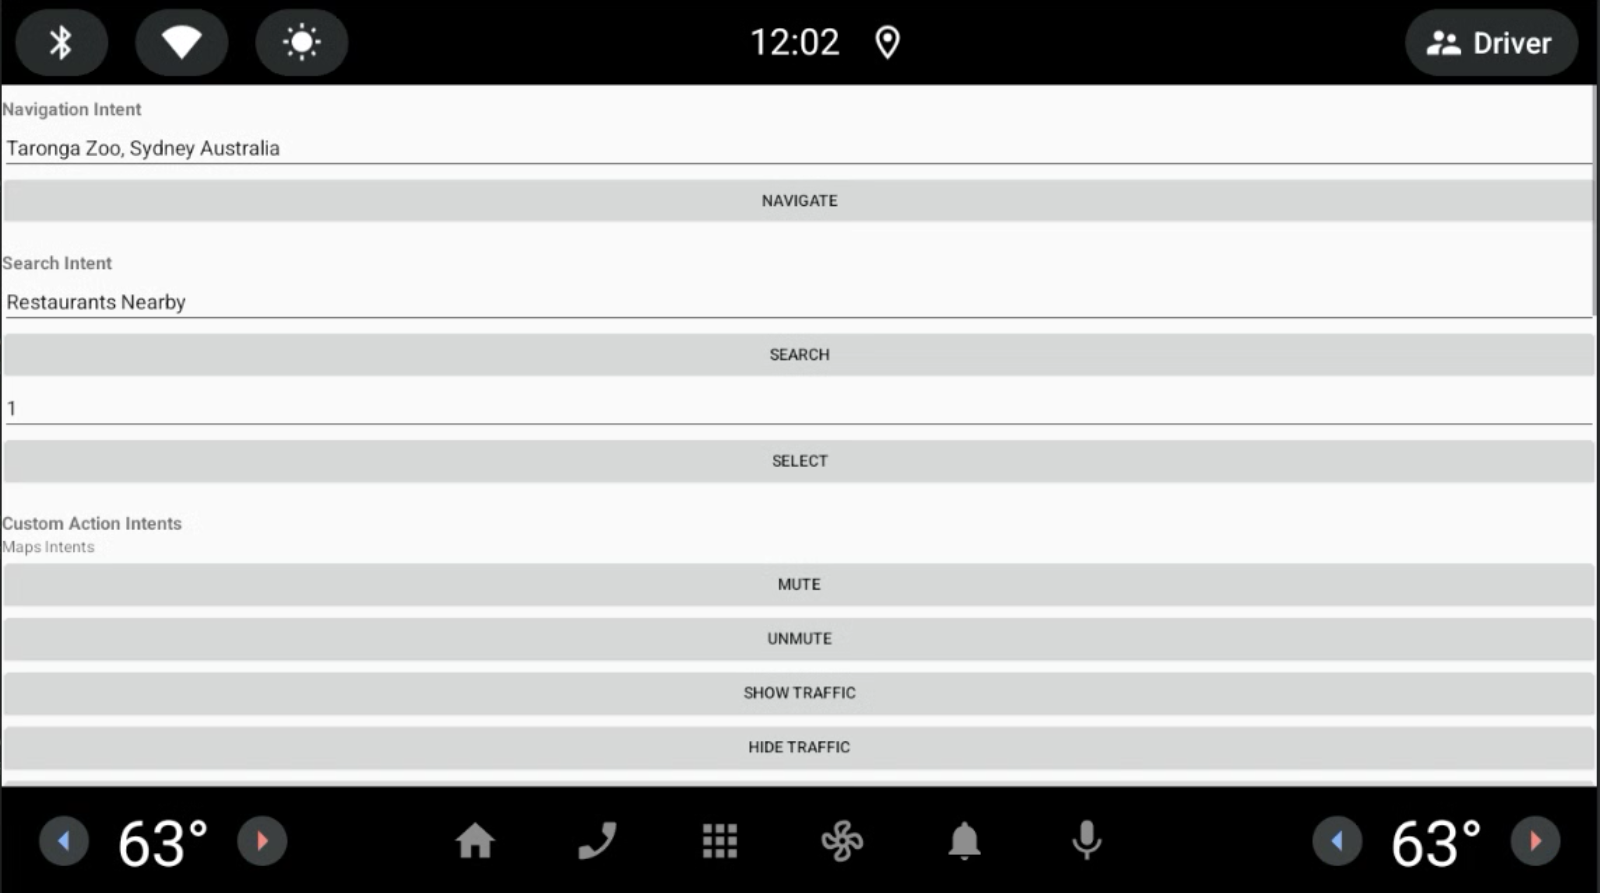
Google Maps عملیات راه اندازی شده را اجرا می کند.
برای تعیین برنامه آزمایشی به عنوان گیرنده مقاصد فعال شده توسط Google Assistant:
به Settings > Google > Google Assistant > Default navigation app بروید.
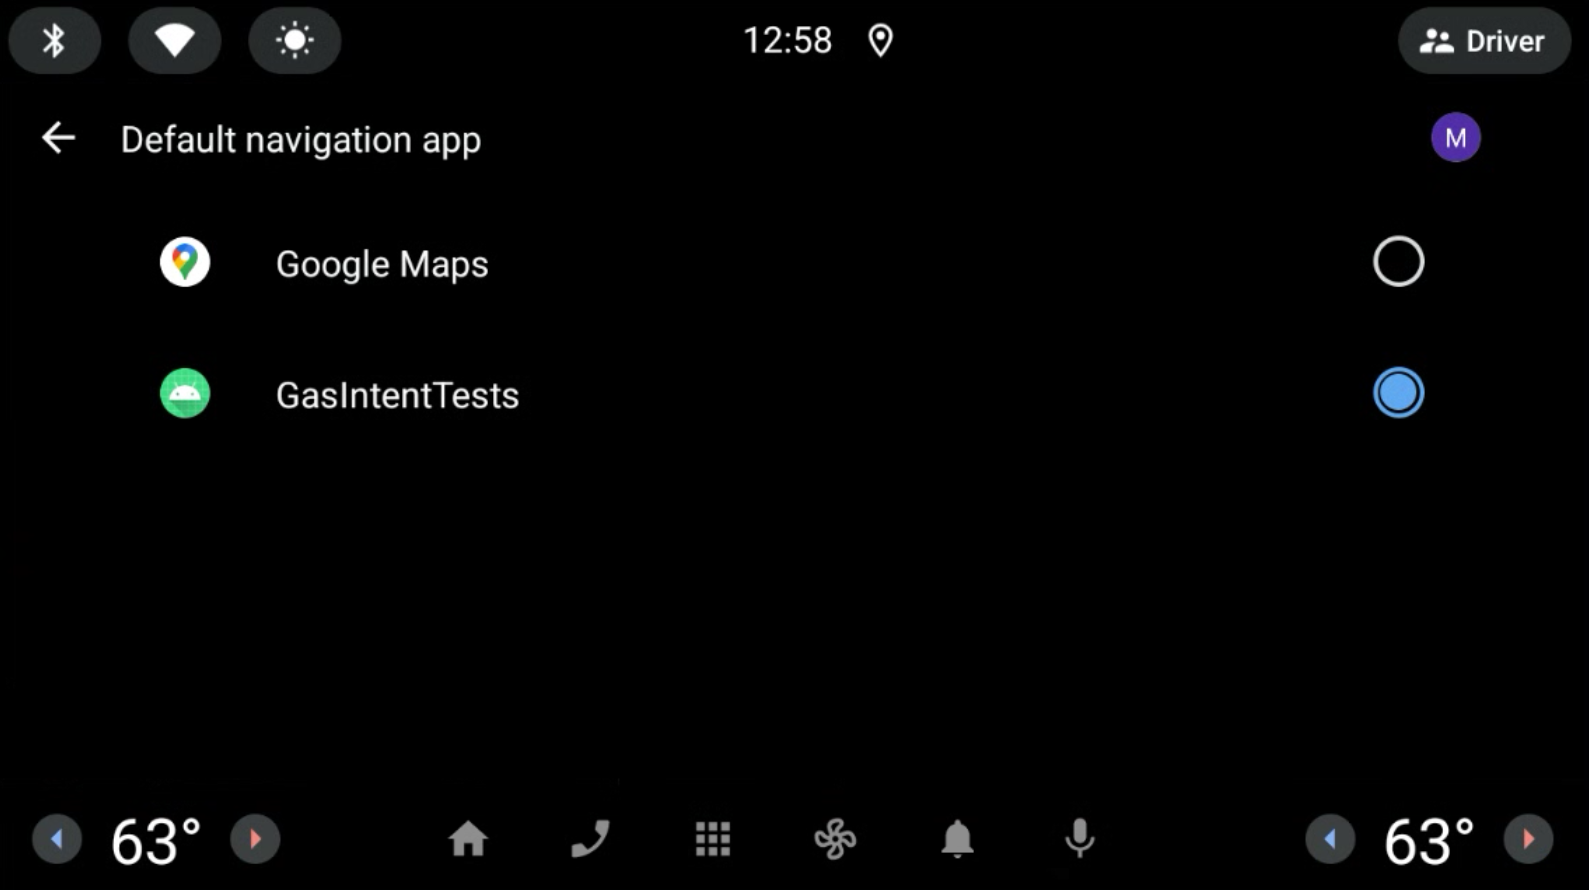
شکل 1. برنامه ناوبری پیش فرض را انتخاب کنید. روی نماد میکروفون کلیک کنید و یک پرس و جو بیان کنید. به عنوان مثال "رستوران های نزدیک". اگر میکروفون آنطور که انتظار می رود کار نمی کند، به کنترل ها، تنظیمات و راهنماهای توسعه یافته مراجعه کنید. Intent URI توسط Google Assistant به برنامه ناوبری ارسال می شود تا بیشتر پردازش شود.
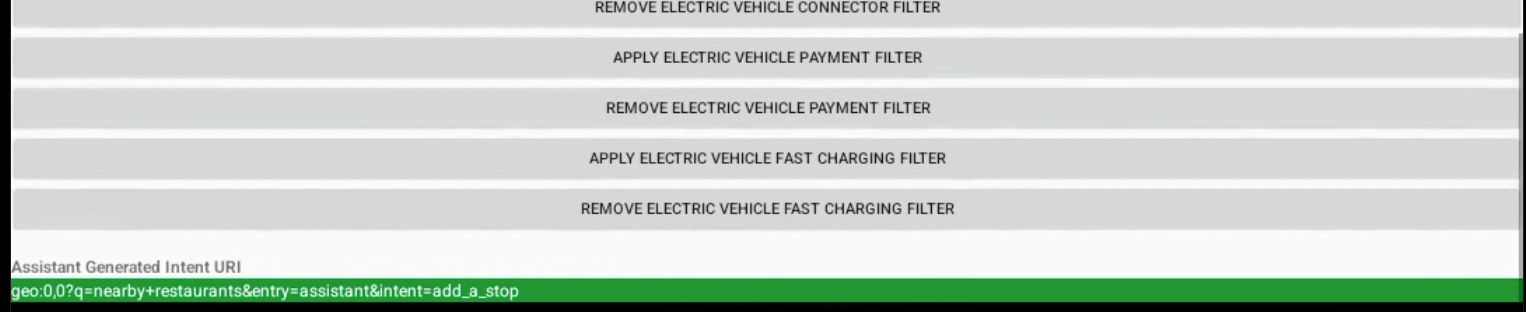
شکل 2. خروجی Google Assistant Intent ایجاد شده.
جزئیات فنی
میتوانید از پل اشکالزدایی اندروید (adb) برای راهاندازی intentها از کنسول استفاده کنید. برای کسب اطلاعات بیشتر، gas-intents-console-tests.txt را ببینید.
برای تعیین اینکه برنامهای میتواند هدفها را از دستیار Google دریافت کند، این کد را در فایل AndroidManifest.xml برنامه ناوبری قرار دهید:
   <!-- Navigation Intent -->
    <intent-filter>
      <action android:name="androidx.car.app.action.NAVIGATE" />
      <category android:name="android.intent.category.DEFAULT"/>
      <data android:scheme="geo" />
    </intent-filter>

    <!-- Search Intent -->
    <intent-filter>
      <action android:name="android.intent.action.VIEW" />
      <category android:name="android.intent.category.DEFAULT"/>
      <data android:scheme="geo" />
    </intent-filter>

    <!-- Custom Action Intents -->
    <intent-filter>
      <action android:name="android.intent.action.VIEW" />
      <category android:name="android.intent.category.DEFAULT"/>
      <data android:scheme="geo.action" />
    </intent-filter>
برای افزودن برنامه به Settings > Google > Google Assistant > Default navigation app تا بتوان آن را مشاهده و انتخاب کرد، اضافه کنید:
    <intent-filter>
        <action android:name="android.intent.action.MAIN" />
        <category android:name="android.intent.category.APP_MAPS" />
    </intent-filter>