
The Android XR Emulator is a specialized version of the Android Emulator that is designed for XR app development. It lets you test and debug your XR apps within the familiar environment of Android Studio.
Before you can run your app in the Android XR Emulator, you need to set it up. Create Android Virtual Devices (AVDs) for either XR headsets or XR glasses, depending on the type of testing you need to do.
- XR headset: The emulator for XR headsets simulates a fully-immersive XR environment, letting you test your app's experiences in a fully-virtual space.
- XR glasses: The emulator for XR glasses simulates a pair of wired XR glasses that let the user see through the optical display while still providing a wide field of view and immersive capabilities.
Follow the steps in the following sections to set up everything you need for these virtual devices.
Check system requirements
Before you start creating Android Virtual Devices (AVDs), review the following system requirements.
System requirements for XR headsets and XR glasses AVDs
To use the Android XR Emulator with an AVD for XR headsets or XR glasses, your computer must meet the following requirements:
- Android Studio: Install the latest Canary build and configure Studio for XR development.
- System: macOS or Windows
- macOS requirements:
- OS: macOS 13.3 or later.
- CPU/GPU: Apple Silicon (M1 chip or newer)
- RAM/VRAM: 16 GB or higher
- Windows requirements:
- OS: Windows 11 or later.
- CPU: Intel 9th generation or later, or AMD Ryzen 1000-series or later.
- RAM: 16 GB or higher
- GPU: NVIDIA GeForce 10 series or later, or AMD Radeon RX 5000 series or later.
- VRAM: 8 GB or higher
- BIOS Settings: VMX CPU extensions must be enabled in your computer's BIOS
- macOS requirements:
Create an Android XR Virtual Device
Follow these steps to create an Android Virtual Device (AVD) to use as you test and debug your app:
Open the latest Canary build of Android Studio, and then click Tools > Device Manager > Add a new device

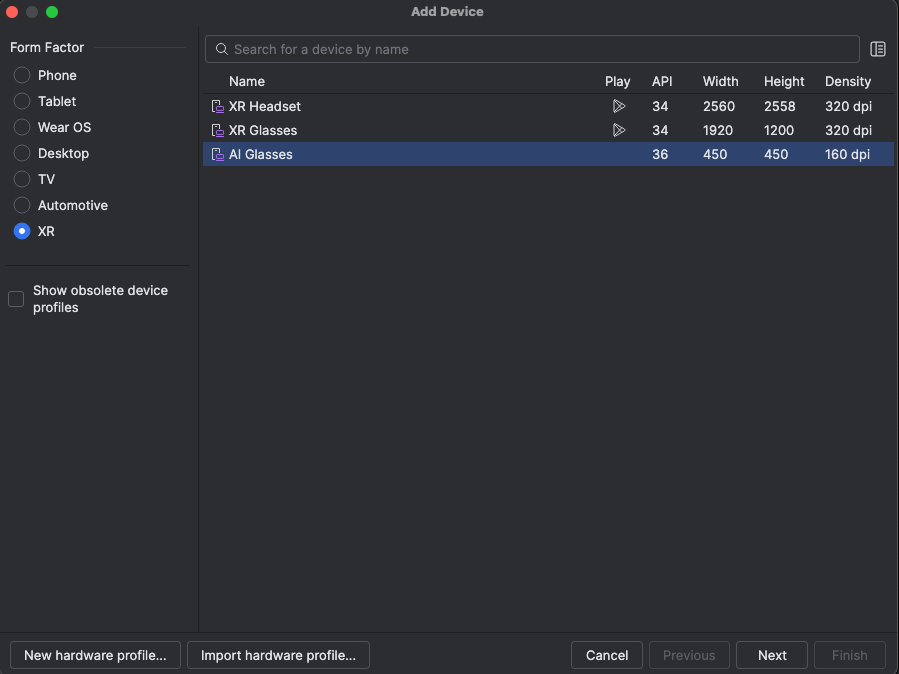
In the Add Device window, in the Form Factor section, select XR.
From the list, select whichever type of XR device you want to create, and then click Next.
In the Configure Virtual Device tab in the Select system image section, select the appropriate Android XR system image for your chosen virtual device that is compatible with your local system.
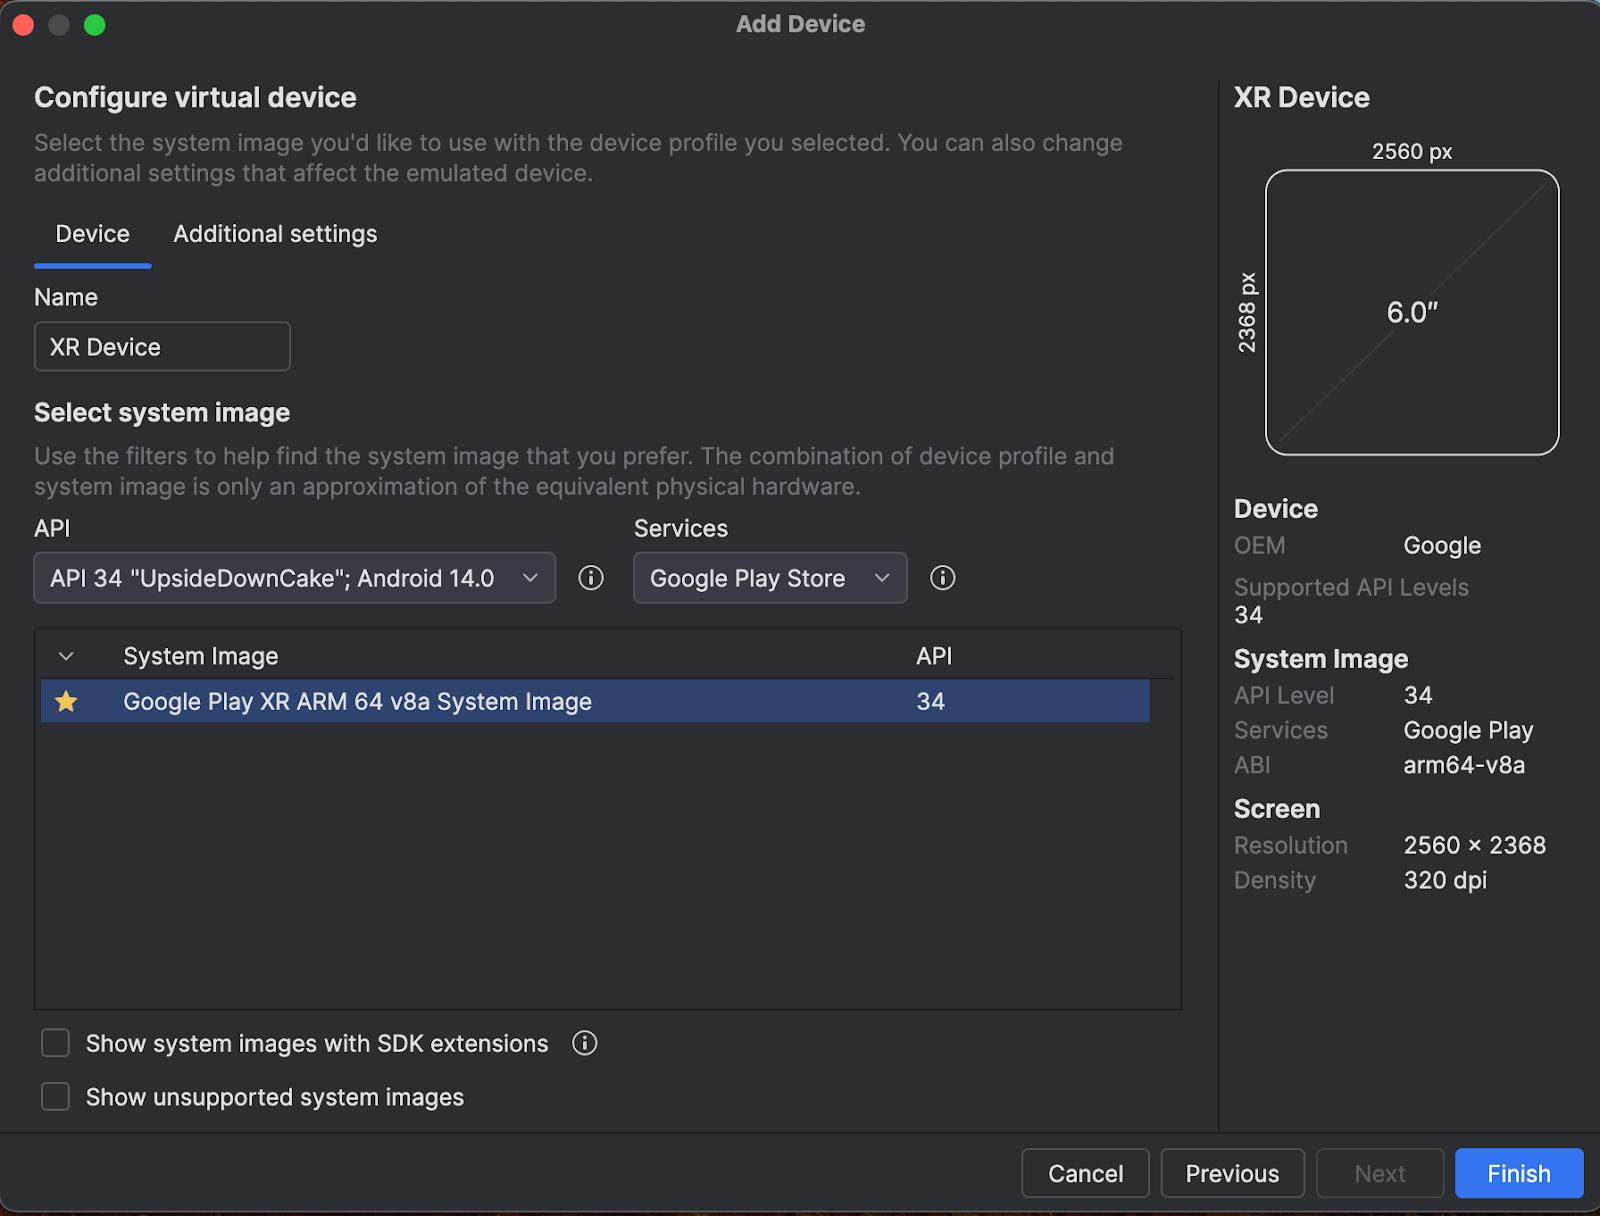
Click Finish.

Next steps
Now that you've created one or more AVDs for XR headsets and XR glasses, run your app on the emulator.
OpenXR™ and the OpenXR logo are trademarks owned by The Khronos Group Inc. and are registered as a trademark in China, the European Union, Japan and the United Kingdom.