Transformer 데모 앱을 사용하면 API의 기능을 사용해 보고
형식 간 미디어 변환, 자르기 및
동영상 효과 적용
이 페이지에서는 데모 앱을 가져오고 컴파일하고 실행하는 방법을 설명합니다. 이 가이드 또한
은 데모 앱을 사용하여 자체 미디어를 변환하는 방법을 설명합니다.
코드 가져오기
기본 데모 앱의 소스 코드는 demos/transformer에서 확인할 수 있습니다.
이 폴더는 GitHub 프로젝트에서 찾을 수 있습니다. 만약
아직 하지 않았다면 프로젝트를 로컬 디렉터리에 클론합니다.
git clone https://github.com/androidx/media.git
그런 다음 Android 스튜디오에서 프로젝트를 엽니다. 다음과 같이 표시됩니다.
Android 프로젝트 뷰 (데모 앱의 관련 폴더는 확장됨):
<ph type="x-smartling-placeholder"></ph>
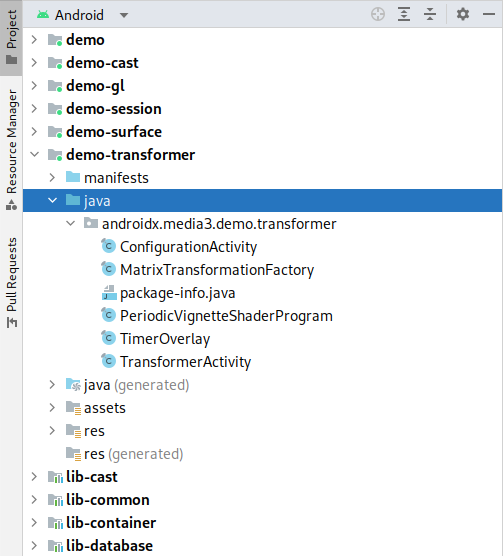
Android 스튜디오의 프로젝트
데모 컴파일 및 실행
데모 앱을 컴파일하고 실행하려면 demo-transformer를 선택하여 실행합니다.
살펴보겠습니다. 데모 앱은
Android 지원 기기를 사용해야 합니다. 다음의 경우 실제 기기를 사용하는 것이 좋습니다.
가능한 이유는 일반적으로 에뮬레이터의 Android 미디어 구현으로,
스택의 기능과 버그가 실제 기기와 다릅니다.
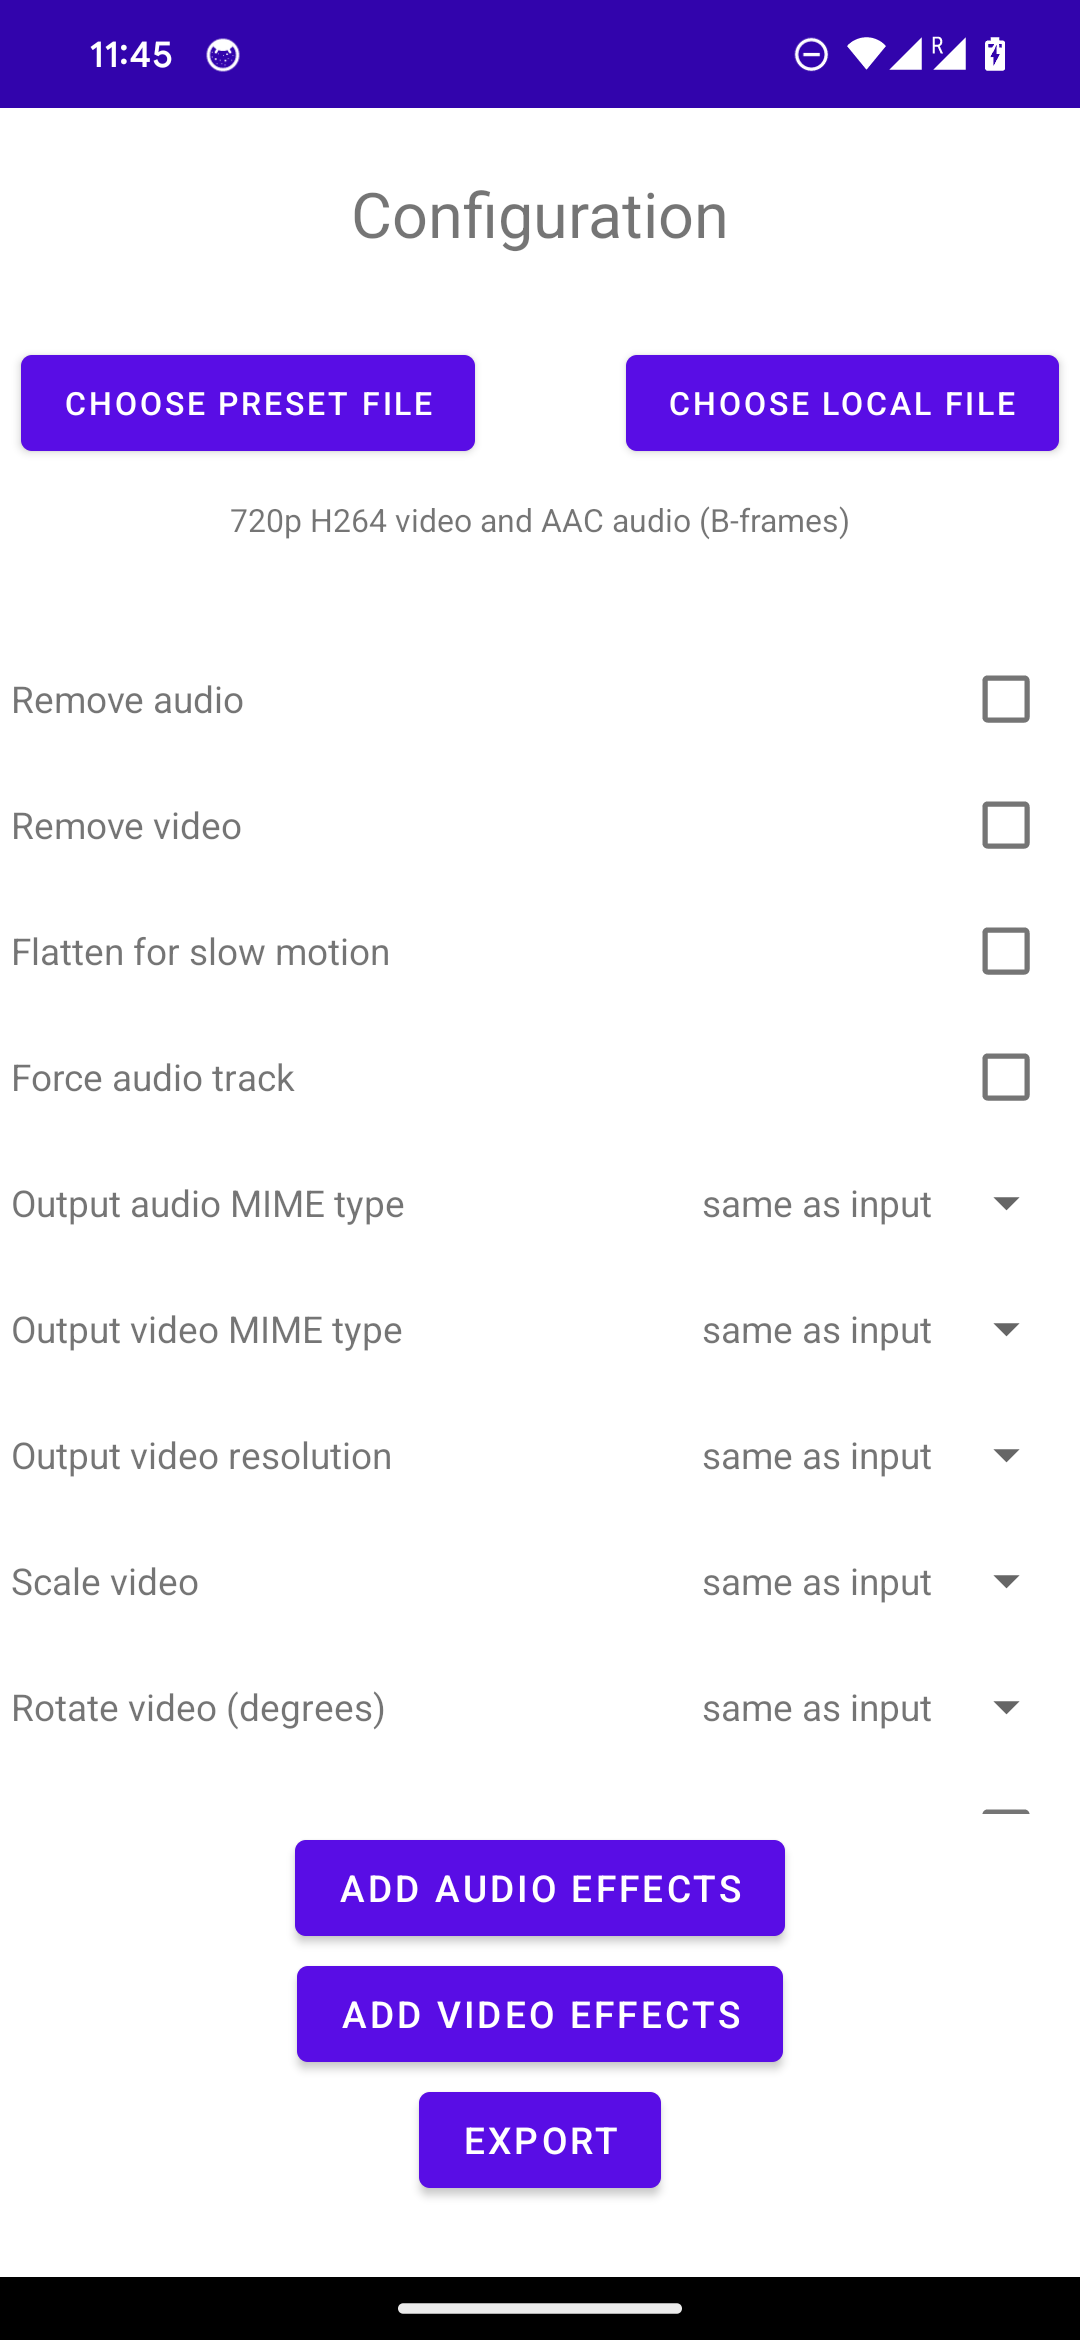
<ph type="x-smartling-placeholder"></ph>
데모 앱 구성 활동
데모 앱은 ConfigurationActivity로 시작합니다. 이 활동에서는
수행하려는 변환을 설정할 수 있습니다. 둘
화면 상단의 버튼을 사용하면 미리 설정된 미디어 목록에서 원하는 미디어 유형을 선택할 수 있습니다.
파일을 업로드하거나 로컬 파일을 선택할 수 있습니다 다음으로, 스크롤 가능한 옵션 목록을 사용하면
출력 형식과 변환을 구성하고 효과를 선택하여
미디어에 적용됩니다 마지막 버튼을 탭하면
TransformerActivity: 현재 진행 상황과 미리보기를 보여주는 활동
트랜스포머를 통과할 때의 프레임의 개수입니다. 변환이 완료되면
완료되면 입력 및 출력 동영상이 두 개의 ExoPlayer에 함께 표시됩니다.
PlayerView 인스턴스.
자체 콘텐츠 변환
데모 앱은
클릭합니다. 또한
명령줄:
adb shell am start -a androidx.media3.demo.transformer.action.VIEW \
-d https://yourdomain.com/sample.mp4
드림
MediaPipe 통합
데모 앱에는
MediaPipe에 있습니다. 이러한 포드에 대해
종속 항목을 수동으로 빌드하려면 withMediaPipe 빌드 변형을 선택하여 사용 설정합니다.
미디어 파이프 프레임 프로세서로
앱을 빌드할 수 있습니다 자세한 내용은
README
를 참조하세요. 구성 활동의 효과 선택기
에는 MediaPipe 기반 효과 예시가 포함되어 있습니다.
[[["이해하기 쉬움","easyToUnderstand","thumb-up"],["문제가 해결됨","solvedMyProblem","thumb-up"],["기타","otherUp","thumb-up"]],[["필요한 정보가 없음","missingTheInformationINeed","thumb-down"],["너무 복잡함/단계 수가 너무 많음","tooComplicatedTooManySteps","thumb-down"],["오래됨","outOfDate","thumb-down"],["번역 문제","translationIssue","thumb-down"],["샘플/코드 문제","samplesCodeIssue","thumb-down"],["기타","otherDown","thumb-down"]],["최종 업데이트: 2025-07-27(UTC)"],[],[],null,["# Transformer demo application\n\nThe Transformer demo app lets you try out the API's capabilities and transform\nyour own media, including converting media between formats, trimming, and\napplying video effects.\n\nThis page describes how to get, compile, and run the demo app. This guide also\ndescribes how to use the demo app to transform your own media.\n\nGet the code\n------------\n\nThe source code for the main demo app can be found in the `demos/transformer`\nfolder of the [GitHub project](https://github.com/androidx/media). If you\nhaven't already done so, clone the project into a local directory: \n\n```\ngit clone https://github.com/androidx/media.git\n```\n\nNext, open the project in Android Studio. You should see the following in the\nAndroid Project view (the relevant folders of the demo app have been expanded):\nThe project in Android Studio\n\nCompile and run the demo\n------------------------\n\nTo compile and run the demo app, select and run the `demo-transformer`\nconfiguration in Android Studio. The demo app will install and run on a\nconnected Android-powered device. We recommend using a physical device if\npossible, because typically an emulator's implementation of Android's media\nstack has different capabilities and bugs compared to a real device.\nDemo app configuration activity\n\nThe demo app begins with the `ConfigurationActivity`, an activity where you can\nset up the input media item and the transformation you want to perform. The two\nbuttons at the top of the screen let you choose from a list of preset media\nfiles or pick a local file. Next, the scrollable list of options lets you\nconfigure the output format and transformations, and you can select effects to\napply to the media. Tapping the last button transitions to\n`TransformerActivity`, an activity that shows the current progress and a preview\nof frames as they are passing through Transformer. Once transformation\ncompletes, the input and output videos are shown together in two ExoPlayer\n`PlayerView` instances.\n\nTransform your own content\n--------------------------\n\nThe demo app supports selecting media for transformation using the buttons at\nthe top of the configuration screen. You can also pass a URL directly on the\ncommand line: \n\n```\nadb shell am start -a androidx.media3.demo.transformer.action.VIEW \\\n -d https://yourdomain.com/sample.mp4\n```\n| **Tip:** If you see errors when selecting local media using this feature, check the [troubleshooting page](/media/media3/transformer/troubleshooting#local-files).\n\nMediaPipe integration\n---------------------\n\nThe demo app includes an example integration with\n[MediaPipe](https://developers.google.com/mediapipe). You will need to build the\ndependency manually, then select the `withMediaPipe` build variant to enable\nbuilding the app with the media pipe frame processor. See the\n[README](https://github.com/androidx/media/tree/release/demos/transformer#mediapipe-frame-processing-demo)\nfor full instructions. The effects selector in the configuration activity\nincludes an example MediaPipe-based effect to try this out."]]