
Android 8.0 (API level 26) introduces fonts in XML, a feature that
lets you use fonts as resources. You can add the font file in
the res/font/ folder to bundle fonts as resources. These fonts
are compiled in your R file and are automatically available in
Android Studio. You can access the font resources using the font resource type. For
example, to access a font resource,
use @font/myfont, or R.font.myfont.
To use the fonts in XML feature on devices running Android 4.1 (API level 16) and higher, use Support Library 26.0. For more information on using the Support Library, refer to the Use the Support Library section.
To add fonts as resources, perform the following steps in Android Studio:
- Right-click the res folder and go to New > Android resource directory. The New Resource Directory window appears.
- In the Resource type list, select font, then click
OK.
Note: The name of the resource directory must be font.
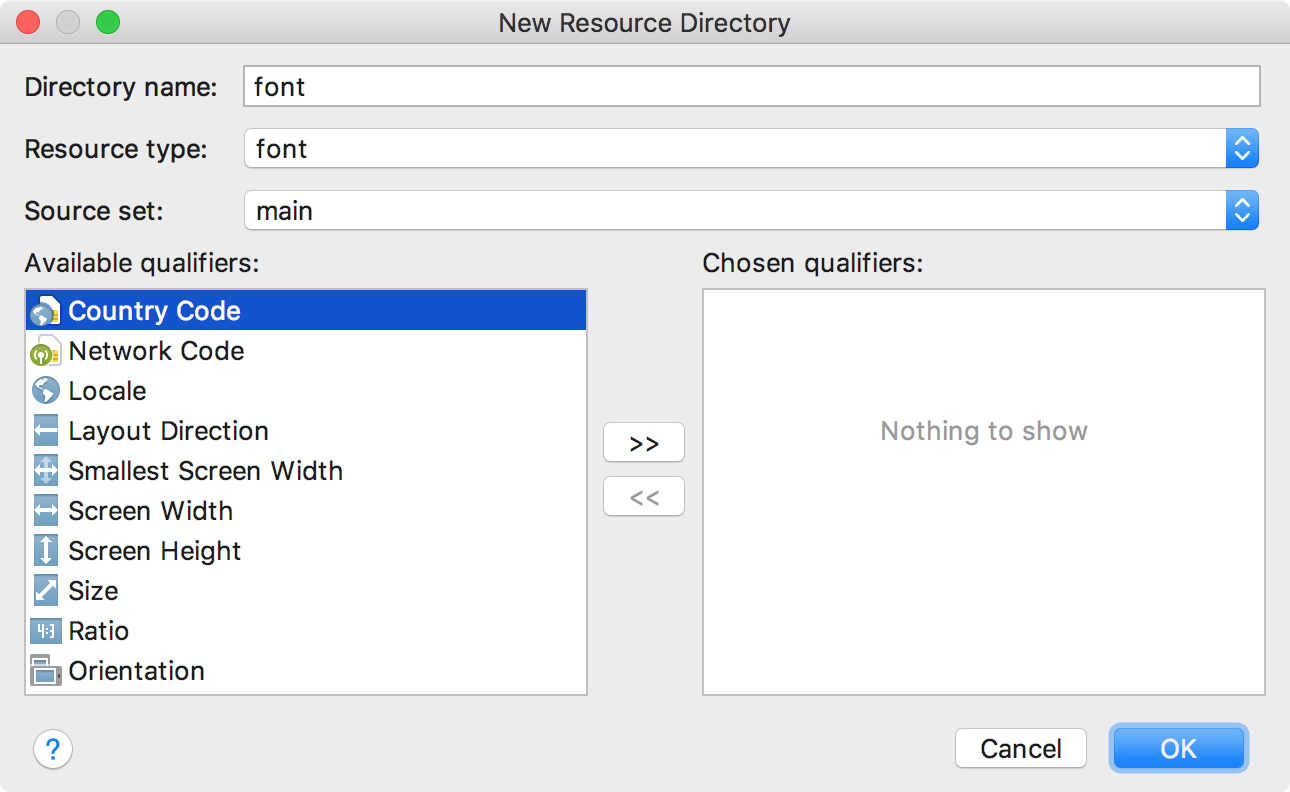
Figure 1. Adding the font resource directory.
- Add your font files in the
fontfolder.The folder structure below generates
R.font.dancing_script,R.font.lobster, andR.font.typo_graphica.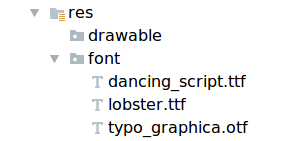
Figure 2. Adding the font files in the
res/fontdirectory. - Double-click a font file to preview the file's fonts in the editor.

Figure 3. Previewing the font file.
Create a font family
A font family is a set of font files along with style and weight details. In Android, you can create a new font family as an XML resource and access it as a single unit, instead of referencing each style and weight as separate resources. By doing this, you let the system select the correct font based on the text style you are using.
To create a font family, perform the following steps in Android Studio:
- Right-click the
fontfolder and select New > Font resource file. The New Resource File window appears. - Enter the filename, then click OK. The new font resource XML opens in the editor.
- Enclose each font file, style, and weight attribute in the
<font>element. The following XML illustrates adding font-related attributes in the font resource XML:<?xml version="1.0" encoding="utf-8"?> <font-family xmlns:android="http://schemas.android.com/apk/res/android"> <font android:fontStyle="normal" android:fontWeight="400" android:font="@font/lobster_regular" /> <font android:fontStyle="italic" android:fontWeight="400" android:font="@font/lobster_italic" /> </font-family>
Use fonts in XML layouts
Use your fonts, either a single font file or a font from a
font family, in TextView
objects or in styles by using the
fontFamily attribute.
Note: When you use a font family, the
TextView switches on its own, as needed, to use the
font files from that family.
Add fonts to a TextView
To set a font for a TextView, do one of the
following:
- In the layout XML file, set the
fontFamilyattribute to the font file you want to access.<TextView android:layout_width="wrap_content" android:layout_height="wrap_content" android:fontFamily="@font/lobster"/>
- Open the Properties window to set the font for the
TextView.- Select a view to open the Properties window.
Note: The Properties window is available only when the design editor is open. Select the Design tab at the bottom of the window.
- Expand the textAppearance property, and then select the font from the fontFamily list.
-

Figure 4. Selecting the font from the Properties window.
- Select a view to open the Properties window.
The Android Studio layout preview, shown in the rightmost pane in Figure 5,
lets you preview the font set in the TextView.

Figure 5. Previewing fonts in layout preview.
Add fonts to a style
Open the styles.xml file and set the fontFamily
attribute to the font file you want to access.
<style name="customfontstyle" parent="@android:style/TextAppearance.Small">
    <item name="android:fontFamily">@font/lobster</item>
</style>
Use fonts programmatically
To retrieve fonts programmatically, call the
getFont(int) method and provide the
resource identifier of the font you want to retrieve. This method returns a
Typeface object. Although the system picks the best
style for you from the fonts' information, you can use the
setTypeface(android.graphics.Typeface, int)
method to set the typeface with specific styles.
Note: The TextView
does this for you.
Kotlin
val typeface = resources.getFont(R.font.myfont)
textView.typeface = typeface
Java
Typeface typeface = getResources().getFont(R.font.myfont);
textView.setTypeface(typeface);
Use the Support Library
The Support Library 26.0 supports fonts in XML on devices running Android 4.1 (API level 16) and higher.
Note: When you declare font families in XML layout through the Support Library, use the app namespace to ensure that your fonts load.
<?xml version="1.0" encoding="utf-8"?>
<font-family xmlns:app="http://schemas.android.com/apk/res-auto">
    <font app:fontStyle="normal" app:fontWeight="400" app:font="@font/myfont-Regular"/>
    <font app:fontStyle="italic" app:fontWeight="400" app:font="@font/myfont-Italic" />
</font-family>
To retrieve fonts programmatically, call the
ResourceCompat.getFont(Context, int) method and provide an
instance of Context and the resource identifier.
Kotlin
val typeface = ResourcesCompat.getFont(context, R.font.myfont)
Java
Typeface typeface = ResourcesCompat.getFont(context, R.font.myfont);