Reminder: By Aug 31, 2026, all new apps and updates to existing apps must use Billing Library version 8 or later. If you need more time to update your app, you can request an extension until Nov 1, 2026. Learn about Play Billing Library version deprecation.
Google uses AI technology to translate content into your preferred language. AI translations can contain errors.
Tester les codes de réponse BillingResult
Restez organisé à l'aide des collections
Enregistrez et classez les contenus selon vos préférences.
La bibliothèque Play Billing renvoie une réponse BillingResult pour vous indiquer le résultat d'une action déclenchée. Pour en savoir plus, consultez la section Gérer les codes de réponse BillingResult. Avant de déployer votre application dans l'environnement de production, vous pouvez tester ses différents flux de réponse à l'aide du simulateur de réponse.
Simulateur de réponse
Lorsque vous intégrez votre application à la bibliothèque Play Billing, il peut être difficile de tester tous les flux BillingResponseCode, car vous n'avez pas beaucoup de contrôle sur la communication entre le Play Store et le backend de Play.
Le simulateur de réponse de l'application Play Billing Lab vous permet
configurer les réponses de code d'erreur de la bibliothèque Play Billing afin de tester divers
et d'erreurs.
Activer les tests des remplacements de facturation pour la bibliothèque Play Billing
Pour activer la communication entre le simulateur de réponse et votre application, vous devez activer les tests de forçage de facturation pour la bibliothèque Play Billing depuis votre application. Pour ce faire, ajoutez les balises de métadonnées suivantes au fichier AndroidManifest.xml de votre application.
Lorsque vous déployez votre application dans l'environnement de production, vous devez utiliser un fichier AndroidManifest.xml distinct qui n'inclut pas ces balises de métadonnées ou vous assurer d'avoir supprimé ces balises du fichier AndroidManifest.xml.
Simuler les erreurs de la bibliothèque Play Billing
Pour simuler des erreurs de la bibliothèque Play Billing, commencez par configurer les codes de réponse
dans l'application Play Billing Lab, puis testez votre application.
Configurer un code de réponse
Dans l'application Play Billing Lab, connectez-vous à votre application avec un compte de testeur de licence.
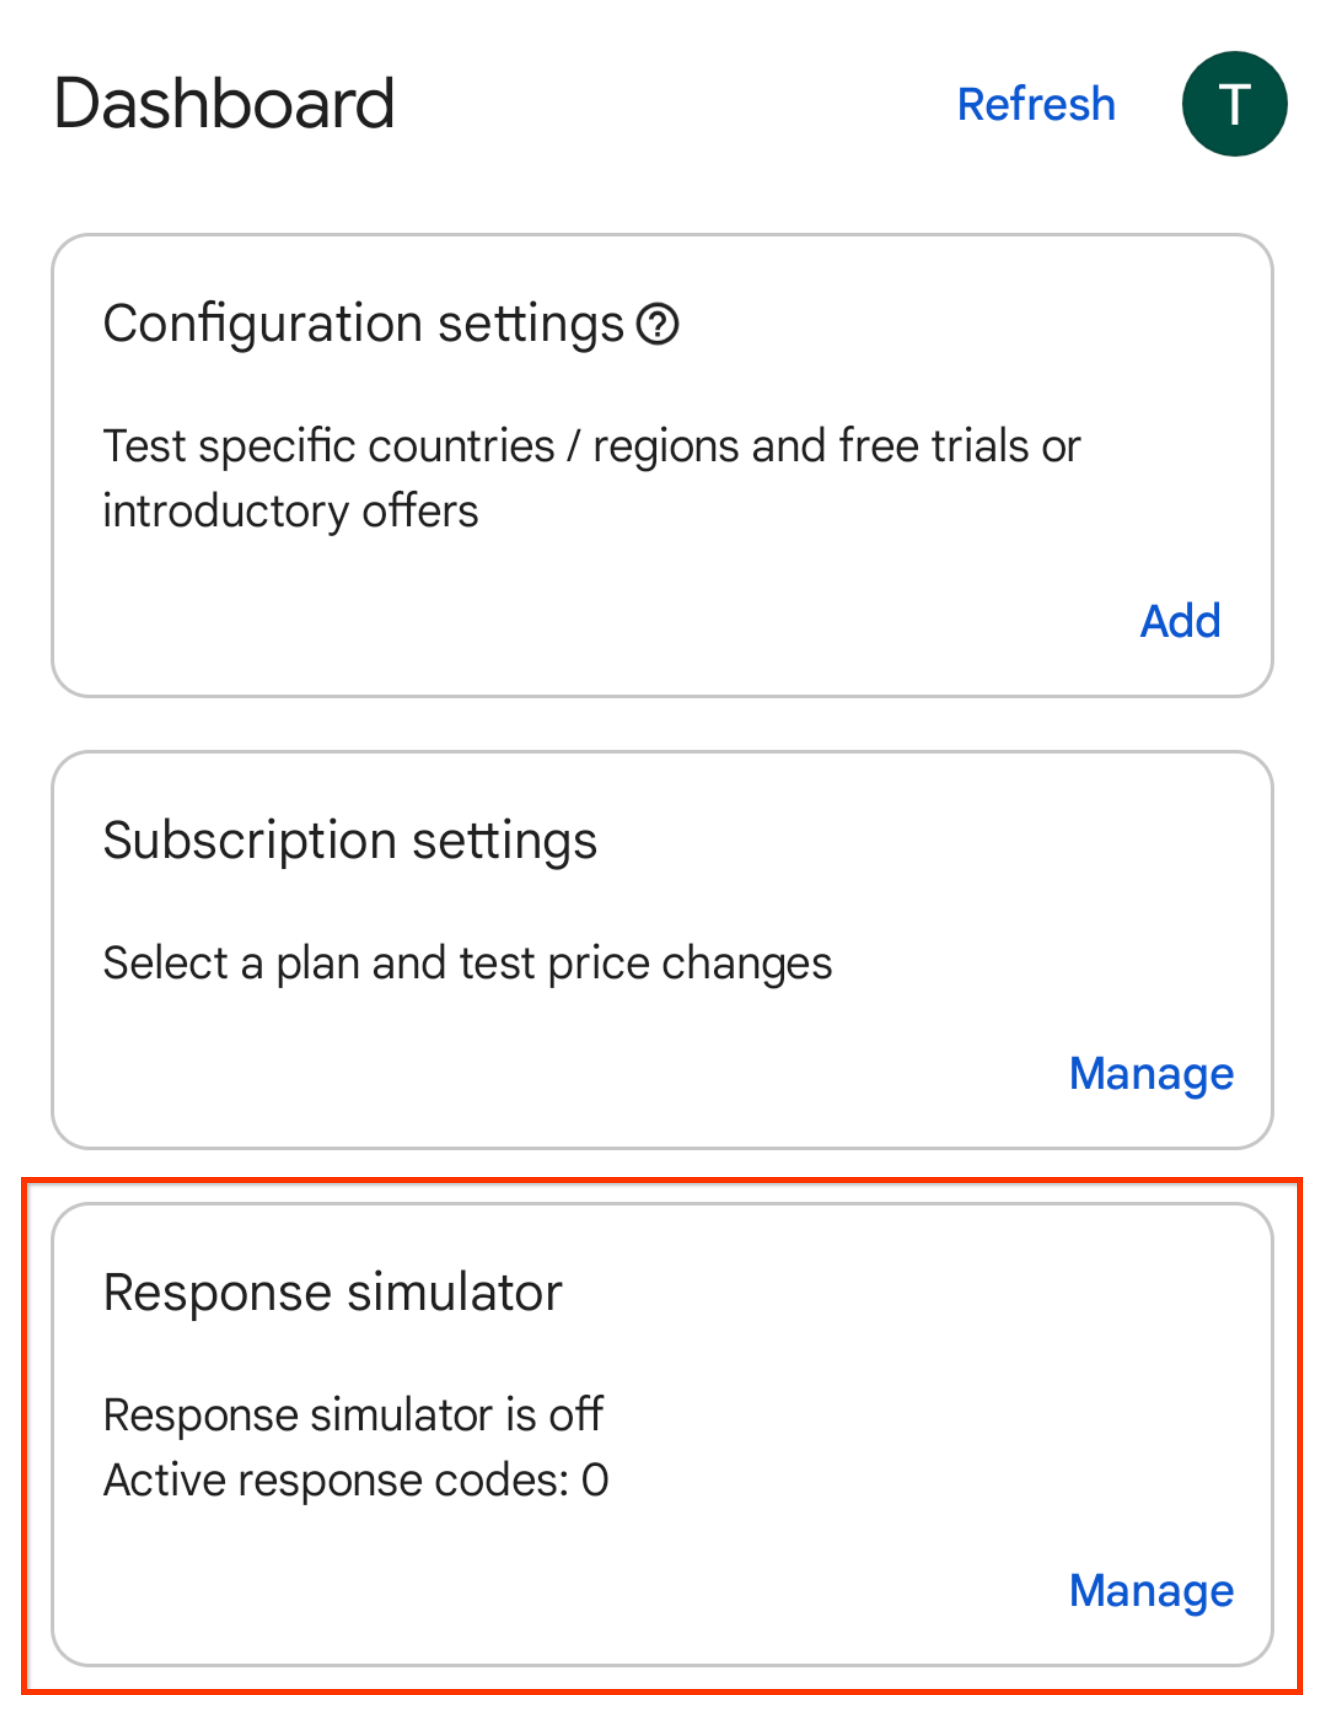
Le tableau de bord Play Billing Lab s'affiche, avec
la fiche Simulateur de réponse.
<ph type="x-smartling-placeholder"></ph>
Figure 1. Fiche du simulateur de réponse.
Cliquez sur Gérer sur la fiche "Simulateur de réponse".
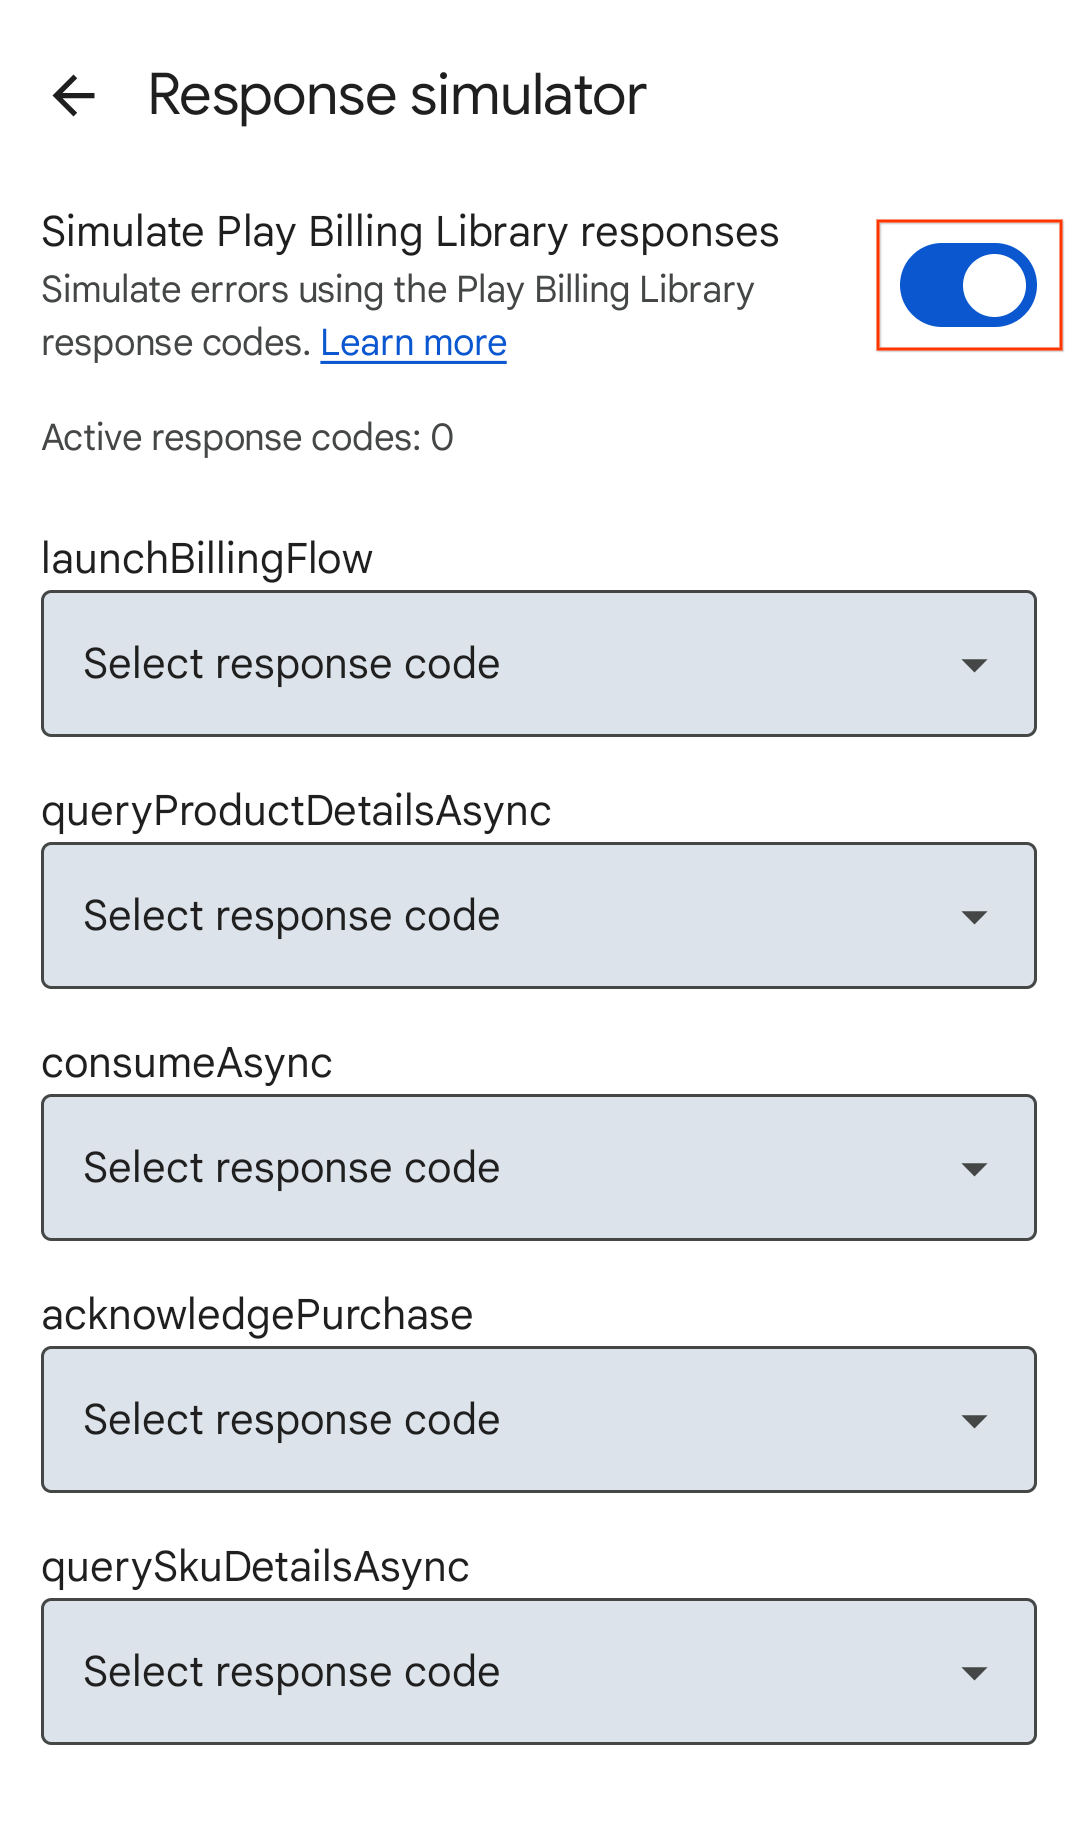
L'écran du simulateur de réponse s'affiche.
Lorsque vous y êtes invité, autorisez les notifications de Play Billing Lab pour voir l'état de la connexion de votre application.
Activez l'option Simuler les réponses de la Bibliothèque Play Billing, si ce n'est pas déjà fait.
Figure 2 Simulez le bouton de commutation des réponses de la Bibliothèque Play Billing.
Sélectionnez un code de réponse pour les API de la bibliothèque Play Billing de votre choix
à tester.
Vos sélections sont automatiquement enregistrées, et le simulateur de réponse est prêt à envoyer les codes de réponse sélectionnés à votre application.
Tester la gestion des erreurs dans votre application
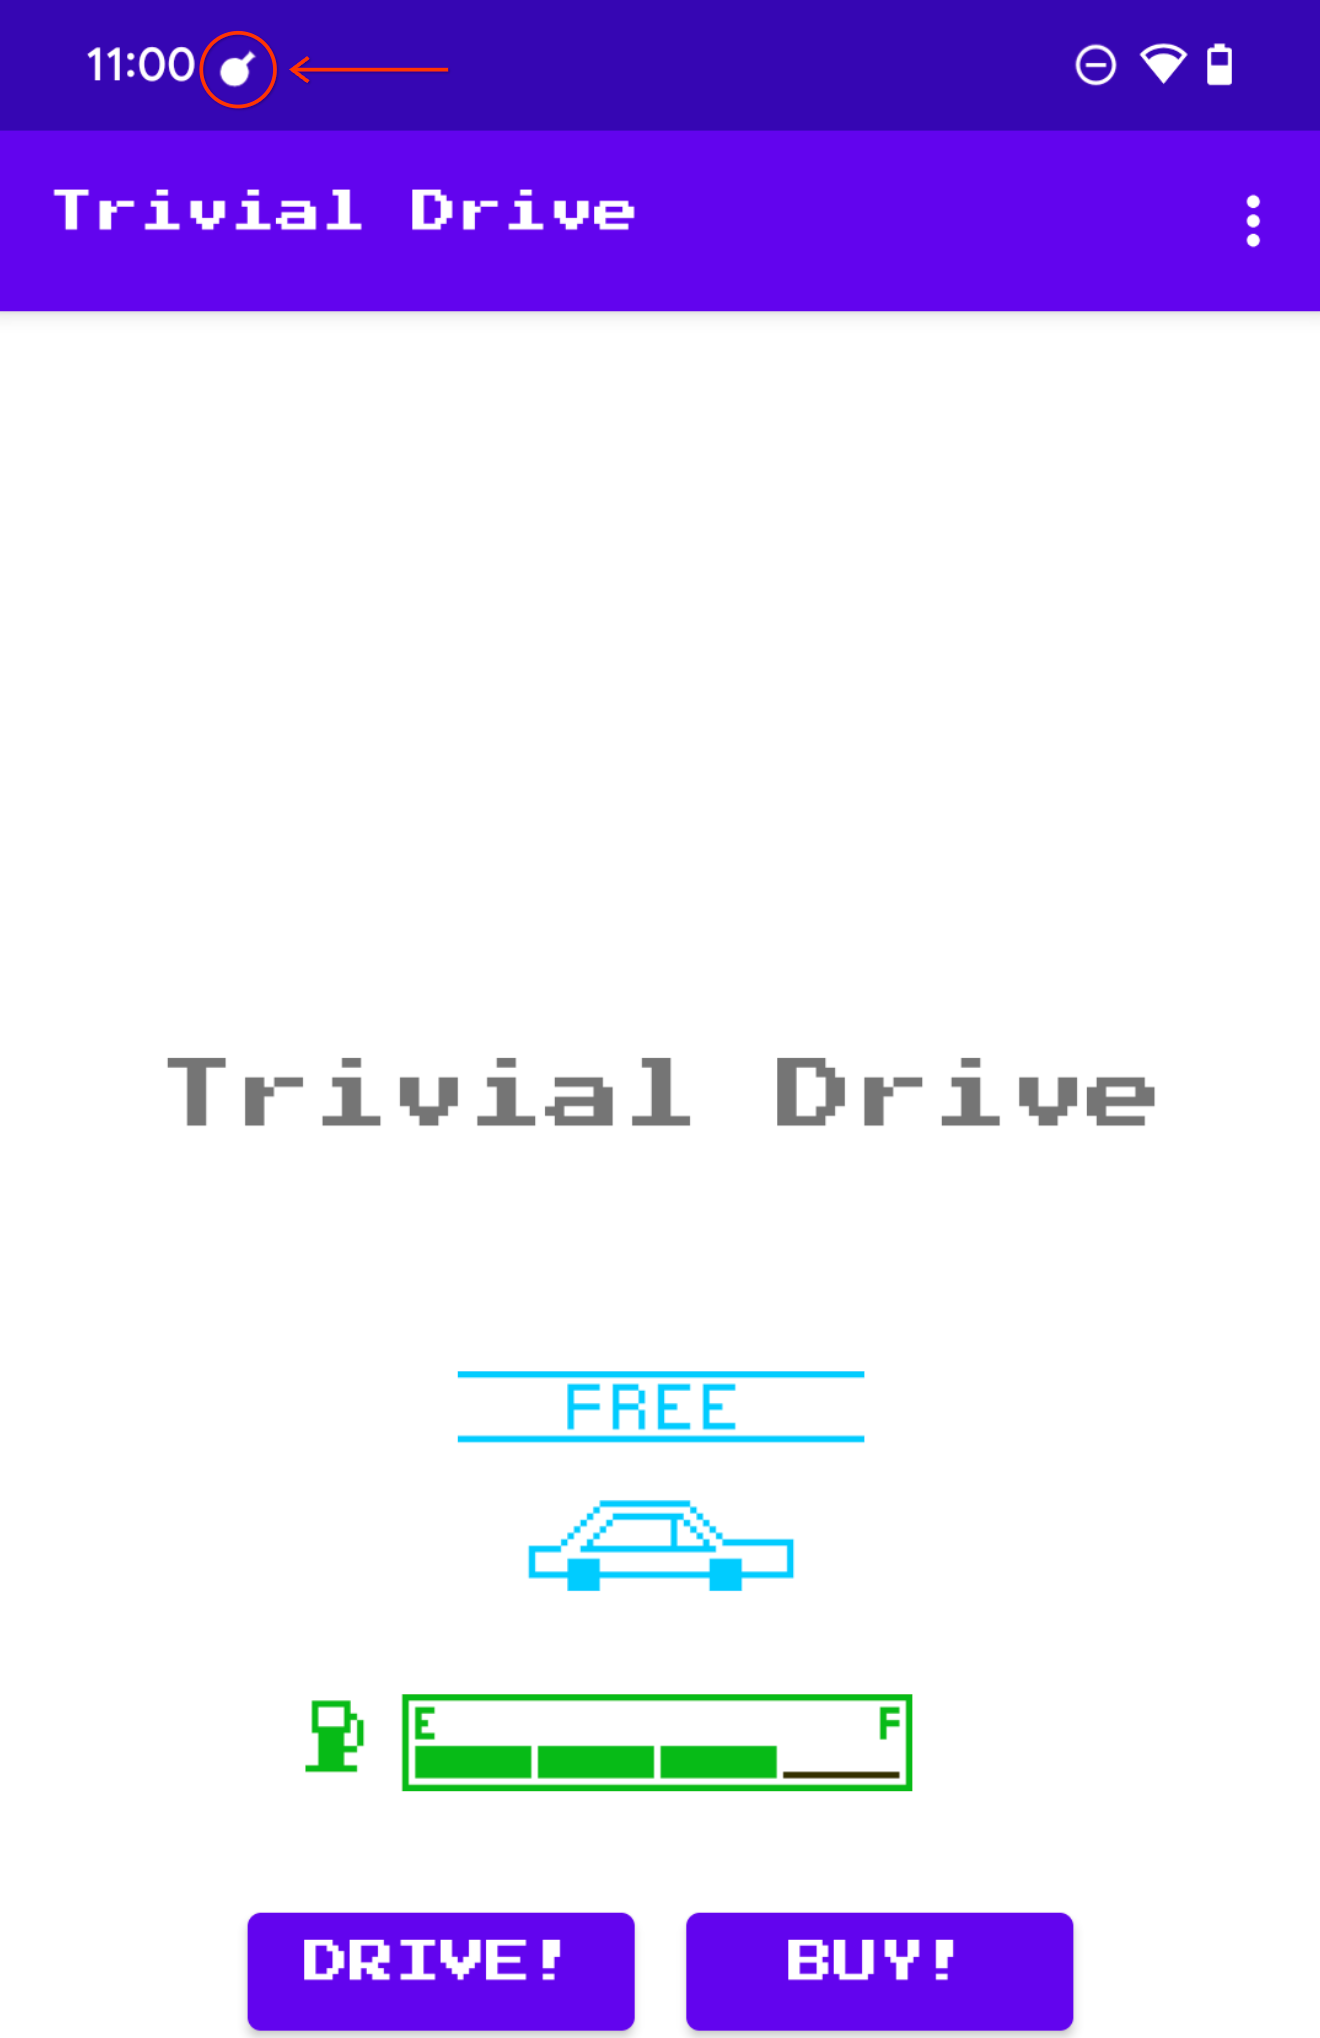
Ouvrez votre application.
Si vous avez autorisé les notifications de Play Billing Lab, l'icône de notification de Play Billing Lab s'affiche dans la barre d'état de votre appareil, ce qui indique que vous êtes bien connecté au simulateur de réponse.
Figure 3 Icône Play Billing Lab indiquant une connexion réussie.
Déclenchez la méthode de l'API Play Billing Library que vous souhaitez tester. Par exemple, si vous souhaitez tester launchBillingFlow, lancez un parcours d'achat intégré.
Le contenu et les exemples de code de cette page sont soumis aux licences décrites dans la Licence de contenu. Java et OpenJDK sont des marques ou des marques déposées d'Oracle et/ou de ses sociétés affiliées.
Dernière mise à jour le 2026/02/27 (UTC).
[[["Facile à comprendre","easyToUnderstand","thumb-up"],["J'ai pu résoudre mon problème","solvedMyProblem","thumb-up"],["Autre","otherUp","thumb-up"]],[["Il n'y a pas l'information dont j'ai besoin","missingTheInformationINeed","thumb-down"],["Trop compliqué/Trop d'étapes","tooComplicatedTooManySteps","thumb-down"],["Obsolète","outOfDate","thumb-down"],["Problème de traduction","translationIssue","thumb-down"],["Mauvais exemple/Erreur de code","samplesCodeIssue","thumb-down"],["Autre","otherDown","thumb-down"]],["Dernière mise à jour le 2026/02/27 (UTC)."],[],[]]