Pakiet Jetpack XR SDK zawiera funkcje i zmiany, które nie są zgodne z niektórymi starszymi wersjami Androida Studio. Aby zapewnić sobie najlepsze wrażenia podczas programowania na platformę Android XR, używaj najnowszej wersji Canary Androida Studio. Inne wersje mogą nie zawierać narzędzi Androida XR. Pamiętaj, że możesz zachować zainstalowaną wersję Androida Studio, ponieważ możesz zainstalować kilka wersji obok siebie.
Instalowanie Androida Studio
Aby pobrać i skonfigurować Android Studio na potrzeby Androida XR:
Zamknij wszystkie zainstalowane wersje Android Studio.
Pobierz najnowszą wersję Canary Android Studio, wyodrębnij ją w wybranej lokalizacji i uruchom aplikację.
Postępuj zgodnie z instrukcjami instalacji w kreatorze.
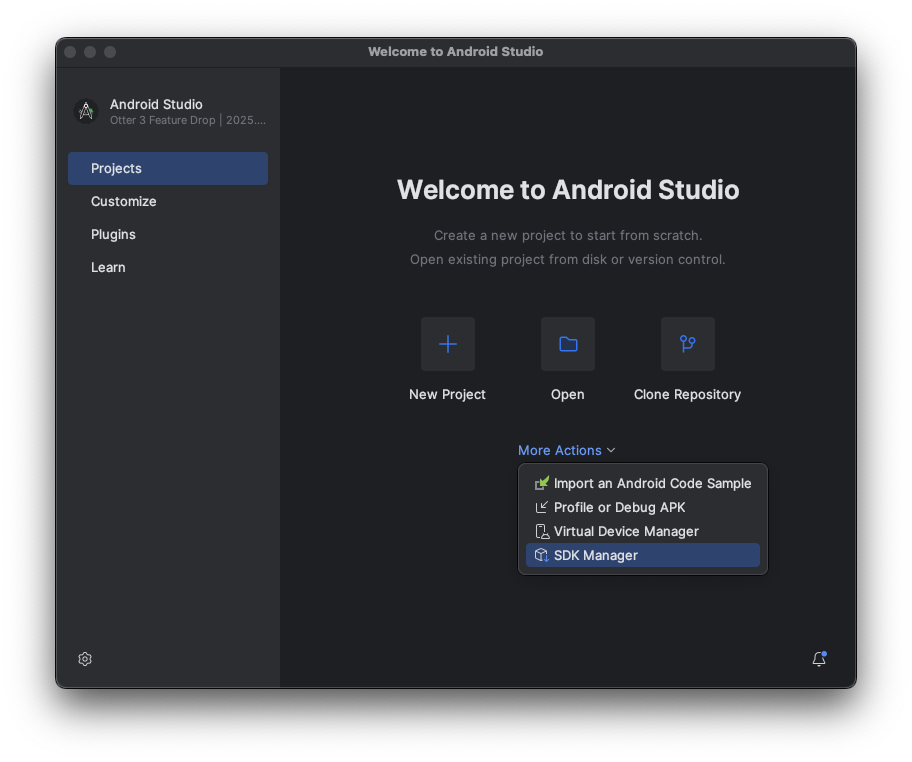
W oknie Witamy w Androidzie Studio kliknij Więcej działań, a potem wybierz Menedżer SDK.
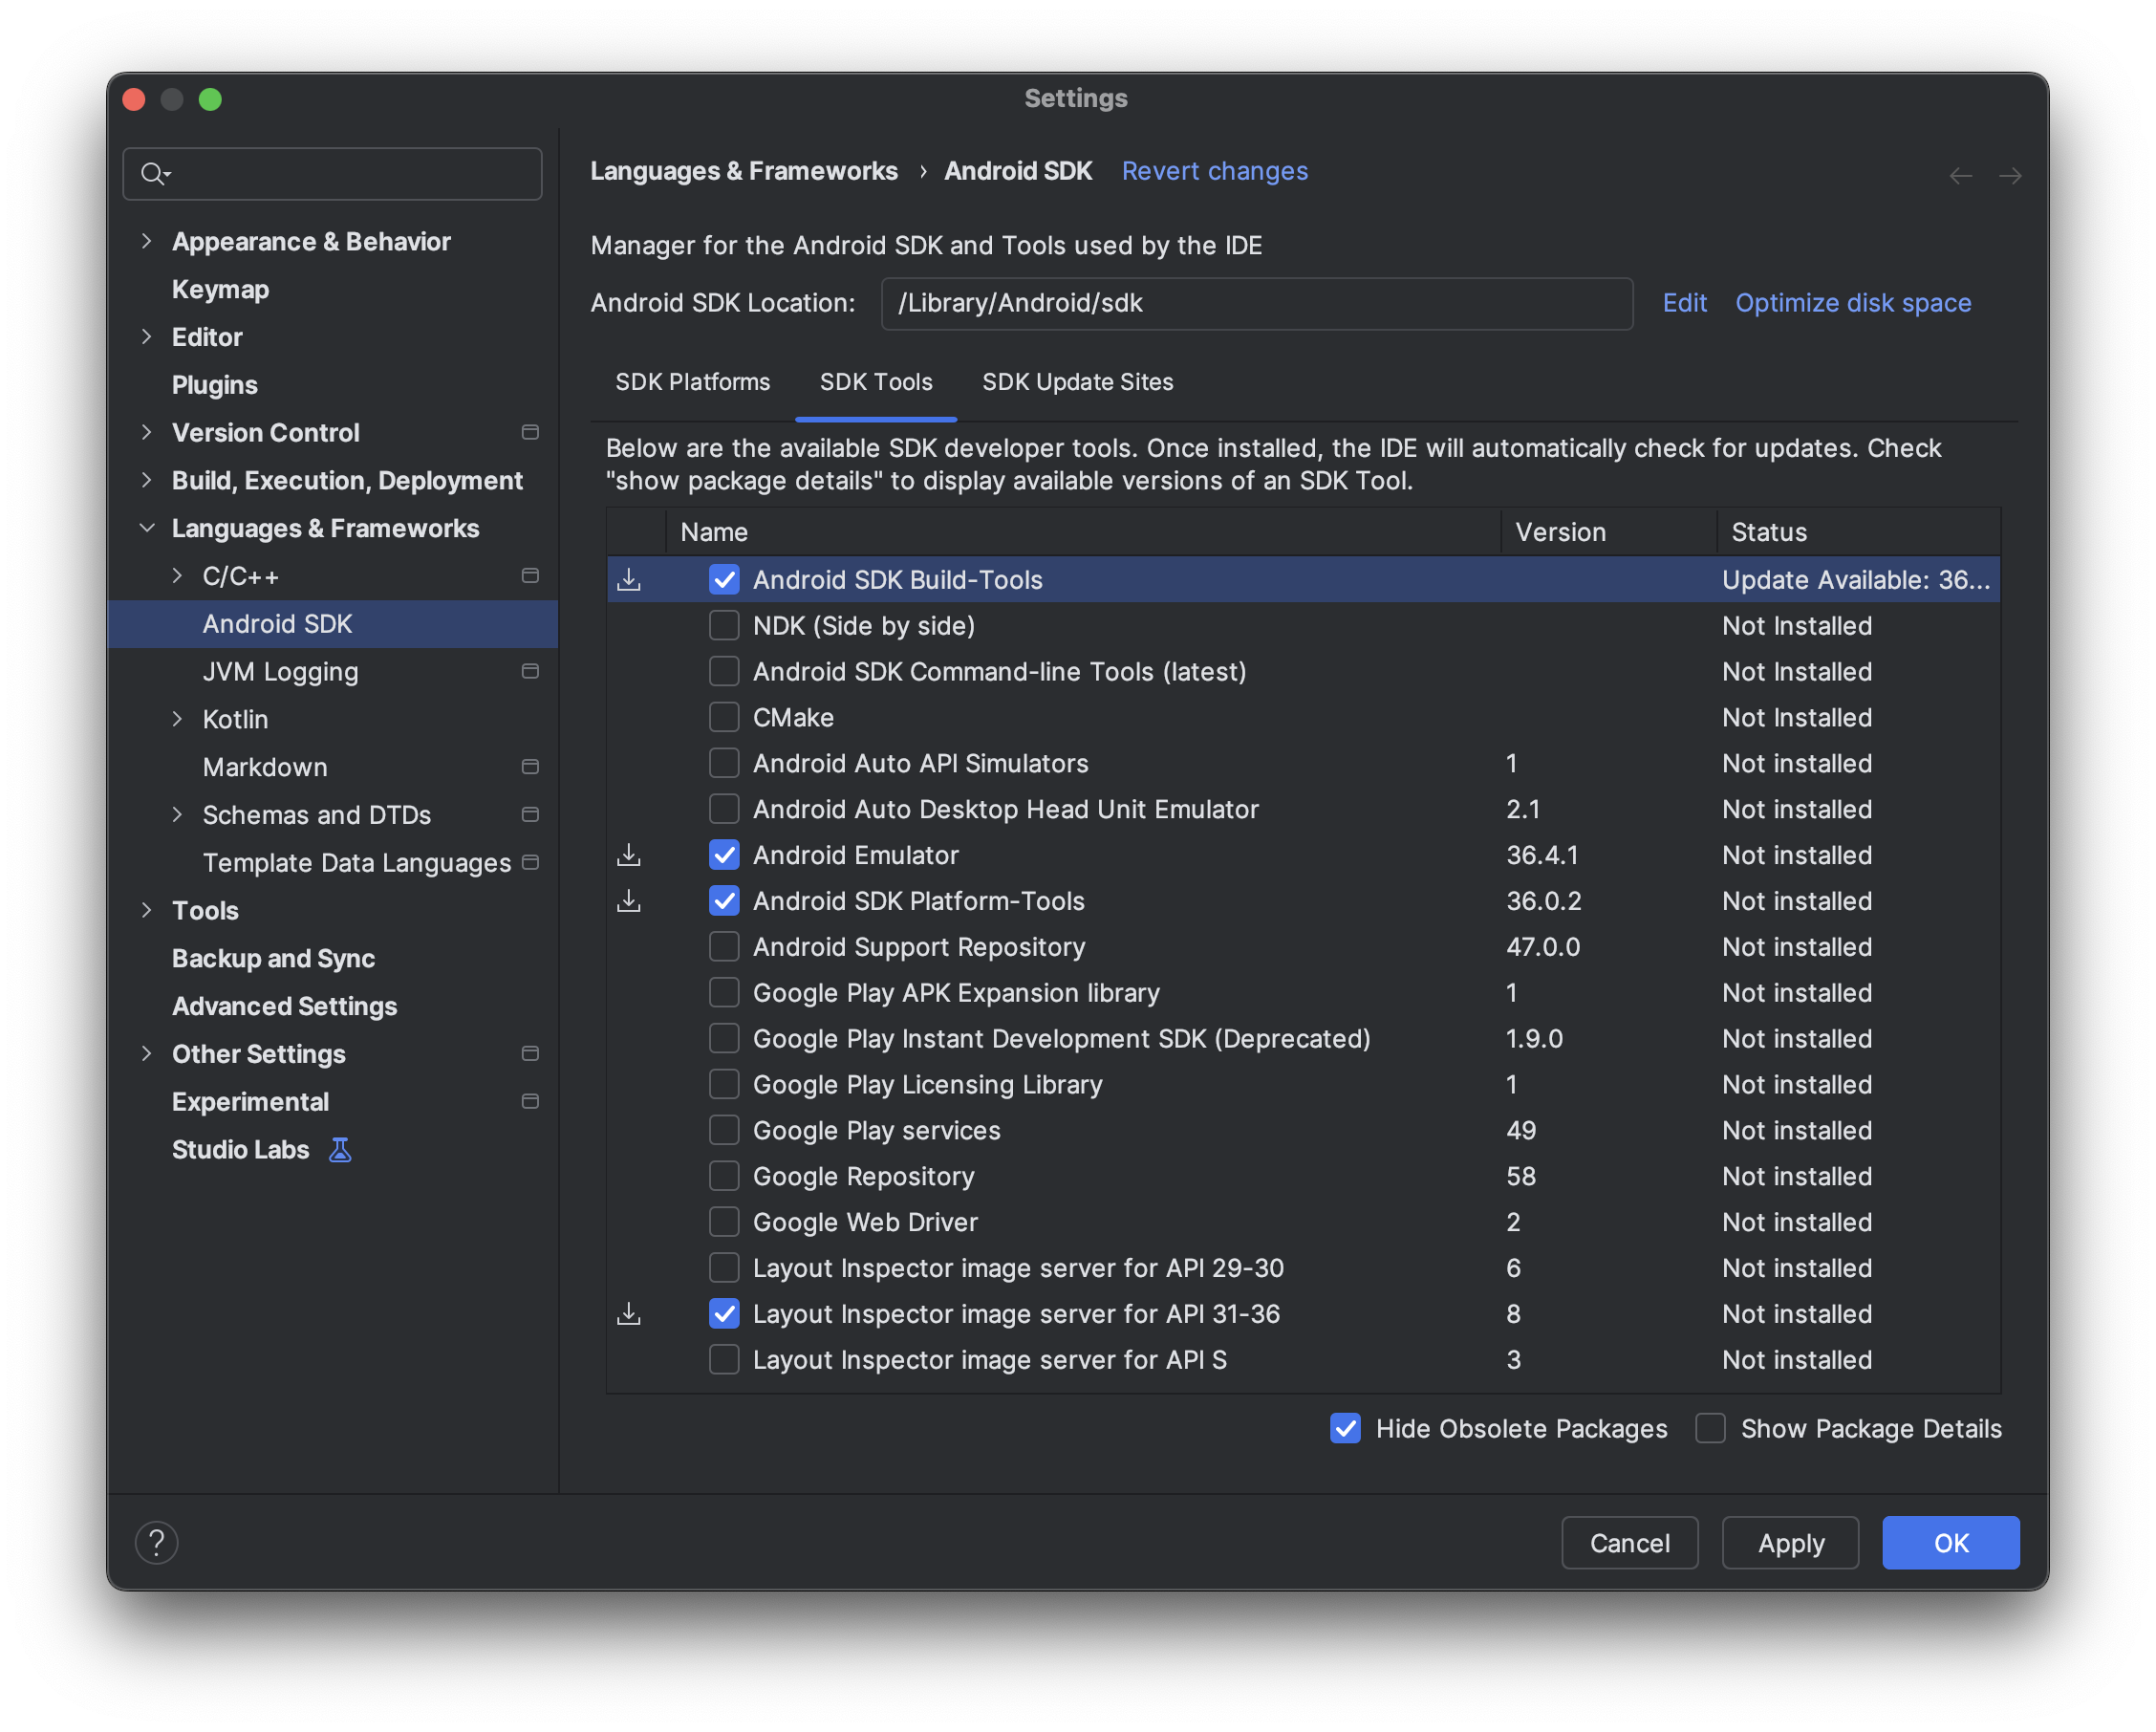
W ustawieniach Android SDK kliknij kartę SDK Tools, a następnie wybierz najnowsze wersje tych narzędzi:
- Narzędzia SDK do kompilacji na Androida
- Android Emulator
- Android SDK Platform-Tools
- Layout Inspector w przypadku interfejsów API 31–36
Tworzenie urządzeń wirtualnych do uruchamiania w emulatorze Androida XR
Aby sprawdzić, jak aplikacja wygląda i działa na różnych typach urządzeń XR, możesz uruchomić ją na wirtualnych urządzeniach XR w emulatorze Androida XR. Informacje o konfigurowaniu emulatora dla różnych typów wirtualnych urządzeń XR znajdziesz na tych stronach:
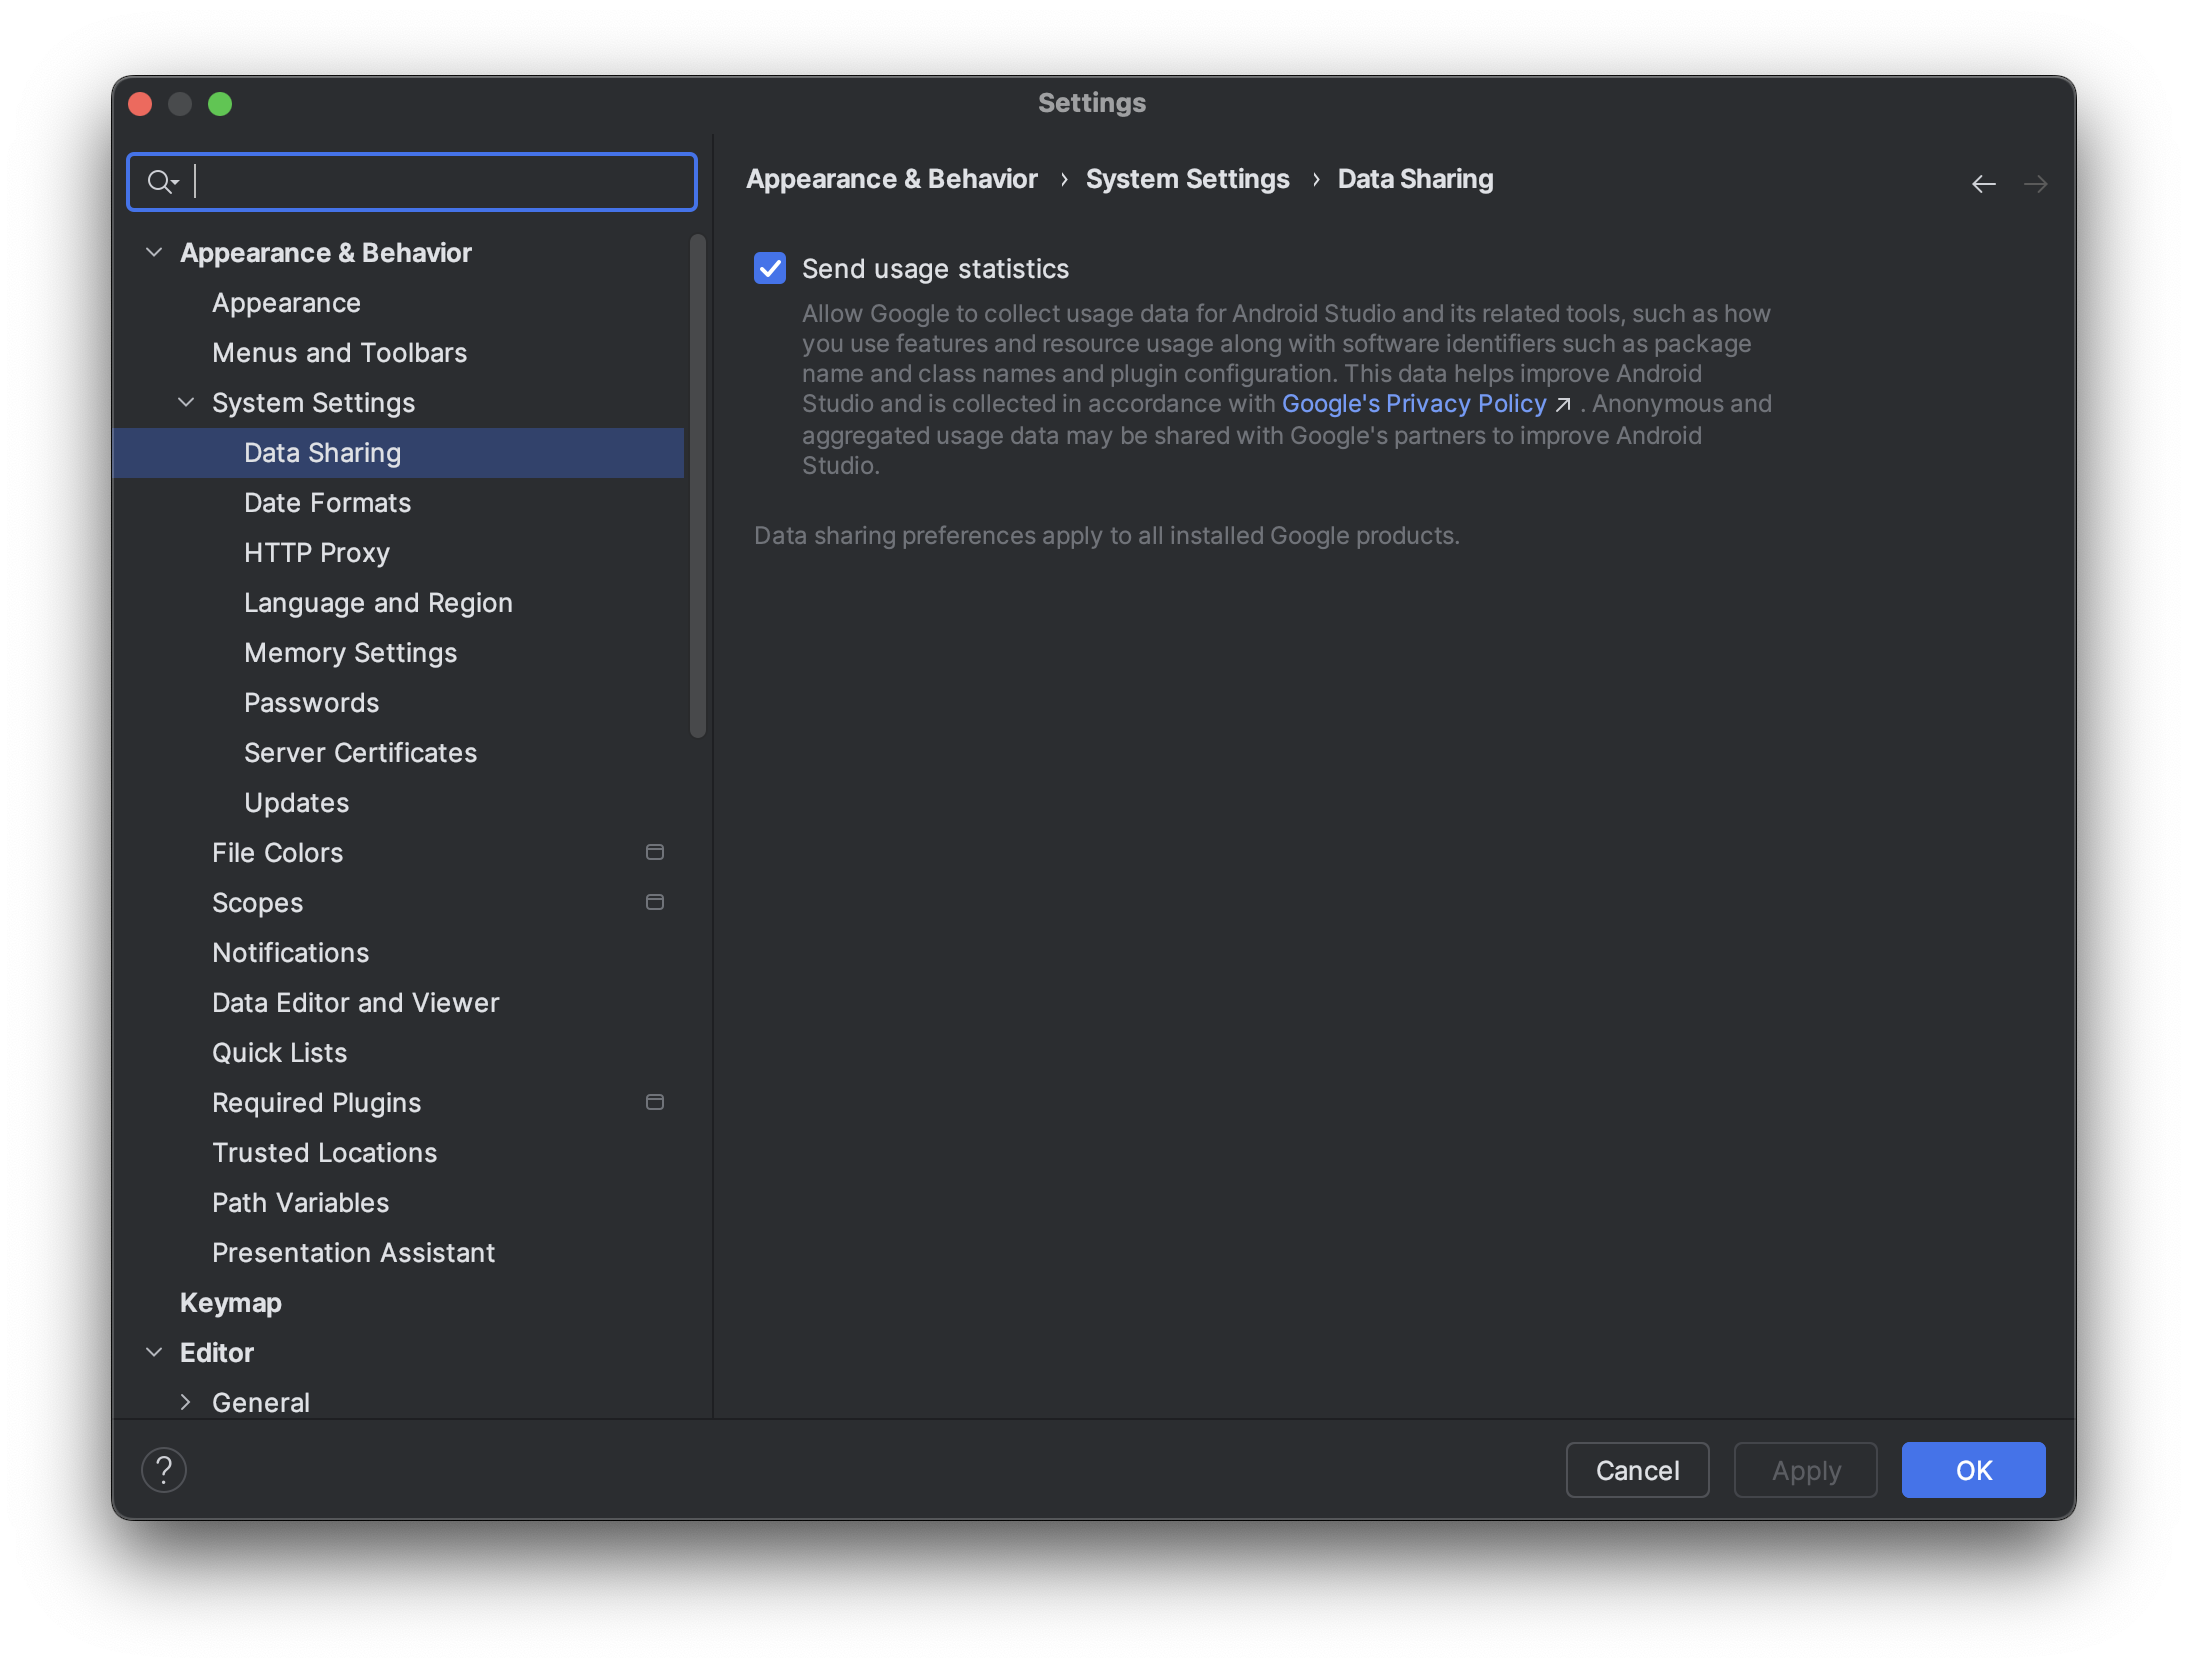
Włącz statystyki użytkowania, aby pomóc w ulepszaniu Androida Studio na potrzeby XR (opcjonalnie)
Jest to wersja Canary Android Studio, więc wiele funkcji jest nadal w trakcie opracowywania. Włącz statystyki użytkowania i przesyłaj opinie, aby pomóc nam ulepszać te narzędzia.
Aby włączyć statystyki użytkowania:
- Kliknij Ustawienia > Wygląd i działanie > Ustawienia systemu > Udostępnianie danych.
Kliknij Wyślij statystyki użytkowania.