The Jetpack XR SDK includes some features and changes that aren't compatible with some lower versions of Android Studio. For the best development experience while developing for Android XR, use the latest Canary build of Android Studio. Other versions might not include Android XR tools. Remember that you can keep your existing version of Android Studio installed, as you can install multiple versions side-by-side.
Install Android Studio
Complete the following steps to download and configure Android Studio for Android XR:
Close any versions of Android Studio that you already have installed.
Download the latest Canary build of Android Studio, extract it into your preferred location, and launch the application.
Follow the installation instructions in the wizard.
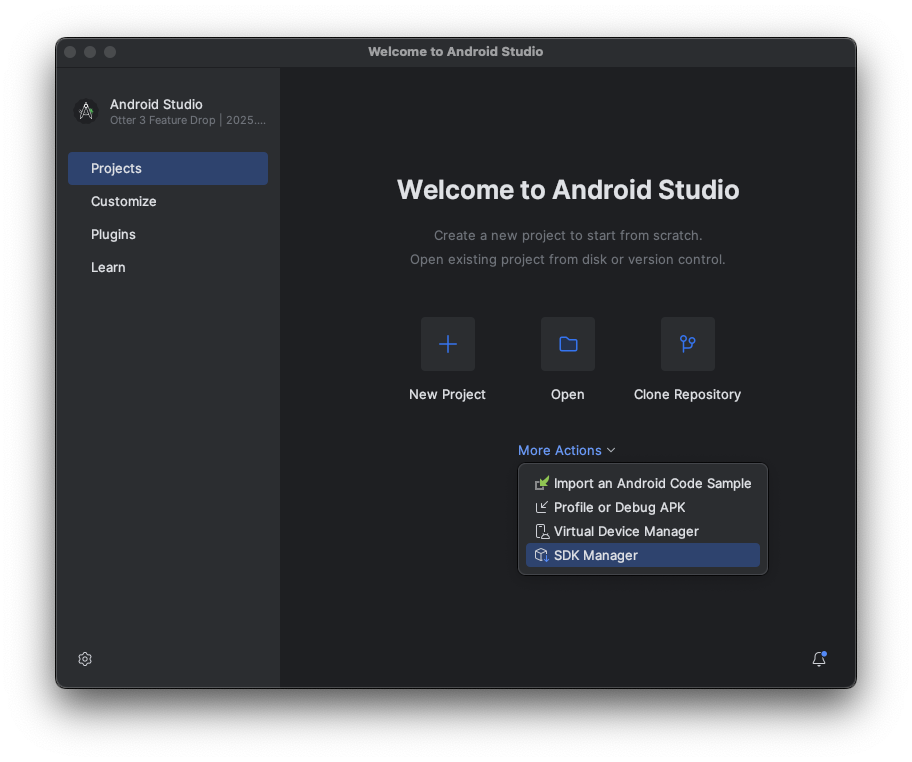
In the Welcome to Android Studio dialog, click More Actions, and then select SDK Manager.
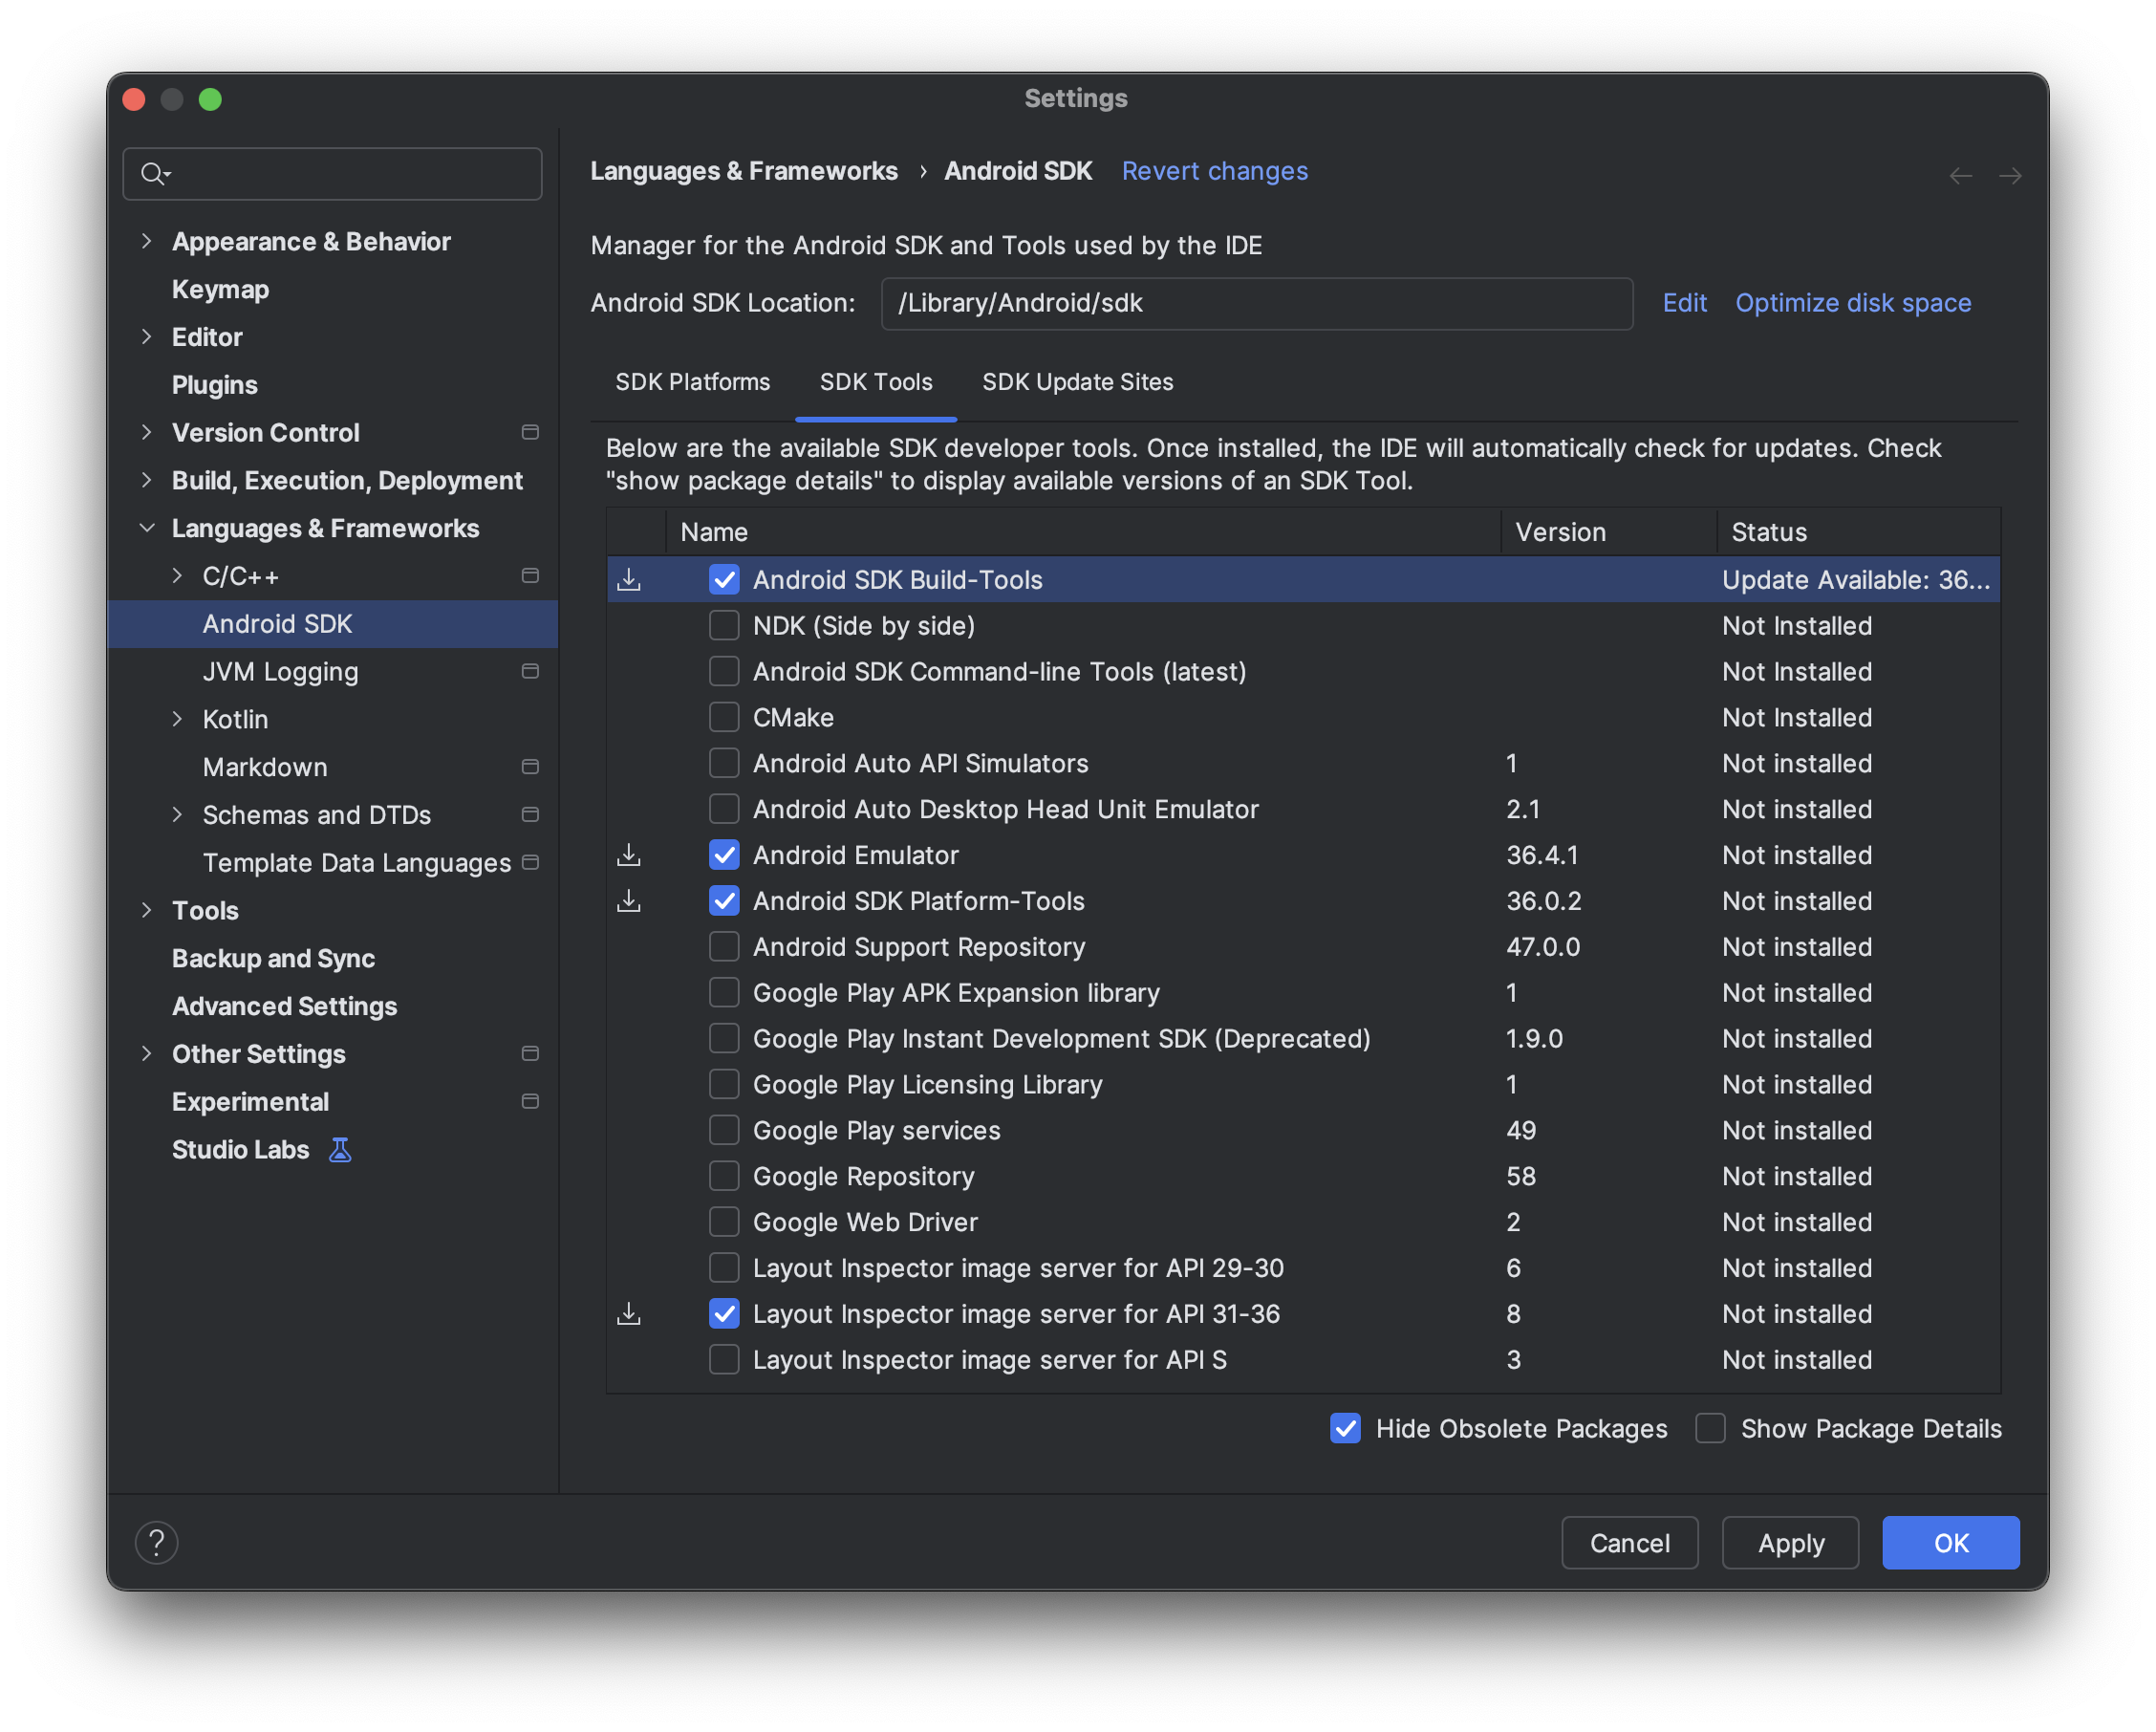
In the Android SDK settings, click the SDK Tools tab, and then select the following tools to install:
- Android SDK Build-Tools
- Android Emulator
- Android SDK Platform-Tools
- Layout Inspector for API 31 - 36
Create virtual devices to run on the Android XR Emulator
To see how your app's experiences look and behave on different types of XR devices, you can run your app on virtual XR devices on the Android XR Emulator. See the following pages for information on setting up the emulator for different types of virtual XR devices:
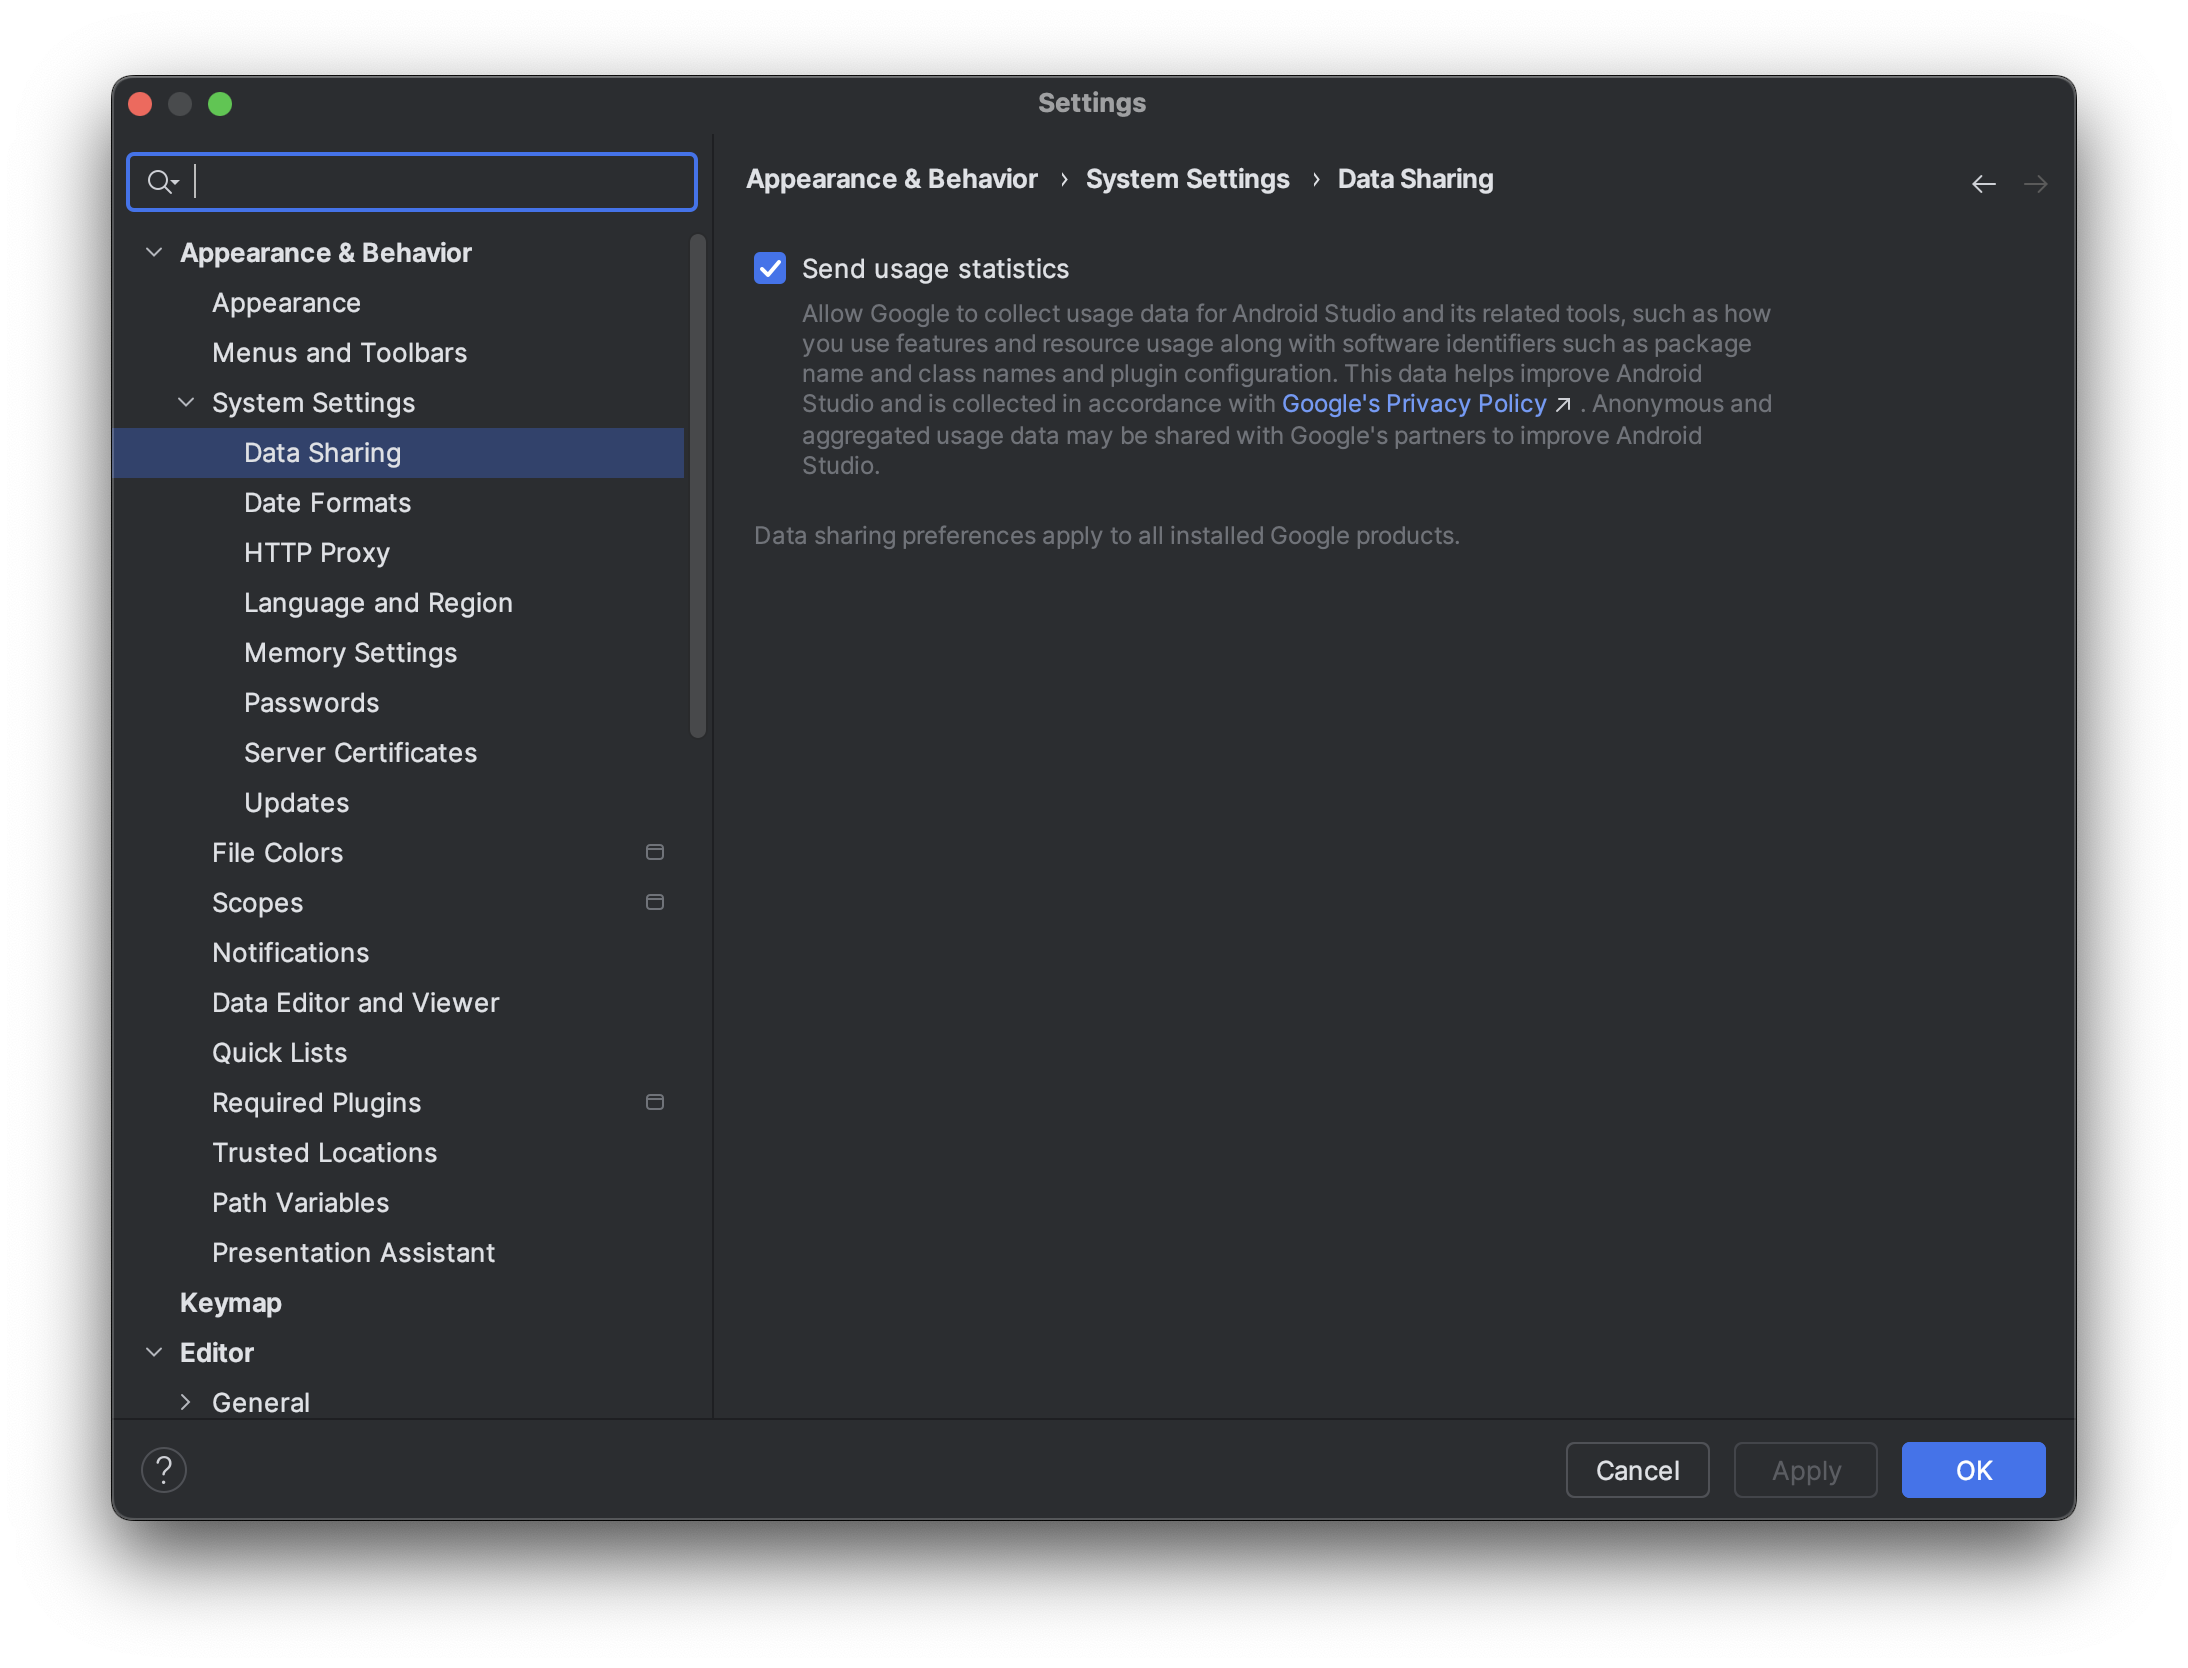
Enable usage statistics to help improve Android Studio for XR (optional)
Because this is a Canary build of Android Studio, many of the features are still under development. Consider enabling usage statistics and sending feedback to help us improve these tools.
To enable usage statistics:
- Click Settings > Appearance & Behavior > System Settings > Data Sharing.
Select Send usage statistics.