Koleksiyonlar ile düzeninizi koruyun
İçeriği tercihlerinize göre kaydedin ve kategorilere ayırın.
Bu kılavuzda, Watch Face Designer kullanılarak oluşturulan kadranınızı Google Play'de nasıl yayınlayacağınız açıklanmaktadır.
Google Play'de geliştirici hesabınızda oturum açma
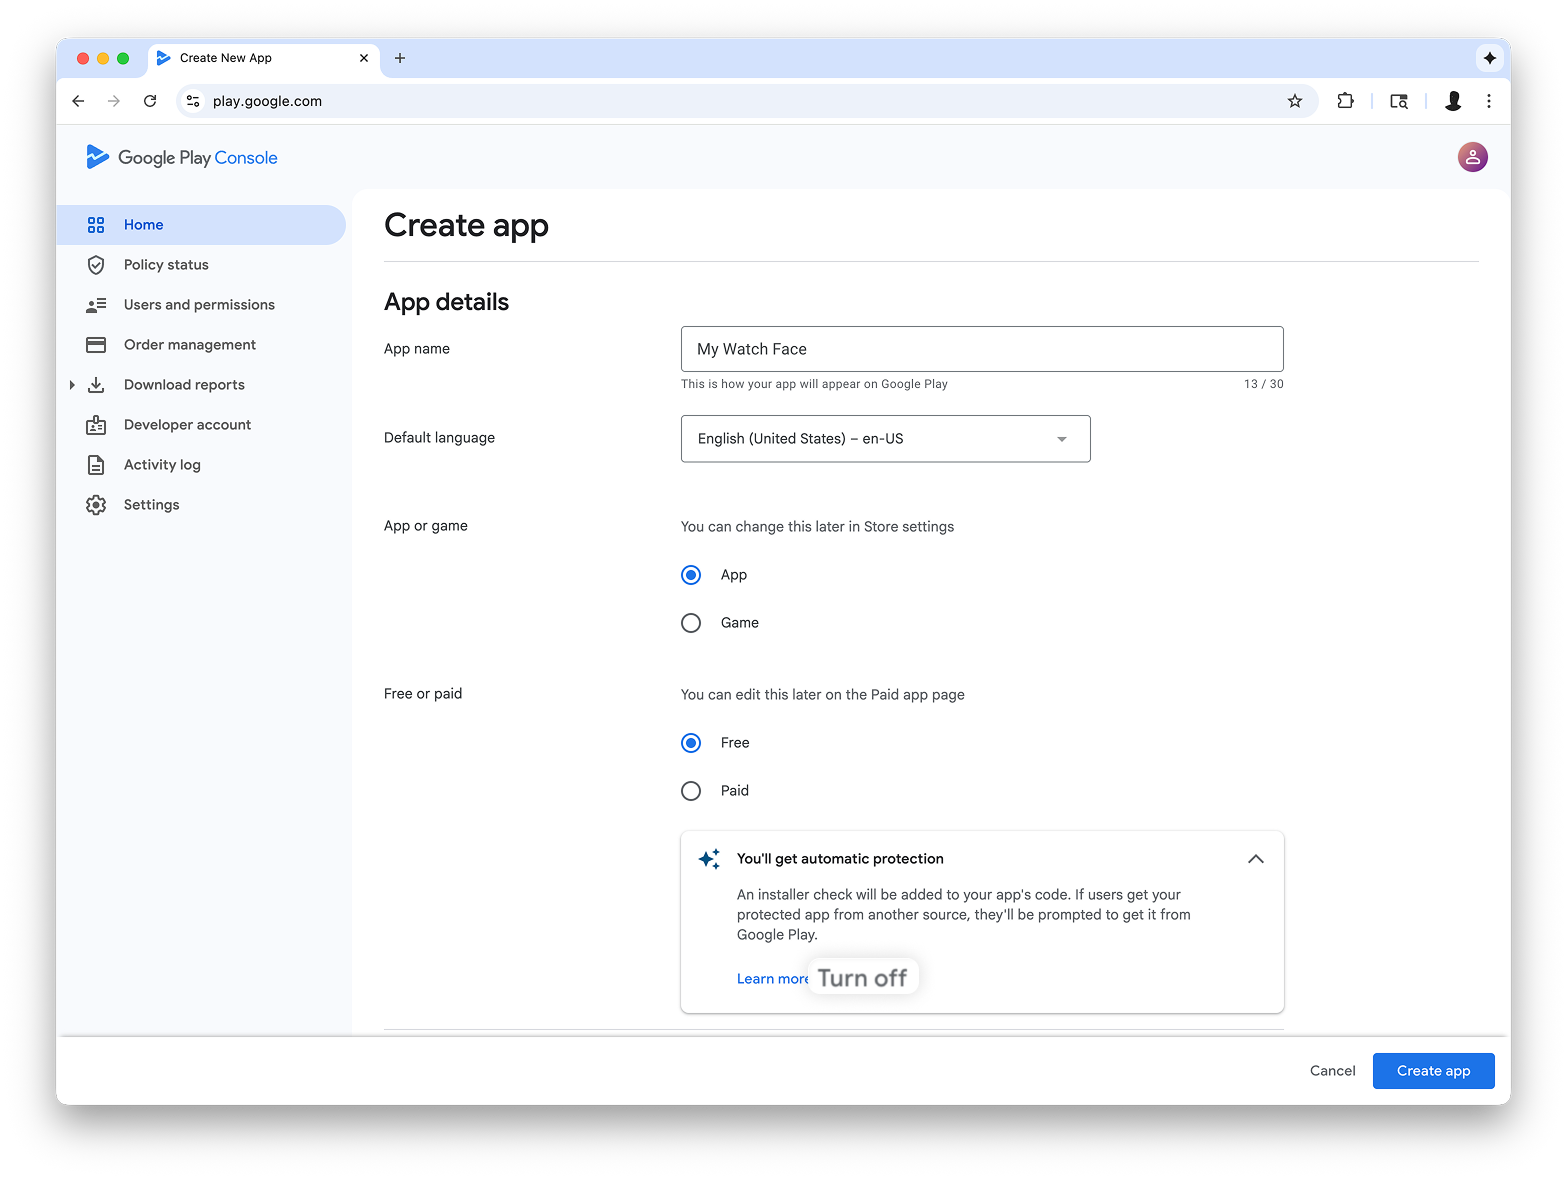
Google Play Console'da oturum açın ve kontrol panelinde "Uygulama Oluştur"u tıklayın.
"Uygulama oluşturma" iş akışı sırasında istendiğinde otomatik korumayı devre dışı bırakın. Aksi takdirde, paketi daha sonra imzalarken sorun yaşarsınız. Otomatik koruma, kod içermediğinden saat yüzleri için geçerli değildir.
Şekil 1: Play Console'daki Uygulama oluştur ekranı
Wear OS form faktörü için destek ekleme
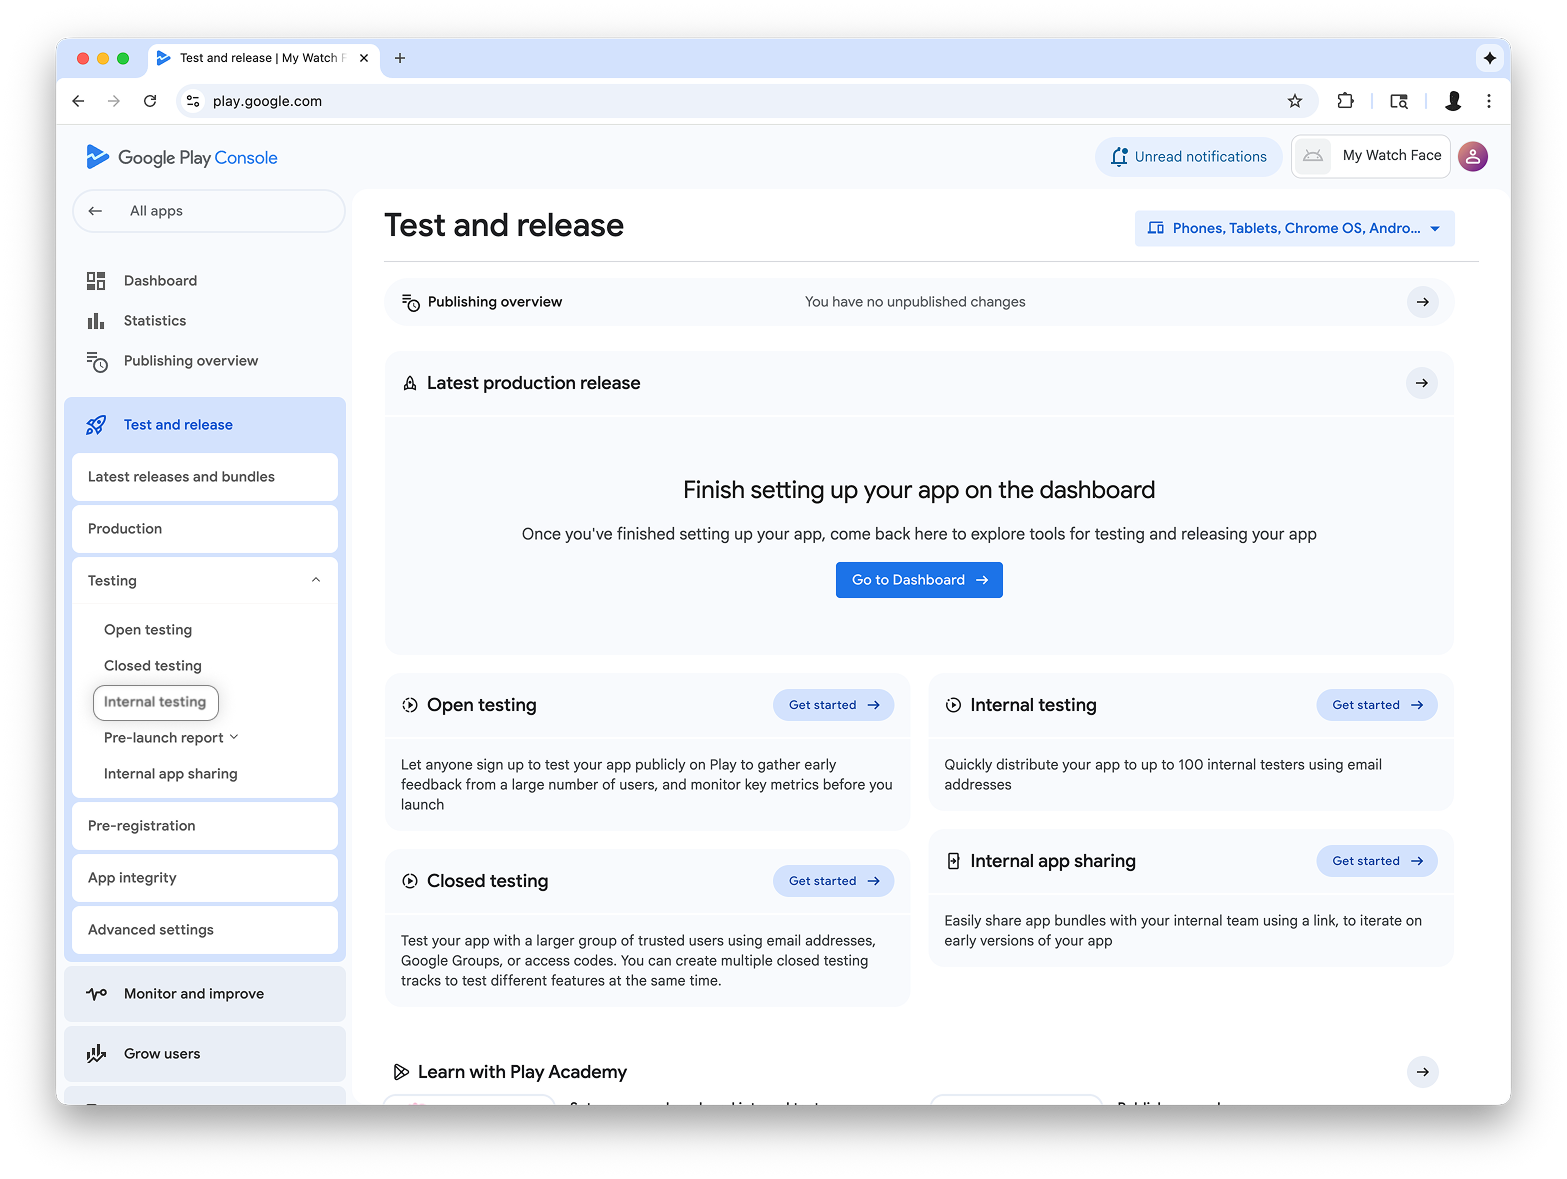
Uygulamanızı oluşturduktan sonra Test etme ve yayınlama > Test etme >
Dahili test'e gidin:
Şekil 2: Play Console'daki Test etme ve yayınlama
ekranı
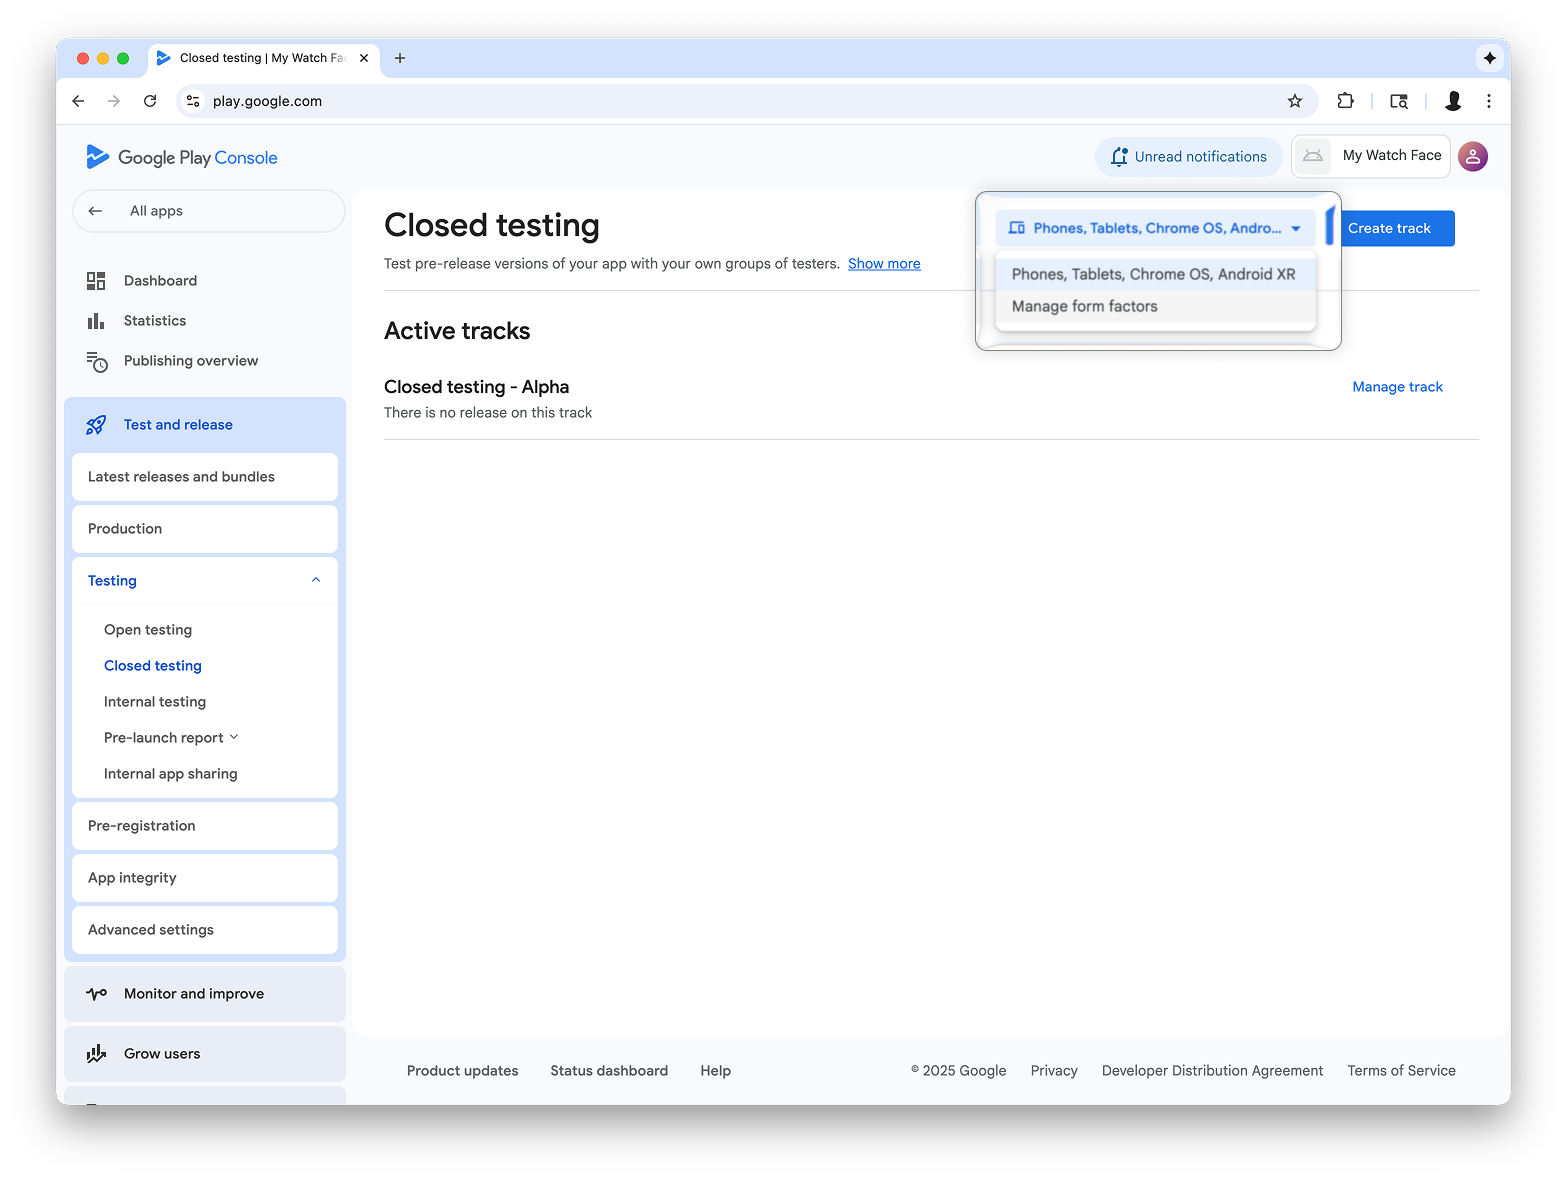
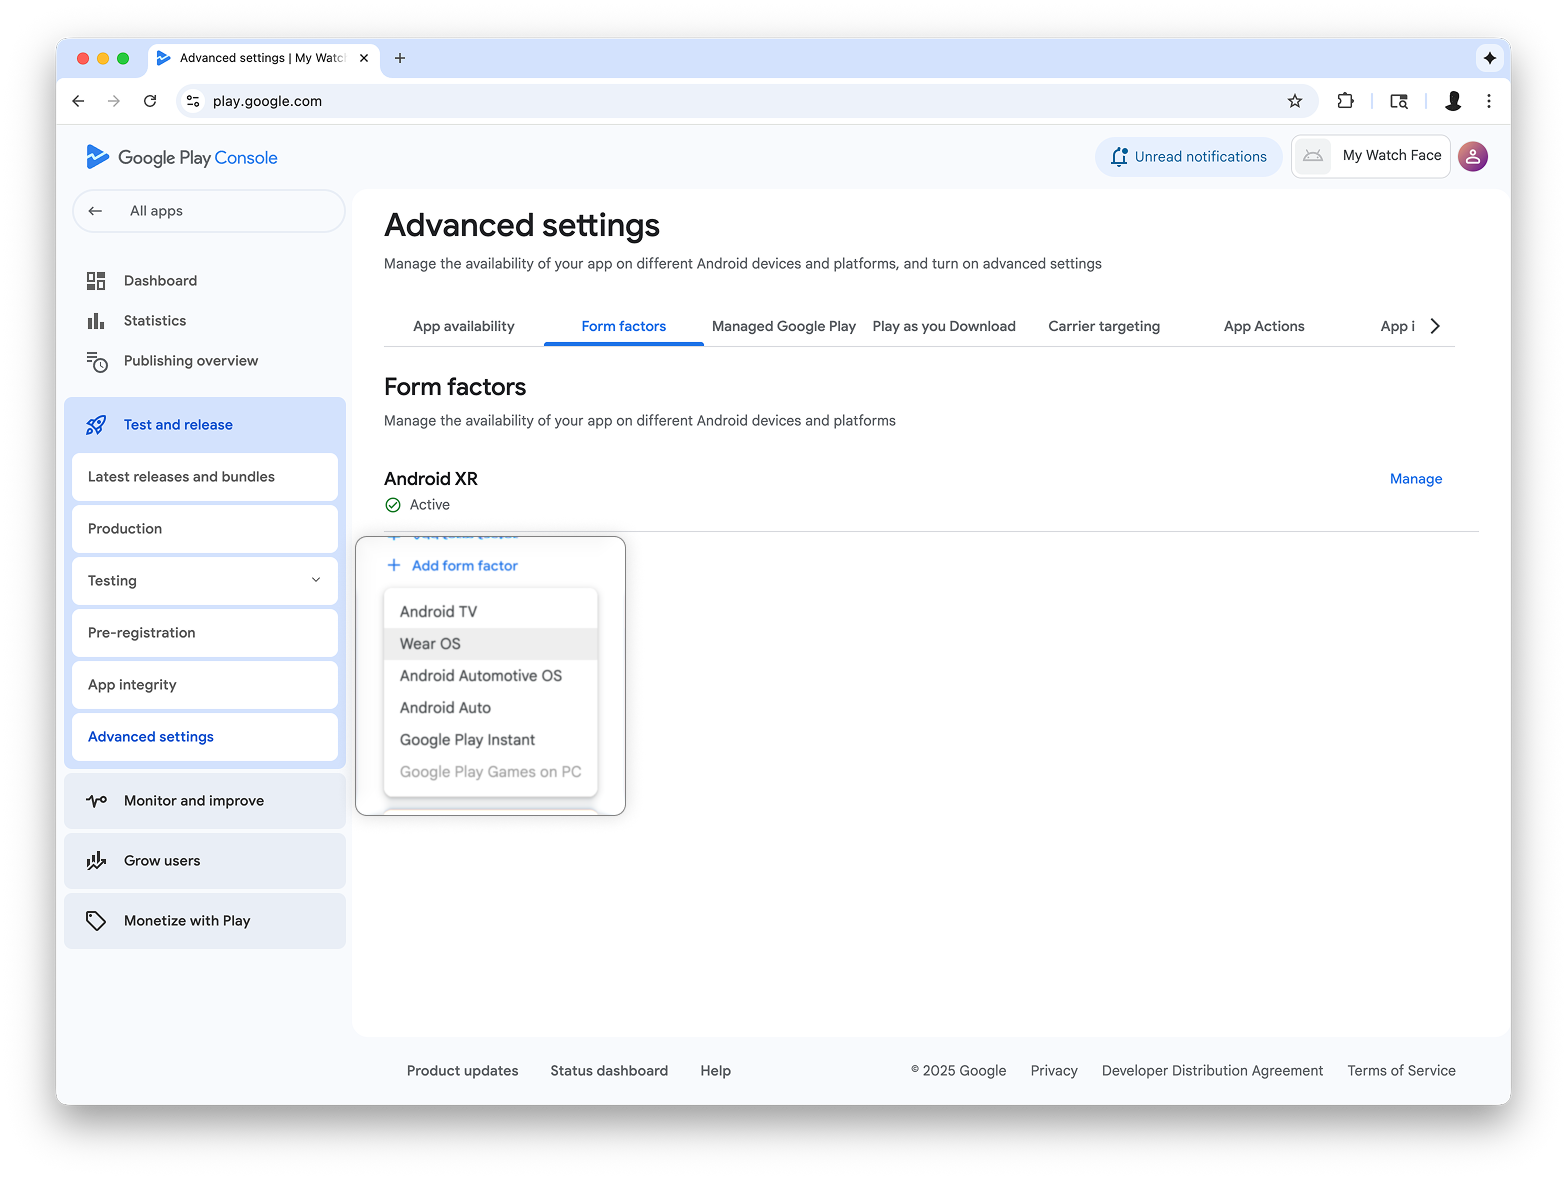
Sayfanın sağ üst kısmındaki açılır listede Form faktörlerini yönet'i seçin
ve Wear OS'i uygulamanız için bir form faktörü olarak ekleyin:
Şekil 3: Form faktörlerini yönet seçeneğini belirleme (sol), ardından Gelişmiş ayarlar ekranındaki Form faktörleri sekmesine Wear OS'i ekleme (sağ)
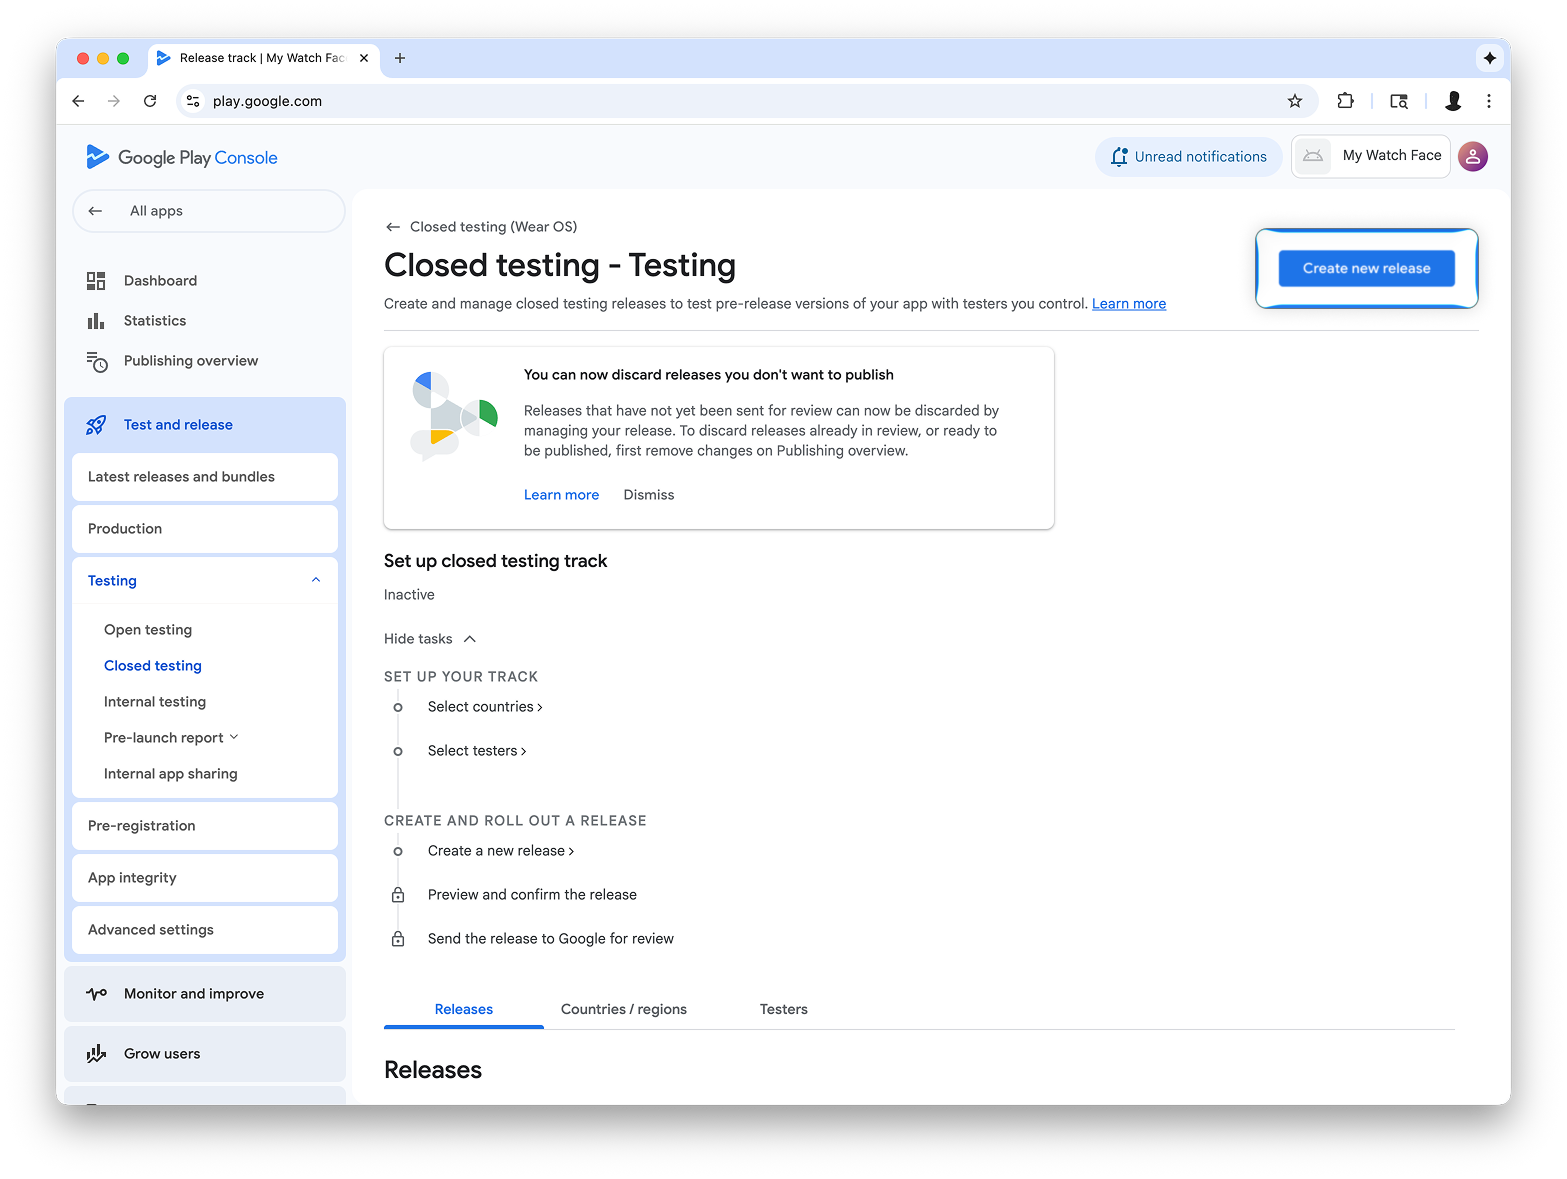
Dahili test kanalında sürüm oluşturma
Dahili test menüsüne dönün ve yalnızca Wear OS'e yönelik bir dahili test kanalı oluşturun. Ardından, sürüm oluşturun:
Şekil 4: Parça oluştur
düğmesini (sol) ve ardından sonraki ekranda Yeni sürüm oluştur
düğmesini (sağ) seçin.
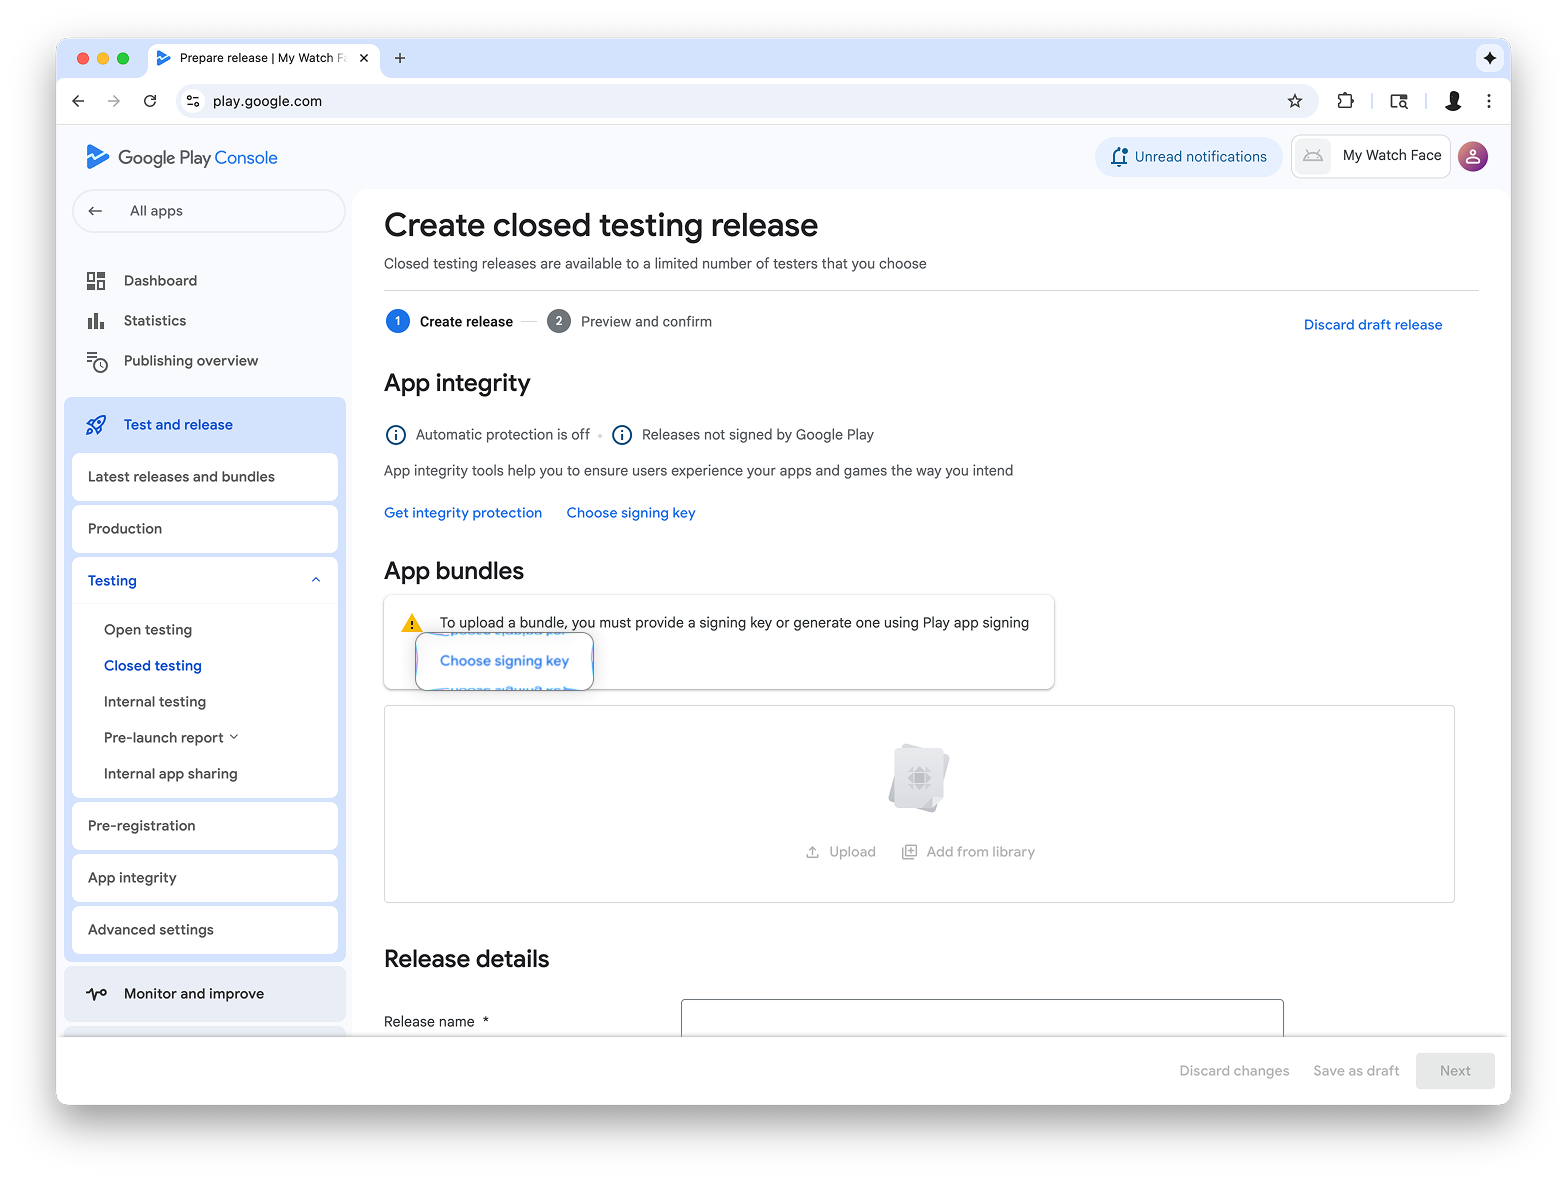
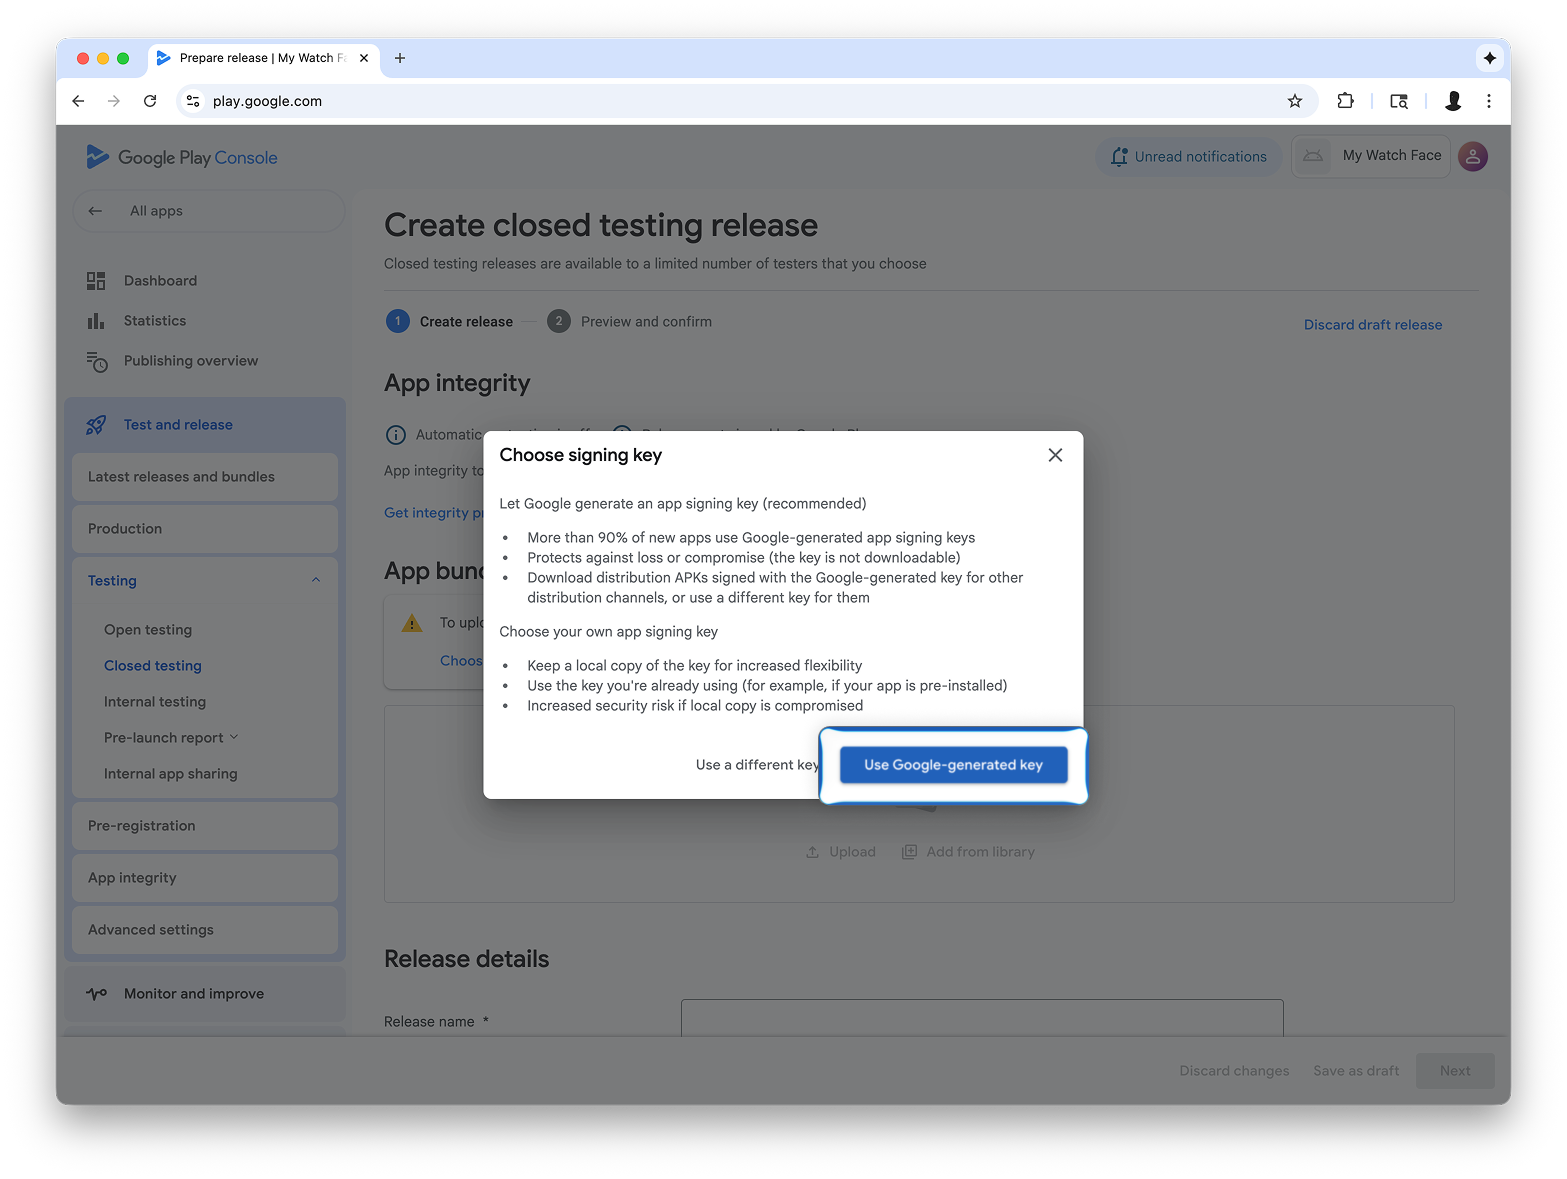
Kapalı test sürümü oluştur ekranında İmzalama anahtarı seç'i belirleyin.
Şekil 5: İmzalama anahtarı seçin düğmesini (sol) ve ardından açılan iletişim kutusunda Google tarafından oluşturulan anahtarı kullan'ı (sağ) seçin.
Watch Face Designer'daki AAB dosyasını Yükle bölümüne sürükleyip bırakın
ve test kanalında sürüm oluşturma işlemine devam edin.
Bu sayfadaki içerik ve kod örnekleri, İçerik Lisansı sayfasında açıklanan lisanslara tabidir. Java ve OpenJDK, Oracle ve/veya satış ortaklarının tescilli ticari markasıdır.
Son güncelleme tarihi: 2025-08-27 UTC.
[[["Anlaması kolay","easyToUnderstand","thumb-up"],["Sorunumu çözdü","solvedMyProblem","thumb-up"],["Diğer","otherUp","thumb-up"]],[["İhtiyacım olan bilgiler yok","missingTheInformationINeed","thumb-down"],["Çok karmaşık / çok fazla adım var","tooComplicatedTooManySteps","thumb-down"],["Güncel değil","outOfDate","thumb-down"],["Çeviri sorunu","translationIssue","thumb-down"],["Örnek veya kod sorunu","samplesCodeIssue","thumb-down"],["Diğer","otherDown","thumb-down"]],["Son güncelleme tarihi: 2025-08-27 UTC."],[],[],null,["This guide explains how to publish your watch face, created using\nWatch Face Designer, to Google Play.\n| **Note:** Before you begin, [export your watch face using the Google Play option](/training/wearables/watch-face-designer/export#google-play) so that you have an Android App Bundle (AAB) file ready.\n\nSign into your developer account in Google Play\n\nSign in to Google Play Console and press 'Create App' on the dashboard.\n| **Note:** If you don't have a Google Play Console developer account, [follow the\n| official guide to create one](https://support.google.com/googleplay/android-developer/answer/6112435). This includes paying a registration fee.\n\nDuring the \"create app,\" workflow, **turn off automatic protection when\nprompted**; otherwise, you'll have issues signing the bundle later. Automatic\nprotection isn't relevant to watch faces because they don't have any code.\n**Figure 1** : The **Create app** screen in the Play Console\n\nAdd support for the Wear OS form factor\n\nAfter you've created your app, navigate to **Test and release \\\u003e Testing \\\u003e\nInternal testing**:\n**Figure 2** : The **Test and release** screen in the Play Console\n\nIn the drop-down in the top right of the page, select **Manage form factors**,\nand add Wear OS as a form factor for your app:\n**Figure 3** : Selecting the **Manage form\nfactors** option (left), then adding Wear OS on the **Form factors** tab on the **Advanced settings** screen (right)\n\nCreate a release on the internal testing track\n\nReturn to the internal testing menu and create a Wear OS-only internal testing\ntrack. Then, create a release:\n**Figure 4** : Select the **Create track** button (left), then on the next screen, select the **Create new release** button (right).\n\nOn the **Create closed testing release** screen, select **Choose signing key**.\n| **Caution:** In the **Choose signing key** dialog that appears, select **Use Google-generated key**:\n**Figure 5** : Select the **Choose signing\nkey** button (left), then in the dialog that appears, select **Use\nGoogle-generated key** (right).\n\nDrag-and-drop the AAB file from Watch Face Designer into the **Upload** section,\nand proceed with creating the release on the testing track.\n\nNext steps\n\nFrom here, follow official Google Play documentation on [trying out apps in the\ntesting track](https://support.google.com/googleplay/answer/7003180) and [promoting releases to production](https://support.google.com/googleplay/android-developer/answer/9859348), which makes your\napp visible to everyone on Google Play."]]