Mantieni tutto organizzato con le raccolte
Salva e classifica i contenuti in base alle tue preferenze.
Questa guida spiega come pubblicare su Google Play il quadrante creato utilizzando
Watch Face Designer.
Accedere al tuo account sviluppatore su Google Play
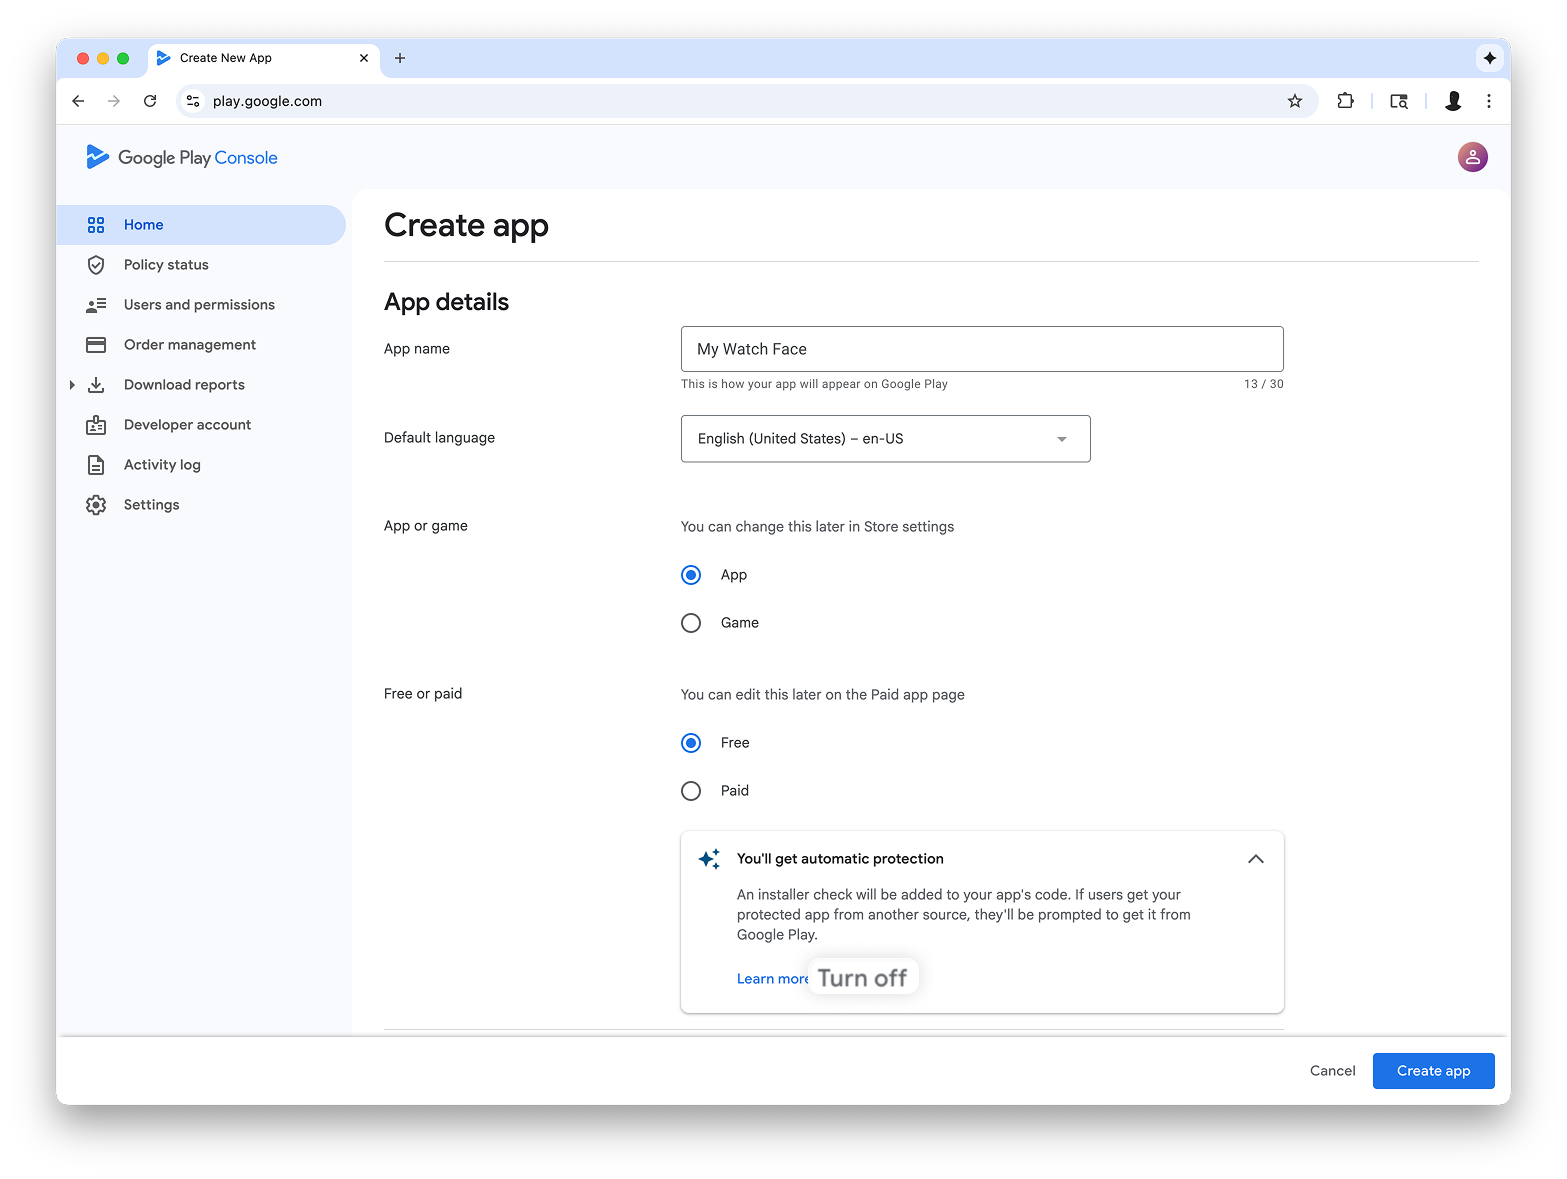
Accedi a Google Play Console e premi "Crea app" nella dashboard.
Durante il flusso di lavoro "Crea app", disattiva la Protezione automatica quando
ti viene richiesto, altrimenti avrai problemi con la firma del bundle in un secondo momento. La protezione
automatica non è pertinente per i quadranti perché non hanno codice.
Figura 1: la schermata Crea app in
Play Console
Aggiungere il supporto per il fattore di forma Wear OS
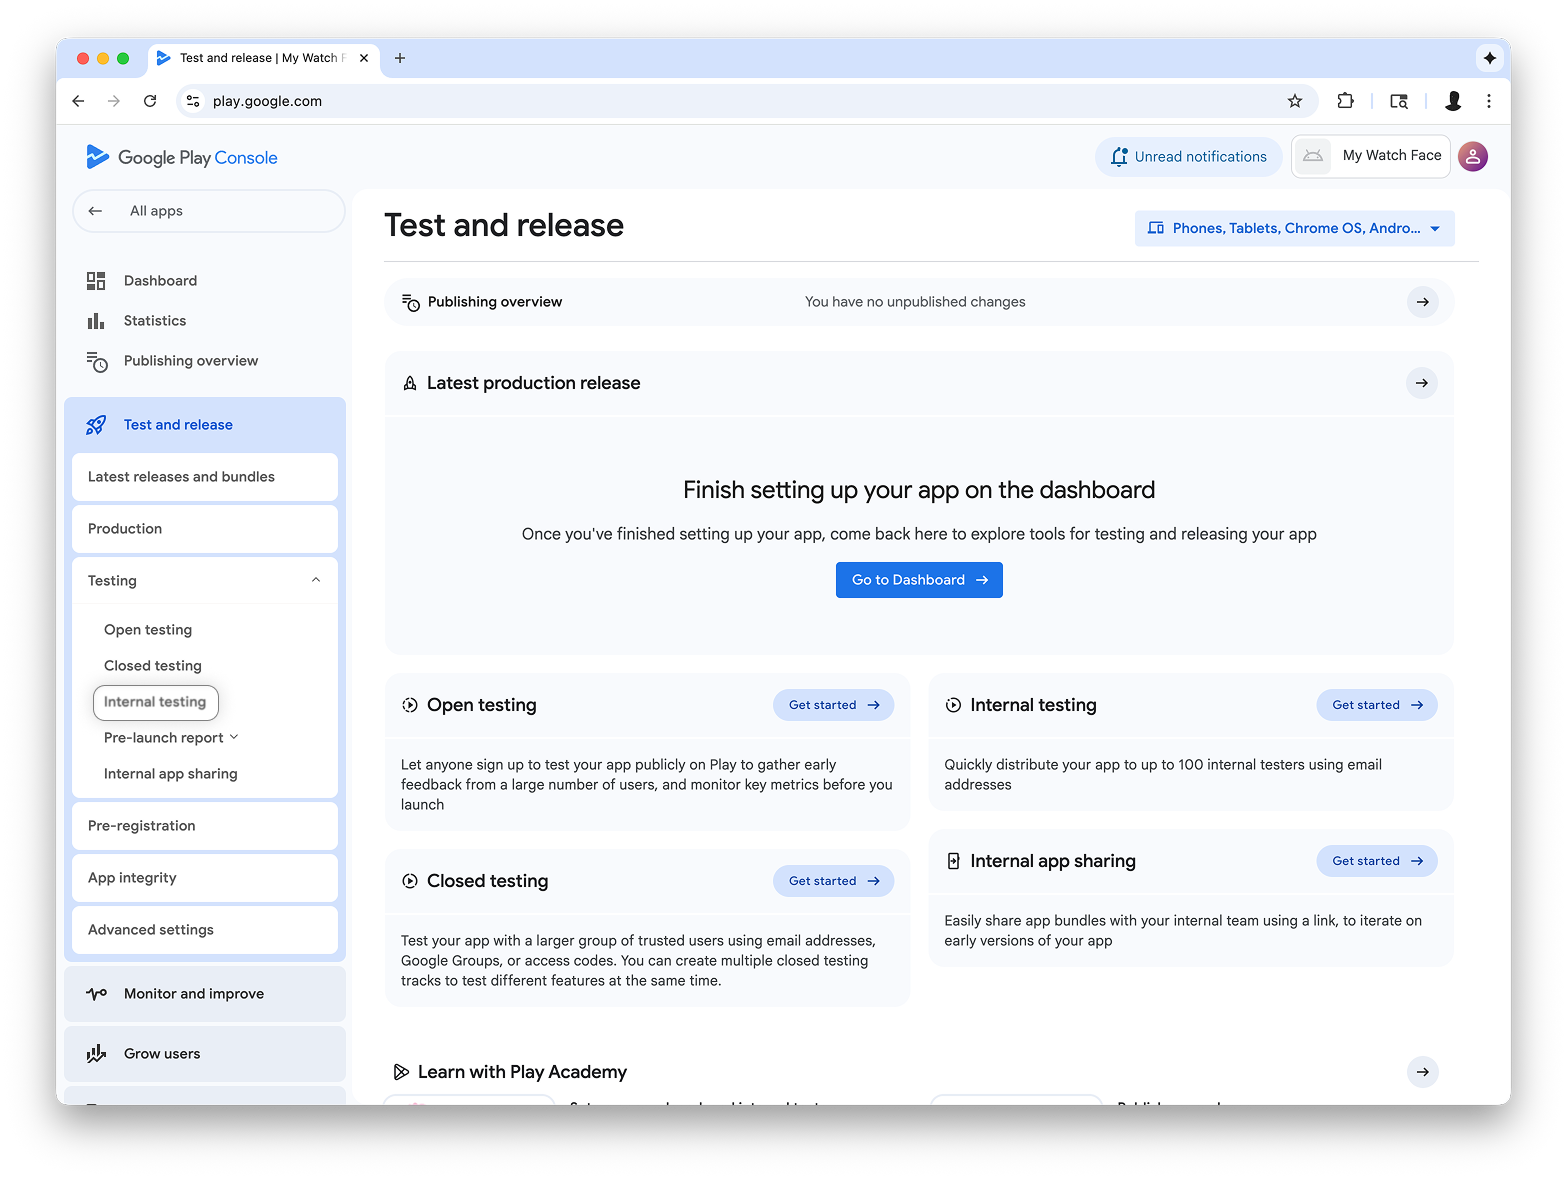
Dopo aver creato l'app, vai a Test e rilascio > Test >
Test interni:
Figura 2: la schermata Test e rilascio
in Play Console
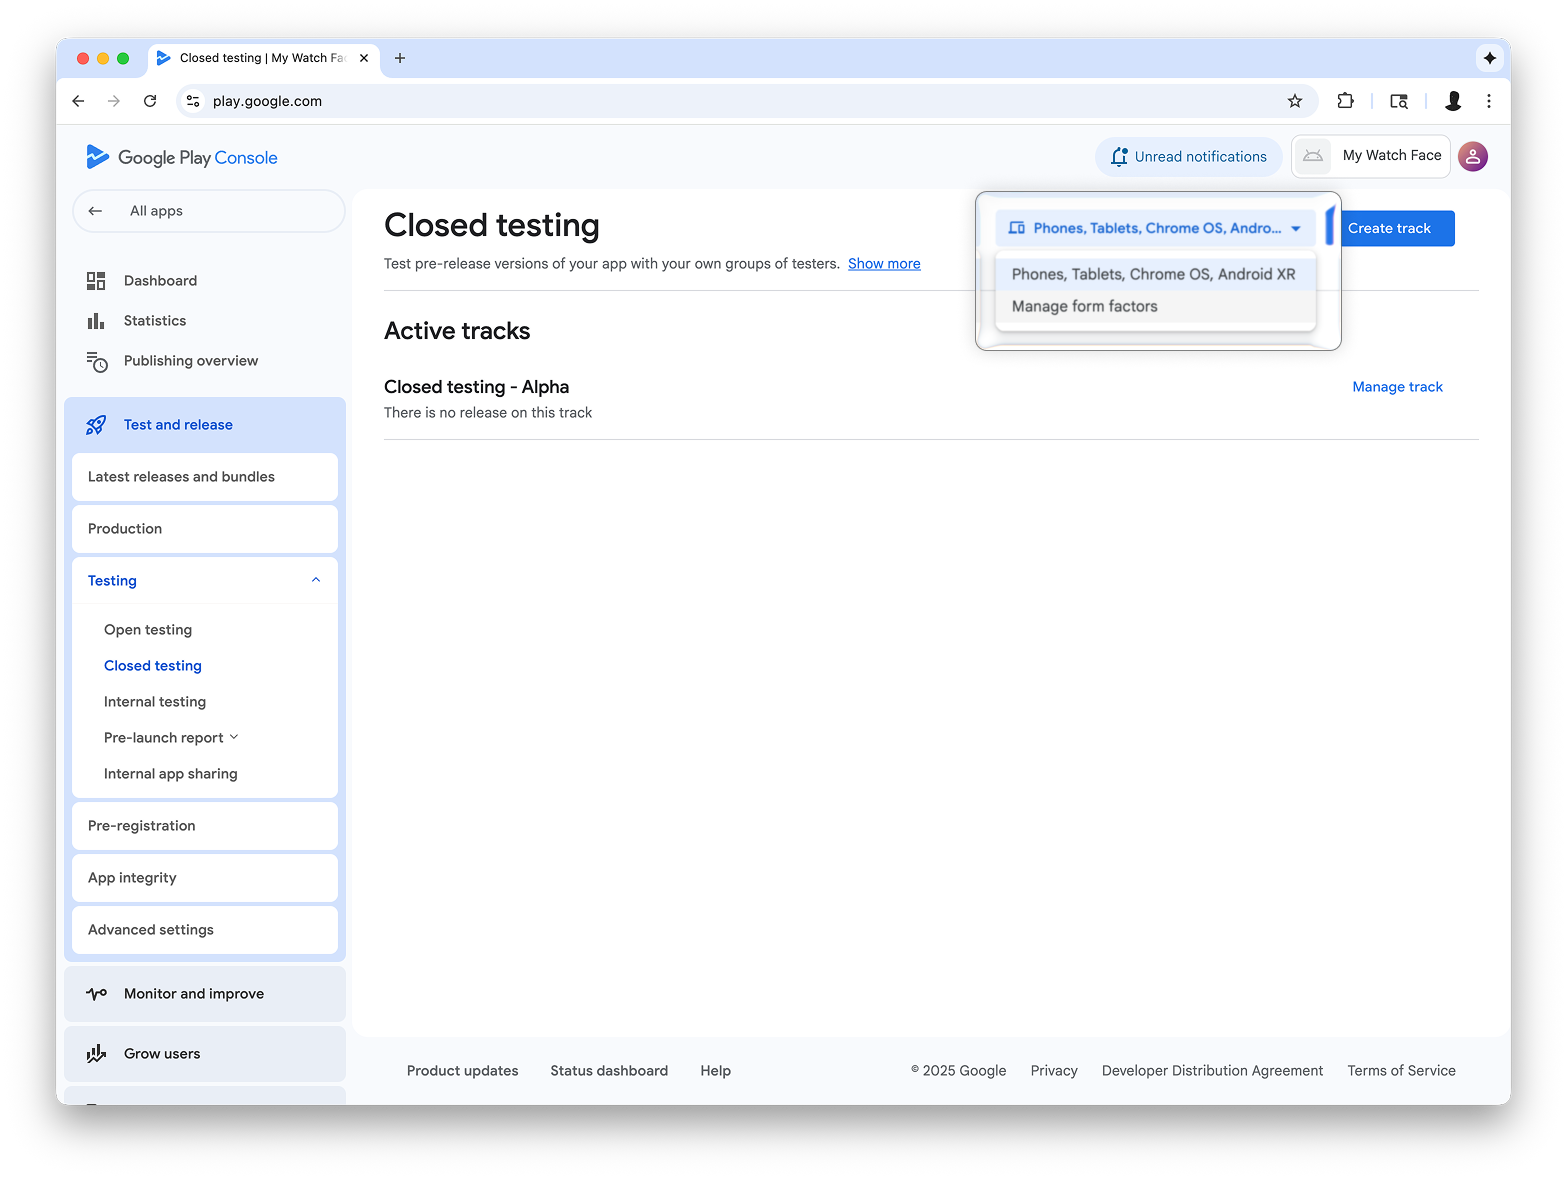
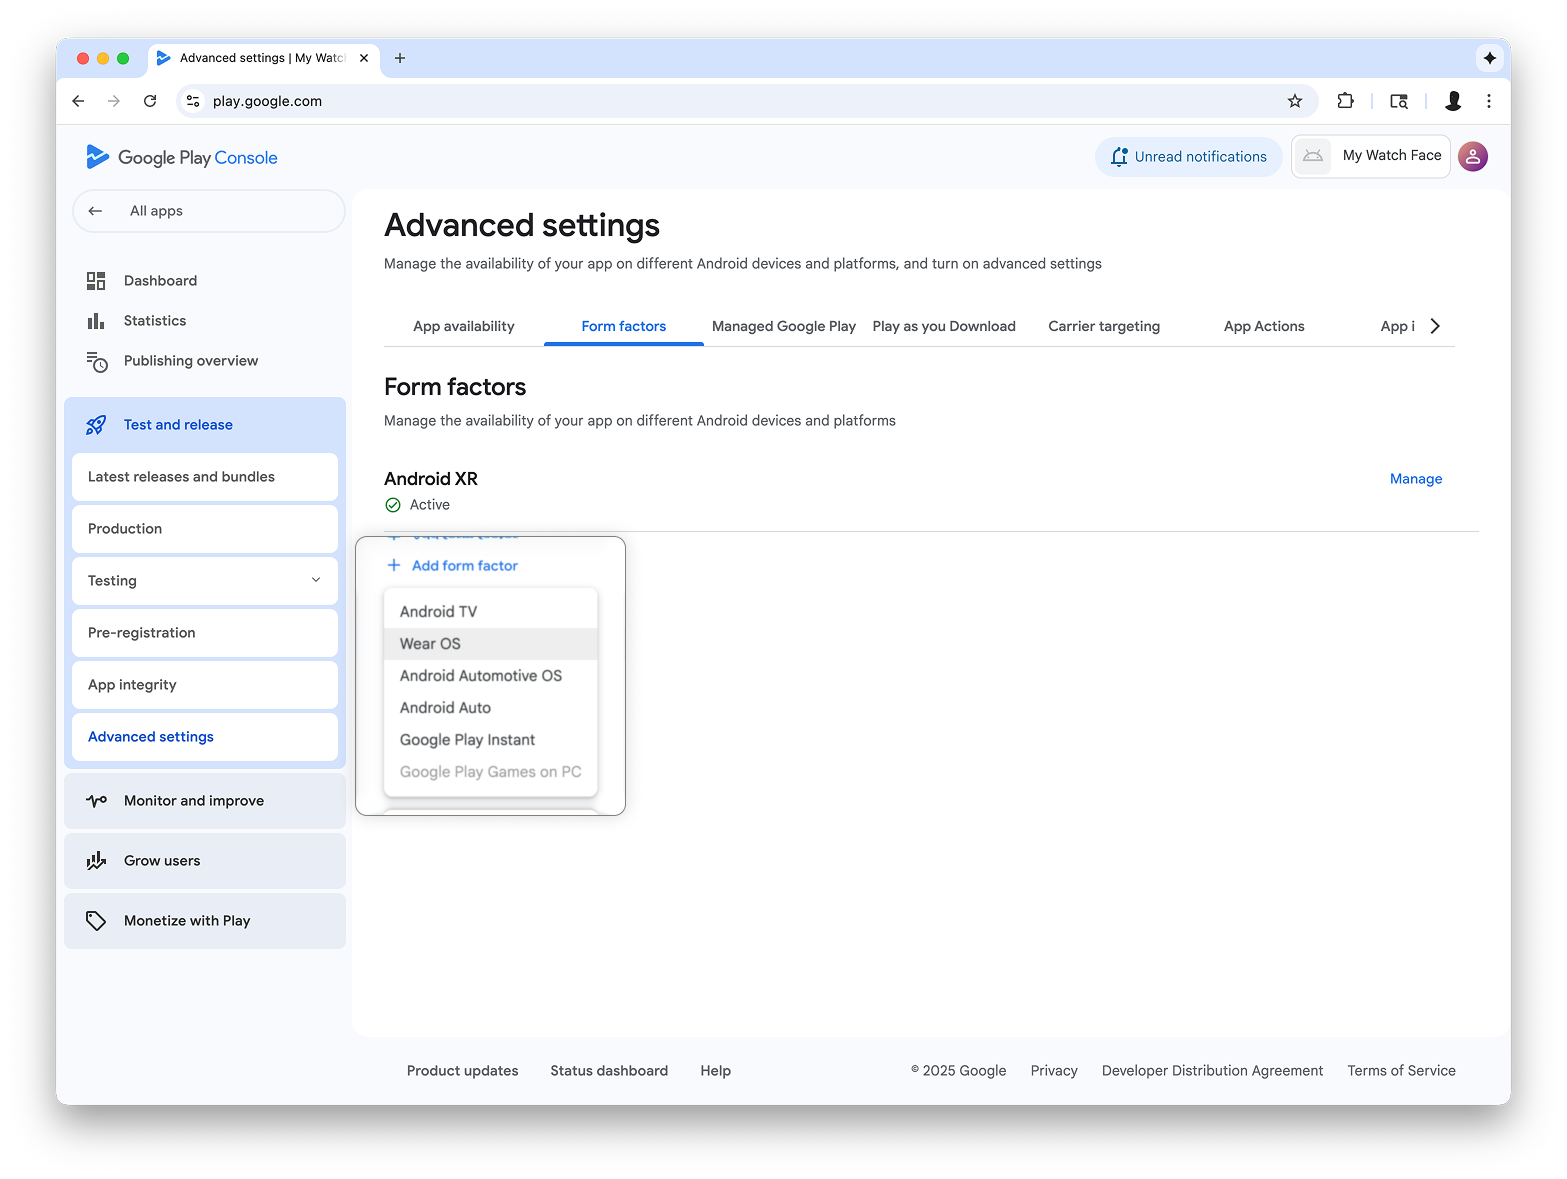
Nel menu a discesa in alto a destra nella pagina, seleziona Gestisci fattori di forma
e aggiungi Wear OS come fattore di forma per la tua app:
Figura 3: selezione dell'opzione Gestisci fattori di forma (a sinistra), quindi aggiunta di Wear OS nella scheda Fattori di forma nella schermata Impostazioni avanzate (a destra)
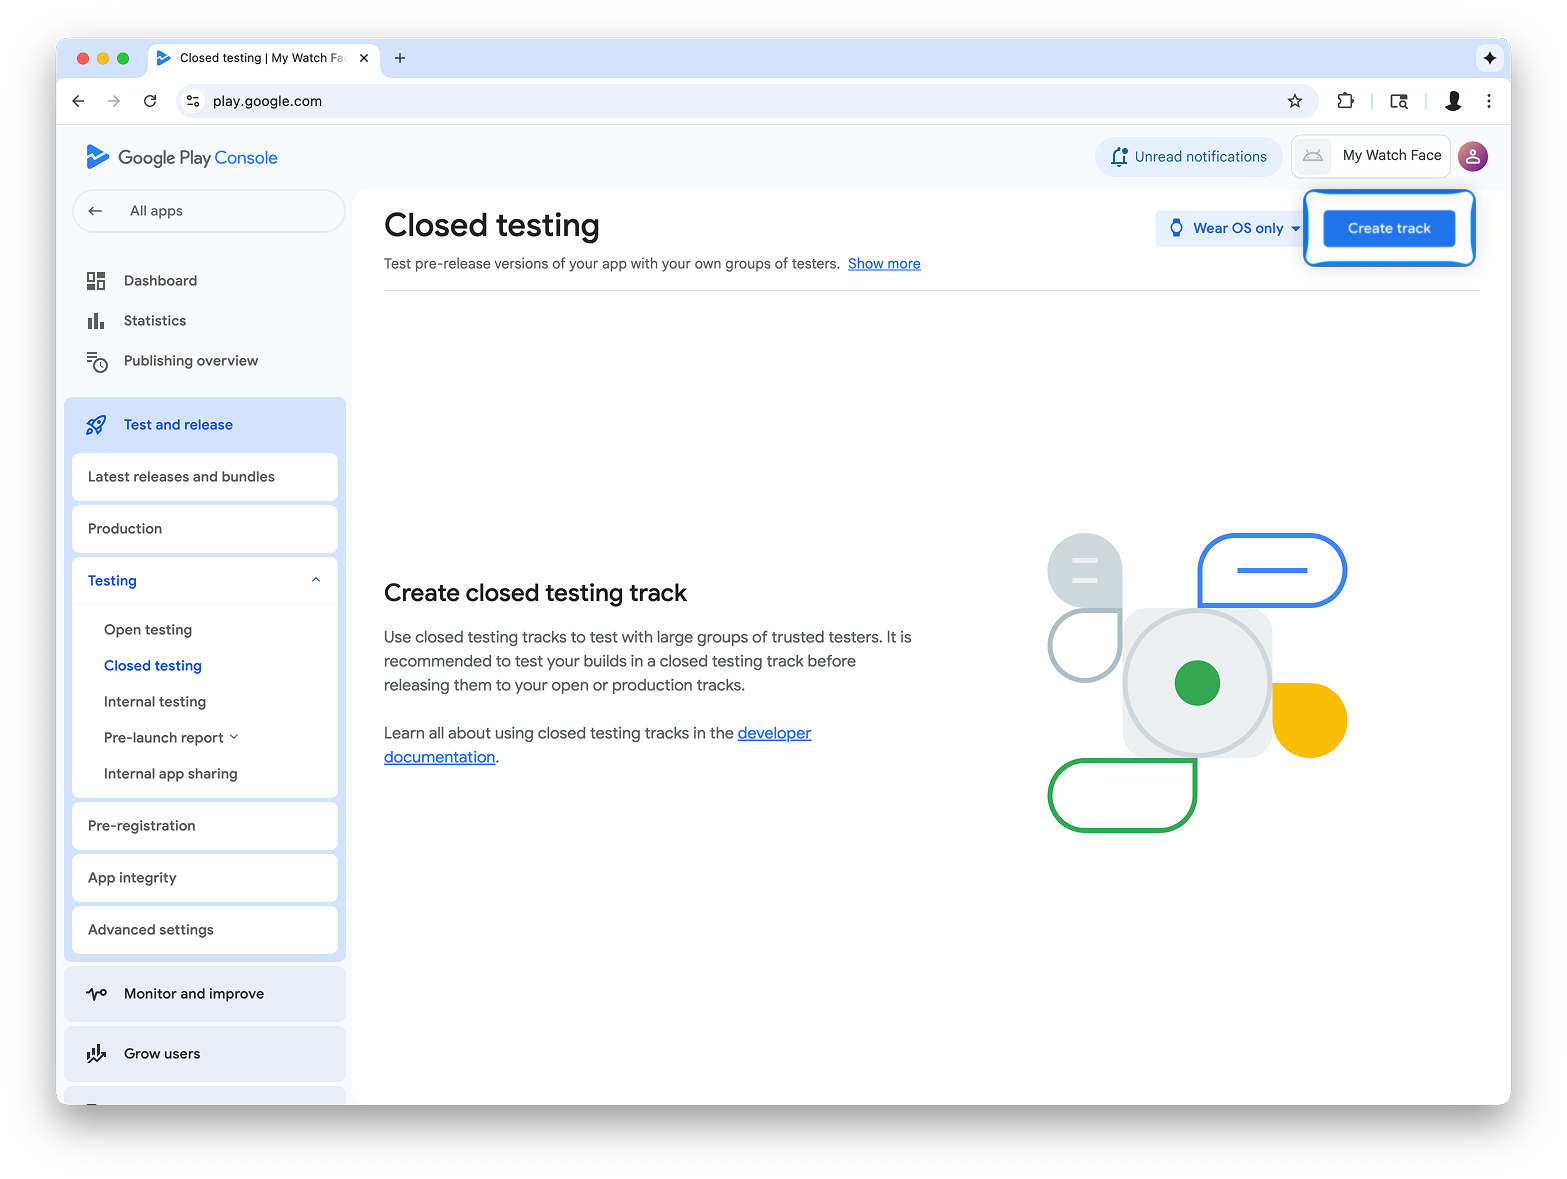
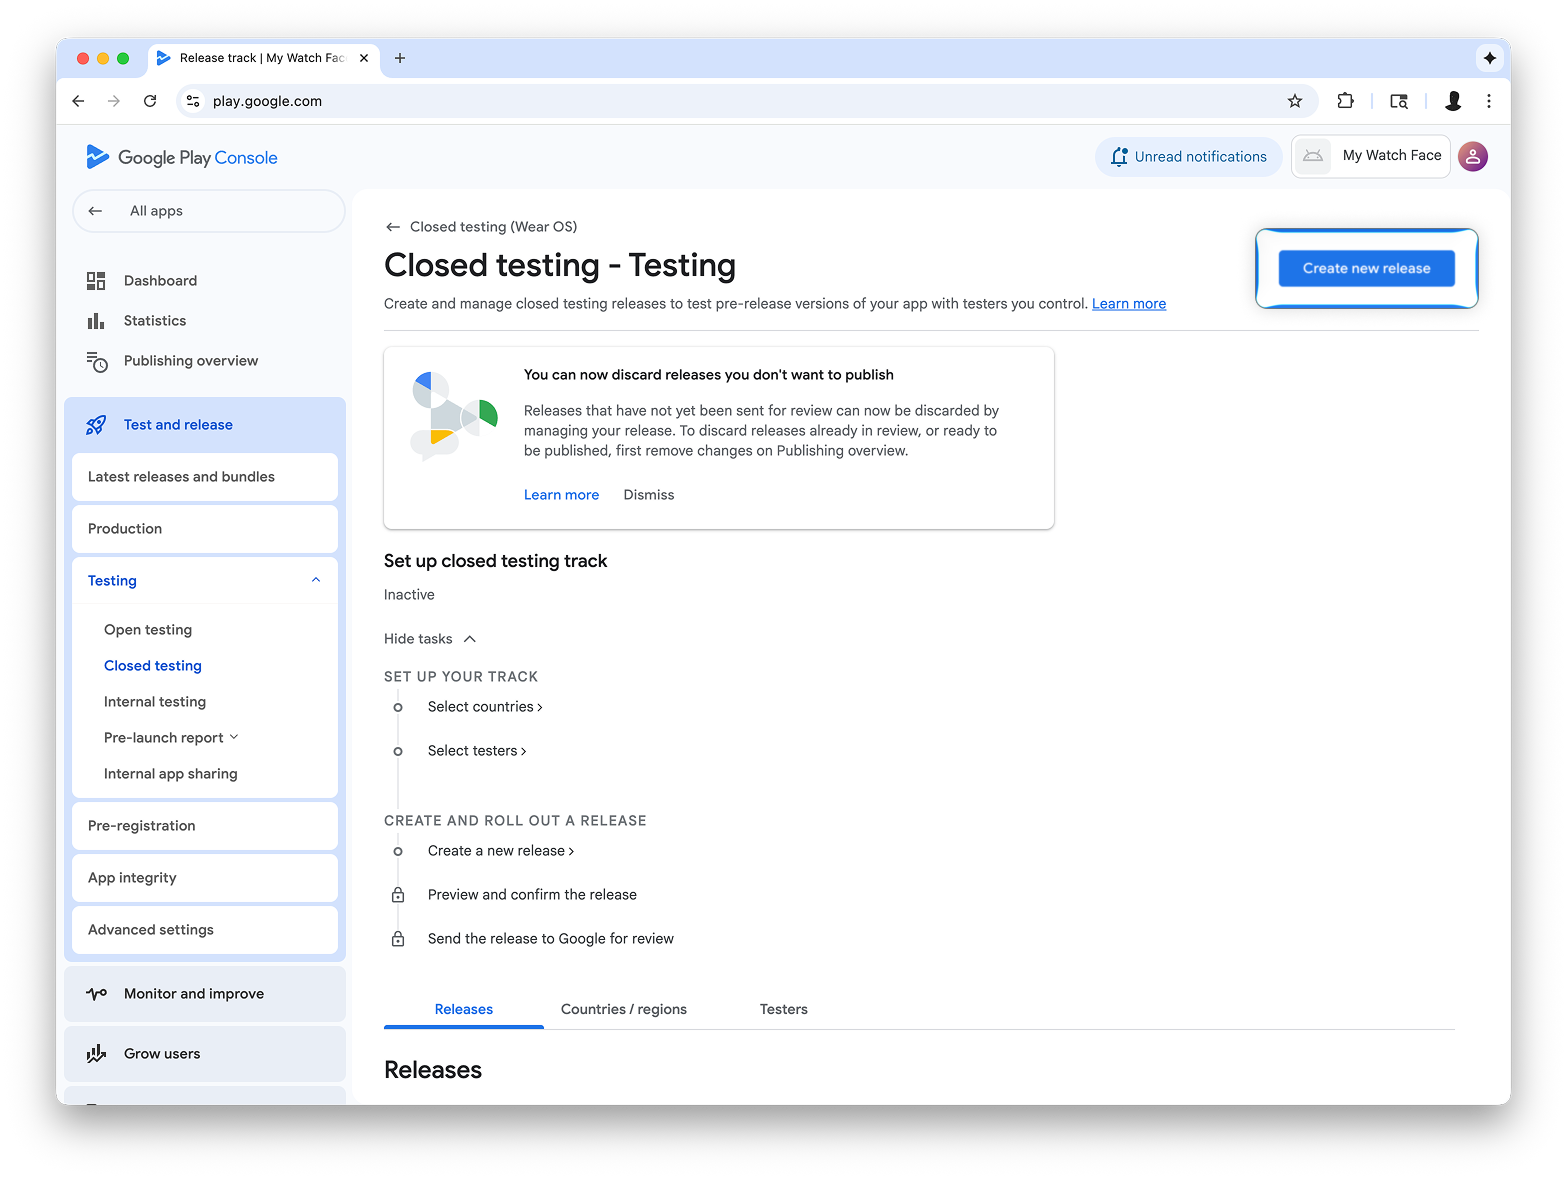
Crea una release nel canale di test interno
Torna al menu dei test interni e crea un canale di test interni solo per Wear OS. Poi, crea una release:
Figura 4: seleziona il pulsante Crea traccia (a sinistra), poi nella schermata successiva seleziona il pulsante Crea nuova release (a destra).
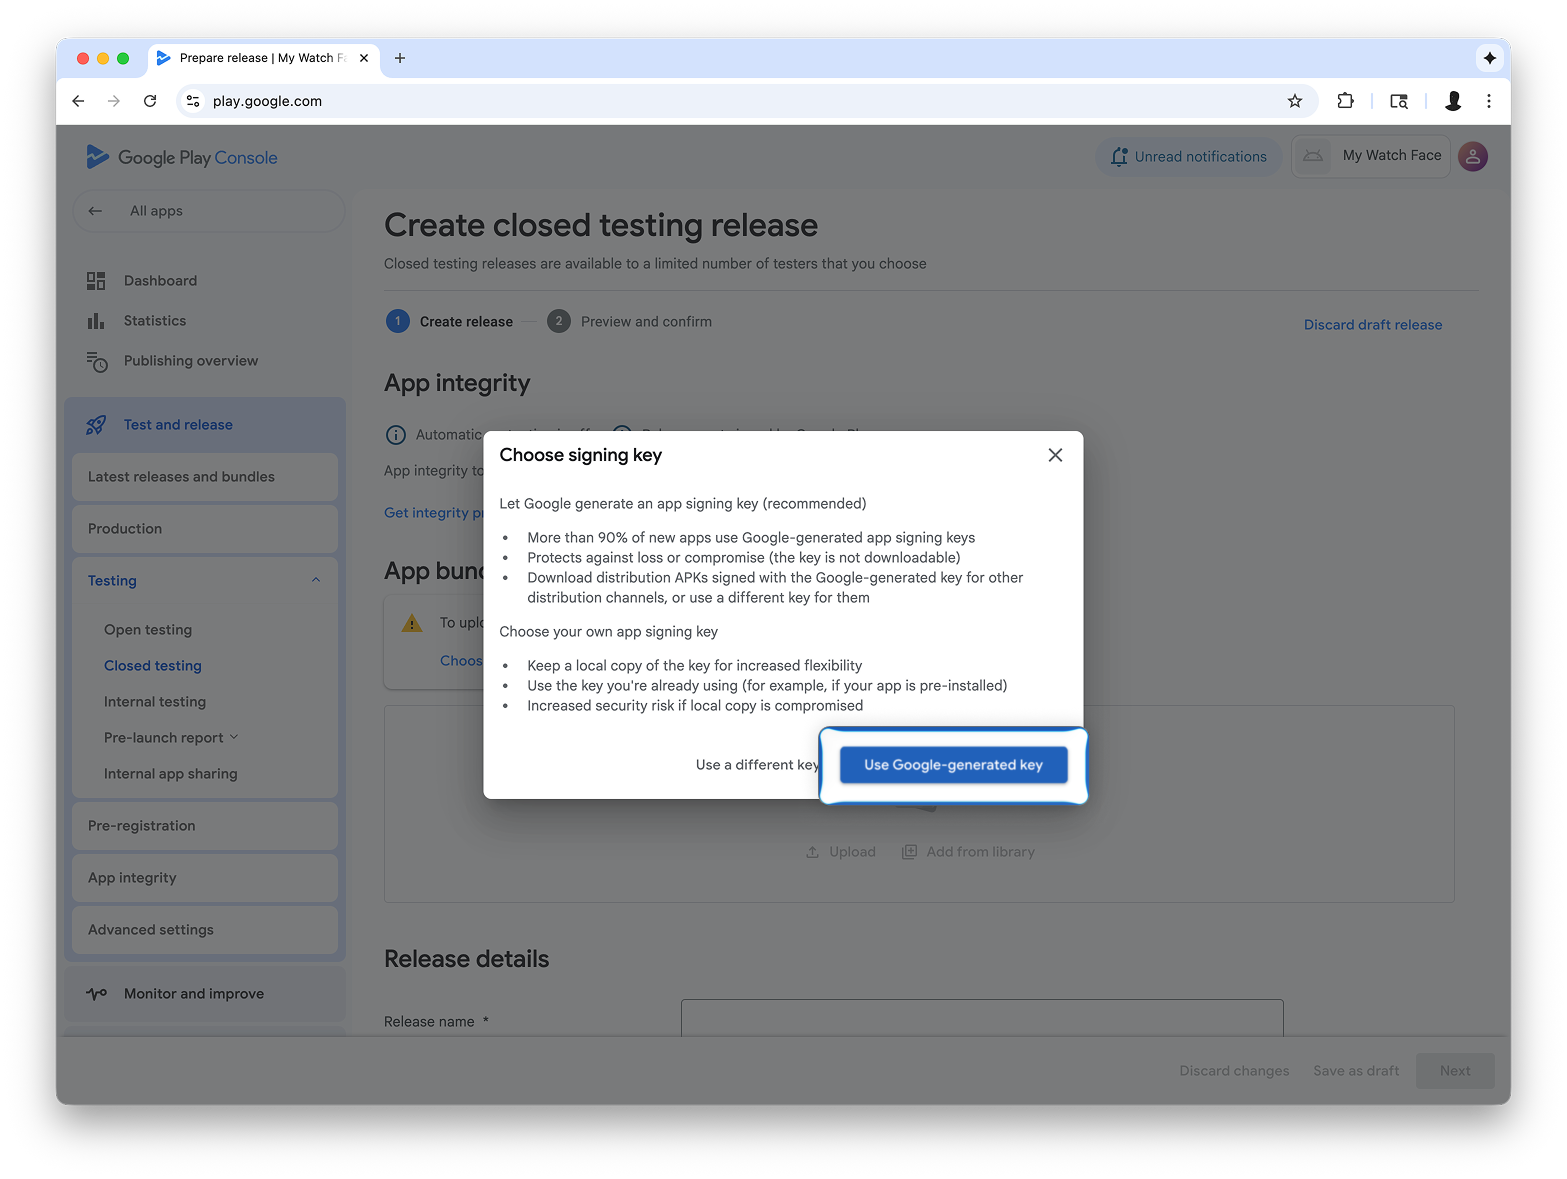
Nella schermata Crea release di test chiuso, seleziona Scegli chiave di firma.
Figura 5: seleziona il pulsante Scegli chiave di firma (a sinistra), poi nella finestra di dialogo visualizzata seleziona Usa chiave generata da Google (a destra).
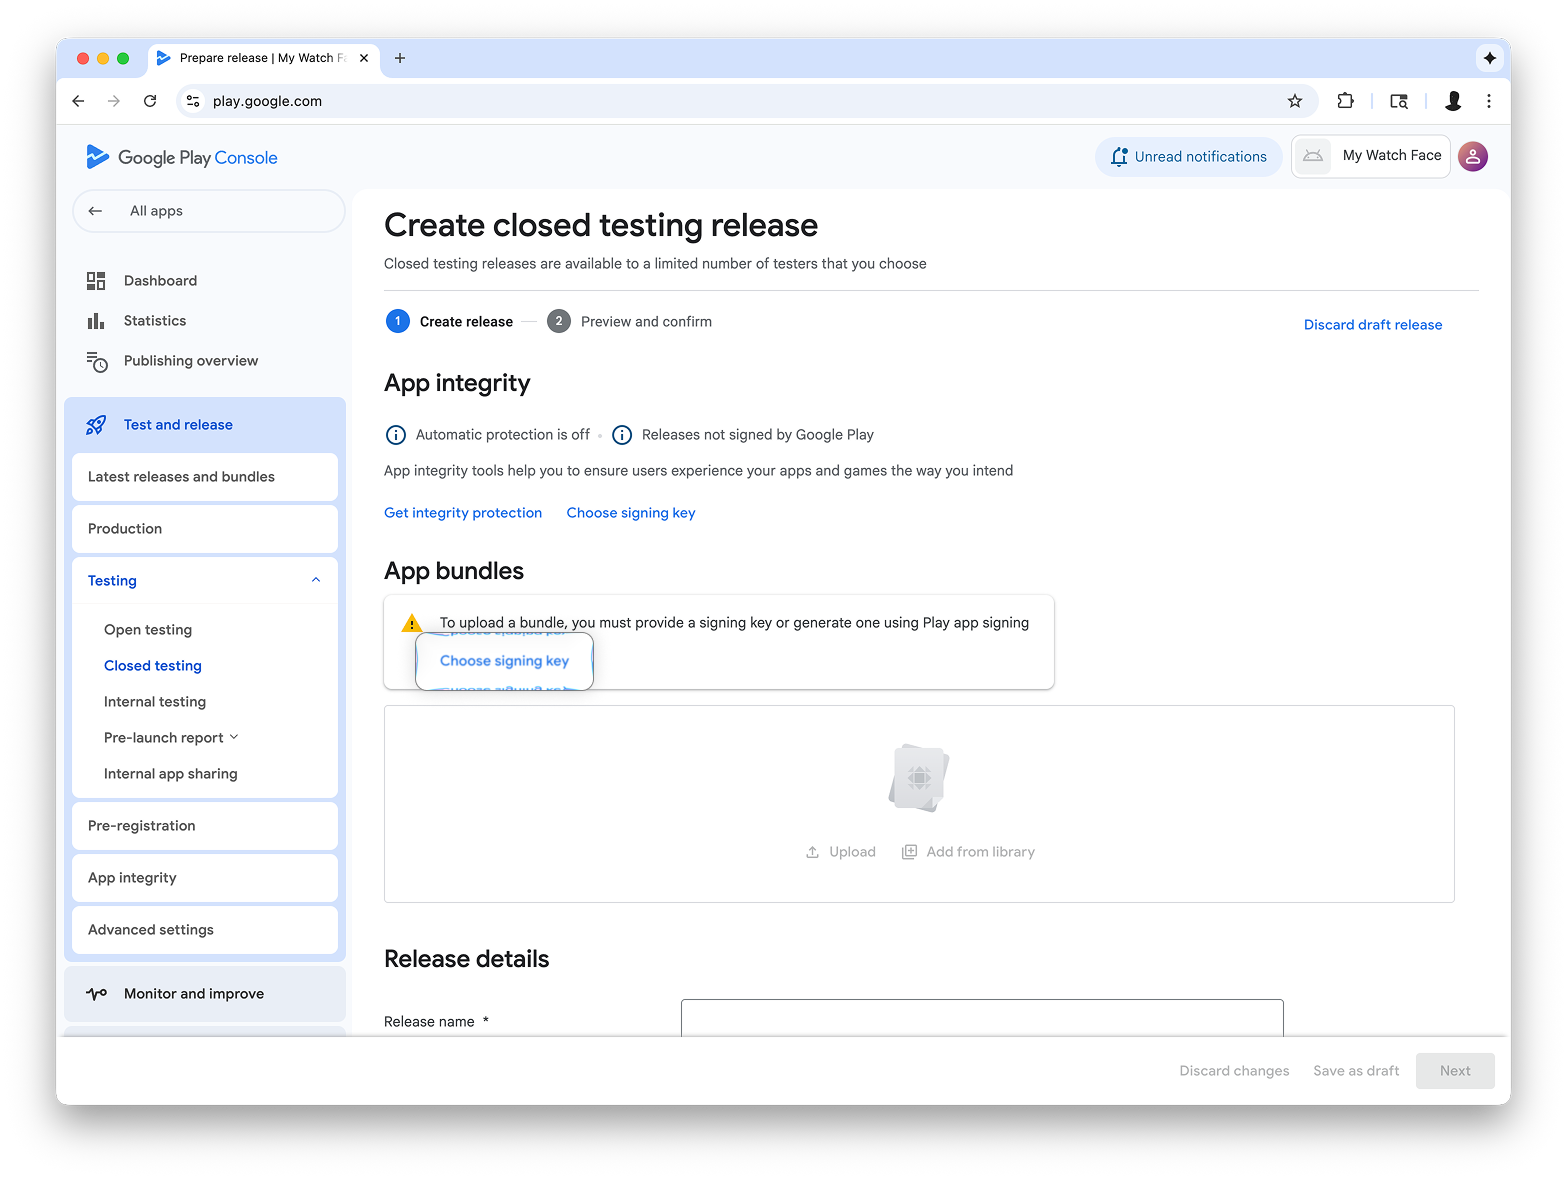
Trascina il file AAB da Watch Face Designer nella sezione Carica
e procedi con la creazione della release nel canale di test.
I campioni di contenuti e codice in questa pagina sono soggetti alle licenze descritte nella Licenza per i contenuti. Java e OpenJDK sono marchi o marchi registrati di Oracle e/o delle sue società consociate.
Ultimo aggiornamento 2025-08-27 UTC.
[[["Facile da capire","easyToUnderstand","thumb-up"],["Il problema è stato risolto","solvedMyProblem","thumb-up"],["Altra","otherUp","thumb-up"]],[["Mancano le informazioni di cui ho bisogno","missingTheInformationINeed","thumb-down"],["Troppo complicato/troppi passaggi","tooComplicatedTooManySteps","thumb-down"],["Obsoleti","outOfDate","thumb-down"],["Problema di traduzione","translationIssue","thumb-down"],["Problema relativo a esempi/codice","samplesCodeIssue","thumb-down"],["Altra","otherDown","thumb-down"]],["Ultimo aggiornamento 2025-08-27 UTC."],[],[],null,["This guide explains how to publish your watch face, created using\nWatch Face Designer, to Google Play.\n| **Note:** Before you begin, [export your watch face using the Google Play option](/training/wearables/watch-face-designer/export#google-play) so that you have an Android App Bundle (AAB) file ready.\n\nSign into your developer account in Google Play\n\nSign in to Google Play Console and press 'Create App' on the dashboard.\n| **Note:** If you don't have a Google Play Console developer account, [follow the\n| official guide to create one](https://support.google.com/googleplay/android-developer/answer/6112435). This includes paying a registration fee.\n\nDuring the \"create app,\" workflow, **turn off automatic protection when\nprompted**; otherwise, you'll have issues signing the bundle later. Automatic\nprotection isn't relevant to watch faces because they don't have any code.\n**Figure 1** : The **Create app** screen in the Play Console\n\nAdd support for the Wear OS form factor\n\nAfter you've created your app, navigate to **Test and release \\\u003e Testing \\\u003e\nInternal testing**:\n**Figure 2** : The **Test and release** screen in the Play Console\n\nIn the drop-down in the top right of the page, select **Manage form factors**,\nand add Wear OS as a form factor for your app:\n**Figure 3** : Selecting the **Manage form\nfactors** option (left), then adding Wear OS on the **Form factors** tab on the **Advanced settings** screen (right)\n\nCreate a release on the internal testing track\n\nReturn to the internal testing menu and create a Wear OS-only internal testing\ntrack. Then, create a release:\n**Figure 4** : Select the **Create track** button (left), then on the next screen, select the **Create new release** button (right).\n\nOn the **Create closed testing release** screen, select **Choose signing key**.\n| **Caution:** In the **Choose signing key** dialog that appears, select **Use Google-generated key**:\n**Figure 5** : Select the **Choose signing\nkey** button (left), then in the dialog that appears, select **Use\nGoogle-generated key** (right).\n\nDrag-and-drop the AAB file from Watch Face Designer into the **Upload** section,\nand proceed with creating the release on the testing track.\n\nNext steps\n\nFrom here, follow official Google Play documentation on [trying out apps in the\ntesting track](https://support.google.com/googleplay/answer/7003180) and [promoting releases to production](https://support.google.com/googleplay/android-developer/answer/9859348), which makes your\napp visible to everyone on Google Play."]]