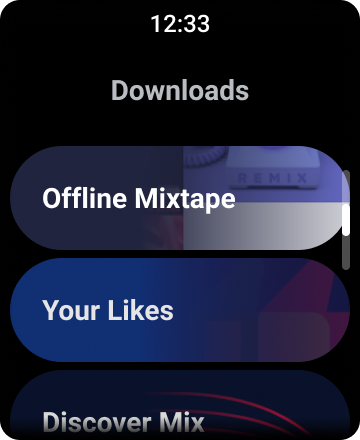
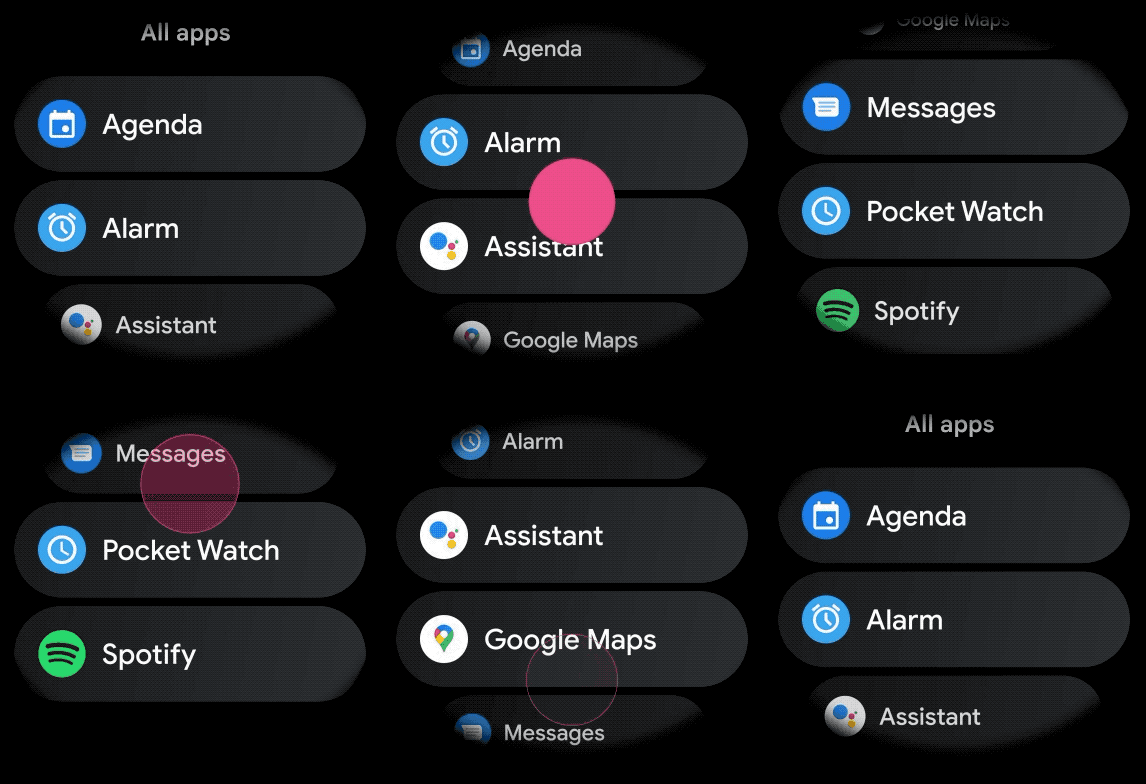
รายการช่วยให้ผู้ใช้เลือกรายการจากชุดตัวเลือกต่างๆ ได้อย่างง่ายดายในอุปกรณ์ Wear OS
ไลบรารี UI ของอุปกรณ์ที่สวมใส่ได้ประกอบด้วยคลาส
WearableRecyclerView ซึ่งเป็นการใช้งานRecyclerViewเพื่อสร้างรายการที่เพิ่มประสิทธิภาพสำหรับอุปกรณ์ที่สวมใส่ได้ คุณใช้อินเทอร์เฟซนี้ในแอปที่สวมใส่ได้โดยใช้การสร้างคอนเทนเนอร์ WearableRecyclerView ใหม่
ใช้ WearableRecyclerView สำหรับรายการแบบยาวที่มีรายการง่ายๆ เช่น ตัวเปิดแอปพลิเคชันหรือรายชื่อติดต่อ แต่ละรายการอาจมีสตริงสั้นๆ และไอคอนที่เชื่อมโยง หรือแต่ละรายการอาจมีเพียงสตริงหรือไอคอน
หมายเหตุ: หลีกเลี่ยงเลย์เอาต์ที่ซับซ้อน ผู้ใช้ควรเห็นไอเทมเพียงแวบเดียวก็เข้าใจได้ว่าเป็นไอเทมอะไร โดยเฉพาะเมื่อใช้กับอุปกรณ์ที่สวมใส่ได้ซึ่งมีหน้าจอขนาดเล็ก
การขยายคลาส RecyclerView ที่มีอยู่ทำให้ WearableRecyclerView
API แสดงรายการรายการที่เลื่อนในแนวตั้งในรายการแนวตรงโดยค่าเริ่มต้น นอกจากนี้ คุณยังใช้ WearableRecyclerView API เพื่อเลือกใช้เลย์เอาต์แบบโค้งและท่าทางสัมผัสแบบวงกลมในแอปอุปกรณ์ที่สวมใส่ได้ด้วย

รูปที่ 1 มุมมองรายการเริ่มต้นใน Wear OS
คู่มือนี้จะแสดงวิธีใช้คลาส WearableRecyclerView เพื่อสร้างรายการในแอป Wear OS, วิธีเลือกใช้เลย์เอาต์โค้งสำหรับรายการที่เลื่อนได้ และวิธีปรับแต่งลักษณะที่ปรากฏของรายการย่อยขณะเลื่อน
เพิ่ม WearableRecyclerView ลงในกิจกรรมโดยใช้ XML
เลย์เอาต์ต่อไปนี้จะเพิ่ม WearableRecyclerView ลงในกิจกรรม
<androidx.wear.widget.WearableRecyclerView
    xmlns:android="http://schemas.android.com/apk/res/android"
    xmlns:tools="http://schemas.android.com/tools"
    android:id="@+id/recycler_launcher_view"
    android:layout_width="match_parent"
    android:layout_height="match_parent"
    android:scrollbars="vertical" />
ตัวอย่างต่อไปนี้แสดง WearableRecyclerView
ที่ใช้กับกิจกรรม
Kotlin
class MainActivity : Activity() {

    override fun onCreate(savedInstanceState: Bundle?) {
        super.onCreate(savedInstanceState)
        setContentView(R.layout.activity_main)
    }
    ...
}
Java
public class MainActivity extends Activity {
    @Override
    public void onCreate(Bundle savedInstanceState) {
        super.onCreate(savedInstanceState);
        setContentView(R.layout.activity_main);
    }
    ...
}
สร้างเลย์เอาต์แบบโค้ง

หากต้องการสร้างเลย์เอาต์โค้งสำหรับรายการที่เลื่อนได้ในแอปสำหรับอุปกรณ์สวมใส่ ให้ทำดังนี้
-
ใช้
WearableRecyclerViewเป็นคอนเทนเนอร์หลักในเลย์เอาต์ XML ที่เกี่ยวข้อง -
ตั้งค่าวิธีการ
setEdgeItemsCenteringEnabled(boolean)เป็นtrueซึ่งจะจัดรายการแรกและรายการสุดท้ายในรายการให้อยู่กึ่งกลางในแนวตั้งบนหน้าจอ -
ใช้เมธอด
WearableRecyclerView.setLayoutManager()เพื่อกำหนดเลย์เอาต์ของรายการบนหน้าจอ
Kotlin
wearableRecyclerView.apply {
    // To align the edge children (first and last) with the center of the screen.
    isEdgeItemsCenteringEnabled = true
    ...
    layoutManager = WearableLinearLayoutManager(this@MainActivity)
}
Java
// To align the edge children (first and last) with the center of the screen.
wearableRecyclerView.setEdgeItemsCenteringEnabled(true);
...
wearableRecyclerView.setLayoutManager(
                new WearableLinearLayoutManager(this));
หากแอปมีข้อกำหนดเฉพาะในการปรับแต่งลักษณะที่ปรากฏของรายการย่อยขณะเลื่อน เช่น การปรับขนาดไอคอนและข้อความขณะที่รายการเลื่อนออกจากตรงกลาง ให้ขยายคลาส
WearableLinearLayoutManager.LayoutCallback และลบล้างเมธอด
onLayoutFinished
ข้อมูลโค้ดต่อไปนี้แสดงตัวอย่างการปรับแต่งการเลื่อนของรายการเพื่อปรับขนาดให้ห่างจากตรงกลางมากขึ้นด้วยการเพิ่มคลาส WearableLinearLayoutManager.LayoutCallback
Kotlin
/** How much icons should scale, at most.  */
private const val MAX_ICON_PROGRESS = 0.65f

class CustomScrollingLayoutCallback : WearableLinearLayoutManager.LayoutCallback() {

    private var progressToCenter: Float = 0f

    override fun onLayoutFinished(child: View, parent: RecyclerView) {
        child.apply {
            // Figure out % progress from top to bottom.
            val centerOffset = height.toFloat() / 2.0f / parent.height.toFloat()
            val yRelativeToCenterOffset = y / parent.height + centerOffset

            // Normalize for center.
            progressToCenter = Math.abs(0.5f - yRelativeToCenterOffset)
            // Adjust to the maximum scale.
            progressToCenter = Math.min(progressToCenter, MAX_ICON_PROGRESS)

            scaleX = 1 - progressToCenter
            scaleY = 1 - progressToCenter
        }
    }
}
Java
public class CustomScrollingLayoutCallback extends WearableLinearLayoutManager.LayoutCallback {
    /** How much icons should scale, at most. */
    private static final float MAX_ICON_PROGRESS = 0.65f;

    private float progressToCenter;

    @Override
    public void onLayoutFinished(View child, RecyclerView parent) {

        // Figure out % progress from top to bottom.
        float centerOffset = ((float) child.getHeight() / 2.0f) / (float) parent.getHeight();
        float yRelativeToCenterOffset = (child.getY() / parent.getHeight()) + centerOffset;

        // Normalize for center.
        progressToCenter = Math.abs(0.5f - yRelativeToCenterOffset);
        // Adjust to the maximum scale.
        progressToCenter = Math.min(progressToCenter, MAX_ICON_PROGRESS);

        child.setScaleX(1 - progressToCenter);
        child.setScaleY(1 - progressToCenter);
    }
}
Kotlin
wearableRecyclerView.layoutManager =
        WearableLinearLayoutManager(this, CustomScrollingLayoutCallback())
Java
CustomScrollingLayoutCallback customScrollingLayoutCallback =
                new CustomScrollingLayoutCallback();
wearableRecyclerView.setLayoutManager(
                new WearableLinearLayoutManager(this, customScrollingLayoutCallback));

