
本文件概述如何開始使用 Vulkan 圖形庫 下載、編譯並執行 Khronos© 範例應用程式。
必要條件
在開始之前,請先確認您已準備好適當的硬體和平台版本。 您必須使用支援 Vulkan、 搭載 Android 7.0 (Nougat) 的 API 級別 24 以上版本。
如要確認您的 Android 版本,請前往「設定」選單。 ,然後選取「關於手機」>Android 版本。確認 硬體和平台版本均已設定妥當,即可下載必要的軟體。
下載
在開始之前,您必須先下載幾項工具和其他軟體。請注意,在 Windows 主機上 建議您避免為工具和原始碼檔案設定階層過多的路徑。 是為瞭解決部分 Windows 作業系統版本的檔案路徑限制。
- 如果您尚未安裝 Android Studio,請先下載 Android Studio, 這包括最新版的 Android SDK。
- 從 Android Studio 中安裝 NDK 和 CMake 或個別下載並安裝這些項目
- 建構及執行 Hello JNI 範例 確保 Android Studio 正常運作
- 安裝 python3 和 build.md 中列出的其他元件 以及主機平台的 10 層
匯入
您將在本節中下載 Khronos© Vulkan© 範例存放區,並產生 Android Gradle ,然後透過 Android Studio IDE 開啟。
- 設定下列環境變數:
export ANDROID_HOME=/path/to/sdk-directory export ANDROID_NDK_HOME=$ANDROID_HOME/ndk/{your-ndk-version-dir} - 將 CMake 新增至 $PATH,用於產生 Android 建構指令碼:
export PATH=$PATH:$ANDROID_HOME/cmake/{your-cmake-version}/bin - 開啟終端機,並將原始碼下載至開發目錄:
cd dev-directory
git clone --recursive https://github.com/KhronosGroup/Vulkan-Samples.git
- 請按照 Build.md 的操作說明進行
來產生 Android 範例專案
cd Vulkan-Samples
./scripts/generate.py android
- 開啟 Android Studio。選擇 [檔案] > 開啟並選取
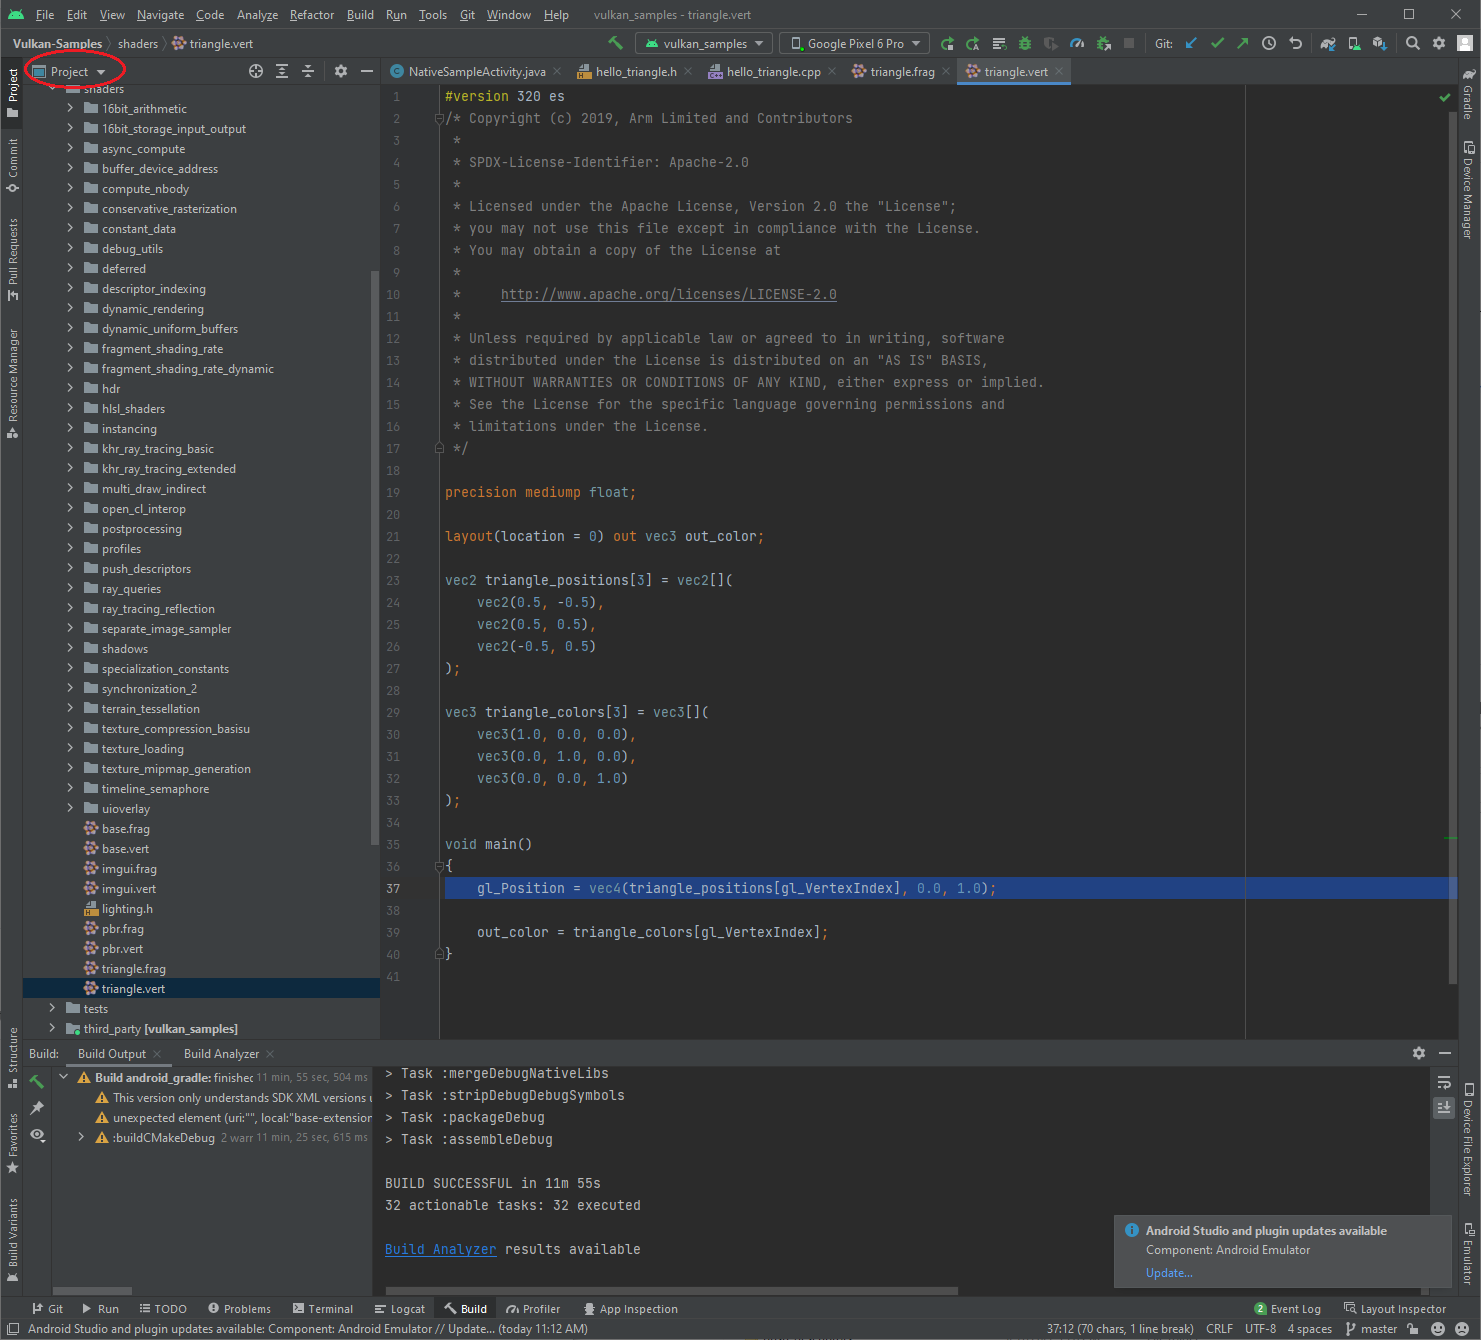
Vulkan-Samples/build/android_gradle/build.gradle。 Android Studio 載入後,您應該會看到類似下方的內容 專案: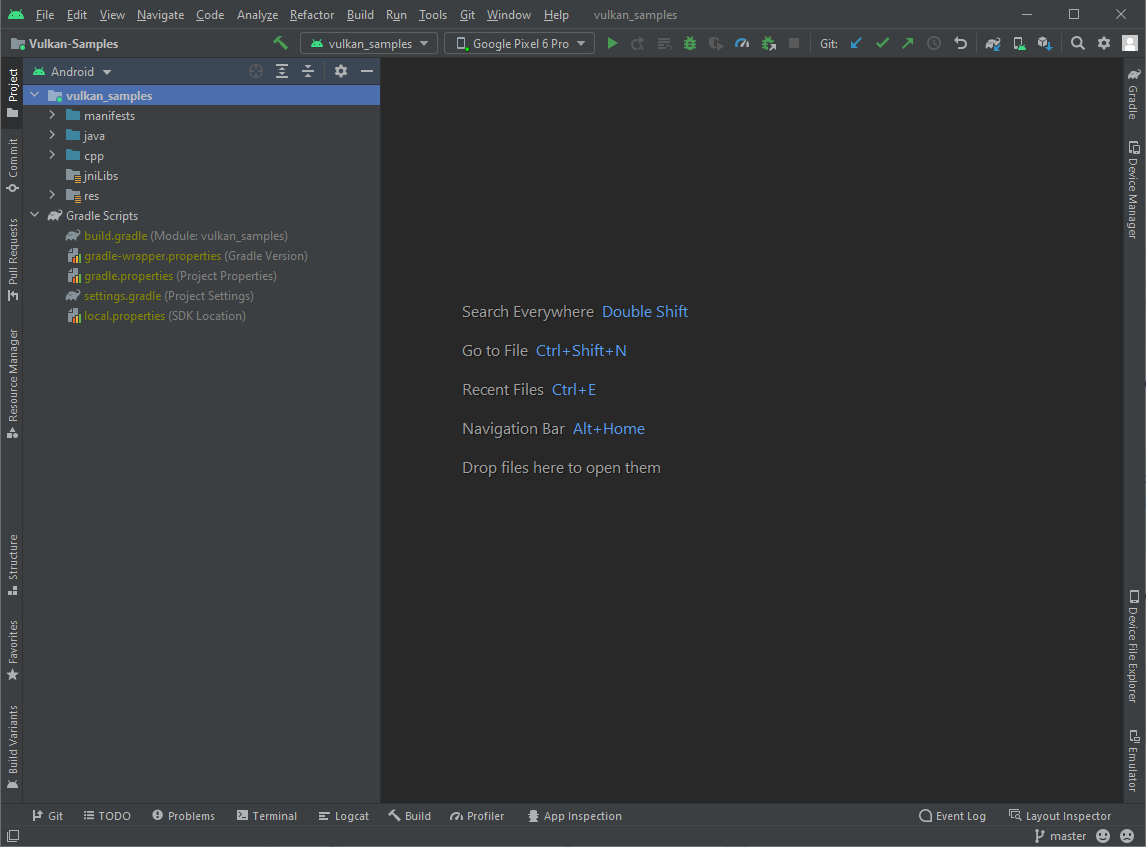
圖 1. Android Studio 中的範例專案。
編譯
本存放區的所有範例都會整理成一個 Android 專案。如要編譯 專案內,請執行下列其中一項操作:
- 如果只要編譯原始碼,請依序點選「Build」選單 >Make Project。 或輸入 Ctrl-F9 快速鍵。
- 如要產生範例 APK,請選取選單「Build」> 「Build Bundle(s)/APK(s)」>建構 APK。
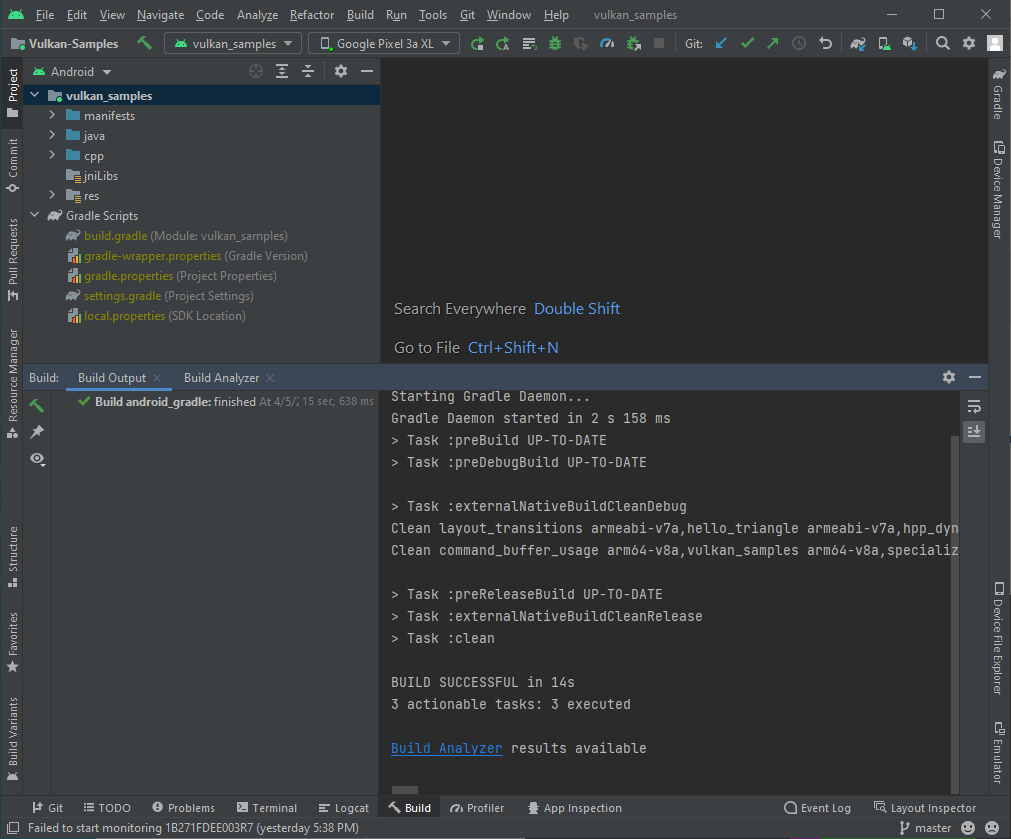
完成後,Android Studio 的「Build」(建構) 視窗應會顯示建構成功的訊息。 假如您看到錯誤,請修正錯誤並重新編譯。
執行
執行範例專案之前,請確認 Android Studio 可辨識 。您應該會看到類似 包括:

如要執行專案,請按照下列步驟操作:
- 使用選單 [執行] >執行 vulkan_sample,或點選執行按鈕
 ,然後等待
以便在連結的裝置上安裝並開始使用。
,然後等待
以便在連結的裝置上安裝並開始使用。 - 在已連結的 Android 裝置上,為必要的存取要求提供授權。
- 啟用「允許管理所有檔案」,然後輕觸「返回」按鈕。 ,系統會傳回範例的啟動主畫面。
- 授予磁碟存取權:
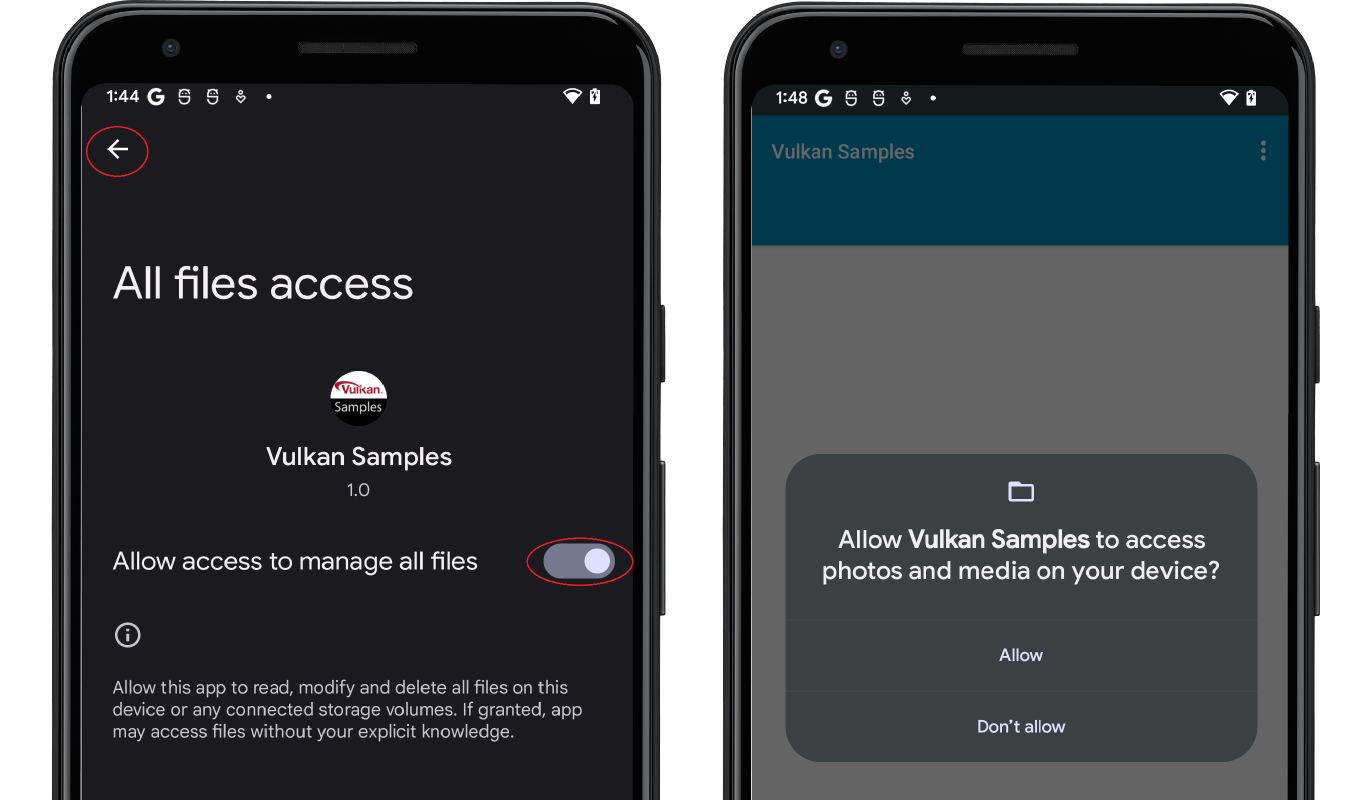
圖 4.允許存取磁碟。
- 您看到的範例主選單畫面應如下所示:
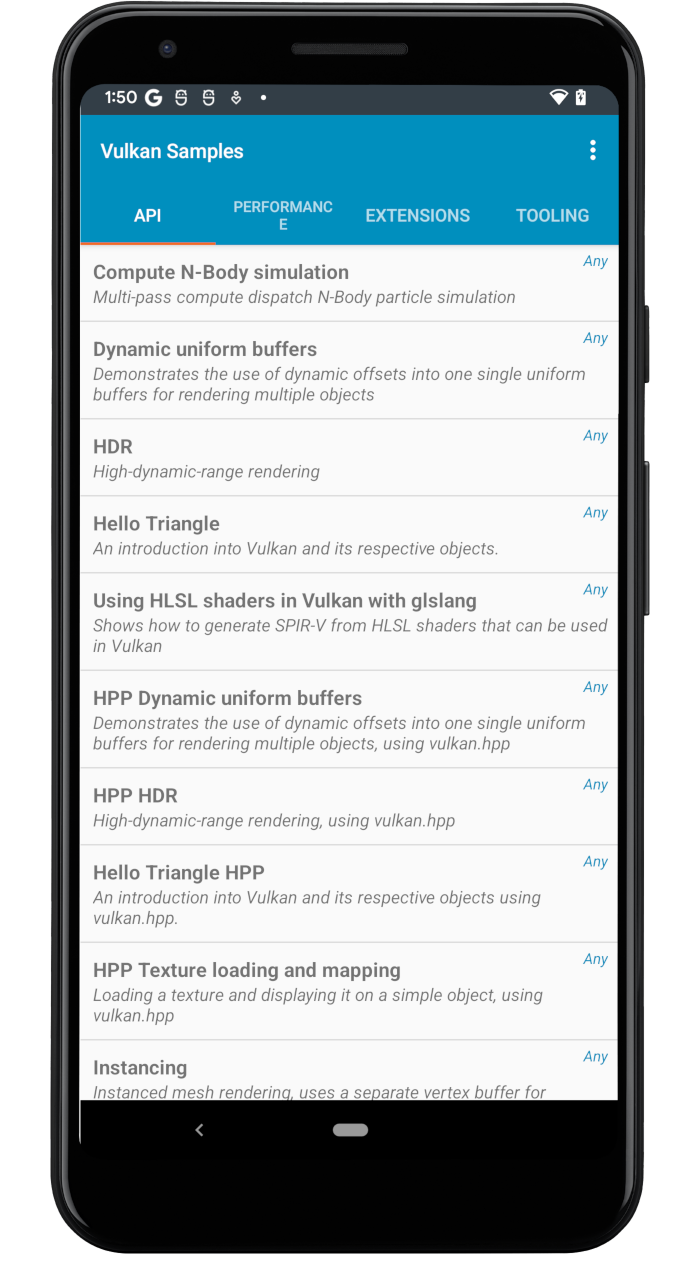
圖 5.範例主選單。 - 瀏覽範例清單,然後選取要執行的幾個範例。
如果您是第一次使用 Vulkan 進行開發,可以先從「API」範例開始執行。
例如,輕觸「Hello Triangle」後,畫面上應會顯示算繪的三角形
類似這樣:
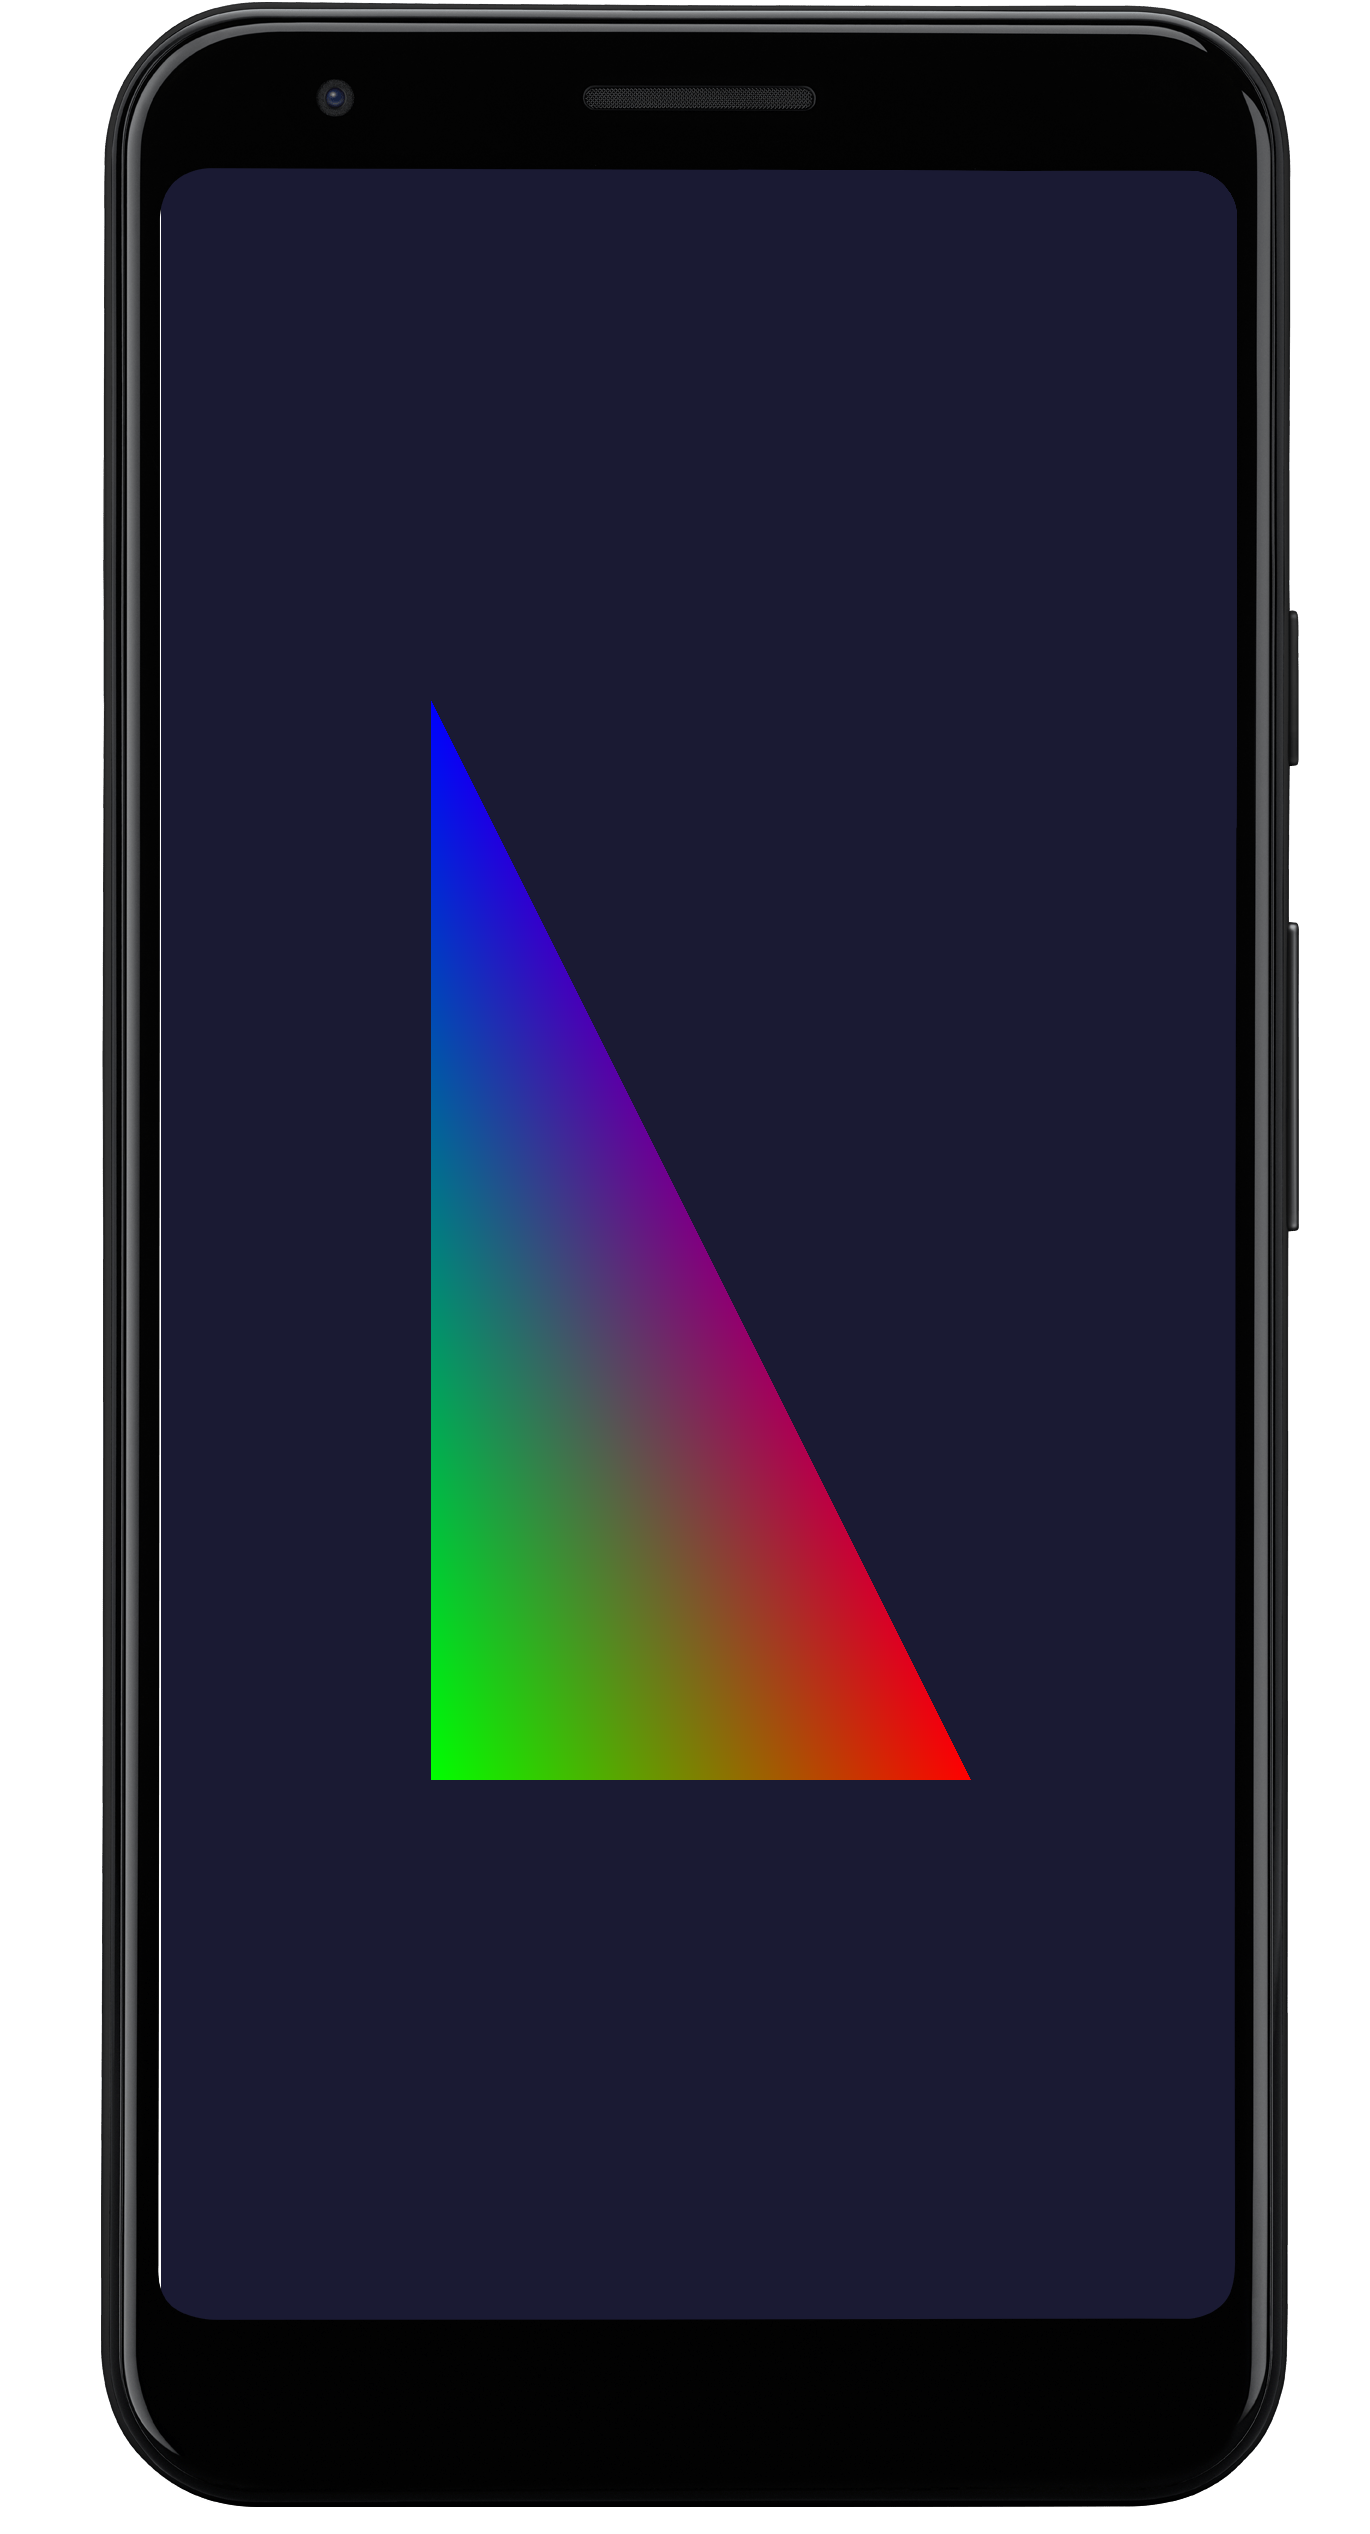
圖 6.Hello Triange 範例。
現在開發系統已設定完畢,可在測試裝置上執行範例專案。
Vulkan 範例專為在多種作業系統上執行而開發,包括 電腦和行動裝置「成效」、「擴充功能」及 工具可能導致裝置不穩定或當機。可能的原因包括 為:
- 特定 Vulkan 功能並非專為 Android 設計。
- 系統不支援您的 Android 作業系統版本。
- 硬體平台的 GPU 功能。
探索
Vulkan 範例的 Java 區段衍生自 NativeActivity 類別,它會傳送一般的應用程式 生命週期事件,例如應用程式建立、啟動、停止及刪除 C/C++ 再也不是件繁重乏味的工作範例的 C/C++ 區段中有一個範例架構 實作執行階段子範例切換功能。非常 Android 系統事件/訊息會透過以下路徑 傳遞至範例應用程式的 Vulkan 程式碼:
NativeSampleActivityJava 區段NativeSampleActivityC/C++ 區段android_native_glue代碼android_main- 範例架構
- 個別子範例程式碼
android_main 是 NativeSampleActivity 和應用程式程式碼之間的橋樑。
這可以是開始操作程式碼範例的起點如果您只需要
專注於 Vulkan 專用原始碼,您可以探索
Vulkan_Samples\samples,其中包含下列項目:
- 「API」類別的範例。
- 「Performance」(效能) 類別的範例。
- 「Extensions」(擴充功能) 類別的範例。
- 「Tooling」(工具) 範例。
所有著色器都集中在 Vulkan_Samples\shaders 中。
您可以開始瀏覽「API」類別的範例,熟悉基本的 Vulkan 用法和範例架構。接著,您就能推進 「Performance」(效能) 和「Extenstions」(擴充功能) 類別的範例。對於著色器程式碼,您可以使用 Android Studio 中的「Project」檢視畫面。
其他資源
Vulkan API 已推出數個版本,功能漸趨成熟。Vulkan 標準委員會和 Vulkan 社群建立了功能豐富的 Vulkan 。下列 清單包含一些用於開發 Vulkan 應用程式的資源:
Vulkan 規範: Khronos Group 負責維護 Vulkan 規範。詳情請見 Vulkan 首頁查看完整規格 訓練、指南 和教學課程
驗證層: 驗證層是應用程式開發程序中不可或缺的一環。 瞭解 Android 上的 Vulkan 驗證層 說明文件。
Shaderc: NDK 中的 Shaderc 程式碼是 Shaderc 存放區。使用說明文件 及操作說明取得最新版本,詳情請參閱 著色器編譯器。