
このドキュメントでは、Khronos© サンプルアプリをダウンロードし、コンパイルして実行することにより、Vulkan グラフィック ライブラリの使用を開始する方法について概説します。
前提条件
始める前に、適切なバージョンのハードウェアとプラットフォームが揃っていることを確認してください。Android 7.0(Nougat)、API レベル 24 以上を搭載し、Vulkan をサポートするデバイスまたはエミュレータを使用する必要があります。
Android のバージョンを確認するには、[設定] メニューに移動して [デバイス情報] > [Android バージョン] を選択します。適切なバージョンのハードウェアとプラットフォームをセットアップしていることを確認したら、必要なソフトウェアをダウンロードできます。
ダウンロード
まず、いくつかのツールとその他のソフトウェアをダウンロードする必要があります。Windows ホスト上では、ツールとソースコードを深い階層のファイルパスに保存しないようおすすめします。これは Windows OS の一部のバージョンに存在するファイルパスの制約を回避するためです。
- Android Studio をダウンロードしていない場合は、こちらからダウンロードします。これには最新の Android SDK が含まれています。
- Android Studio 内から NDK と CMake をインストールするか、個別にダウンロードしてインストールします。
- Hello JNI サンプルをビルドして実行し、Android Studio が正しく動作していることを確認します。
- ホスト プラットフォームの build.md に表示されている python3 とその他のコンポーネントをインストールします。
インポート
このセクションでは、Khronos© Vulkan© サンプル リポジトリをダウンロードし、Android Gradle プロジェクトを生成して Android Studio IDE で開きます。
- 次の環境変数を設定します。
export ANDROID_HOME=/path/to/sdk-directory export ANDROID_NDK_HOME=$ANDROID_HOME/ndk/{your-ndk-version-dir} - CMake を $PATH に追加します。これは、Android ビルド スクリプトの生成に使用されます。
export PATH=$PATH:$ANDROID_HOME/cmake/{your-cmake-version}/bin - ターミナルを開いて、開発ディレクトリにソースコードをダウンロードします。
cd dev-directory
git clone --recursive https://github.com/KhronosGroup/Vulkan-Samples.git
- 以下の手順(Build.md にあります)に沿って、Android サンプル プロジェクトを生成します。
cd Vulkan-Samples
./scripts/generate.py android
- Android Studio を開きます。[File] > [Open] を選択し、
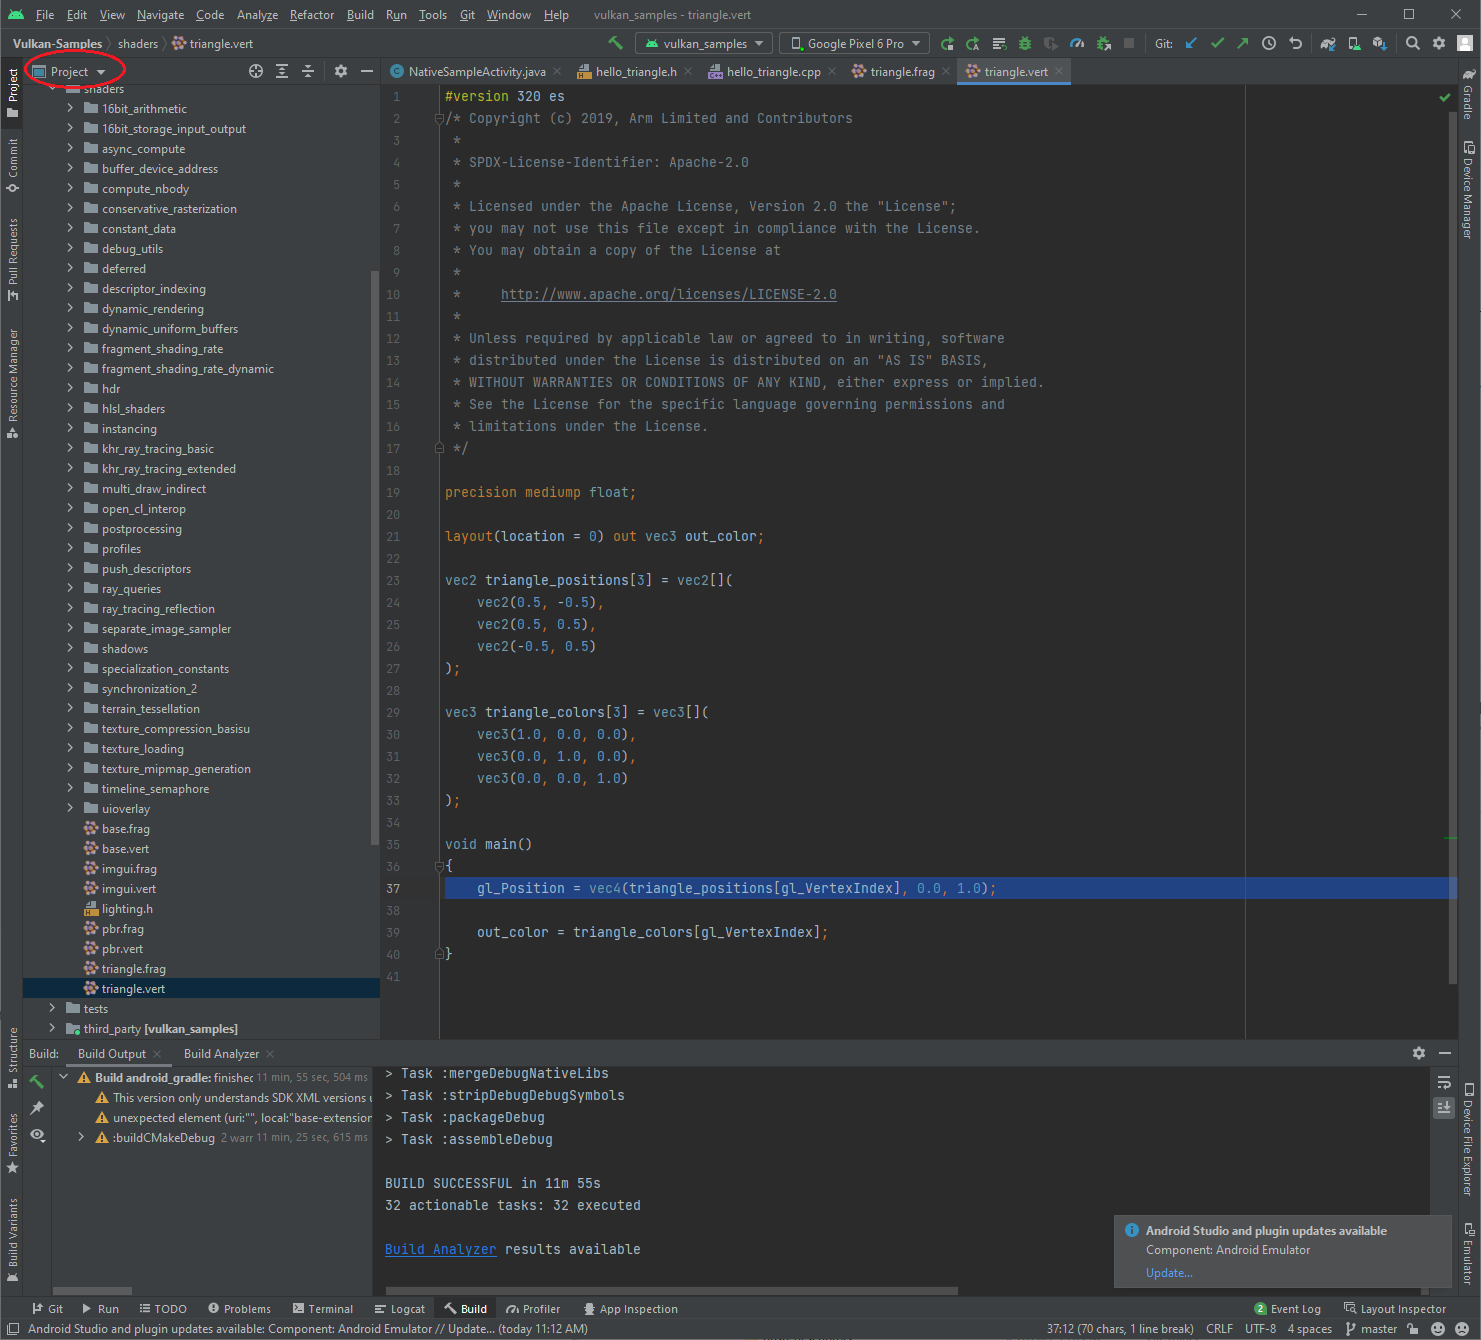
Vulkan-Samples/build/android_gradle/build.gradleを選択します。Android Studio がプロジェクトを読み込むと、次のような画面が表示されます。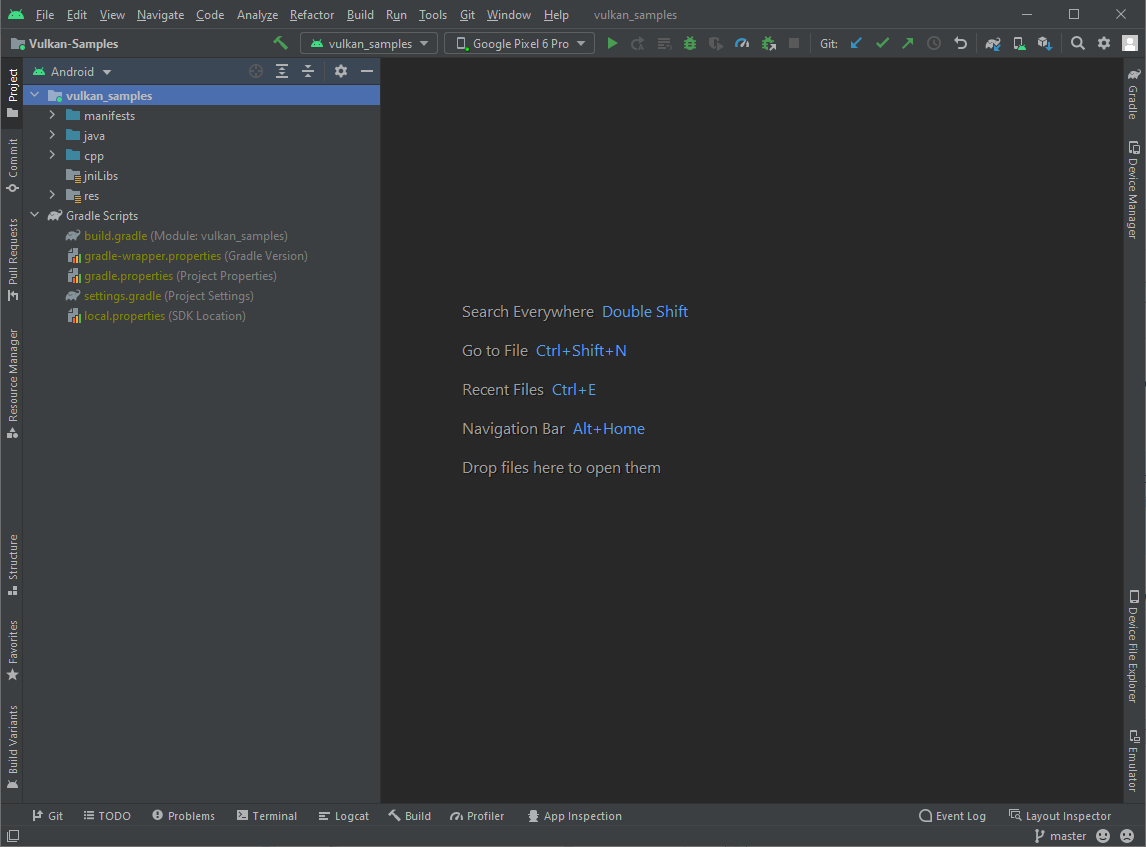
図 1. Android Studio 内のサンプル プロジェクト
コンパイル
このリポジトリ内のすべてのサンプルは、一つの Android プロジェクトにまとめられています。プロジェクトをコンパイルするには、次のいずれかを行います。
- 単にソースをコンパイルするには、メニューの [Build] > [Make Project] を使用するか、Ctrl+F9 ショートカット キーを押します。
- サンプル APK を生成するには、メニューの [Build] > [Build Bundle(s)/APK(s)] > [Build APK(s)] を選択します。
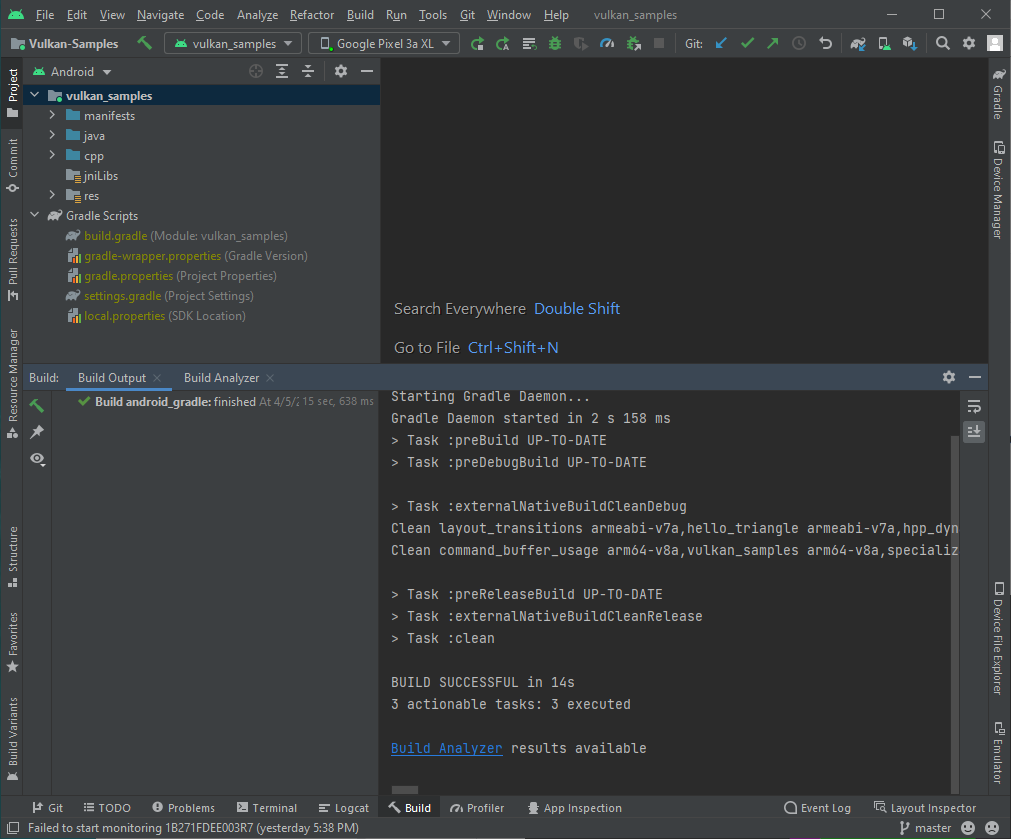
Android Studio の [Build] ウィンドウに、ビルド成功メッセージが表示されます。エラーが表示された場合は、修正して再コンパイルします。
実行
サンプル プロジェクトを実行する前に、Android Studio が接続済みの Vulkan デバイスまたは Android Emulator を認識していることを確認してください。次のような画面が表示されます。

プロジェクトを実行する手順は次のとおりです。
- メニューの [Run] > [Run vulkan_sample] を使用するか、ツールバーの実行ボタン
 をクリックし、サンプルがインストールされて接続済みのデバイスで起動されるのを待ちます。
 - 接続済みの Android デバイスで、必要なアクセス リクエストを承認します。
- [全ファイルの管理権を付与] を有効にしてから戻る矢印ボタンをタップし、サンプルのメイン起動画面に戻ります。
- ディスクへのアクセスを許可します。
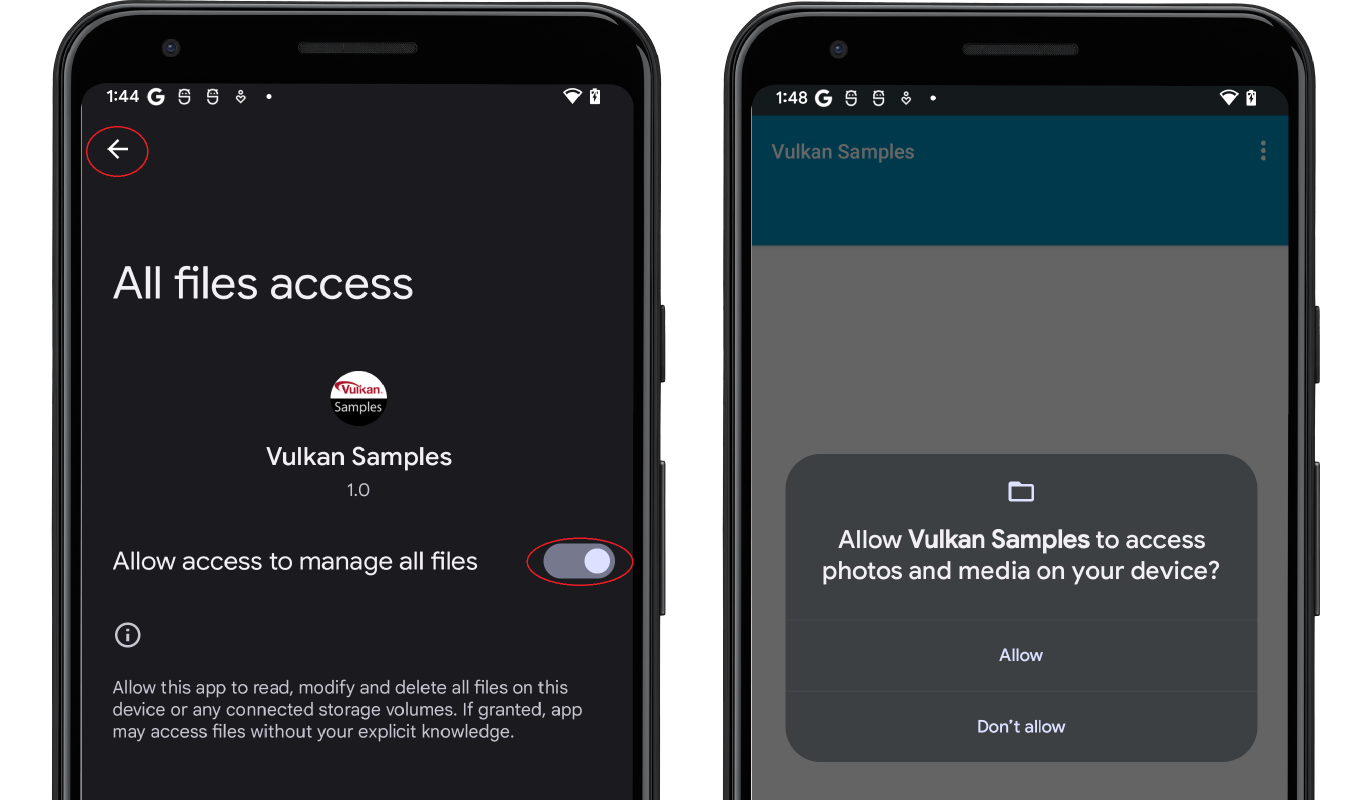
図 4. ディスクへのアクセスを有効にする
- 次のようなサンプル メインメニュー画面が表示されます。
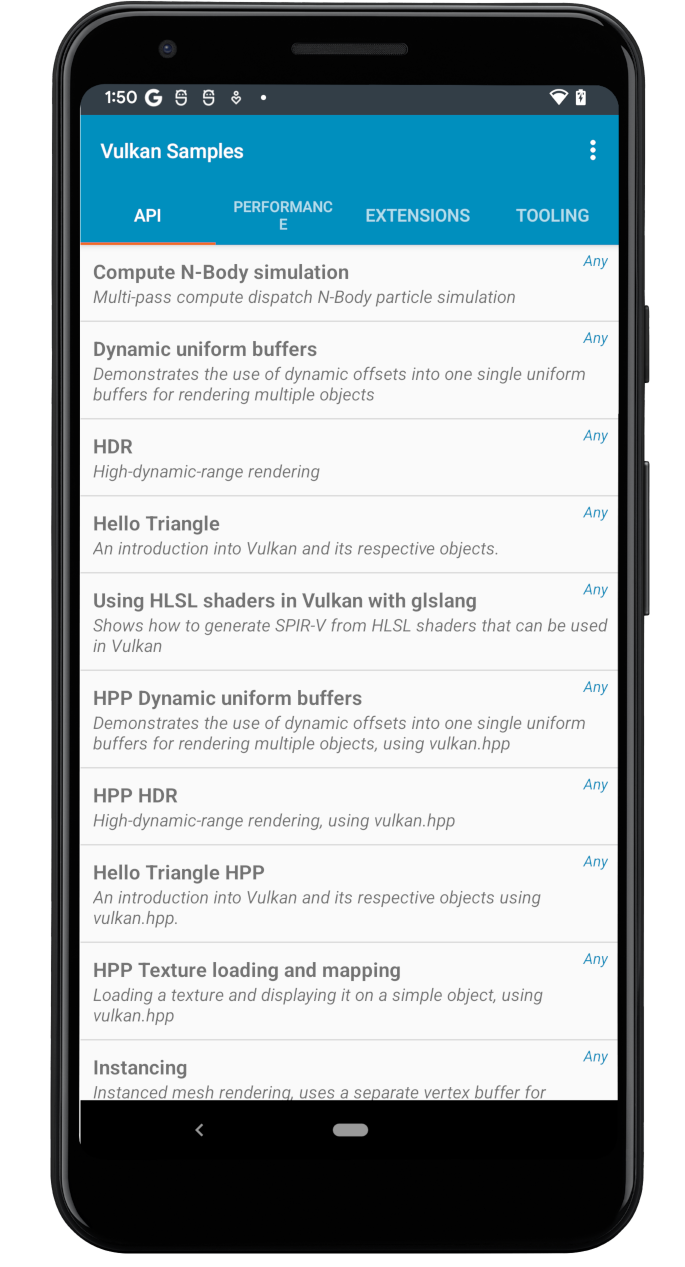
図 5. サンプル メインメニュー - サンプルリストを参照して、実行するサンプルをいくつか選択します。初めて Vulkan 開発を行う場合は、「API」サンプルから始めることができます。たとえば、[Hello Triangle] をタップすると、次のようなレンダリング済みの三角形が表示されます。

図 6. Hello Triangle サンプル
以上により、テストデバイスでサンプルを実行できるように開発システムがセットアップされました。
Vulkan サンプルは、複数のオペレーティング システム(パソコン用とモバイル用のものを含む)向けに開発されています。[Performance]、[Extensions]、[Tooling] にあるサンプルの一部は安定しておらず、デバイスでクラッシュすることがあります。これには、次のようなさまざまな理由が考えられます。
- Vulkan の特定の機能が Android 向けに設計されていない。
- 使用している Android OS バージョンがサポートされていない。
- ハードウェア プラットフォームの GPU 機能に問題がある。
確認
Vulkan サンプルの Java セクションは、NativeActivity クラスから派生したものです。このクラスは、アプリの作成、起動、停止、破棄などの一般的なアプリのライフサイクル イベントを C/C++ コードに渡します。サンプルの C/C++ セクションには、ランタイムのサブサンプル切り替え機能を実装するサンプル フレームワークがあります。大まかに言うと、Android システムのイベント / メッセージは、次のパスをたどってサンプルアプリの次の Vulkan コードに到達します。
NativeSampleActivityJava セクションNativeSampleActivityC/C++ セクションandroid_native_glueコードandroid_main- サンプル フレームワーク
- 個別のサブサンプルのコード
android_main は NativeSampleActivity とアプリコードの橋渡しとなっており、サンプルコードをたどる際の出発点にすることができます。Vulkan 固有のソースのみを確認したい場合は、次の内容を含む Vulkan_Samples\samples のコードを参照してください。
- 「api」カテゴリのサンプル
- 「performance」カテゴリのサンプル
- 「extensions」カテゴリのサンプル
- 「tooling」のサンプル
Vulkan_Samples\shaders は、すべてのシェーダーのホームです。
「API」カテゴリのサンプルを参照すると、Vulkan の基本的な使用方法とサンプル フレームワークの理解を深めることができます。次に、「Performance」および「Extensions」カテゴリのサンプルに進みます。シェーダー コードについては、Android Studio の [Project] ビューを使用できます。
参考情報
Vulkan API はいくつかのバージョンを経ているため、成熟しています。Vulkan 標準委員会と Vulkan コミュニティでは、API の使用方法とベスト プラクティスのデモを含む Vulkan マテリアルの豊富なセットを作成しています。Vulkan アプリの開発に役立つリソースを以下に示します。
Vulkan 仕様: Vulkan 仕様は Khronos Group が管理しています。完全な仕様、トレーニング、ガイド、チュートリアルについては、Vulkan のホームページをご覧ください。
検証レイヤ: 検証レイヤはアプリ開発に不可欠です。詳しくは、Android の Vulkan 検証レイヤのドキュメントをご覧ください。
Shaderc: NDK の Shaderc コードは、Shaderc リポジトリのダウンストリームです。使用方法のドキュメントと最新バージョンを入手する手順については、シェーダー コンパイラをご覧ください。