Publicar do Watch Face Designer no Google Play
Mantenha tudo organizado com as coleções
Salve e categorize o conteúdo com base nas suas preferências.
Neste guia, explicamos como publicar no Google Play um mostrador do relógio criado com o
Watch Face Designer.
Faça login na sua conta de desenvolvedor no Google Play
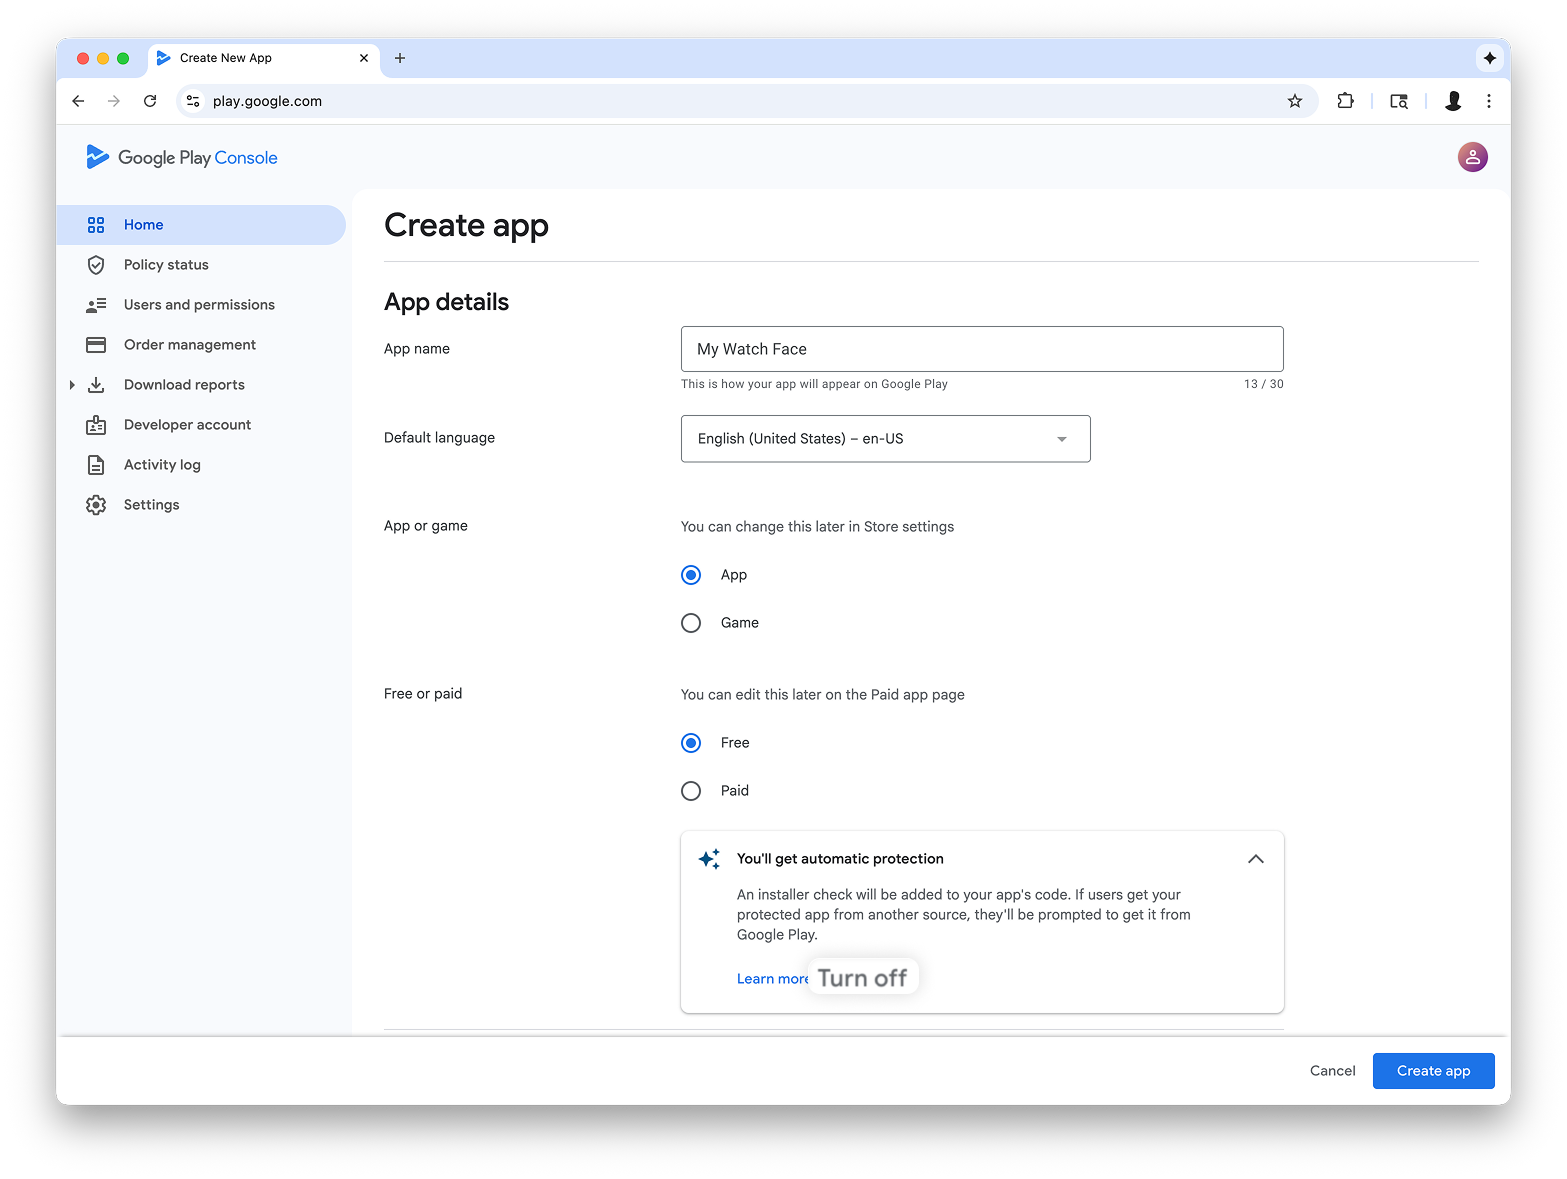
Faça login no Google Play Console e clique em "Criar app" no painel.
Durante o fluxo de trabalho "criar app", desative a proteção automática quando
solicitado. Caso contrário, você terá problemas para assinar o pacote depois. A proteção automática não é relevante para mostradores de relógio porque eles não têm código.
Figura 1: a tela Criar app no
Play Console
Adicionar suporte ao formato do Wear OS
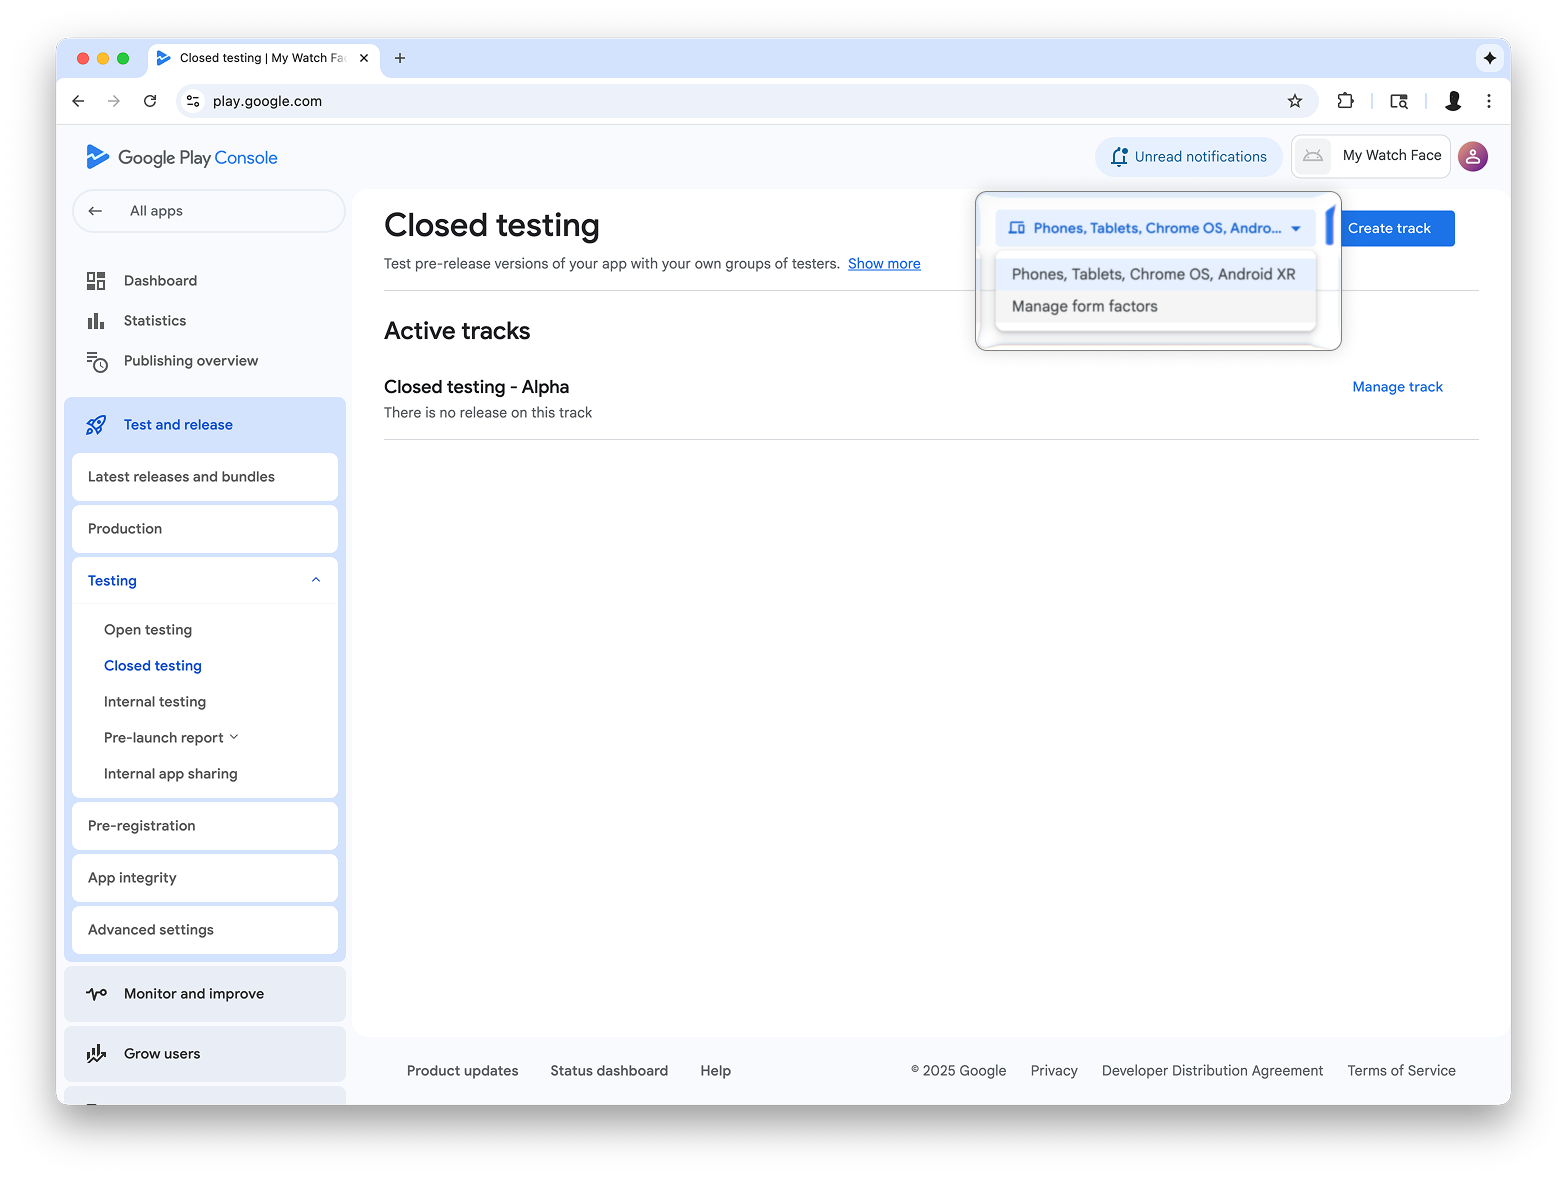
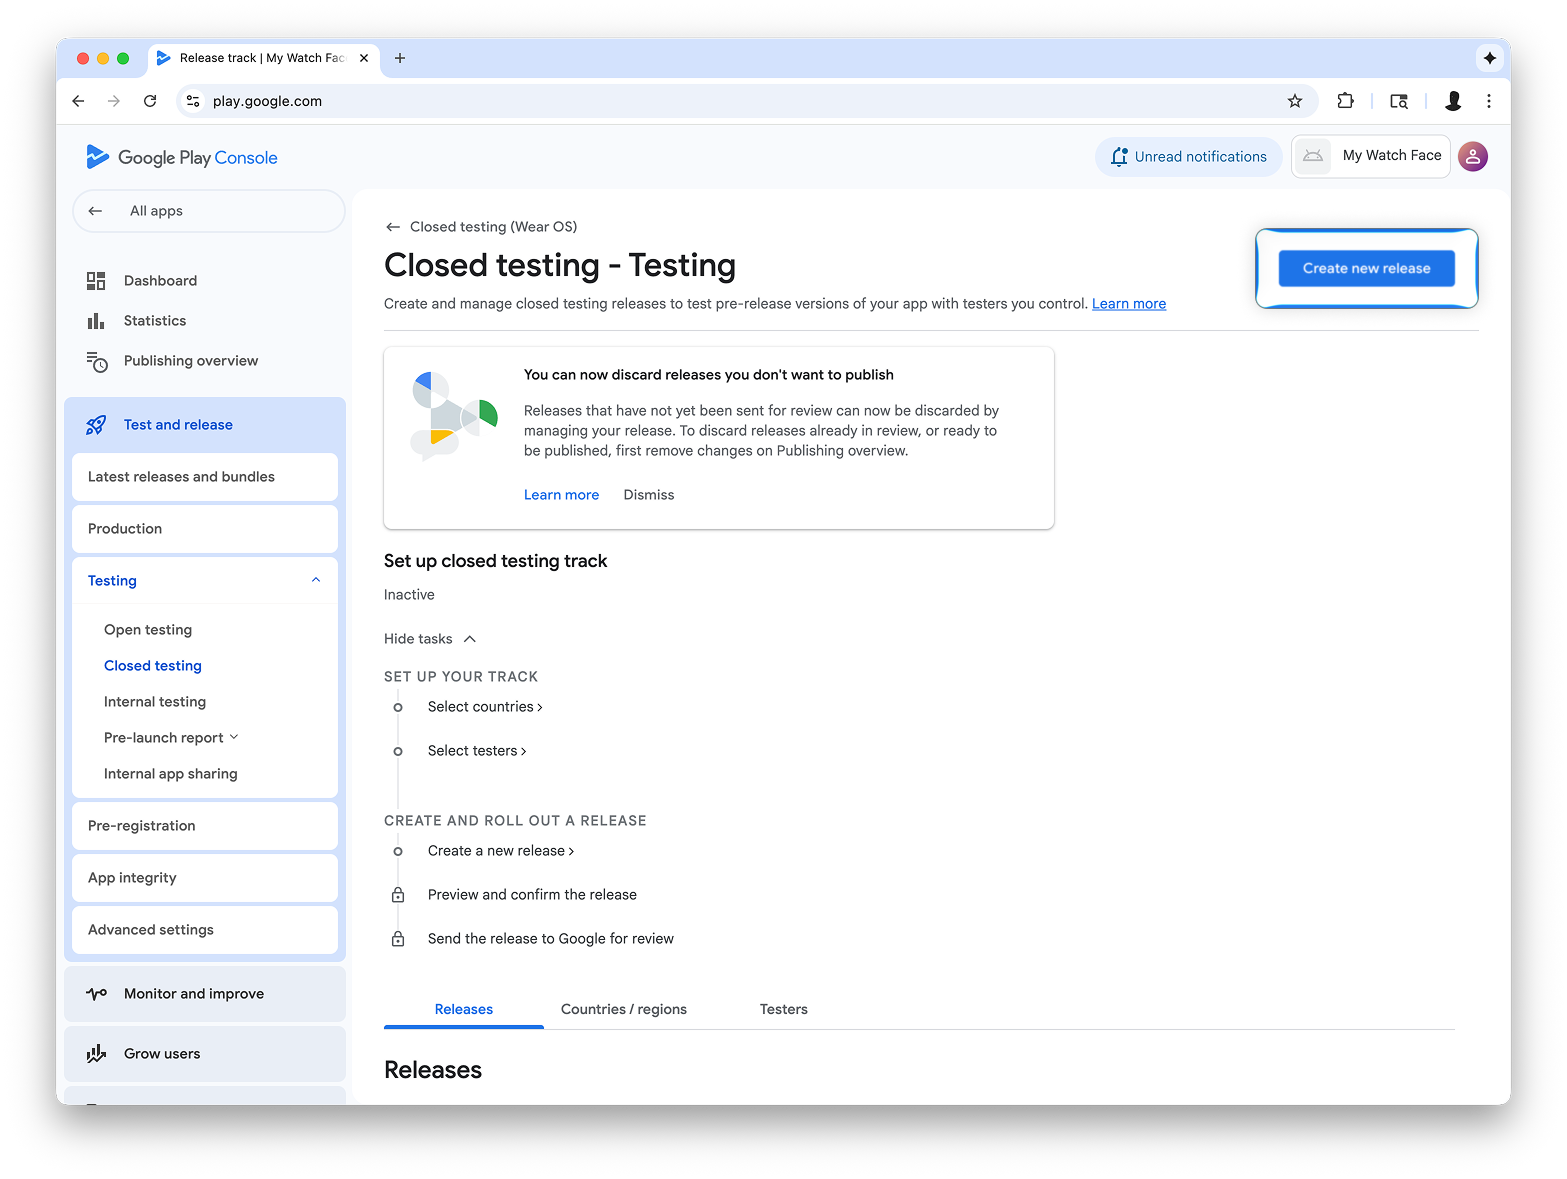
Depois de criar o app, acesse Teste e lançamento > Teste >
Teste interno:
Figura 2: a tela Testar e lançar
no Play Console
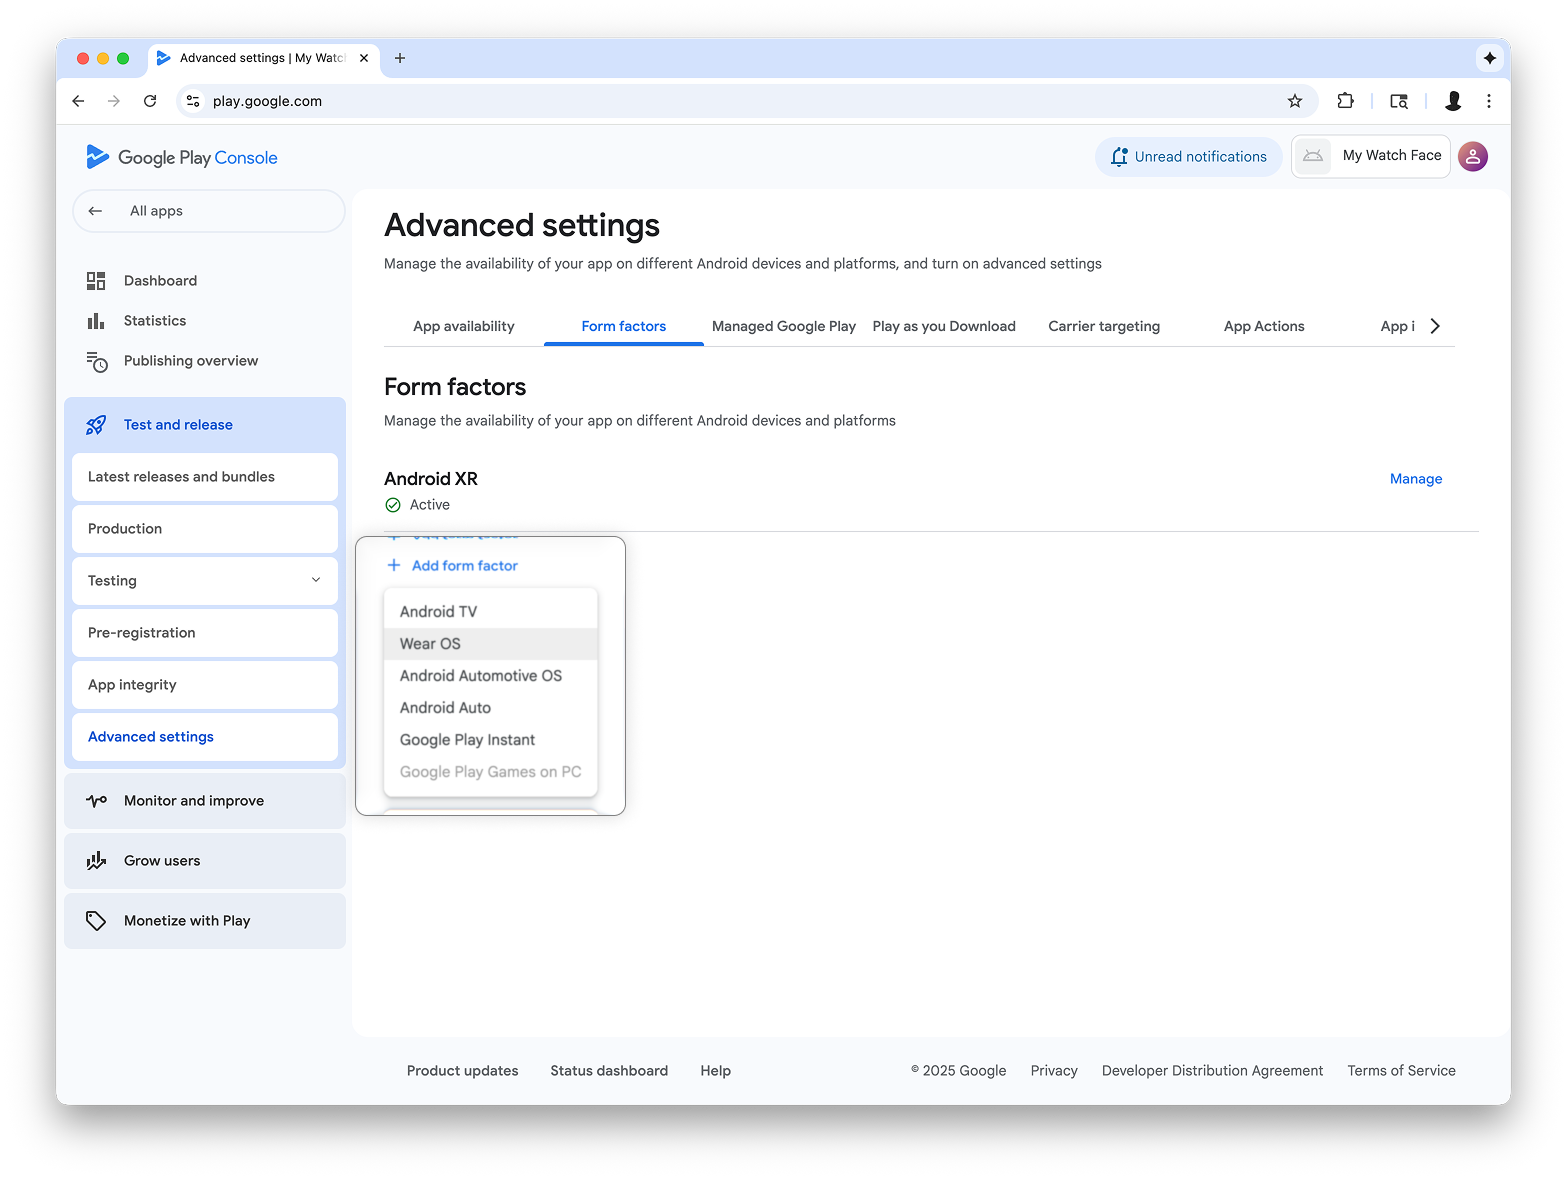
No menu suspenso no canto superior direito da página, selecione Gerenciar formatos e adicione o Wear OS como um formato para seu app:
Figura 3: selecionar a opção Gerenciar formatos (à esquerda) e adicionar o Wear OS na guia Formatos da tela Configurações avançadas (à direita)
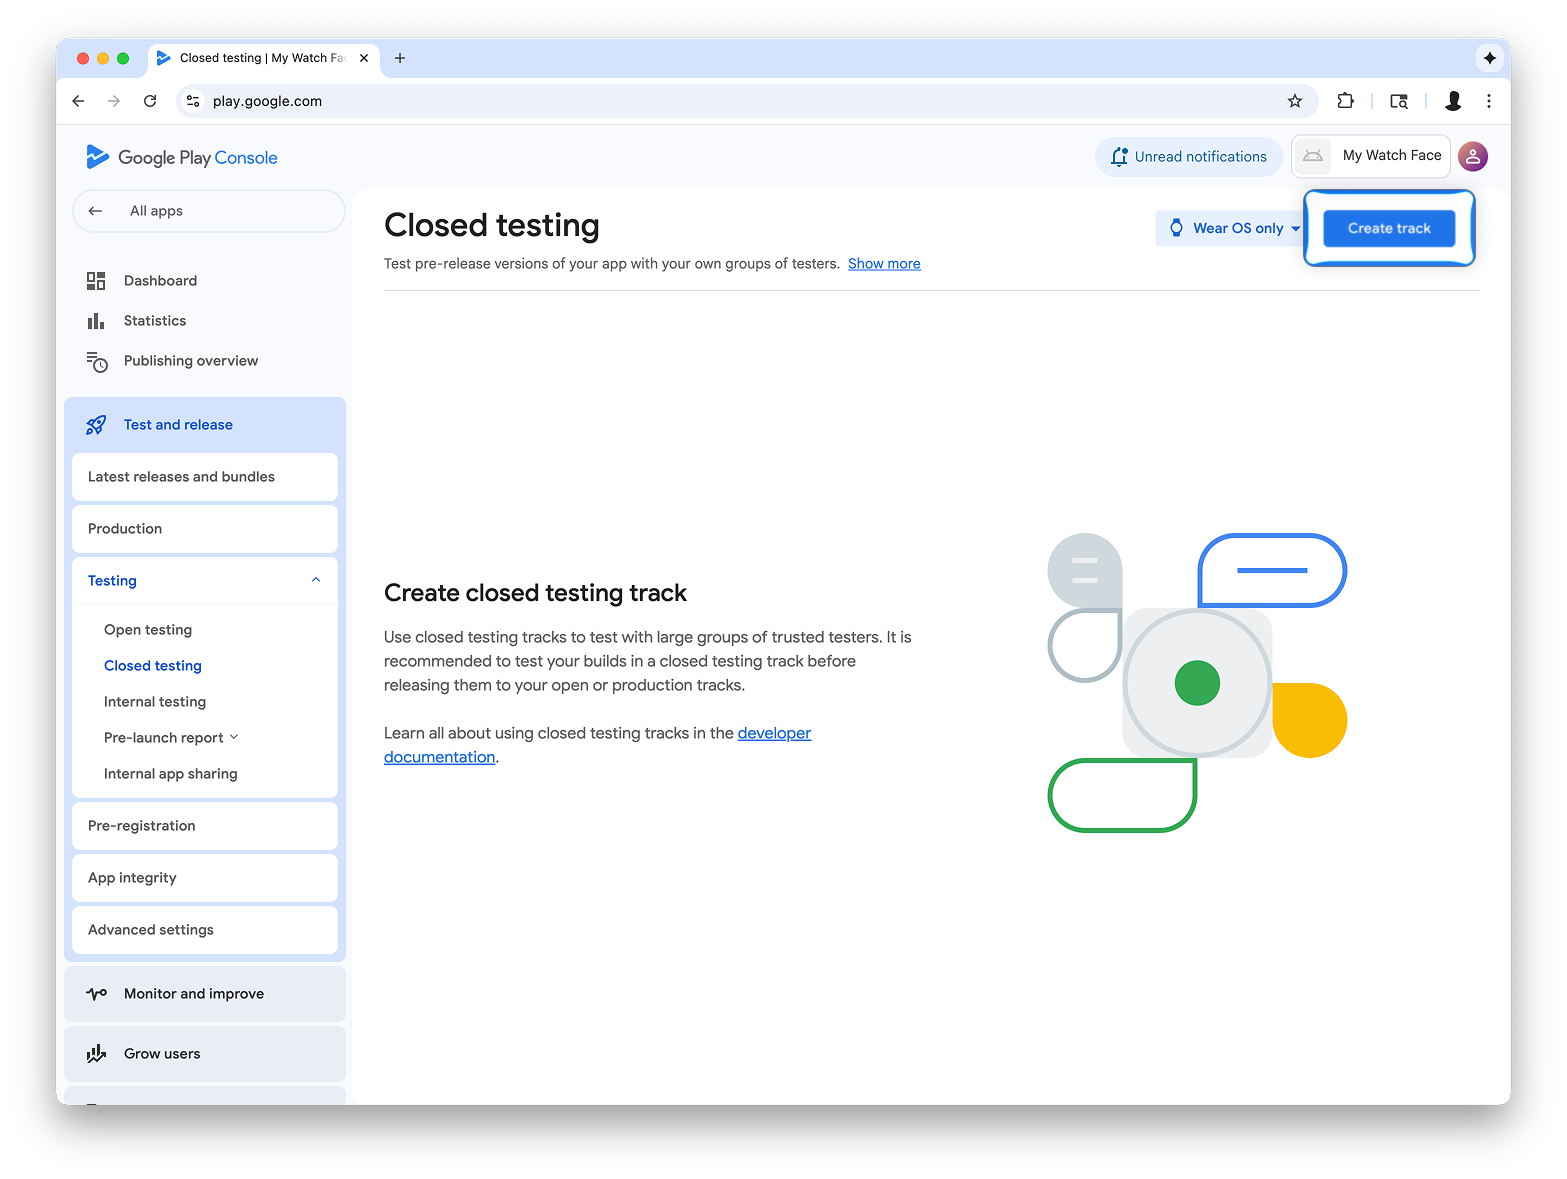
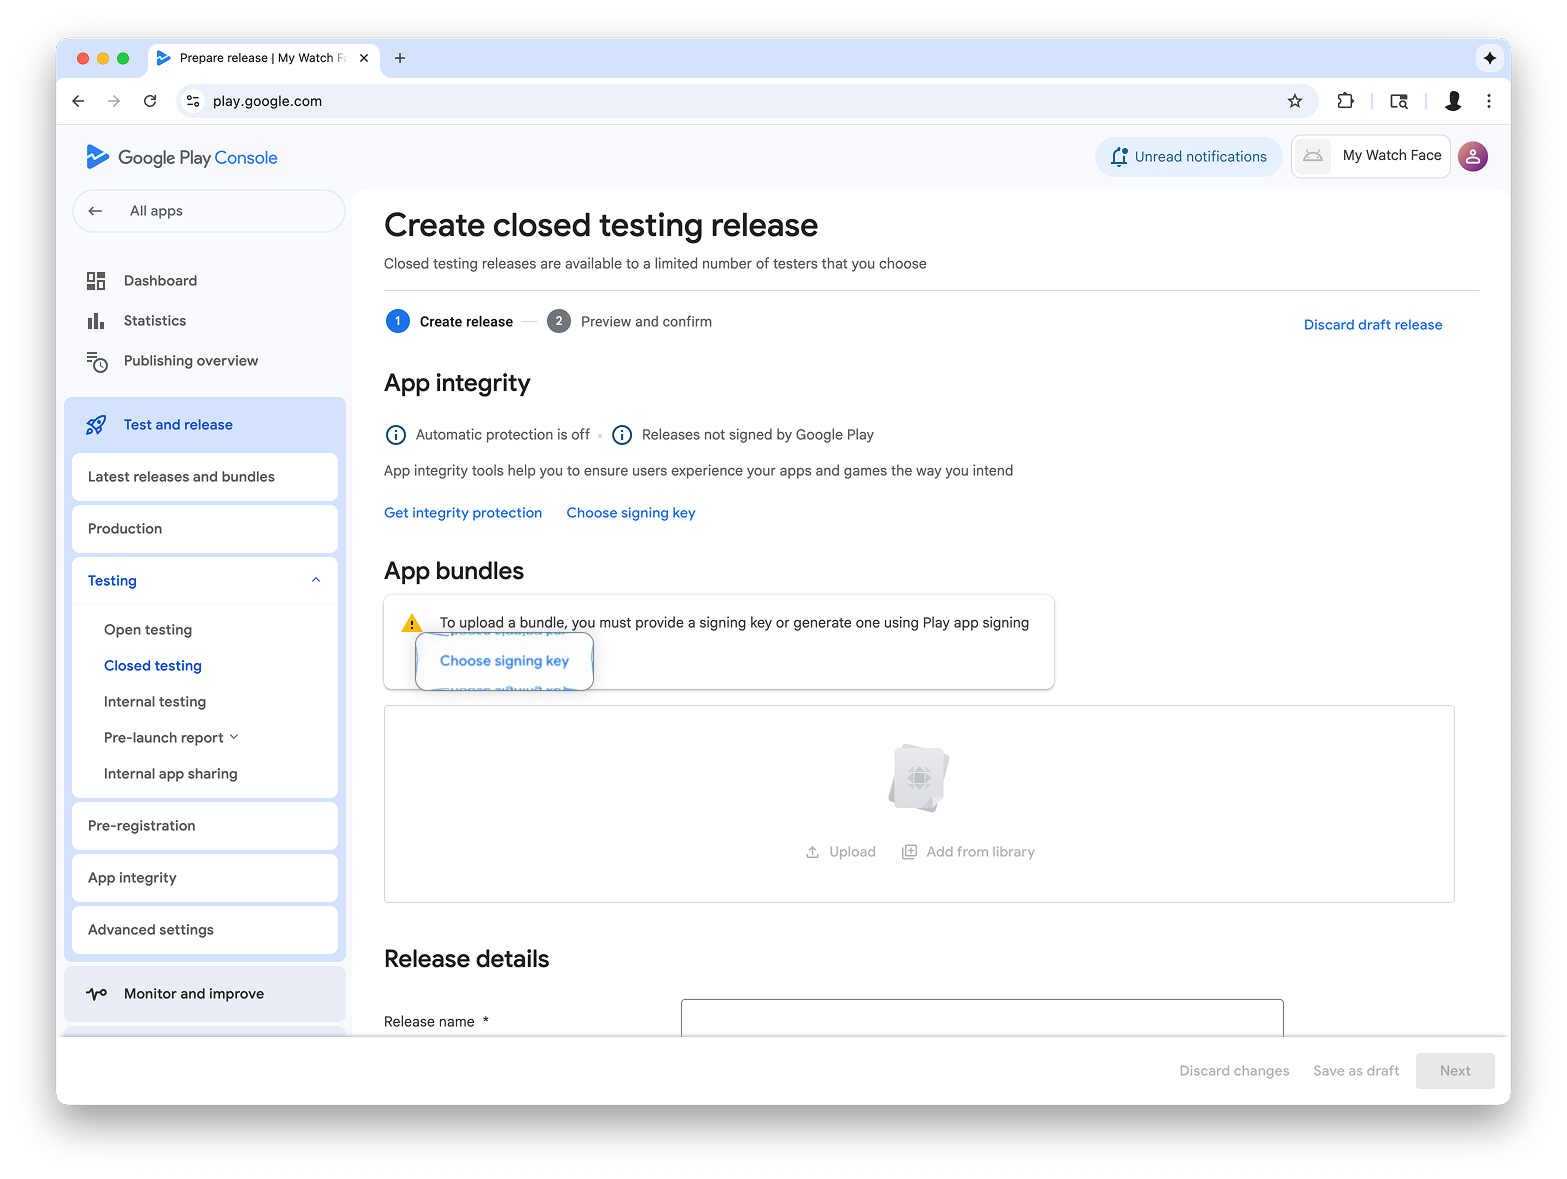
Criar uma versão na faixa de teste interno
Volte ao menu de teste interno e crie uma faixa de teste interno somente para Wear OS. Em seguida, crie um lançamento:
Figura 4: selecione o botão Criar faixa (à esquerda) e, na próxima tela, o botão Criar nova versão (à direita).
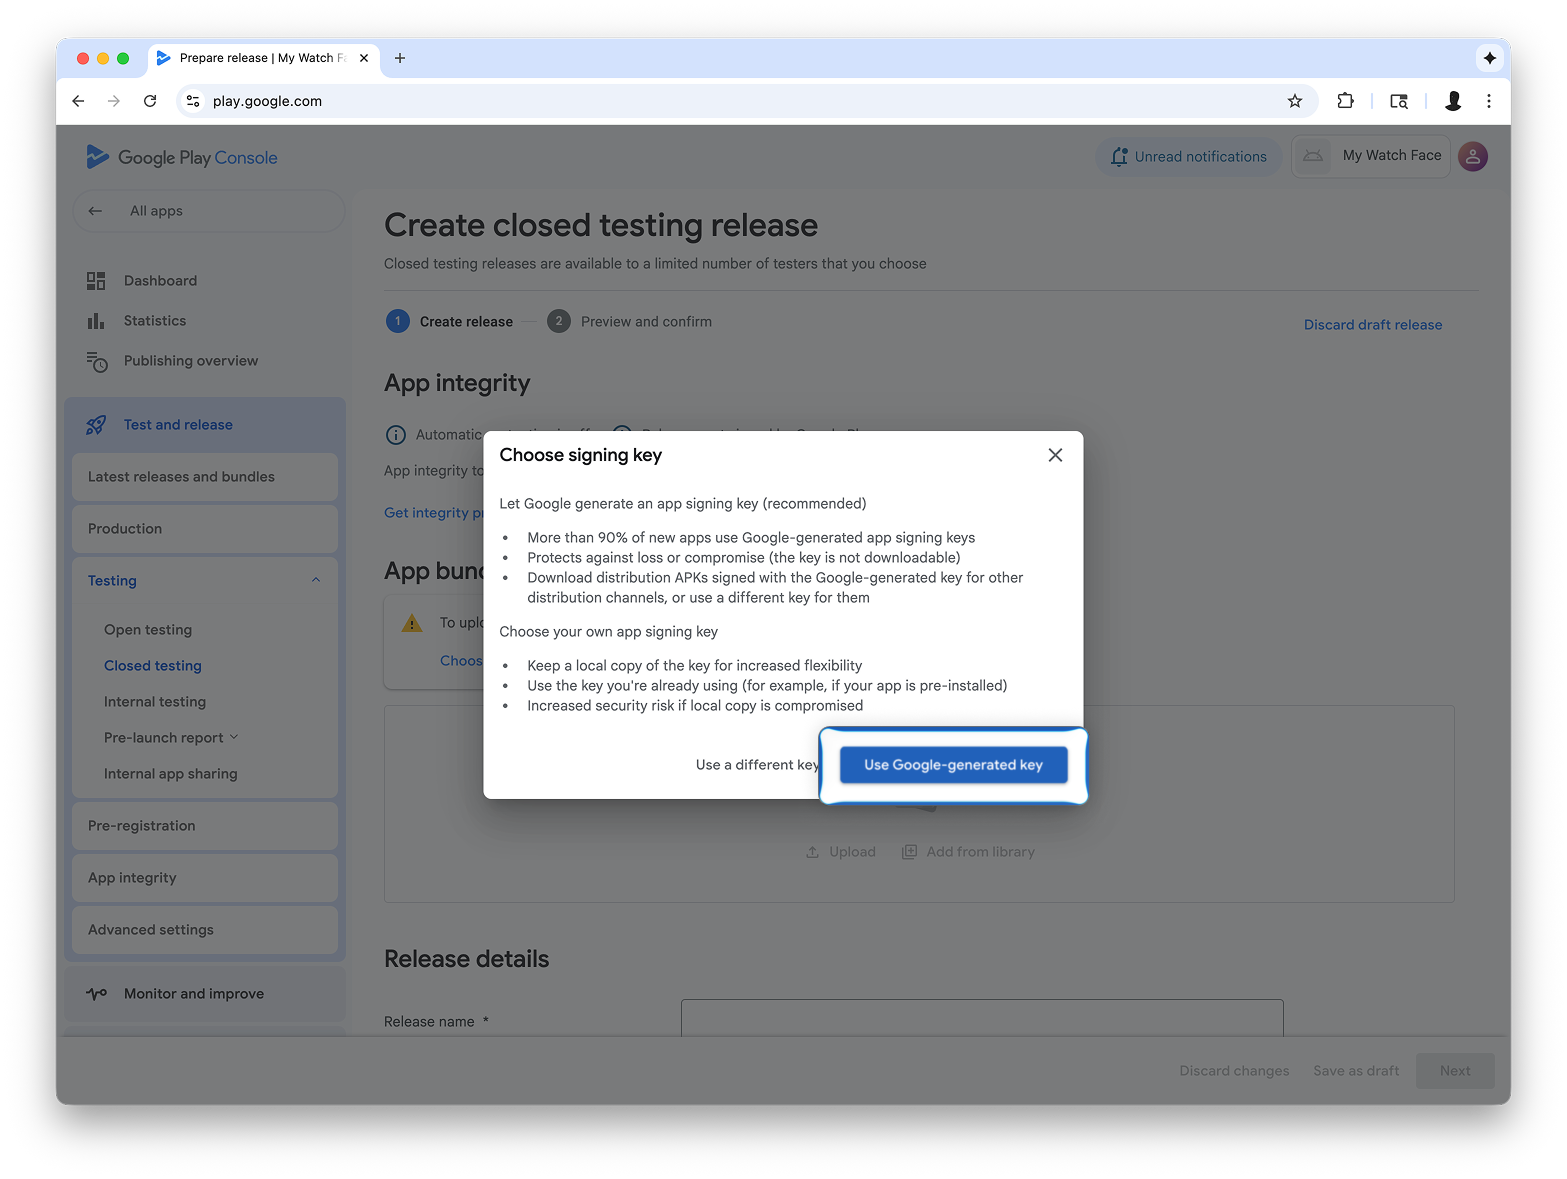
Na tela Criar versão de teste fechado, selecione Escolher chave de assinatura.
Figura 5: selecione o botão Escolher chave de
assinatura (esquerda) e, na caixa de diálogo que aparece, selecione Usar
chave gerada pelo Google (direita).
Arraste e solte o arquivo AAB do Watch Face Designer na seção Fazer upload
e continue criando a versão na faixa de teste.
O conteúdo e os exemplos de código nesta página estão sujeitos às licenças descritas na Licença de conteúdo. Java e OpenJDK são marcas registradas da Oracle e/ou suas afiliadas.
Última atualização 2026-06-18 UTC.
[[["Fácil de entender","easyToUnderstand","thumb-up"],["Meu problema foi resolvido","solvedMyProblem","thumb-up"],["Outro","otherUp","thumb-up"]],[["Não contém as informações de que eu preciso","missingTheInformationINeed","thumb-down"],["Muito complicado / etapas demais","tooComplicatedTooManySteps","thumb-down"],["Desatualizado","outOfDate","thumb-down"],["Problema na tradução","translationIssue","thumb-down"],["Problema com as amostras / o código","samplesCodeIssue","thumb-down"],["Outro","otherDown","thumb-down"]],["Última atualização 2026-06-18 UTC."],[],[]]