קל לארגן דפים בעזרת אוספים
אפשר לשמור ולסווג תוכן על סמך ההעדפות שלך.
במדריך הזה מוסבר איך לפרסם ב-Google Play את תצוגת השעון שיצרתם באמצעות Watch Face Designer.
כניסה לחשבון הפיתוח ב-Google Play
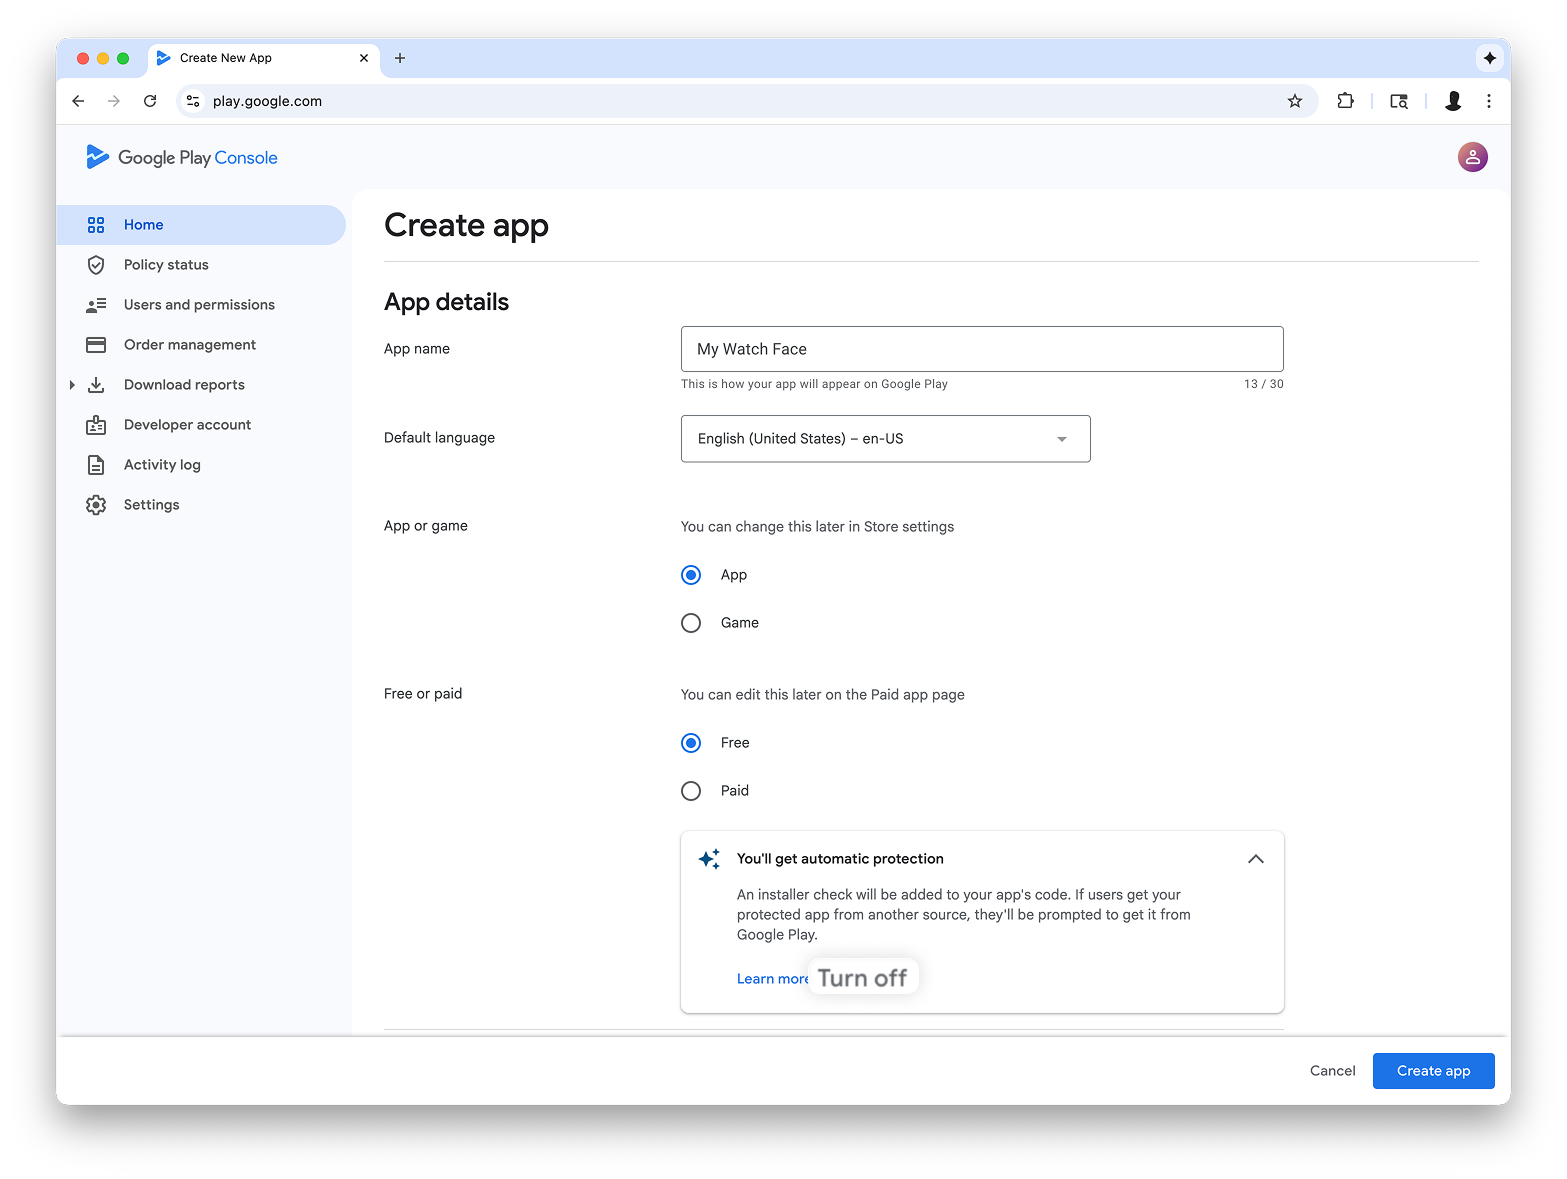
נכנסים ל-Google Play Console ולוחצים על 'יצירת אפליקציה' במרכז הבקרה.
במהלך תהליך העבודה 'יצירת אפליקציה', משביתים את ההגנה האוטומטית כשמוצגת בקשה לכך. אחרת, תהיה בעיה בחתימה על ה-bundle בהמשך. הגנה אוטומטית לא רלוונטית ללוחות שעונים כי אין בהם קוד.
איור 1: המסך יצירת אפליקציה ב-Play Console
הוספת תמיכה בגורם הצורה Wear OS
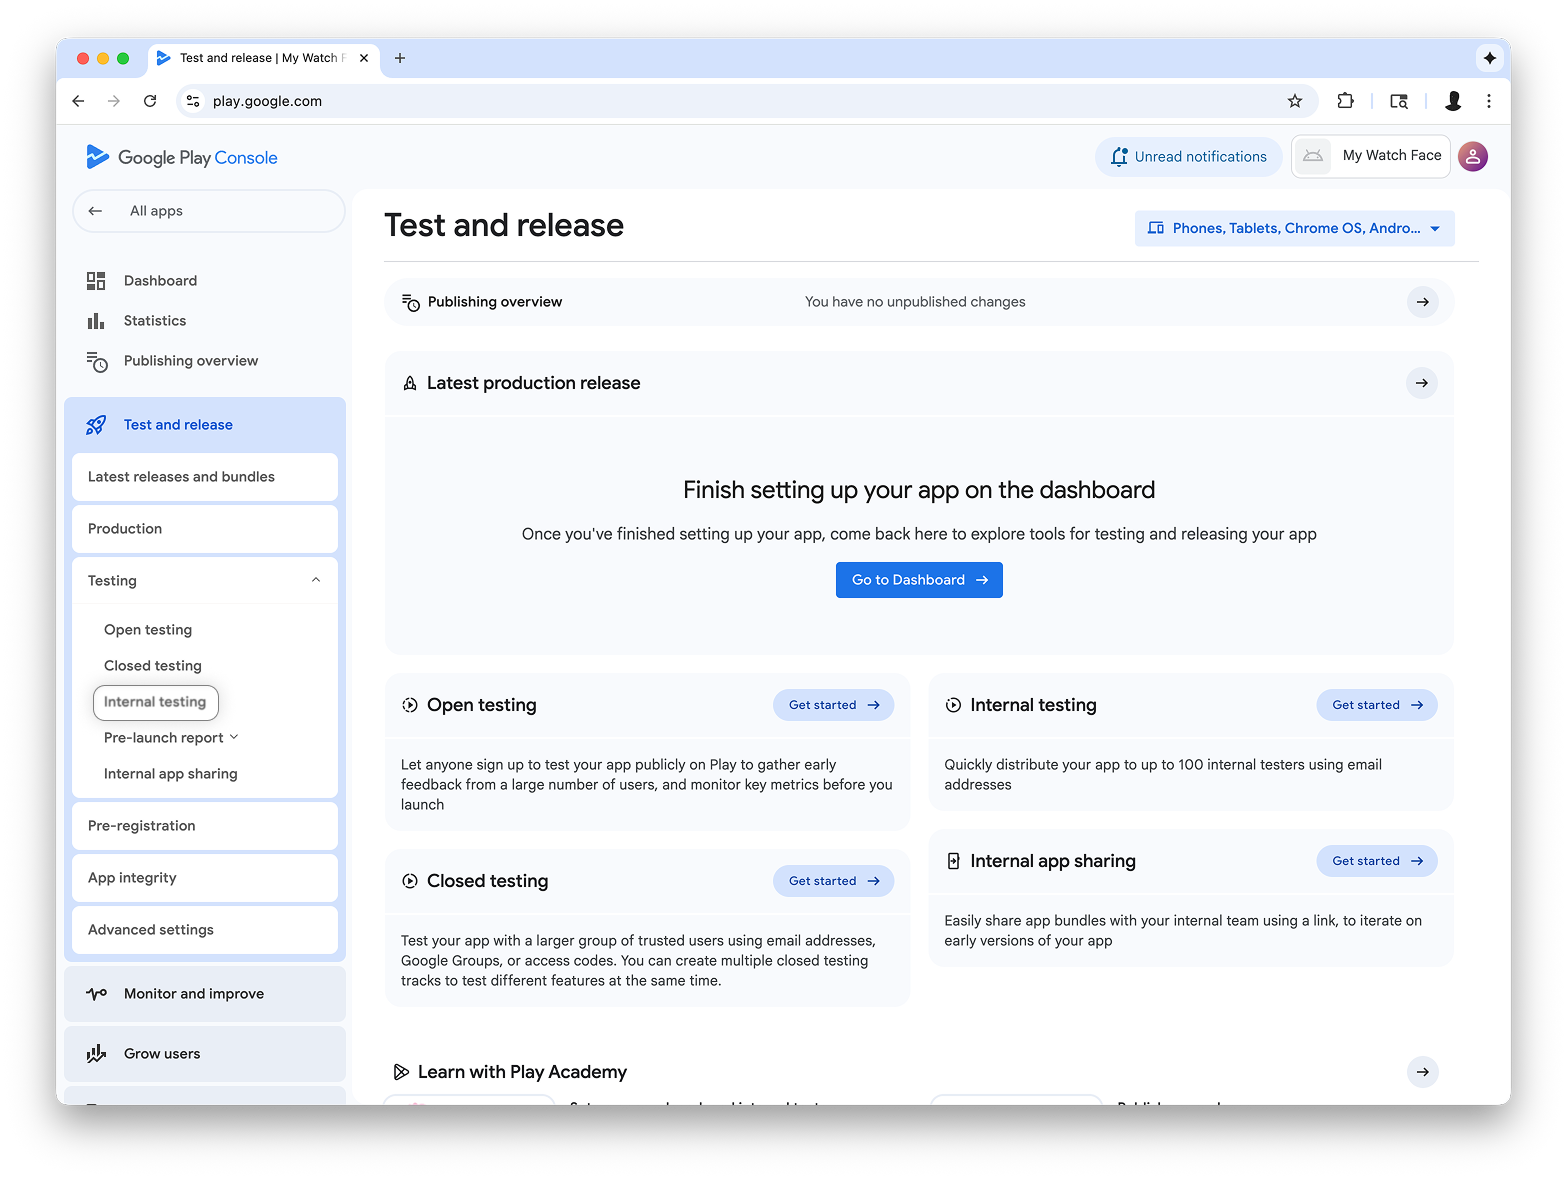
אחרי שיוצרים את האפליקציה, עוברים אל בדיקה ופרסום > בדיקה > בדיקה פנימית:
איור 2: המסך בדיקה והשקה ב-Play Console
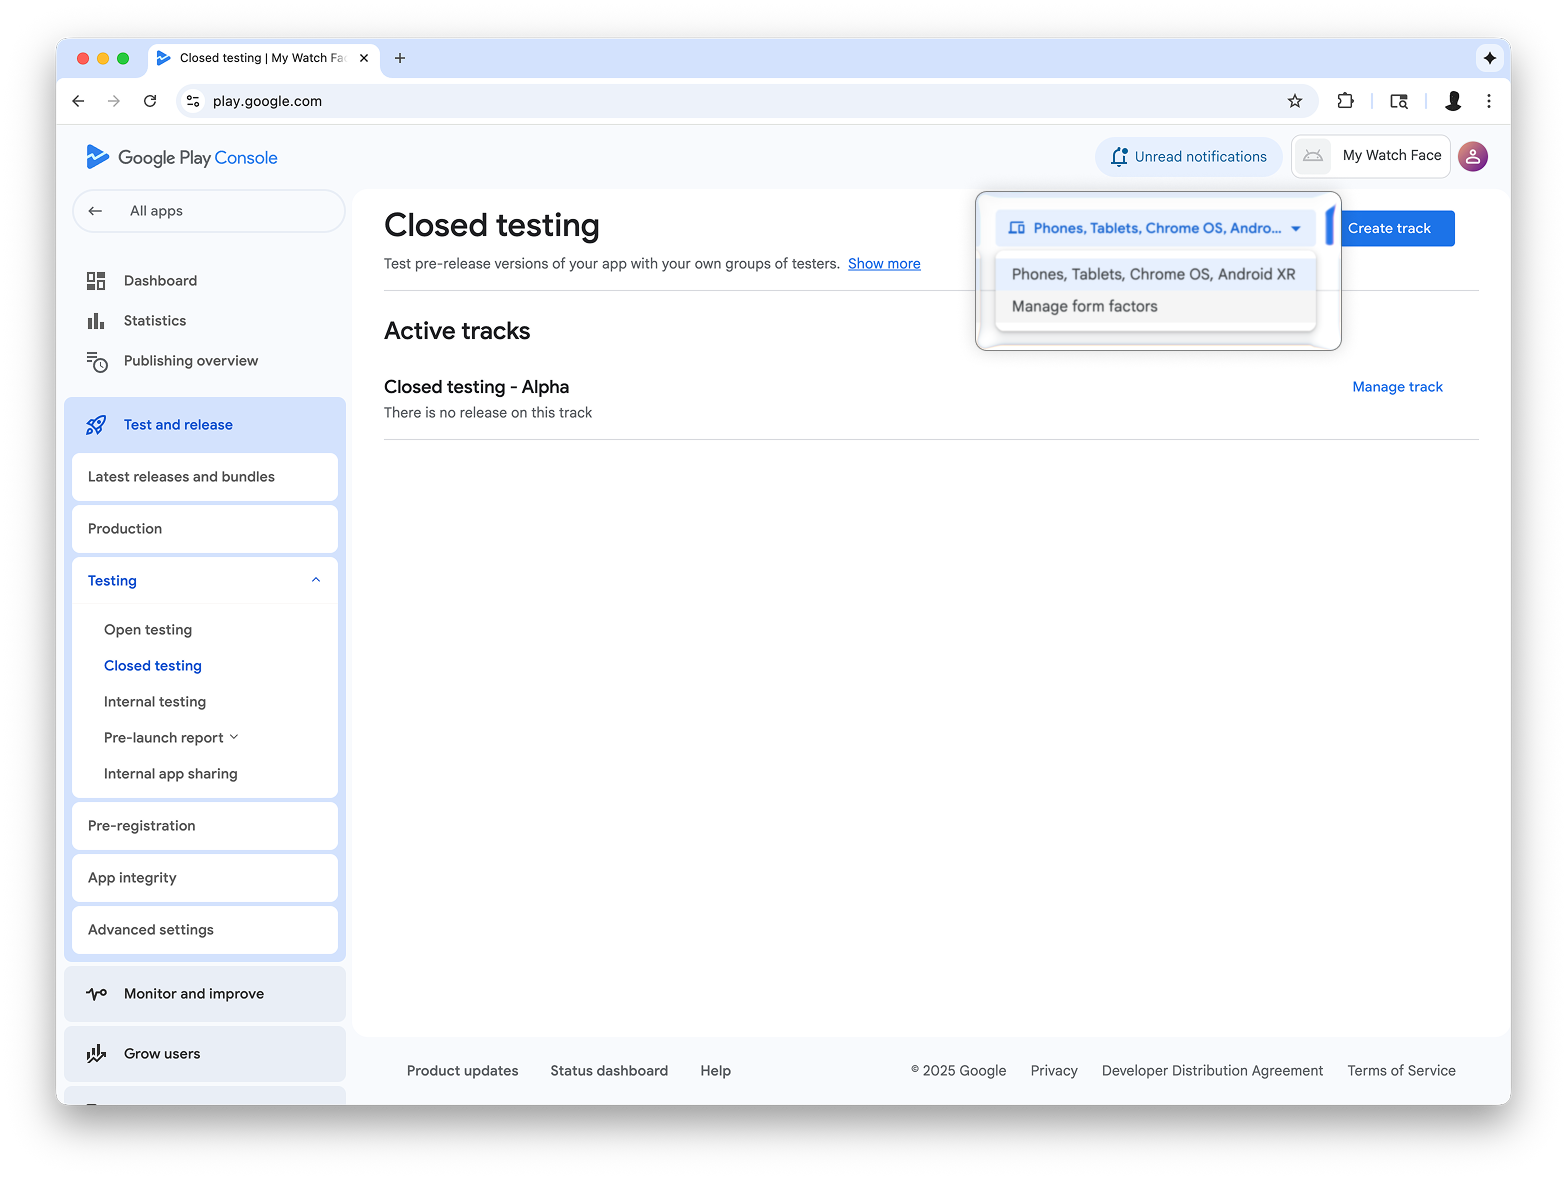
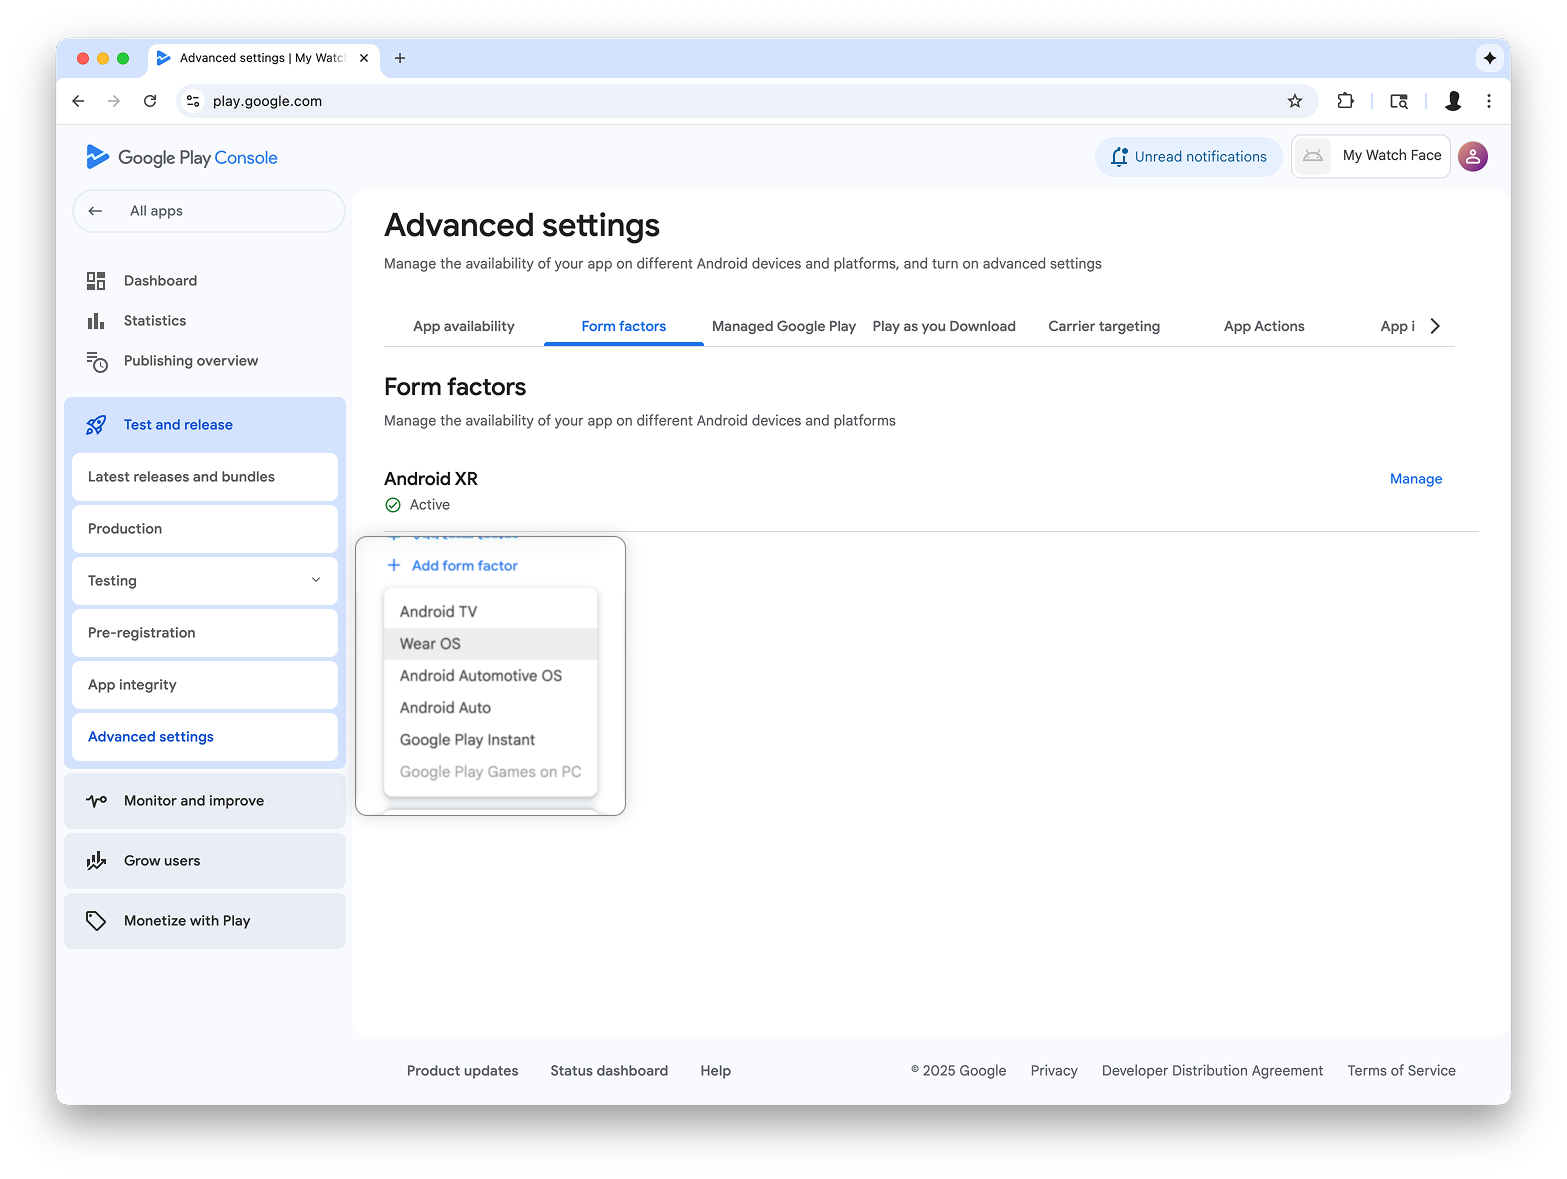
בתפריט הנפתח בפינה השמאלית העליונה של הדף, בוחרים באפשרות ניהול גורמי צורה ומוסיפים את Wear OS כגורם צורה לאפליקציה:
איור 3: בחירה באפשרות ניהול גורמי צורה (מימין), ואז הוספה של Wear OS בכרטיסייה גורמי צורה במסך הגדרות מתקדמות (משמאל)
יצירת גרסה במסלול לבדיקות פנימיות
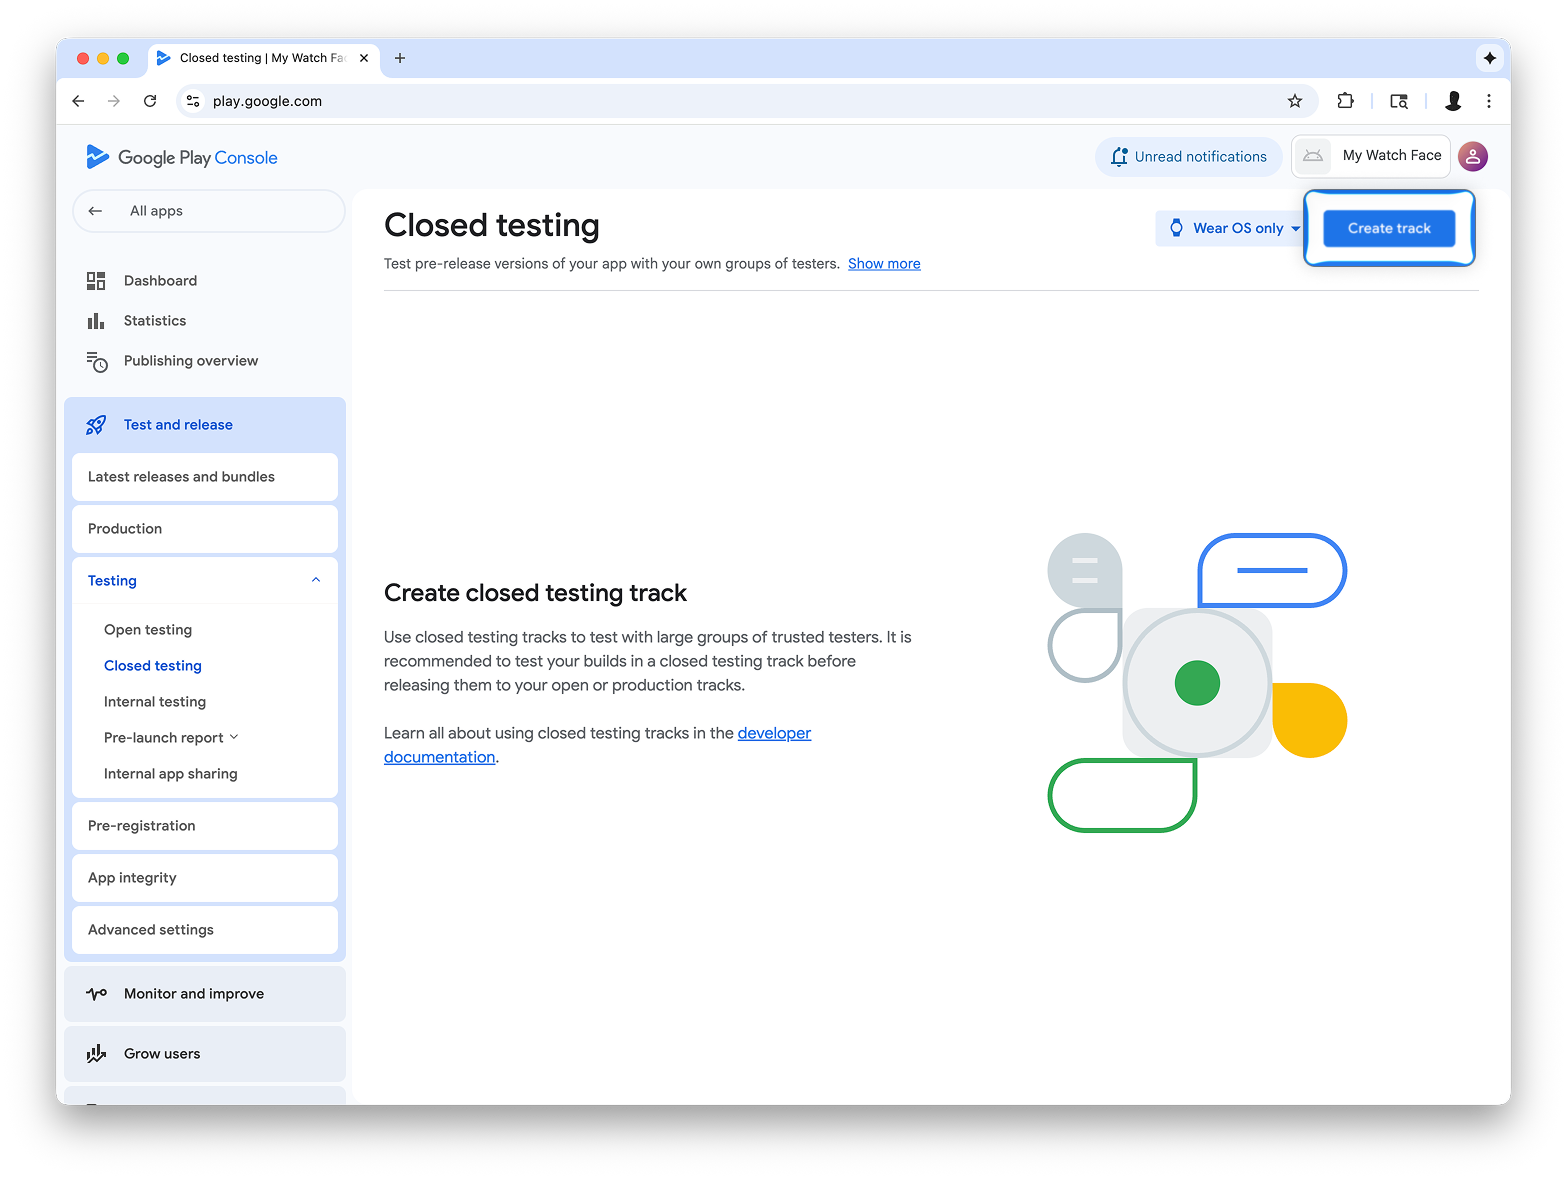
חוזרים לתפריט הבדיקות הפנימיות ויוצרים מסלול בדיקות פנימיות ל-Wear OS בלבד. לאחר מכן, יוצרים גרסה:
איור 4: לוחצים על הלחצן יצירת קהל יעד מצומצם (מימין), ואז במסך הבא לוחצים על הלחצן יצירת גרסה חדשה (משמאל).
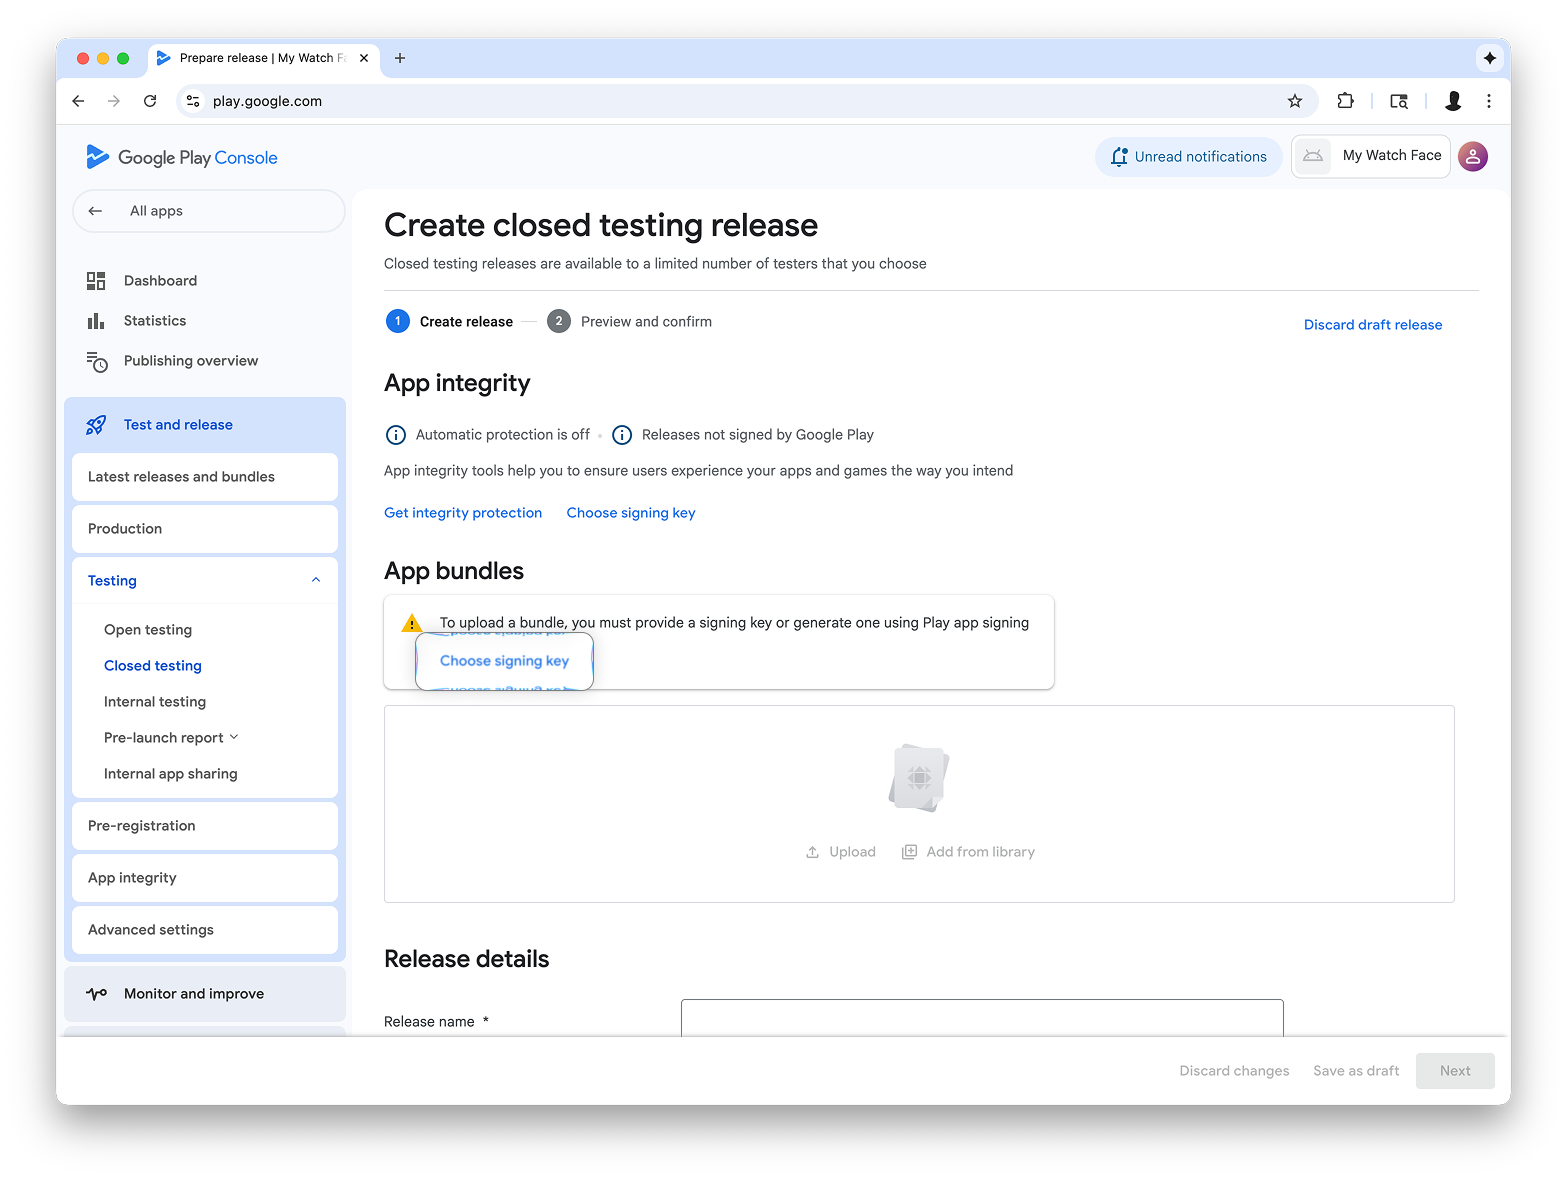
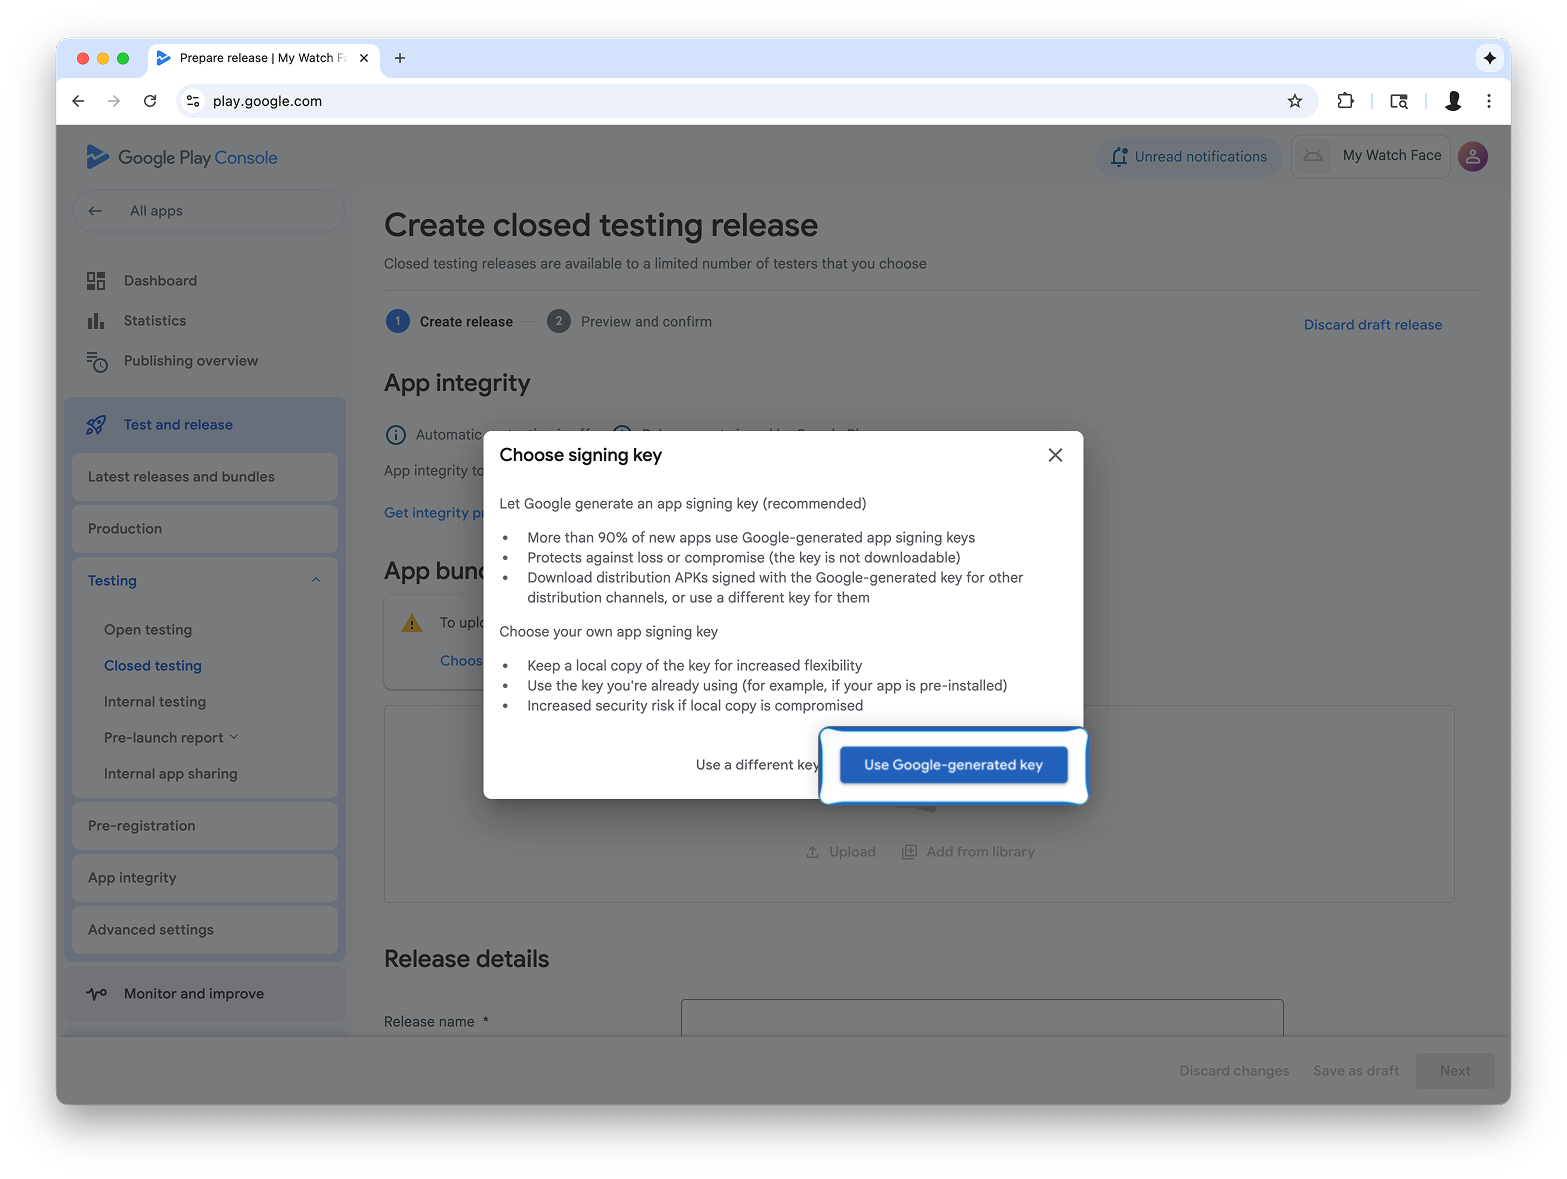
במסך יצירת גרסה לבדיקות סגורות, בוחרים באפשרות בחירה של חתימת אפליקציה.
איור 5: לוחצים על הלחצן Choose signing key (מימין), ואז בתיבת הדו-שיח שמופיעה בוחרים באפשרות Use Google-generated key (משמאל).
גוררים את קובץ ה-AAB מ-Watch Face Designer אל הקטע העלאה וממשיכים ליצירת הגרסה במסלול הבדיקה.
דוגמאות התוכן והקוד שבדף הזה כפופות לרישיונות המפורטים בקטע רישיון לתוכן. Java ו-OpenJDK הם סימנים מסחריים או סימנים מסחריים רשומים של חברת Oracle ו/או של השותפים העצמאיים שלה.
עדכון אחרון: 2025-08-27 (שעון UTC).
[[["התוכן קל להבנה","easyToUnderstand","thumb-up"],["התוכן עזר לי לפתור בעיה","solvedMyProblem","thumb-up"],["סיבה אחרת","otherUp","thumb-up"]],[["חסרים לי מידע או פרטים","missingTheInformationINeed","thumb-down"],["התוכן מורכב מדי או עם יותר מדי שלבים","tooComplicatedTooManySteps","thumb-down"],["התוכן לא עדכני","outOfDate","thumb-down"],["בעיה בתרגום","translationIssue","thumb-down"],["בעיה בדוגמאות/בקוד","samplesCodeIssue","thumb-down"],["סיבה אחרת","otherDown","thumb-down"]],["עדכון אחרון: 2025-08-27 (שעון UTC)."],[],[],null,["This guide explains how to publish your watch face, created using\nWatch Face Designer, to Google Play.\n| **Note:** Before you begin, [export your watch face using the Google Play option](/training/wearables/watch-face-designer/export#google-play) so that you have an Android App Bundle (AAB) file ready.\n\nSign into your developer account in Google Play\n\nSign in to Google Play Console and press 'Create App' on the dashboard.\n| **Note:** If you don't have a Google Play Console developer account, [follow the\n| official guide to create one](https://support.google.com/googleplay/android-developer/answer/6112435). This includes paying a registration fee.\n\nDuring the \"create app,\" workflow, **turn off automatic protection when\nprompted**; otherwise, you'll have issues signing the bundle later. Automatic\nprotection isn't relevant to watch faces because they don't have any code.\n**Figure 1** : The **Create app** screen in the Play Console\n\nAdd support for the Wear OS form factor\n\nAfter you've created your app, navigate to **Test and release \\\u003e Testing \\\u003e\nInternal testing**:\n**Figure 2** : The **Test and release** screen in the Play Console\n\nIn the drop-down in the top right of the page, select **Manage form factors**,\nand add Wear OS as a form factor for your app:\n**Figure 3** : Selecting the **Manage form\nfactors** option (left), then adding Wear OS on the **Form factors** tab on the **Advanced settings** screen (right)\n\nCreate a release on the internal testing track\n\nReturn to the internal testing menu and create a Wear OS-only internal testing\ntrack. Then, create a release:\n**Figure 4** : Select the **Create track** button (left), then on the next screen, select the **Create new release** button (right).\n\nOn the **Create closed testing release** screen, select **Choose signing key**.\n| **Caution:** In the **Choose signing key** dialog that appears, select **Use Google-generated key**:\n**Figure 5** : Select the **Choose signing\nkey** button (left), then in the dialog that appears, select **Use\nGoogle-generated key** (right).\n\nDrag-and-drop the AAB file from Watch Face Designer into the **Upload** section,\nand proceed with creating the release on the testing track.\n\nNext steps\n\nFrom here, follow official Google Play documentation on [trying out apps in the\ntesting track](https://support.google.com/googleplay/answer/7003180) and [promoting releases to production](https://support.google.com/googleplay/android-developer/answer/9859348), which makes your\napp visible to everyone on Google Play."]]