
يوضّح هذا المستند كيفية بدء استخدام مكتبة رسومات Vulkan عن طريق تنزيل نموذج تطبيق Khronos© وتجميعه وتشغيله.
المتطلّبات الأساسية
قبل البدء، تأكد من إعداد الأجهزة وإصدار النظام الأساسي المناسب. يجب استخدام جهاز أو محاكي يتوافق مع Vulkan تعمل بنظام التشغيل Android 7.0 (Nougat)، المستوى 24 من واجهة برمجة التطبيقات أو الإصدارات الأحدث
يمكنك التأكّد من إصدار Android بالانتقال إلى قائمة الإعدادات واختيار لمحة عن الهاتف > إصدار Android: بمجرد التأكد من أن إعداد الأجهزة وإصدار النظام الأساسي المناسب، يمكنك تنزيل البرامج اللازمة.
تنزيل
قبل البدء، يجب تنزيل عدة أدوات وبرامج أخرى. لاحظ أنه في مضيف Windows، يُوصى بتجنب التسلسل الهرمي لمسار الملفات العميق للأدوات ورمز المصدر؛ وذلك للتغلب على حدود مسار الملفات في بعض إصدارات نظام التشغيل Windows.
- إذا لم يكن لديك "استوديو Android"، يمكنك تنزيله. ويشمل ذلك أحدث حزمة تطوير برامج (SDK) لنظام التشغيل Android.
- تثبيت NDK وCMake من داخل "استوديو Android" أو تنزيلها وتثبيتها بشكل منفصل
- إنشاء نموذج مرحبًا JNI وتشغيله لضمان عمل "استوديو Android" بشكل صحيح
- تثبيت python3 والمكونات الأخرى المدرجة في build.md للنظام الأساسي المضيف.
استيراد
في هذا القسم، يمكنك تنزيل نموذج مستودع Acronos© Vulkan©، وإنشاء إصدار Android Gradle ثم افتحه باستخدام بيئة تطوير البرامج (IDE) الخاصة بـ "استوديو Android".
- اضبط متغيّرات البيئة التالية:
export ANDROID_HOME=/path/to/sdk-directory export ANDROID_NDK_HOME=$ANDROID_HOME/ndk/{your-ndk-version-dir} - إضافة أداة CMake إلى مسار $PATH المستخدَم لإنشاء نصوص برمجية لإصدار Android:
export PATH=$PATH:$ANDROID_HOME/cmake/{your-cmake-version}/bin - افتح نافذة طرفية ونزِّل رمز المصدر في دليل التطوير:
cd dev-directory
git clone --recursive https://github.com/KhronosGroup/Vulkan-Samples.git
- اتبع هذه التعليمات (من Build.md)
لإنشاء نموذج مشروع Android:
cd Vulkan-Samples
./scripts/generate.py android
- افتح "استوديو Android". اختر ملف > فتح واختيار
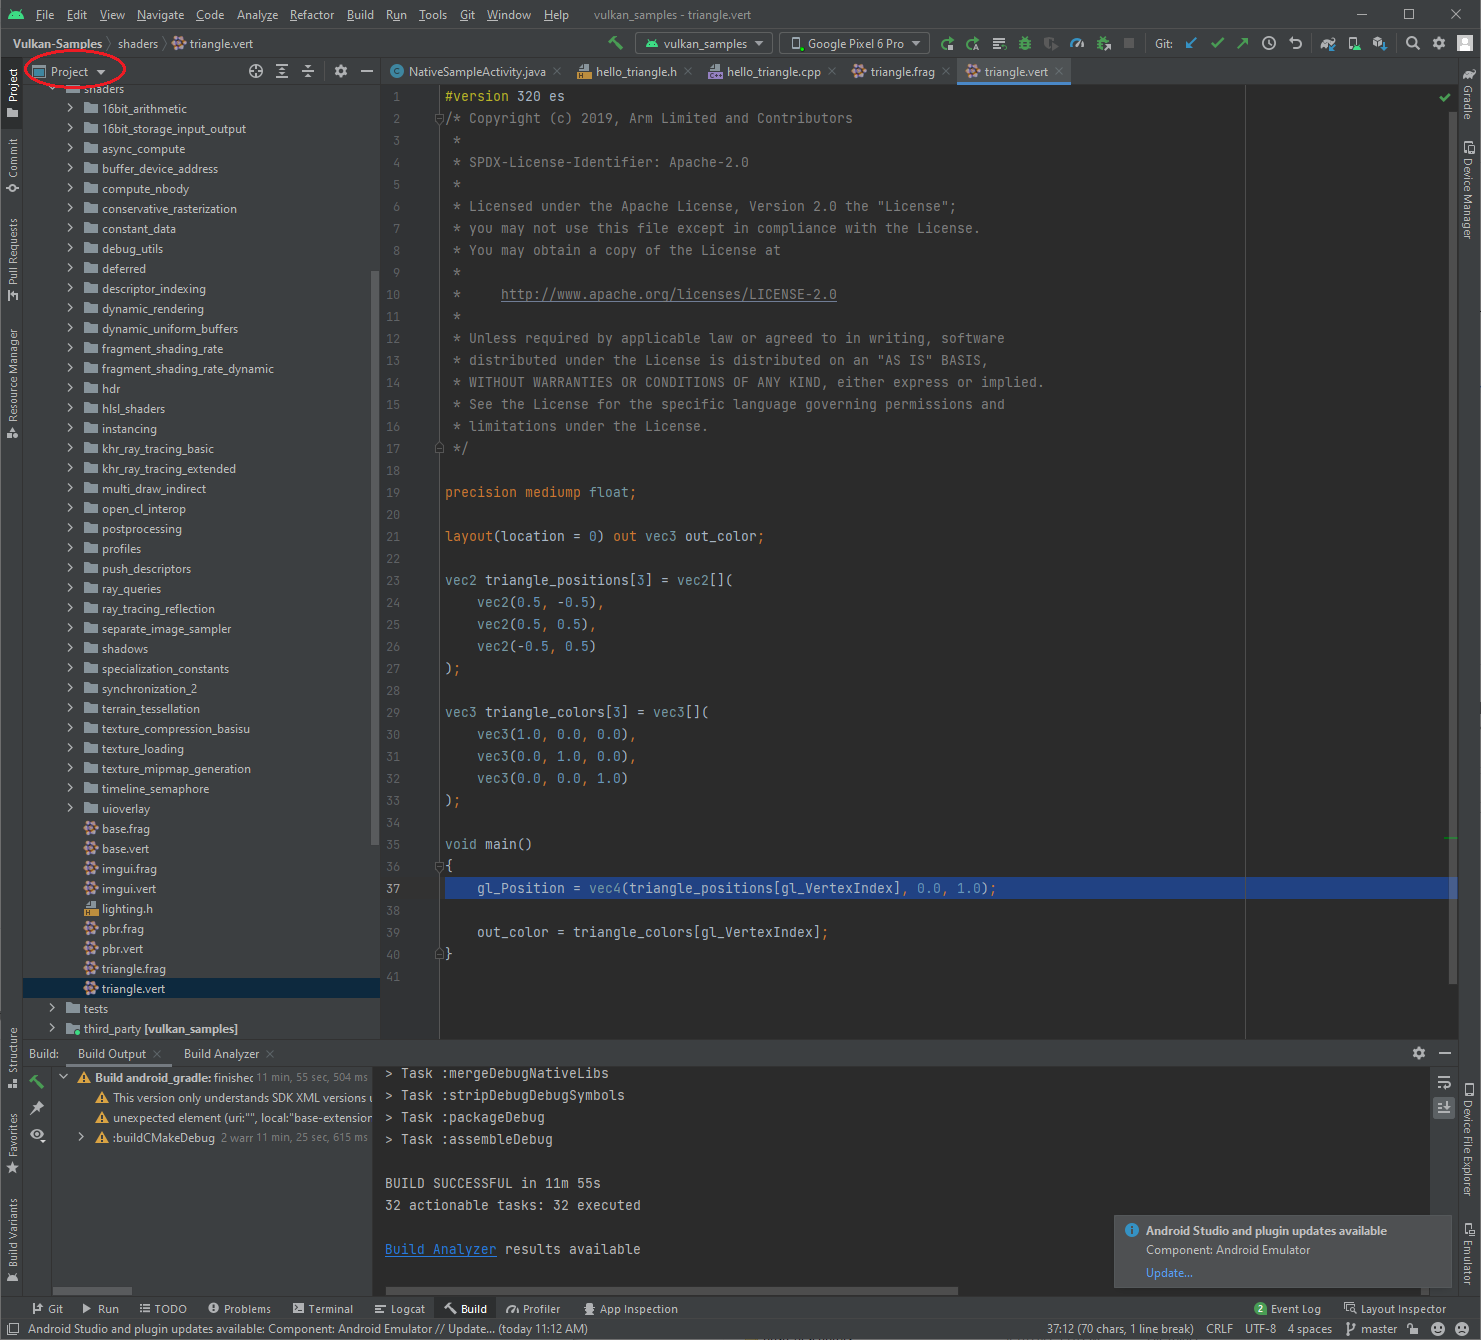
Vulkan-Samples/build/android_gradle/build.gradleمن المفترض أن يظهر تطبيق مشابه لما يلي بعد تحميل "استوديو Android" المشروع: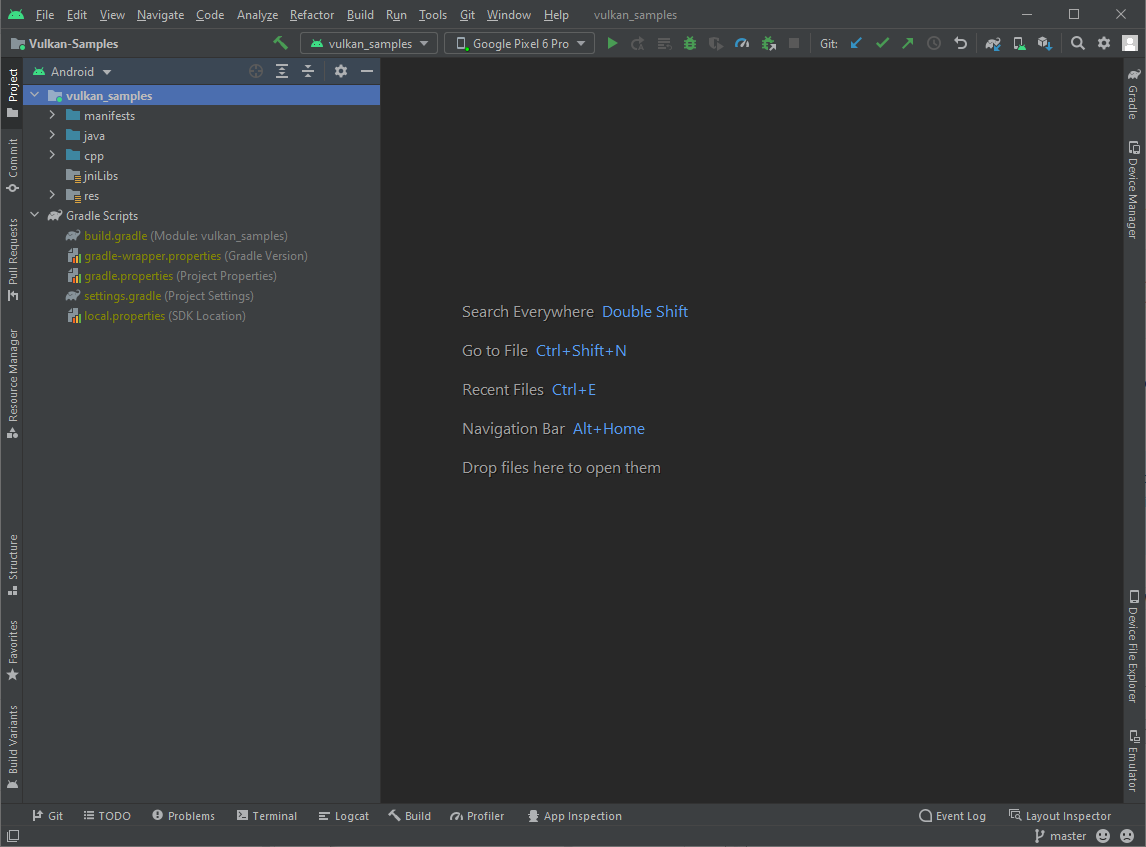
الشكل 1. نموذج المشروع في "استوديو Android"
التجميع
تم تنظيم جميع النماذج في هذا المستودع في مشروع Android واحد. لتجميع مشروعك، فيمكنك تنفيذ أي مما يلي:
- لتجميع المصادر فقط، استخدِم القائمة إنشاء > إنشاء المشروع، أو اكتب مفتاح الاختصار Ctrl-F9.
- لإنشاء نموذج حزمة APK، اختَر القائمة إنشاء >. إنشاء حِزم/حِزم APK > إنشاء حِزم APK:
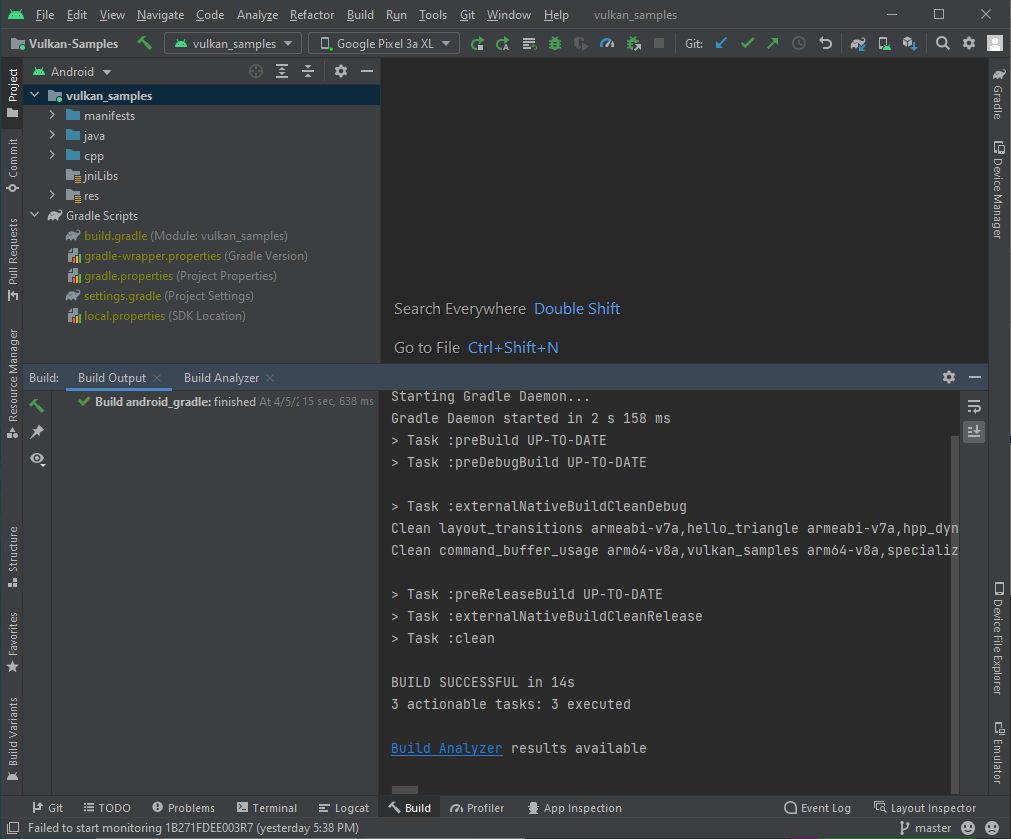
من المفترض أن تظهر لك رسالة الإصدار بنجاح ضمن نافذة إنشاء في "استوديو Android". في حال ظهور أخطاء، عليك إصلاحها ثم إعادة تجميعها.
تنفيذ
قبل تنفيذ نموذج المشروع، تأكَّد من أنّ "استوديو Android" يتعرّف على جهاز Vulkan أو محاكي Android المتصل. من المفترض أن ترى شيئًا مثل التالي:

لتشغيل المشروع، قم بما يلي:
- استخدم القائمة تشغيل > شغِّل vulkan_ sample أو انقر على زر التشغيل.
 في شريط الأدوات، وانتظر
العيّنة ليتم تثبيتها وبدء تشغيلها على جهازك المتصل.
في شريط الأدوات، وانتظر
العيّنة ليتم تثبيتها وبدء تشغيلها على جهازك المتصل. - على جهاز Android المرتبط، عليك الموافقة على طلبات الوصول المطلوبة.
- تفعيل السماح بالوصول لإدارة كل الملفات، ثم النقر على السهم زر الرجوع لعرض نموذج شاشة البدء الرئيسية.
- السماح بالوصول إلى القرص:
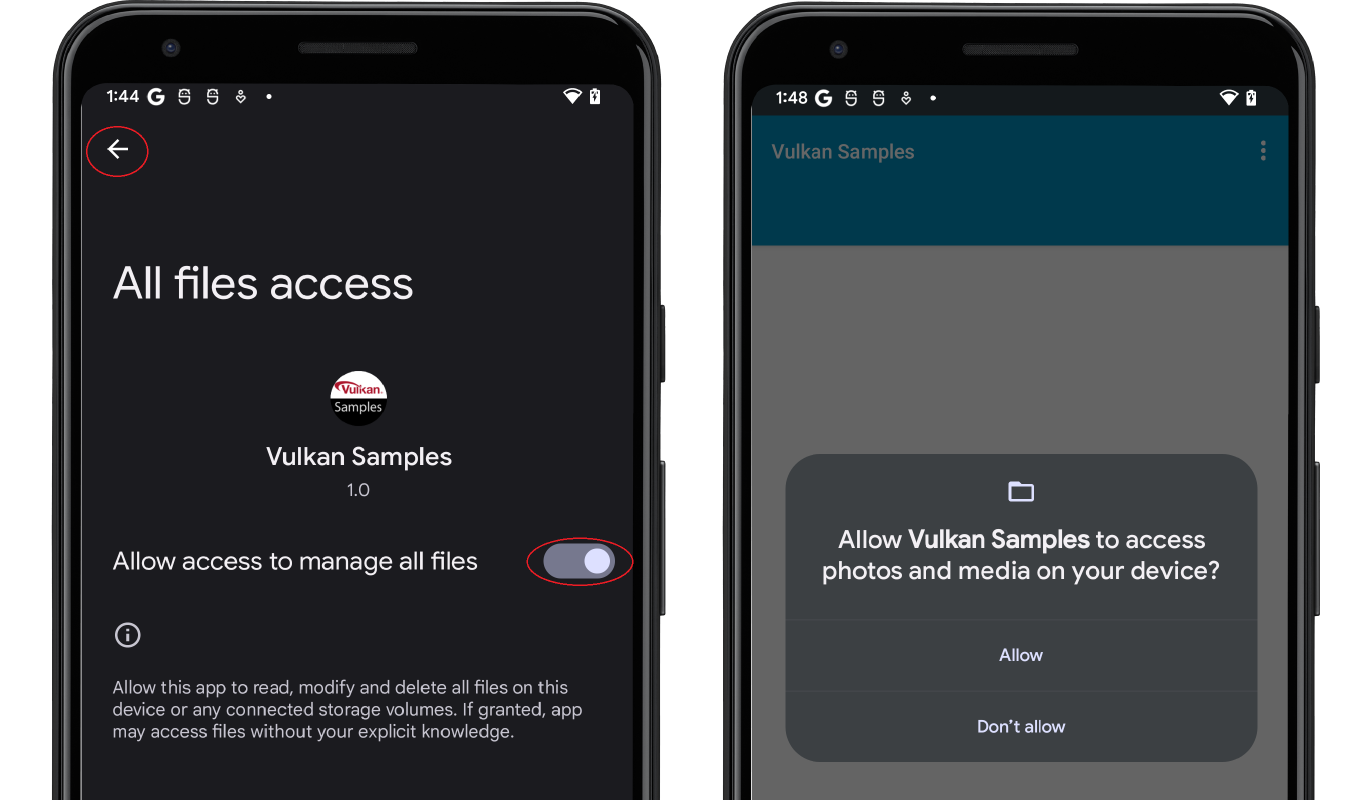
الشكل 4. فعِّل الوصول إلى القرص.
- يُفترض أن يظهر لك نموذج شاشة القائمة الرئيسية، على غرار ما يلي:
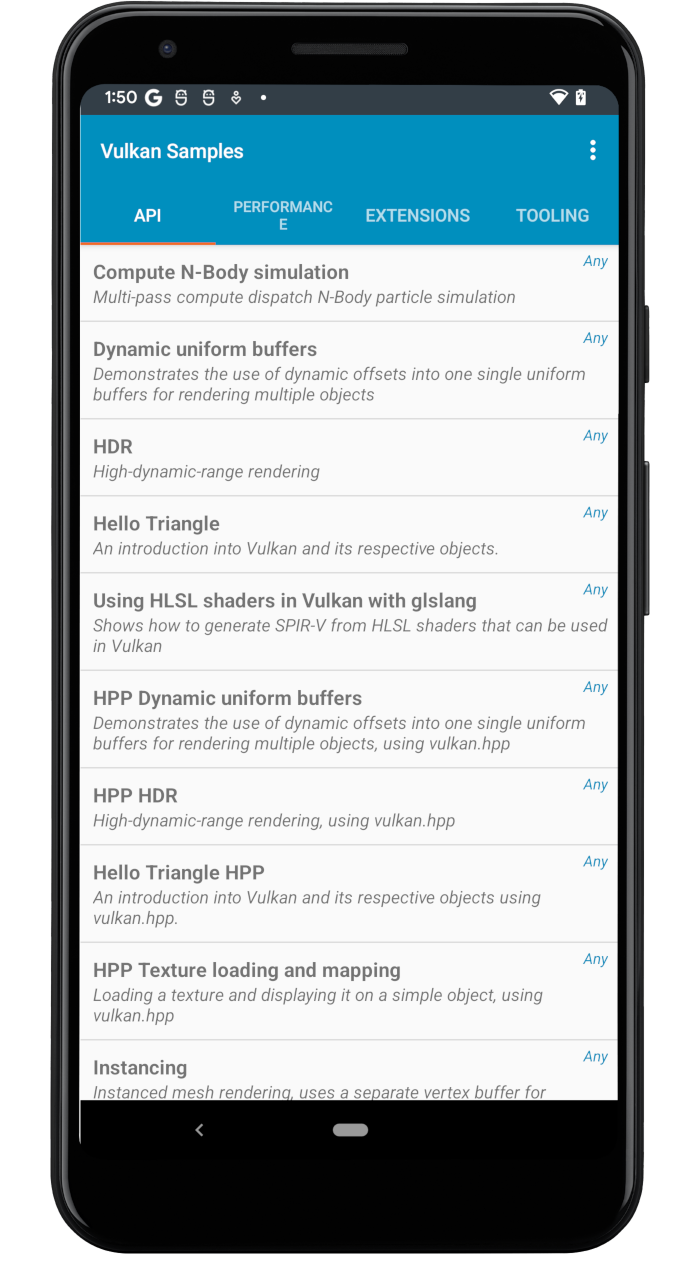
الشكل 5. عيّنات من القائمة الرئيسية - تصفح القائمة النموذجية واختر بعضها لتشغيلها.
إذا كنت حديث العهد بتطوير Vulkan، يمكنك البدء بنماذج "واجهة برمجة التطبيقات".
على سبيل المثال، عند النقر على "مثلّث مرحبًا"، يجب عرض مثلث.
مشابه لما يلي:
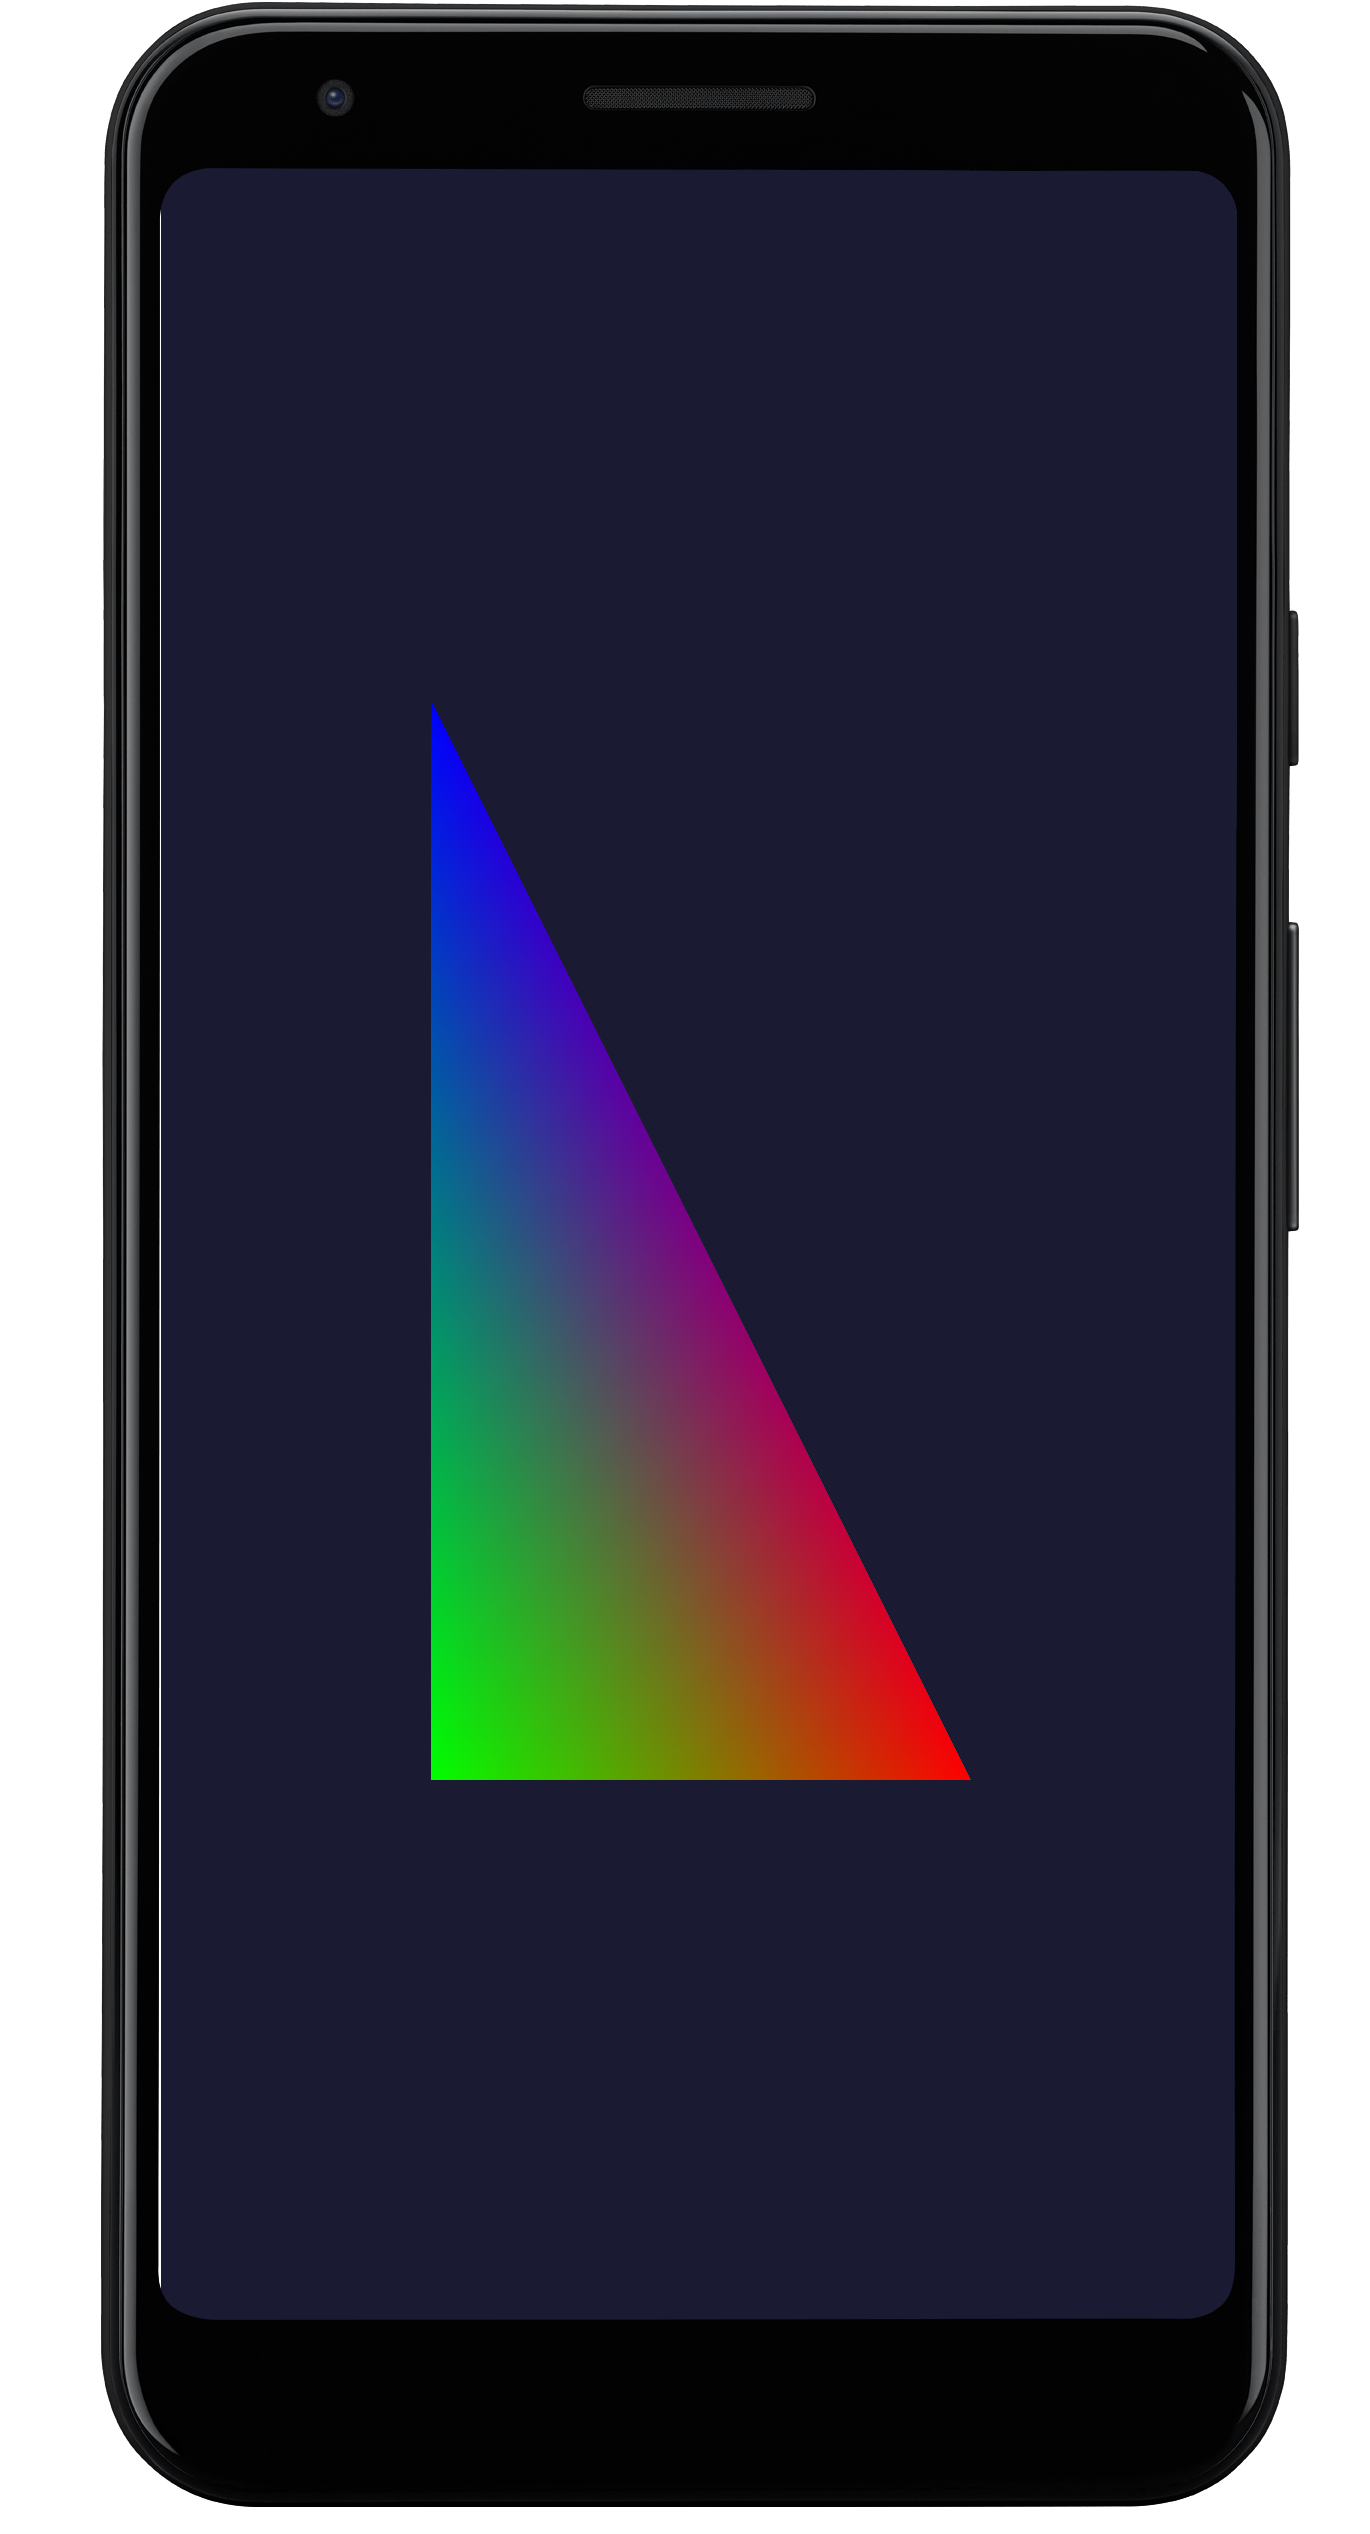
الشكل 6. نموذج Hello Triange
تم إعداد نظام التطوير الآن لتشغيل العيّنات على جهاز الاختبار.
تم تطوير Vulkan Samples لأنظمة تشغيل متعددة، بما فيها تلك الخاصة الكمبيوتر المكتبي والهاتف المحمول. بعض النماذج ضمن الأداء والإضافات قد تكون الأدوات غير مستقرة وتتعطّل على جهازك. وقد يرجع ذلك إلى أسباب مختلفة، مثل كـ:
- لم يتم تصميم ميزات Vulkan المحدَّدة لنظام Android.
- إصدار نظام التشغيل Android غير متوافق.
- قدرة وحدة معالجة الرسومات في النظام الأساسي لأجهزتك
استكشاف
يُستمَد قسم Java في نموذج Vulkan من فئة NativeActivity. يجتاز التطبيق العادي أحداث مراحل النشاط، مثل إنشاء تطبيق وبدئه وإيقافه وتدميره إلى C/C++ الرمز. في قسم C/C++ من العينة، يوجد نموذج إطار عمل تنفِّذ وظيفة تبديل النموذج الفرعي في وقت التشغيل. بشكل عام أحداث/رسائل نظام Android، تمر عبر المسار التالي إلى الوصول إلى نموذج رمز Vulkan للتطبيق:
NativeSampleActivityقسم Java- قسم
NativeSampleActivityC/C++ - رمز
android_native_glue android_main- نموذج إطار عمل
- رمز العينة الفرعية الفردية
android_main هو الجسر بين NativeSampleActivity ورمز التطبيق،
والتي يمكن أن تكون نقطة البداية لاتباع التعليمات البرمجية النموذجية. إذا قمت للتو
تريد التركيز على مصادر Vulkan المحددة، يمكنك استكشاف التعليمات البرمجية ضمن
Vulkan_Samples\samples، الذي يحتوي على ما يلي:
- نماذج لفئة "واجهة برمجة التطبيقات".
- نماذج لفئة "الأداء"
- نماذج فئات "الإضافات".
- عينات "الأدوات".
تتيح غرفة "Vulkan_Samples\shaders" تثبيت كل أدوات تظليل الألوان.
يمكنك البدء في تصفح عينات فئات "واجهة برمجة التطبيقات" للتعرف على الأساسيات استخدام Vulkan ونموذج إطار العمل. بعد ذلك يمكنك التقدم إلى نماذج لفئات "الأداء" و"الإضافات". بالنسبة إلى رمز أداة التظليل، يمكنك استخدام عرض المشروع في "استوديو Android".
مصادر إضافية
واجهت واجهة برمجة التطبيقات Vulkan API عدة إصدارات، وبالتالي فهي في مرحلة التطوير. ذا فولكان ومجتمع Vulkan مجموعة كبيرة من شخصيات Vulkan توضح استخدام واجهة برمجة التطبيقات وأفضل الممارسات. ما يلي: بعض الموارد لتطوير تطبيق Vulkan:
مواصفات Sense تحتفظ مجموعة Khronos بمواصفات Vulkan. عرض صفحة Vulkan الرئيسية للاطّلاع على المواصفات الكاملة تدريب وأدلة والبرامج التعليمية
طبقات التحقّق: طبقات التحقق ضرورية لتطوير التطبيقات. الاطّلاع على طبقات التحقّق من Vulkan على Android للحصول على التفاصيل.
Shaderc. رمز Shaderc في NDK هو المصدر مستودع Shaderc. بالنسبة إلى مستندات الاستخدام وتعليمات الحصول على أحدث إصدار، راجع برامج التحويل البرمجي لـ Shader.