
本文档将通过下载、编译和运行 Khronos© 示例应用的方式,介绍如何开始使用 Vulkan 图形库。
前提条件
首先,请确保您已准备好合适的硬件和平台版本。 您应使用支持 Vulkan 且搭载 Android 7.0 (Nougat)(API 级别 24 或更高级别)的设备或模拟器。
您可以前往设置菜单并依次选择关于手机 > Android 版本,确认您的 Android 版本。确认设置好合适的硬件和平台版本后,您可以下载所需的软件。
下载
首先,您必须下载多个工具和其他软件。请注意,在 Windows 主机上,建议您不要为工具和源代码使用深层文件路径层次结构;这样做是为了绕开部分 Windows 操作系统版本对文件路径的限制。
- 如果您还没有 Android Studio,请下载。这将包含最新的 Android SDK。
- 从 Android Studio 中安装 NDK 和 CMake,或单独下载并安装它们。
- 构建并运行 Hello JNI 示例,确保 Android Studio 正常运行。
- 为您的主机平台安装 build.md 中列出的 python3 和其他组件。
导入
在本部分中,您将下载 Khronos© Vulkan© 示例代码库,生成一个 Android Gradle 项目,然后使用 Android Studio IDE 打开该项目。
- 设置以下环境变量:
export ANDROID_HOME=/path/to/sdk-directory export ANDROID_NDK_HOME=$ANDROID_HOME/ndk/{your-ndk-version-dir} - 将 CMake 添加到用于生成 Android 构建脚本的 $PATH:
export PATH=$PATH:$ANDROID_HOME/cmake/{your-cmake-version}/bin - 打开终端并将源代码下载到您的开发目录:
cd dev-directory
git clone --recursive https://github.com/KhronosGroup/Vulkan-Samples.git
- 请按照以下说明(来自 Build.md)生成 Android 示例项目:
cd Vulkan-Samples
./scripts/generate.py android
- 打开 Android Studio。依次选择 File > Open,然后再选择
Vulkan-Samples/build/android_gradle/build.gradle。 在 Android Studio 加载项目后,系统会显示类似于下图所示的窗口: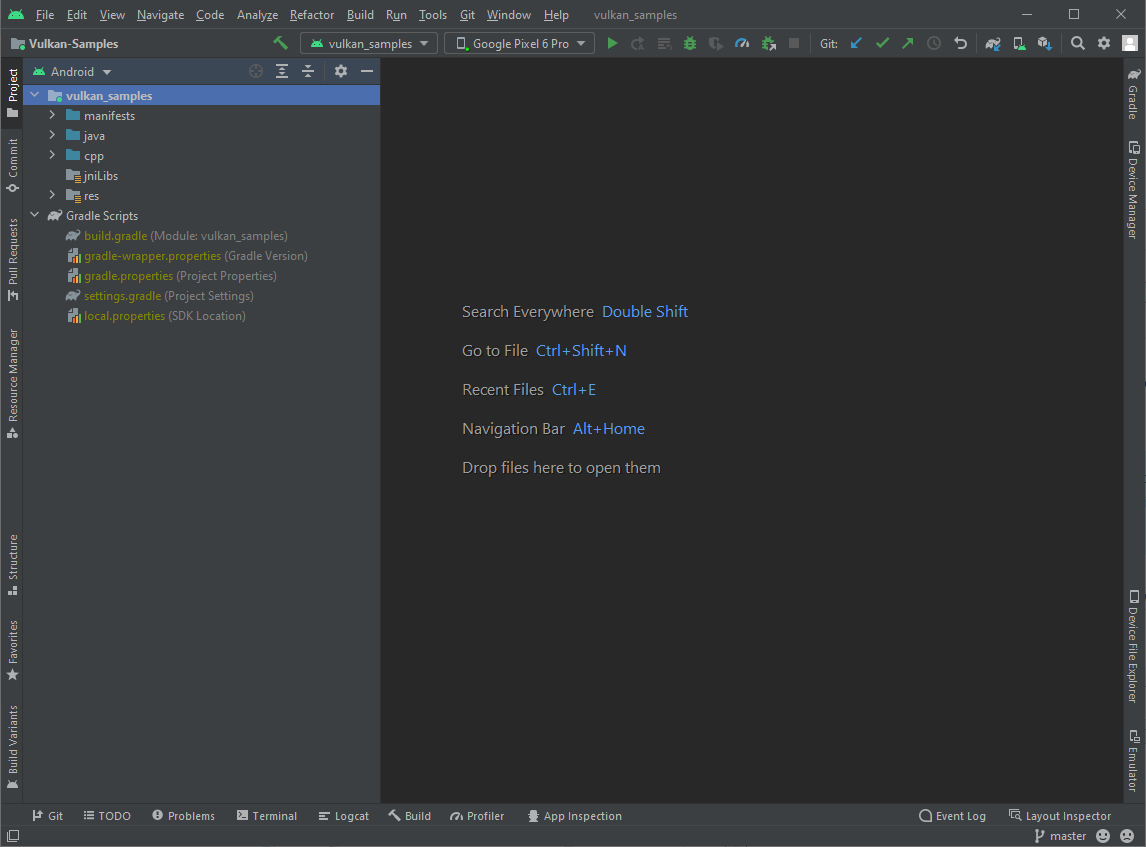
图 1. Android Studio 中的示例项目。
编译
此代码库中的所有示例会划归到一个 Android 项目中。如需编译项目,请执行以下任一操作:
- 如果只需编译源代码,请使用菜单依次选择 Build > Make Project,或按下 Ctrl-F9 快捷键。
- 如需生成示例 APK,请依次选择菜单 Build > Build Bundle(s)/APK(s) > Build APK(s)。
您应该会在 Android Studio 的 Build 窗口中看到构建成功的消息。如果窗口中显示错误消息,请修复错误并重新编译。
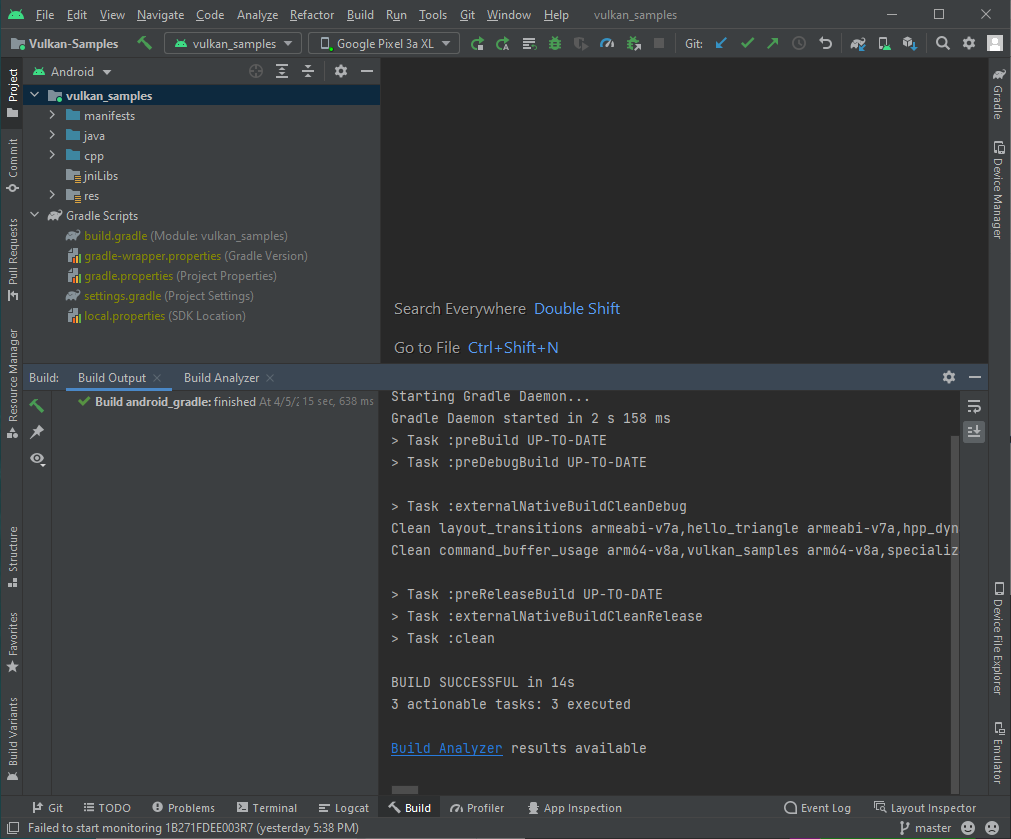
执行
在运行示例项目之前,请确保 Android Studio 可识别您连接的 Vulkan 设备或 Android 模拟器。您应该会看到类似下图所示的内容:

如需运行项目,请执行以下操作:
- 请依次使用菜单 Run > Run vulkan_sample,或点击工具栏中的“Run”按钮
 ,然后等待示例在已连接的设备上安装并启动。
 - 在已连接的 Android 设备上,授权所需的访问权限请求。
- 启用 Allow access to manage all files,然后点按箭头 Back button 以返回示例的主开始屏幕。
- 允许磁盘访问:
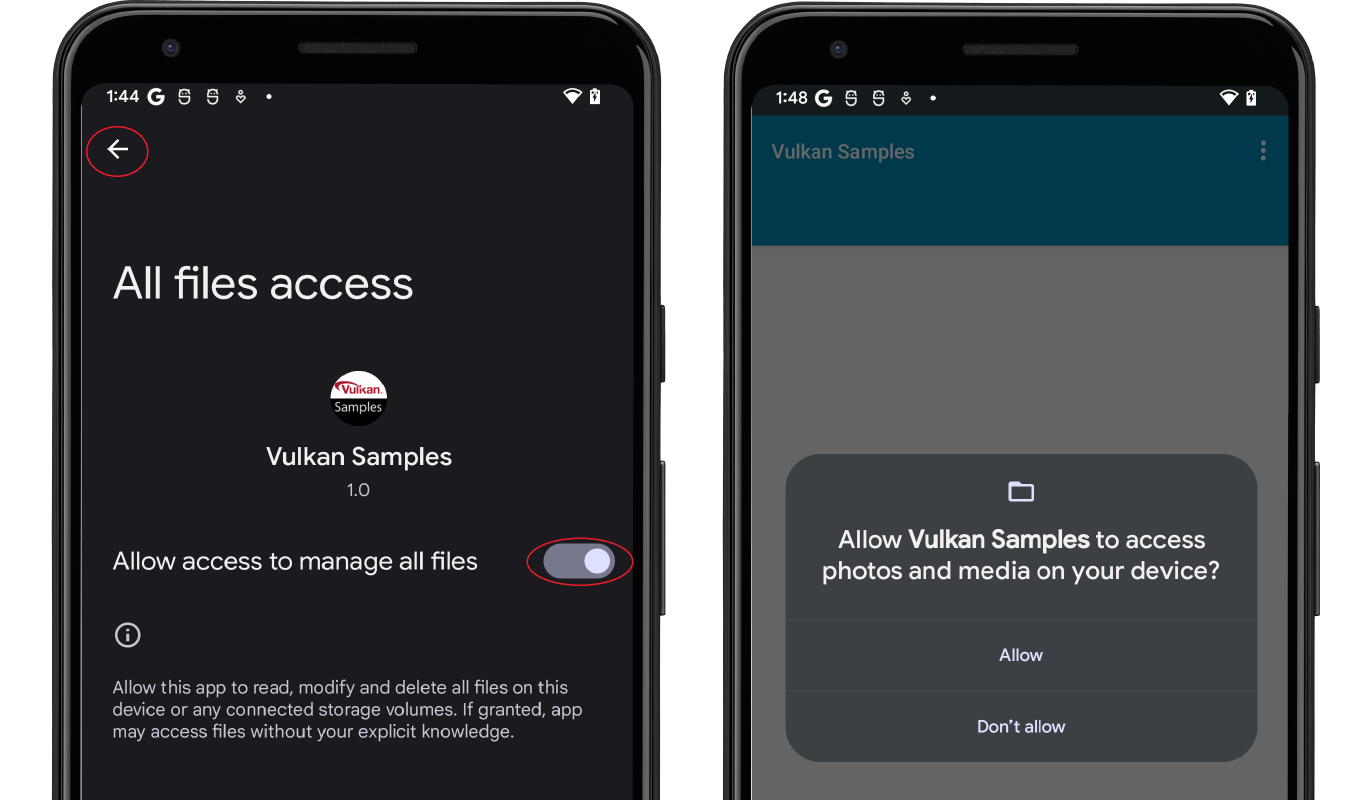
图 4. 启用磁盘访问权限。
- 您应该会看到类似于下图所示的示例主菜单屏幕:
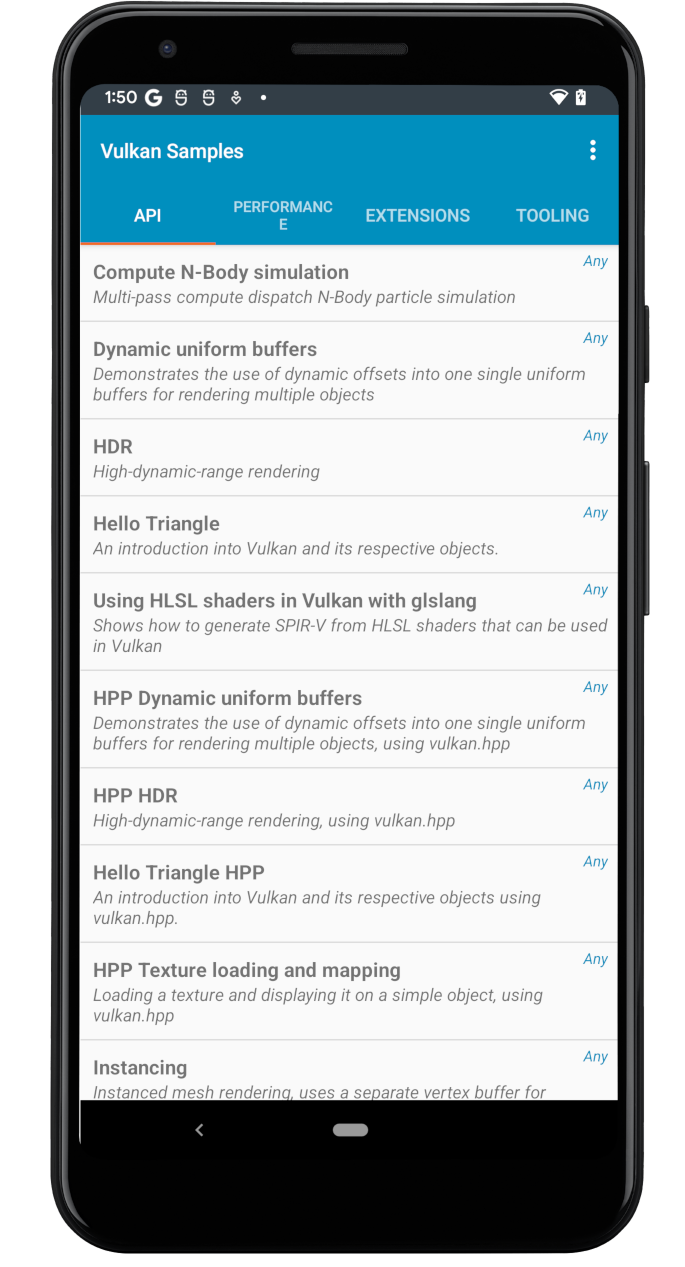
图 5. 示例主菜单。 - 浏览示例列表,然后选择几项运行。
如果您不熟悉 Vulkan 开发,可以从“API”示例着手。例如,点按“Hello Triangle”后,系统应该会显示一个经过渲染的三角形,类似下图所示:
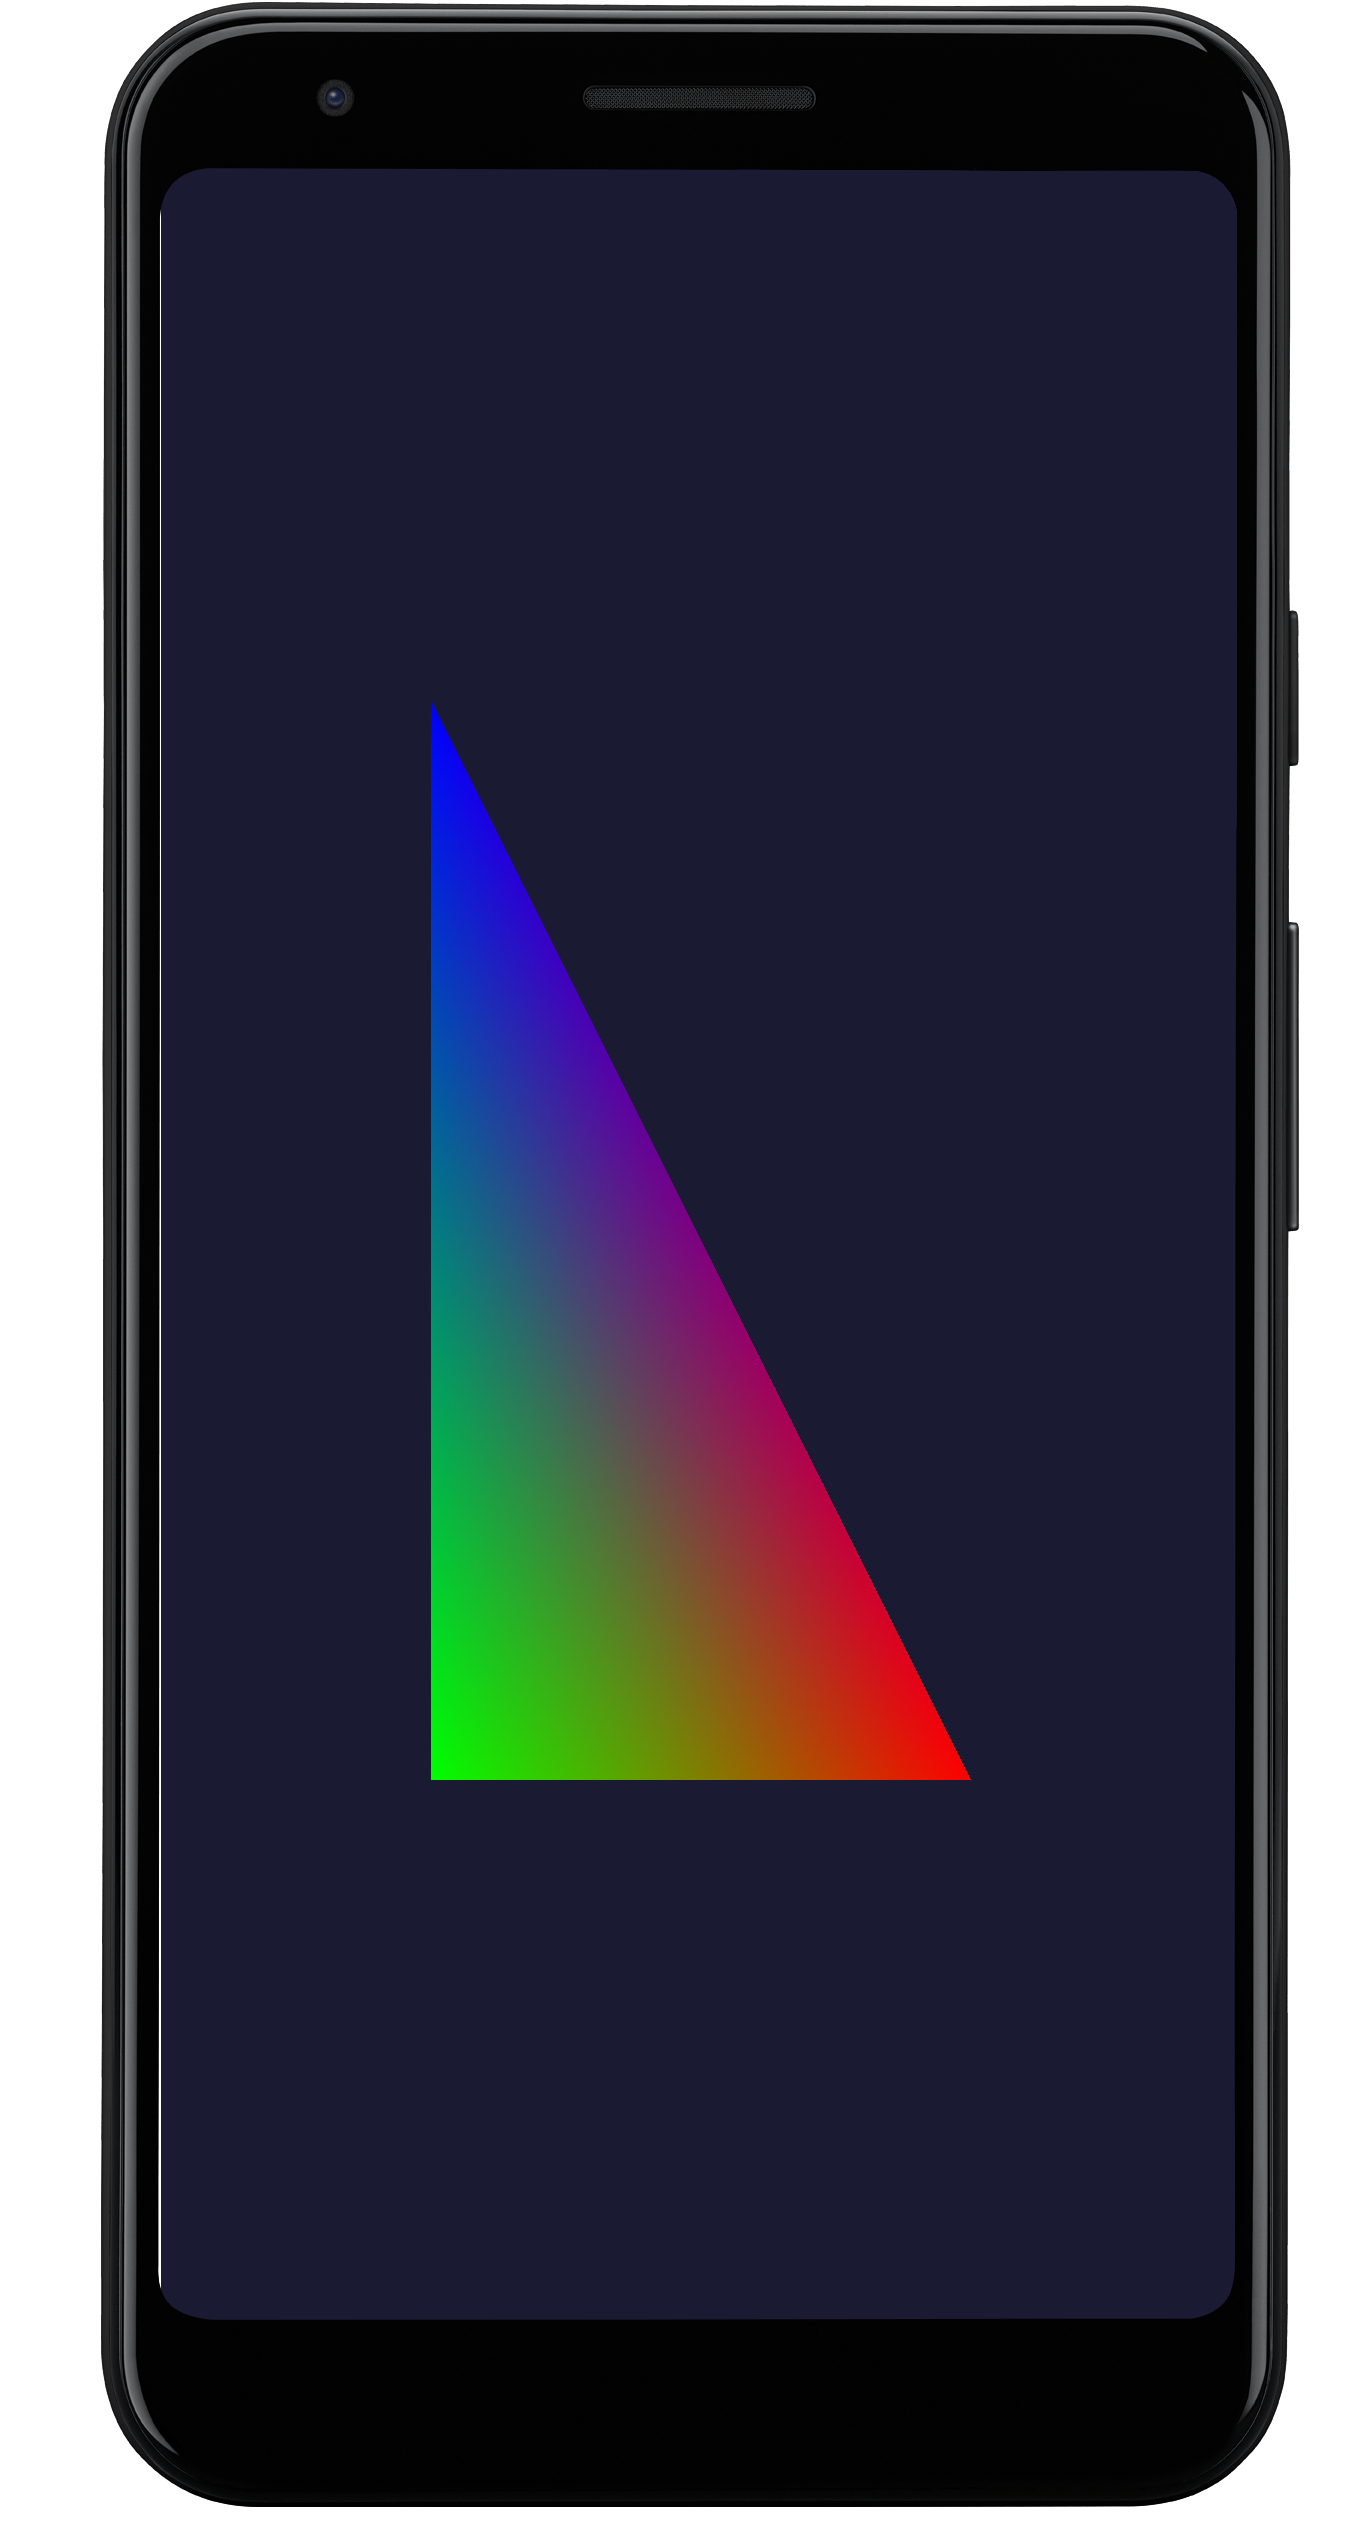
图 6. Hello Triange 示例。
您的开发系统现已设置为在测试设备上运行示例。
Vulkan 示例是面向多种操作系统开发的,包括桌面设备和移动设备的操作系统。Performance、Extensions 和 Tooling 下的部分示例在您的设备上运行时可能会不稳定并发生崩溃。这可能是由各种原因造成的,例如:
- 特定的 Vulkan 功能并非面向 Android 设计。
- Android OS 版本不受支持。
- 硬件平台的 GPU 功能。
探索
Vulkan 示例的 Java 部分派生自 NativeActivity 类。该类会将典型的应用生命周期事件(如应用的创建、启动、停止和销毁)传递给 C/C++ 代码。在示例的 C/C++ 部分中,有一个示例框架可实现运行时子示例切换功能。大体上讲,Android 系统事件/消息会经过以下路径传递给示例应用的 Vulkan 代码:
NativeSampleActivityJava 部分NativeSampleActivityC/C++ 部分android_native_glue代码android_main- 示例框架
- 各个子示例的代码
android_main 是 NativeSampleActivity 与应用代码之间的桥梁,可作为遵守示例代码的着手点。如果您只想关注特定的 Vulkan 源代码,则可以浏览 Vulkan_Samples\samples 下的代码,其中包含以下内容:
- “API”类别示例。
- “Performance”类别示例。
- “Extensions”类别示例。
- “Tooling”示例。
Vulkan_Samples\shaders 是所有着色器的存储位置。
您可以从浏览“API”类别的示例开始,逐步熟悉 Vulkan 的基本用法和示例框架。然后,您可以继续探索“Performance”和“Extenstions”类别的示例。如需了解着色器代码,您可以使用 Android Studio 中的 Project 视图。

其他资源
Vulkan API 已经历了几个版本,因此日趋成熟。Vulkan 标准委员会和 Vulkan 社区已经创建了一组内容丰富的 Vulkan 资料,其中演示了该 API 的用法和最佳做法。以下列表包含一些关于 Vulkan 应用开发的资源:
Vulkan 规范。 Khronos Group 会维护 Vulkan 规范。如需查看完整规范、培训、指南和教程,请参阅 Vulkan 首页。
验证层。验证层对于应用开发至关重要。如需了解详情,请参阅 Android 上的 Vulkan 验证层文档。
Shaderc。 NDK 中的 Shaderc 代码是 Shaderc 代码库的下游代码。如需查看用法文档和最新版本的获取说明,请参阅着色器编译器。