संग्रह की मदद से व्यवस्थित रहें
अपनी प्राथमिकताओं के आधार पर, कॉन्टेंट को सेव करें और कैटगरी में बांटें.
इस गाइड में, Watch Face Designer का इस्तेमाल करके बनाए गए वॉच फ़ेस को Google Play पर पब्लिश करने का तरीका बताया गया है.
Google Play में अपने डेवलपर खाते में साइन इन करें
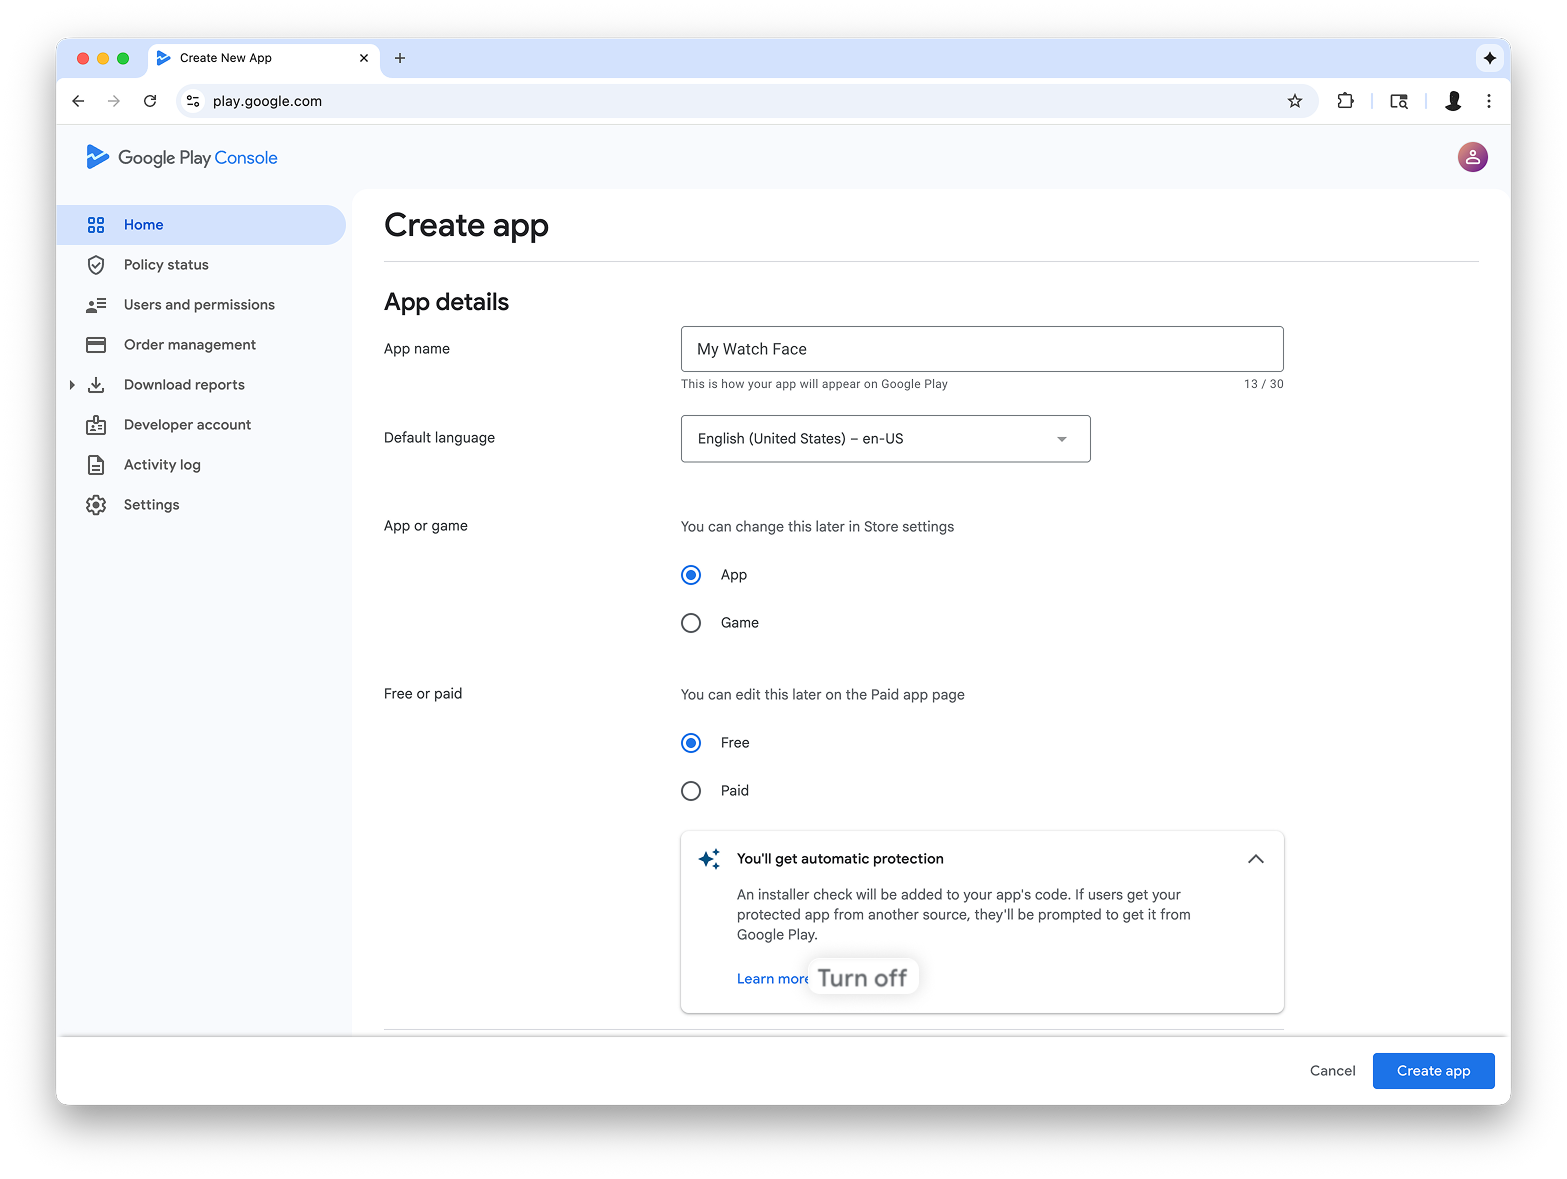
Google Play Console में साइन इन करें और डैशबोर्ड पर 'ऐप्लिकेशन बनाएं' पर क्लिक करें.
"ऐप्लिकेशन बनाएं" वर्कफ़्लो के दौरान, प्रॉम्प्ट मिलने पर ऑटोमैटिक प्रोटेक्शन की सुविधा बंद करें. ऐसा न करने पर, बाद में बंडल पर हस्ताक्षर करने में समस्याएं आएंगी. ऑटोमैटिक प्रोटेक्शन की सुविधा, वॉच फ़ेस के लिए काम नहीं करती. ऐसा इसलिए है, क्योंकि उनमें कोई कोड नहीं होता.
पहली इमेज: Play Console में ऐप्लिकेशन बनाएं स्क्रीन
दिखाई गई है
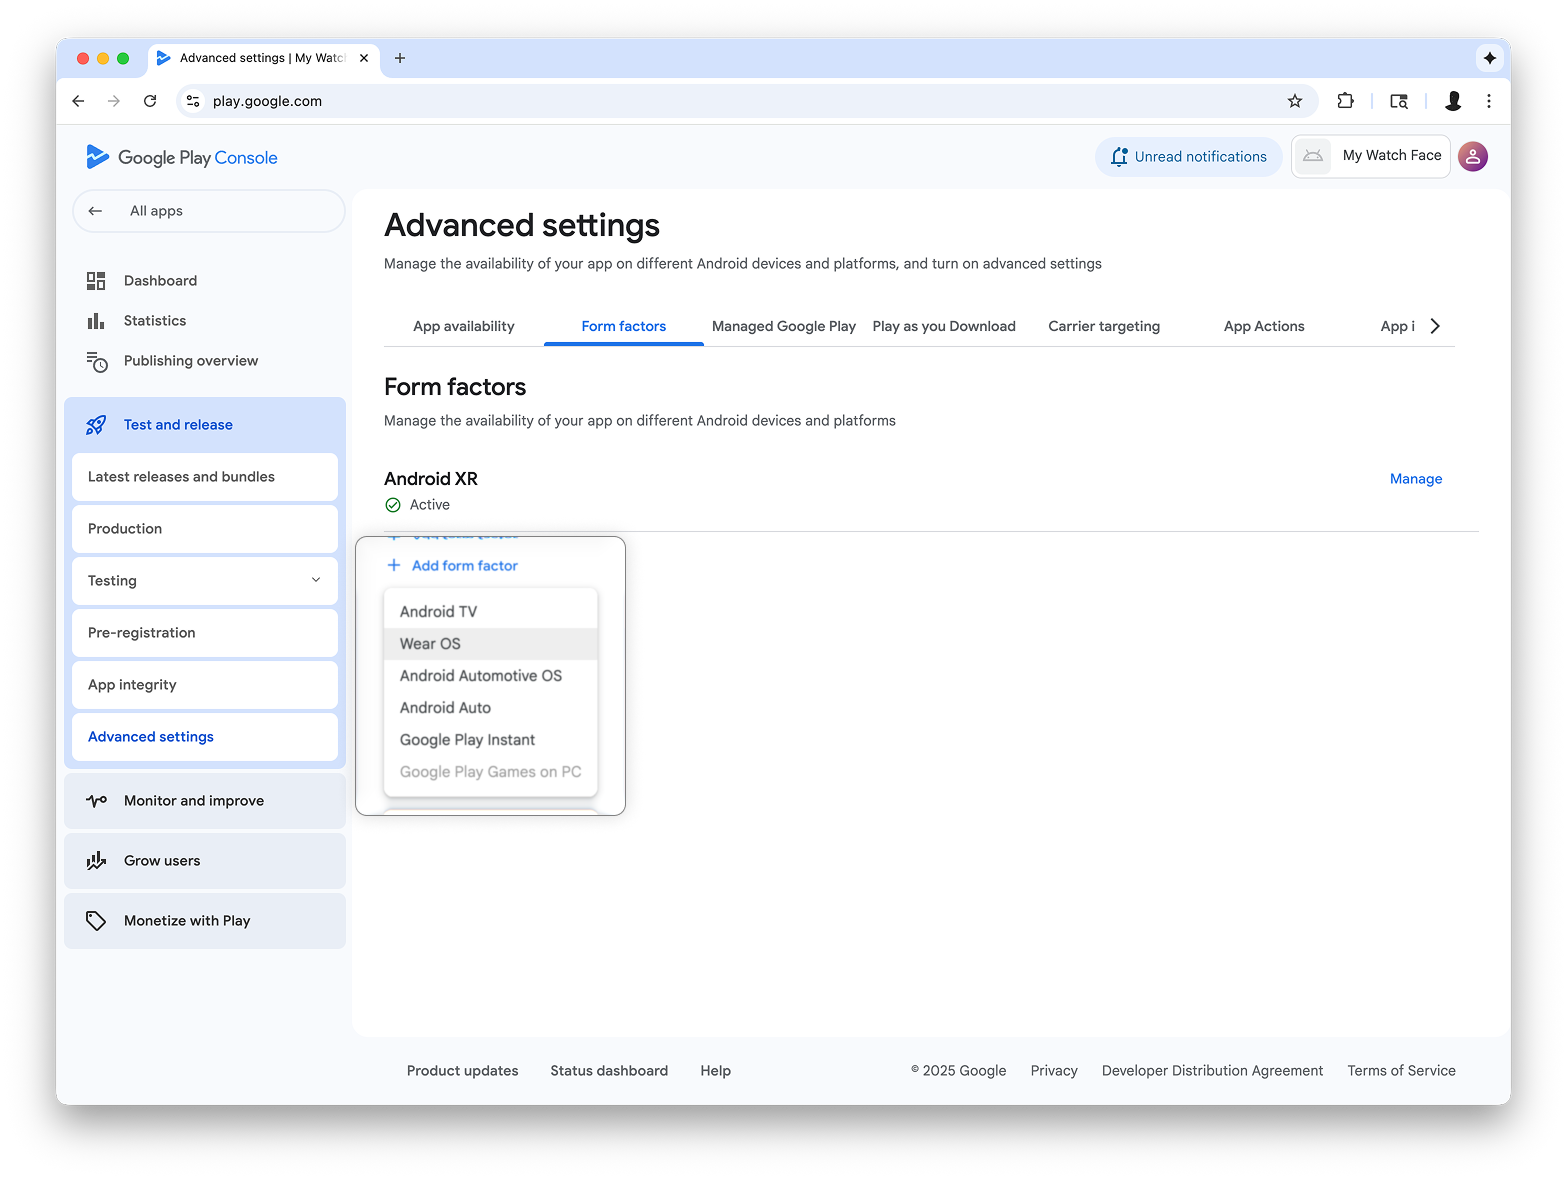
Wear OS वाले डिवाइस के नाप या आकार के लिए सहायता जोड़ना
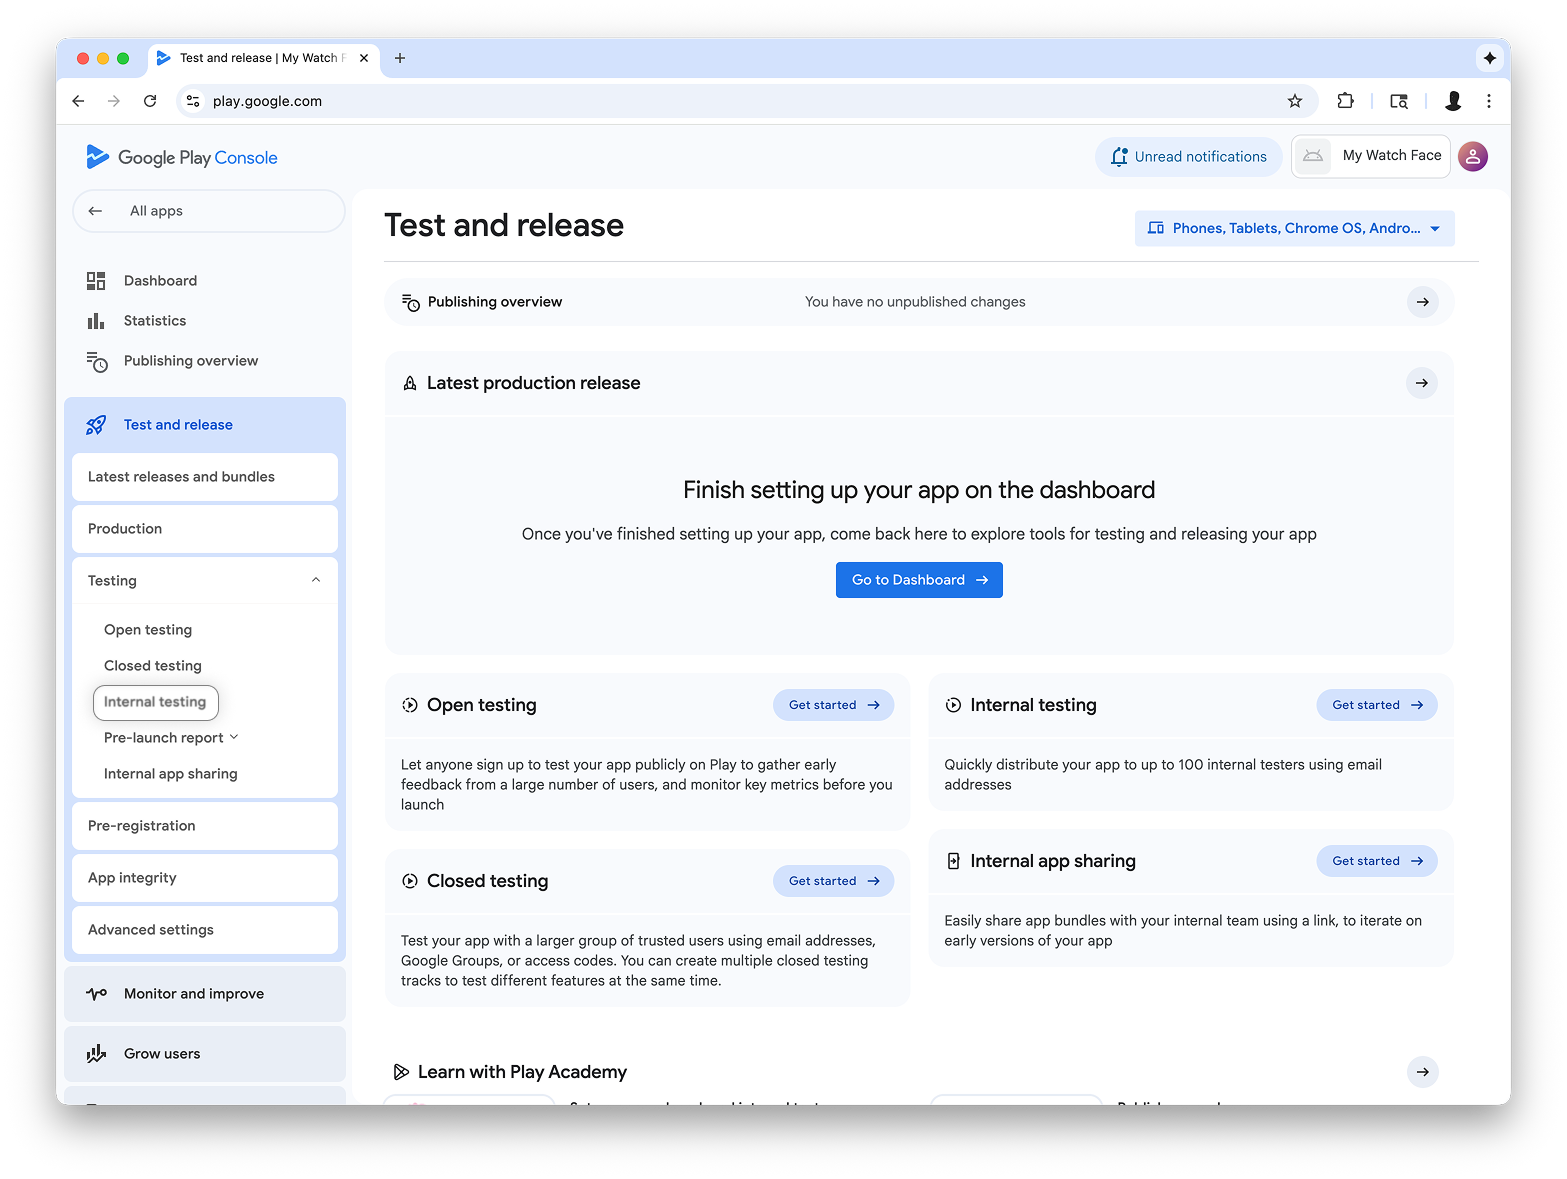
ऐप्लिकेशन बनाने के बाद, टेस्ट और रिलीज़ > टेस्टिंग >
इंटरनल टेस्टिंग पर जाएं:
दूसरी इमेज: Play Console में टेस्ट और रिलीज़ करें
स्क्रीन
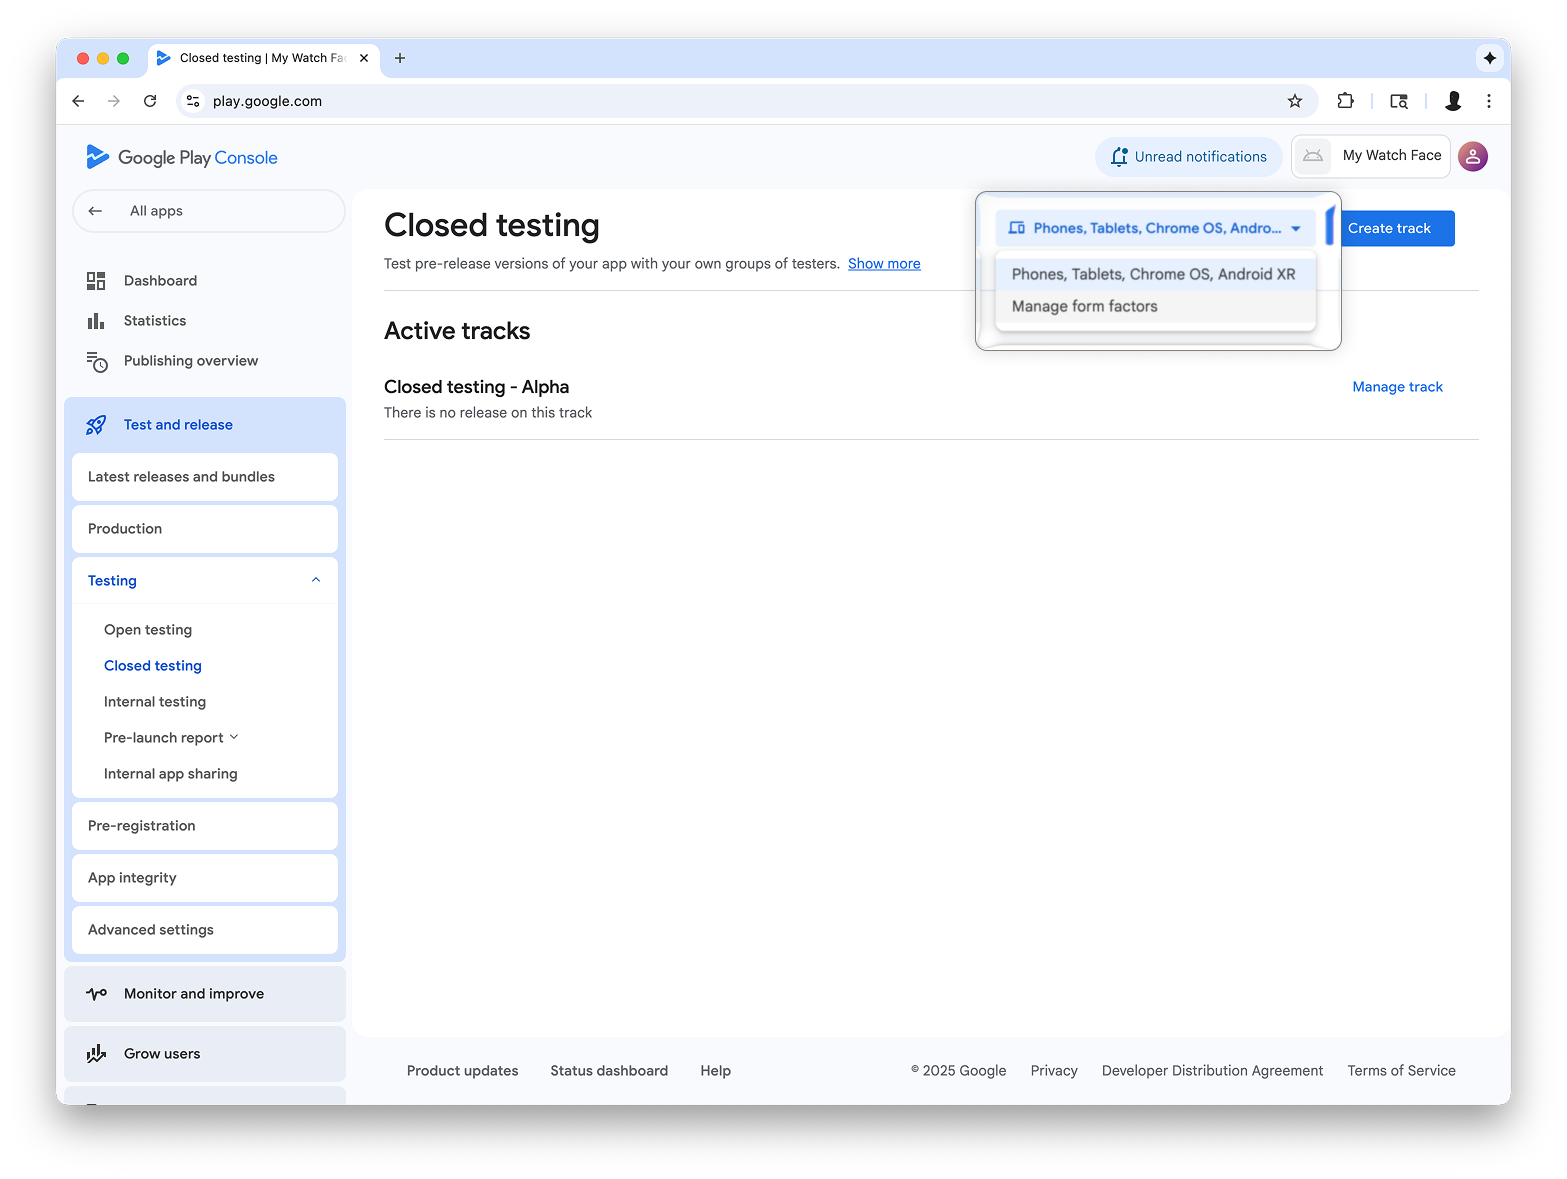
पेज के सबसे ऊपर दाईं ओर मौजूद ड्रॉप-डाउन मेन्यू में जाकर, डिवाइस के साइज़, डाइमेंशन या कॉन्फ़िगरेशन मैनेज करें को चुनें.
इसके बाद, अपने ऐप्लिकेशन के लिए Wear OS को डिवाइस के साइज़, डाइमेंशन या कॉन्फ़िगरेशन के तौर पर जोड़ें:
तीसरी इमेज: डिवाइस के टाइप मैनेज करें विकल्प (बाईं ओर) को चुनना. इसके बाद, बेहतर सेटिंग स्क्रीन (दाईं ओर) पर मौजूद डिवाइस के टाइप टैब में जाकर, Wear OS जोड़ना
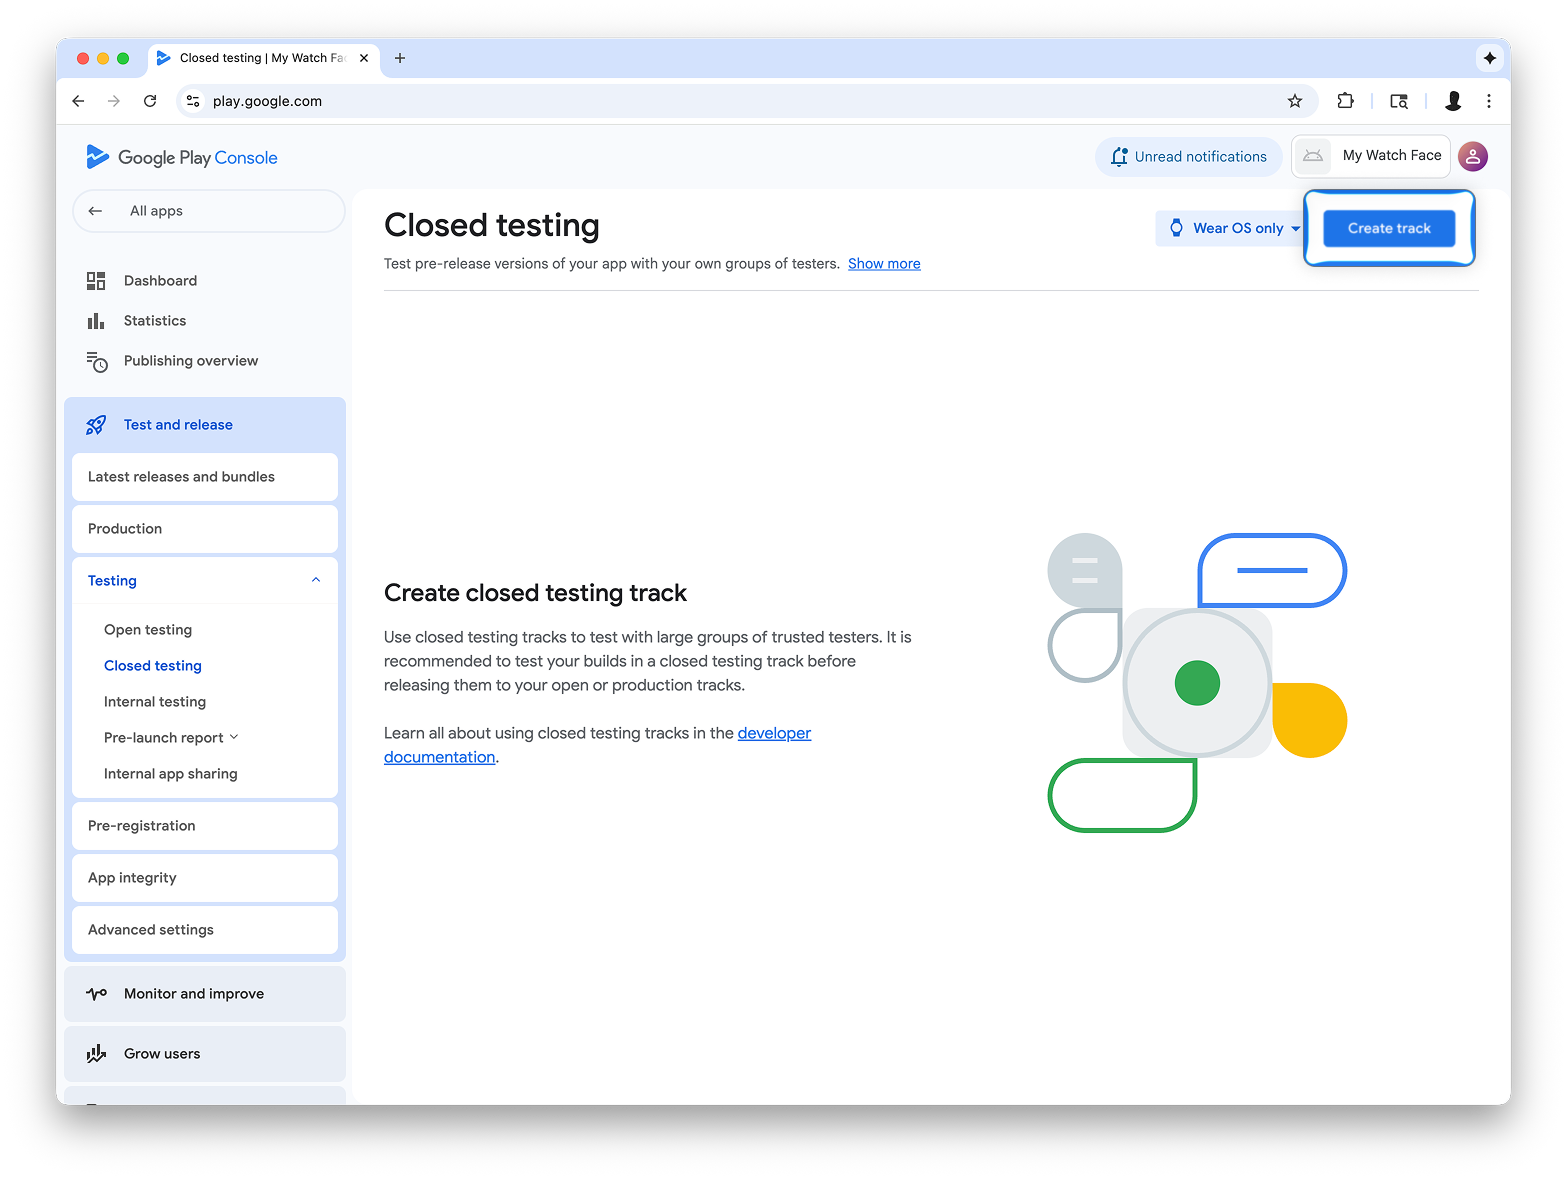
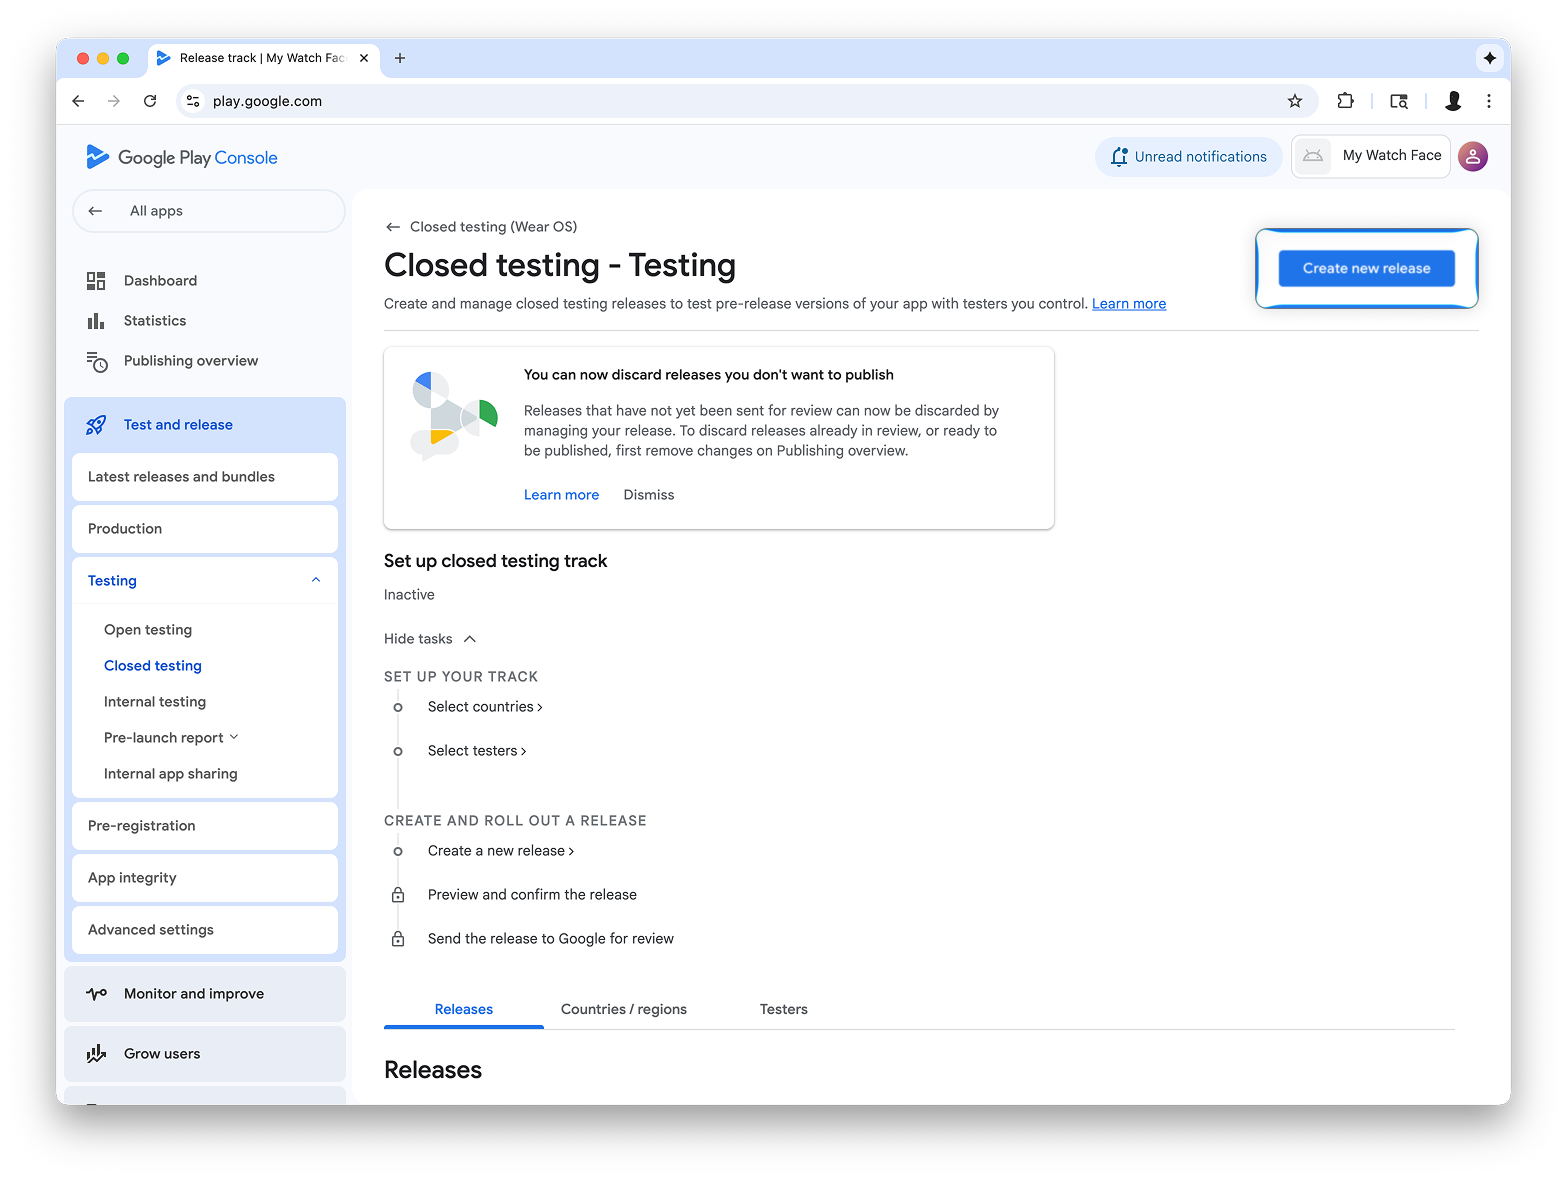
इंटरनल टेस्टिंग ट्रैक पर रिलीज़ बनाना
इंटरनल टेस्टिंग मेन्यू पर वापस जाएं और सिर्फ़ Wear OS के लिए इंटरनल टेस्टिंग ट्रैक बनाएं. इसके बाद, रिलीज़ बनाएं:
चौथी इमेज: ट्रैक बनाएं
बटन (बाईं ओर) चुनें. इसके बाद, अगली स्क्रीन पर नई रिलीज़ बनाएं
बटन (दाईं ओर) चुनें.
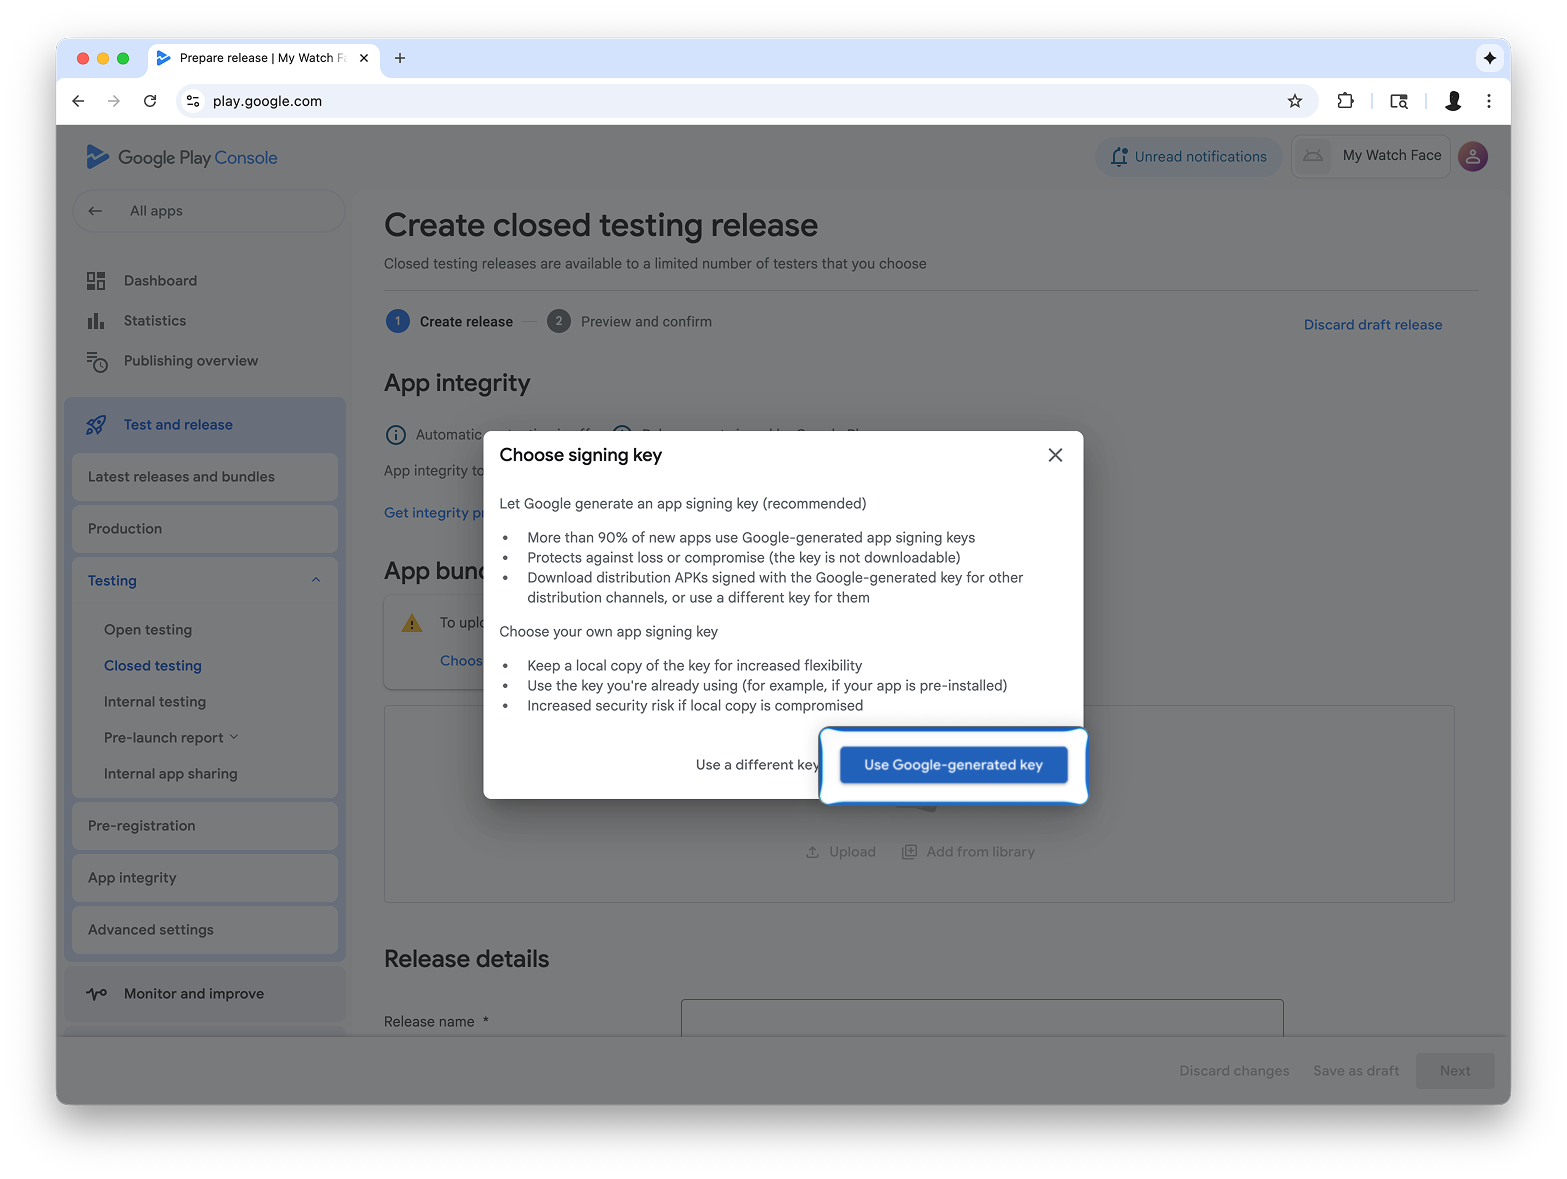
क्लोज़्ड टेस्टिंग के लिए रिलीज़ बनाएं स्क्रीन पर, हस्ताक्षर करने की कुंजी चुनें को चुनें.
पांचवीं इमेज: हस्ताक्षर करने के लिए कुंजी चुनें बटन (बाईं ओर) को चुनें. इसके बाद, दिखने वाले डायलॉग में, Google से जनरेट की गई कुंजी का इस्तेमाल करें (दाईं ओर) को चुनें.
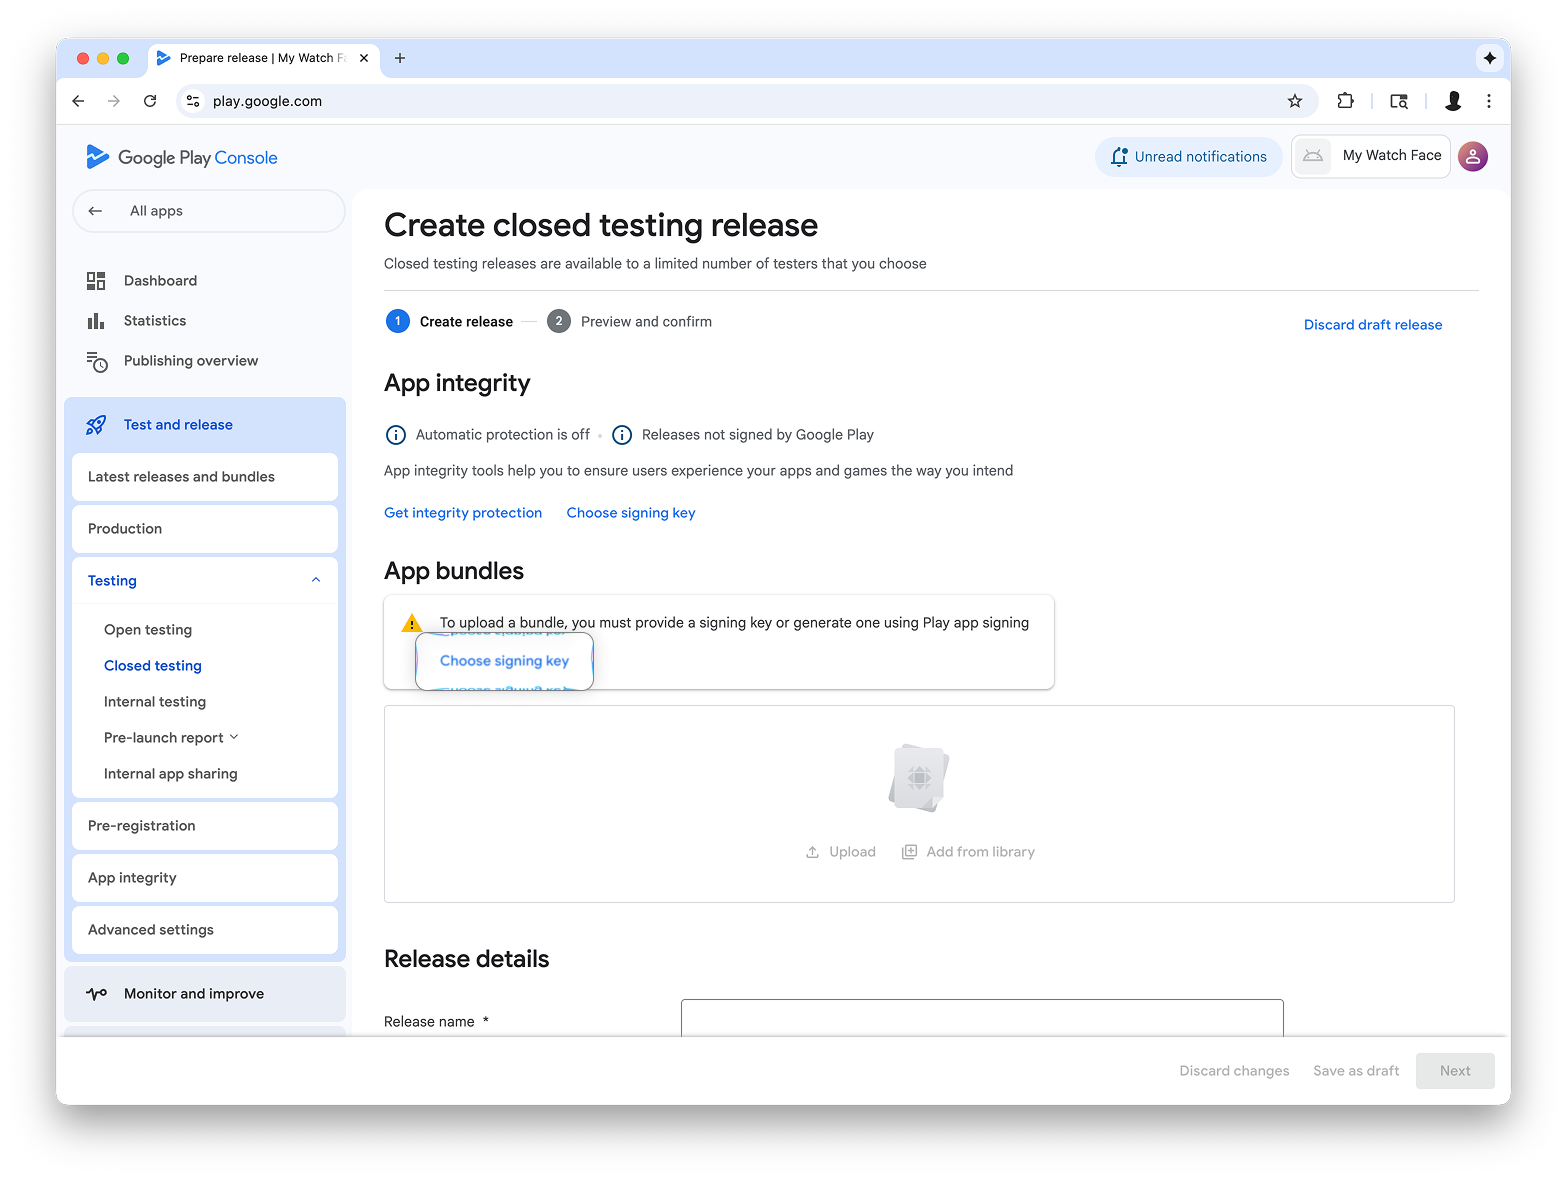
Watch Face Designer से AAB फ़ाइल को अपलोड करें सेक्शन में खींचें और छोड़ें. इसके बाद, टेस्टिंग ट्रैक पर रिलीज़ बनाने की प्रोसेस जारी रखें.
इस पेज पर मौजूद कॉन्टेंट और कोड सैंपल कॉन्टेंट के लाइसेंस में बताए गए लाइसेंस के हिसाब से हैं. Java और OpenJDK, Oracle और/या इससे जुड़ी हुई कंपनियों के ट्रेडमार्क या रजिस्टर किए हुए ट्रेडमार्क हैं.
आखिरी बार 2025-08-27 (UTC) को अपडेट किया गया.
[[["समझने में आसान है","easyToUnderstand","thumb-up"],["मेरी समस्या हल हो गई","solvedMyProblem","thumb-up"],["अन्य","otherUp","thumb-up"]],[["वह जानकारी मौजूद नहीं है जो मुझे चाहिए","missingTheInformationINeed","thumb-down"],["बहुत मुश्किल है / बहुत सारे चरण हैं","tooComplicatedTooManySteps","thumb-down"],["पुराना","outOfDate","thumb-down"],["अनुवाद से जुड़ी समस्या","translationIssue","thumb-down"],["सैंपल / कोड से जुड़ी समस्या","samplesCodeIssue","thumb-down"],["अन्य","otherDown","thumb-down"]],["आखिरी बार 2025-08-27 (UTC) को अपडेट किया गया."],[],[],null,["This guide explains how to publish your watch face, created using\nWatch Face Designer, to Google Play.\n| **Note:** Before you begin, [export your watch face using the Google Play option](/training/wearables/watch-face-designer/export#google-play) so that you have an Android App Bundle (AAB) file ready.\n\nSign into your developer account in Google Play\n\nSign in to Google Play Console and press 'Create App' on the dashboard.\n| **Note:** If you don't have a Google Play Console developer account, [follow the\n| official guide to create one](https://support.google.com/googleplay/android-developer/answer/6112435). This includes paying a registration fee.\n\nDuring the \"create app,\" workflow, **turn off automatic protection when\nprompted**; otherwise, you'll have issues signing the bundle later. Automatic\nprotection isn't relevant to watch faces because they don't have any code.\n**Figure 1** : The **Create app** screen in the Play Console\n\nAdd support for the Wear OS form factor\n\nAfter you've created your app, navigate to **Test and release \\\u003e Testing \\\u003e\nInternal testing**:\n**Figure 2** : The **Test and release** screen in the Play Console\n\nIn the drop-down in the top right of the page, select **Manage form factors**,\nand add Wear OS as a form factor for your app:\n**Figure 3** : Selecting the **Manage form\nfactors** option (left), then adding Wear OS on the **Form factors** tab on the **Advanced settings** screen (right)\n\nCreate a release on the internal testing track\n\nReturn to the internal testing menu and create a Wear OS-only internal testing\ntrack. Then, create a release:\n**Figure 4** : Select the **Create track** button (left), then on the next screen, select the **Create new release** button (right).\n\nOn the **Create closed testing release** screen, select **Choose signing key**.\n| **Caution:** In the **Choose signing key** dialog that appears, select **Use Google-generated key**:\n**Figure 5** : Select the **Choose signing\nkey** button (left), then in the dialog that appears, select **Use\nGoogle-generated key** (right).\n\nDrag-and-drop the AAB file from Watch Face Designer into the **Upload** section,\nand proceed with creating the release on the testing track.\n\nNext steps\n\nFrom here, follow official Google Play documentation on [trying out apps in the\ntesting track](https://support.google.com/googleplay/answer/7003180) and [promoting releases to production](https://support.google.com/googleplay/android-developer/answer/9859348), which makes your\napp visible to everyone on Google Play."]]