

Identität
Die Sicherheit und Funktionalität Ihrer Android-App hängt von der Verwaltung der Nutzeridentität ab. Dazu gehört die Überprüfung der Identität Ihrer Nutzer (Authentifizierung), die Kontrolle des Zugriffs auf die Daten der Nutzer (Autorisierung) und ein reibungsloser Prozess zur Kontoerstellung.
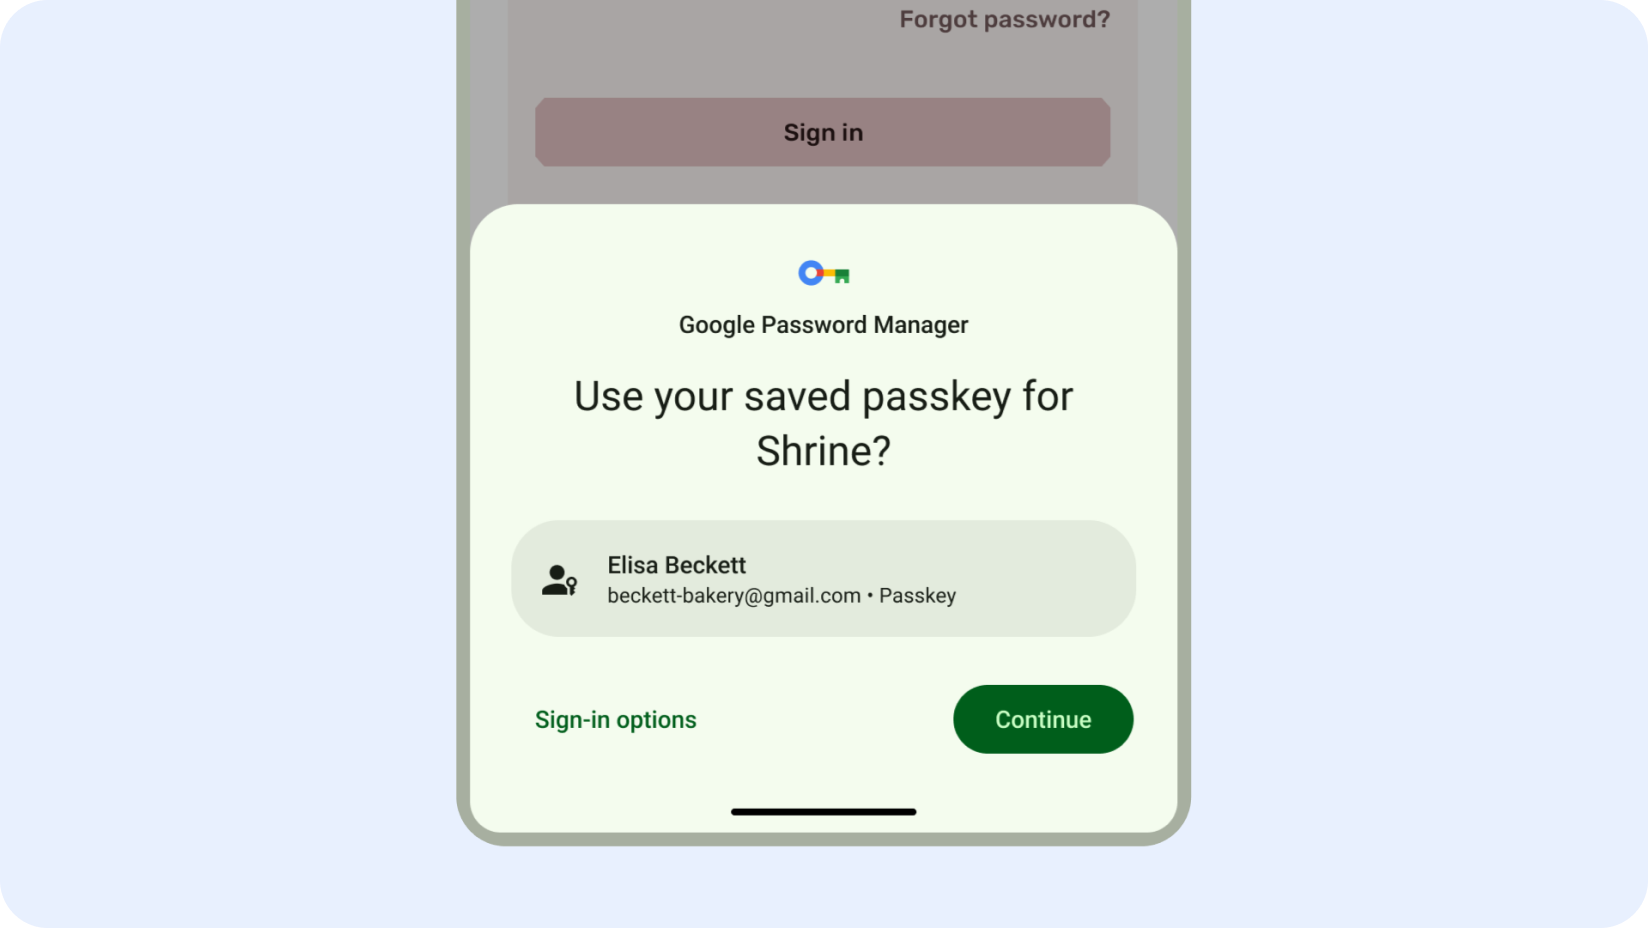
Der Anmeldedaten-Manager ist ein zentraler Hub für verschiedene Anmeldemethoden, einschließlich Passkeys. Er ermöglicht es Nutzern, sich mit nur einem Tippen in Ihrer App anzumelden. So müssen sich Nutzer nicht mehr merken, welche Methode sie verwenden müssen, sondern können sich stattdessen auf die Auswahl des richtigen Kontos konzentrieren.
Anmeldung mit nur einmal tippen
Einfache Kontoerstellung
Einheitliche Oberfläche
Einbindung in den Google Passwortmanager
Passkeys verbessern die Nutzerfreundlichkeit der Authentifizierung unter Android
Die Anmeldung kann eine große Quelle für Verwirrung und App-Abbruch sein.
Passkeys, die über den Anmeldedaten-Manager verfügbar sind, verbessern die Nutzerfreundlichkeit, da die Anmeldung einfacher und sicherer wird. Sie sind phishingresistent und können nicht wiederverwendet werden. Nutzer können sich anmelden, indem sie ihr Gerät per Fingerabdruck, Gesichtserkennung oder lokaler PIN entsperren, anstatt sich ein Passwort merken und eingeben zu müssen.
Schnelles Erstellen von Konten
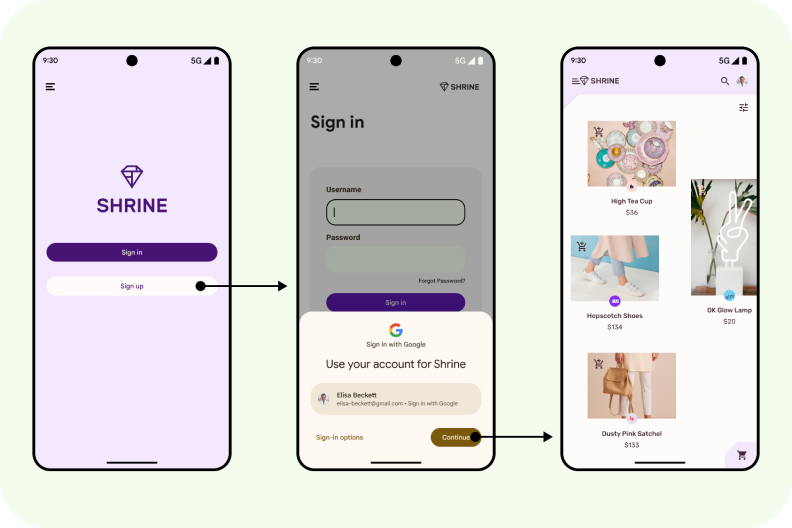
Sie können den Registrierungsvorgang optimieren und die Abbruchraten senken, indem Sie „Über Google anmelden“ bei der Kontoerstellung einbinden.
Diese Option zur Registrierung mit nur einem Klick nutzt vertraute Nutzeranmeldedaten, um die Abläufe zu vereinfachen und die Nutzerfreundlichkeit zu verbessern.
Wenn Sie „Über Google anmelden“ bei der Registrierung priorisieren, können Sie den Onboarding-Prozess Ihrer App und die Nutzerzufriedenheit erheblich verbessern.
Anmeldung mit nur einem Klick
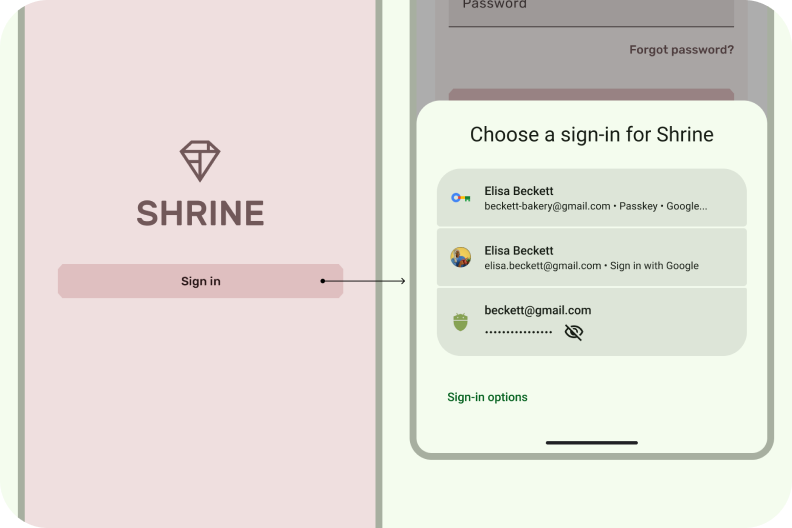
Credential Manager ist eine Jetpack API, die mehrere Anmeldemethoden wie Nutzername und Passwort, Passkeys und die föderierte Anmeldung (z. B. „Über Google anmelden“) in einer einzigen API unterstützt. Dadurch wird die Einbindung für Entwickler vereinfacht.
Nutzer können sich mit nur einem Klick in Ihrer App anmelden, ohne sich Gedanken über die richtige Option machen zu müssen. Der Anmeldedaten-Manager vereinfacht die Anmeldung für Nutzer, unabhängig von der gewählten Authentifizierungsmethode.
Erste Schritte bei der Authentifizierung
Nutzerauthentifizierung mit Passkeys
Anmeldedaten-Manager mit Passkeys verknüpfen
Anmeldedaten-Manager in „Über Google anmelden“ einbinden
Anmeldedaten-Manager in WebView einbinden
Firebase Authentication mit „Über Google anmelden“ integrieren
Aktuelle Neuigkeiten und Videos
Von älteren APIs zu Credential Manager migrieren

Von der alten Google Log-in-Version migrieren
Google Sign-in für Android wird nicht mehr unterstützt und wird voraussichtlich 2025 entfernt. Verwenden Sie den Anmeldedaten-Manager, um die Nutzerfreundlichkeit zu verbessern und Ihre App auf dem neuesten Stand zu halten.
Credential Manager konzentriert sich auf die Registrierung und Anmeldung. Verwenden Sie für die Autorisierung AuthorizationClient für detaillierte Autorisierungsanfragen an Google-Konten wie Drive, Kalender oder Fotos.

Von Smart Lock für Passwörter migrieren
