
Credential Manager is the recommended Jetpack API for credential exchange in Android apps. The Credential Manager API streamlines credential exchange across form factors for use cases spanning authentication and authorization. You can also use Credential Manager to handle digital credentials and restore user credentials on new Android devices.
Credential Manager features
Credential Manager streamlines the sign-in process and enhances security by offering a robust set of capabilities, including:
- Support for various authentication mechanisms: Enables users to sign up
or sign in to your app using:
- Passkeys
- Sign-in with Google and other federated sign-in mechanisms
- Passwords
- Digital credentials
- Cross-device credential restore: Provides integration with Restore Credentials, allowing users to seamlessly start using your app on a new device.
- Seamless integration with credential providers: Offers support for credential providers, including password managers such as Google Password Manager.
- Credential management: Enables updating the metadata for user credentials, helping to keep credentials consistent across your app and credential providers.
- WebView compatibility: Works with apps that use WebView.
- Autofill integration: Integrates with autofill to display credentials within the autofill UI.
Benefits of using Credential Manager
Adopting Credential Manager provides several key advantages for both your application and your users:
- Enhanced security: Passkeys offer enhanced security and protect users from phishing attempts.
- Support for various form factors: The APIs work across Android form factors, including mobile, Android XR, and Wear OS devices.
- Simplified authentication across use cases: Digital credentials, such as digital driver's licenses, corporate IDs, and national ID cards, enable authentication across various use cases, including those requiring phone number verification.
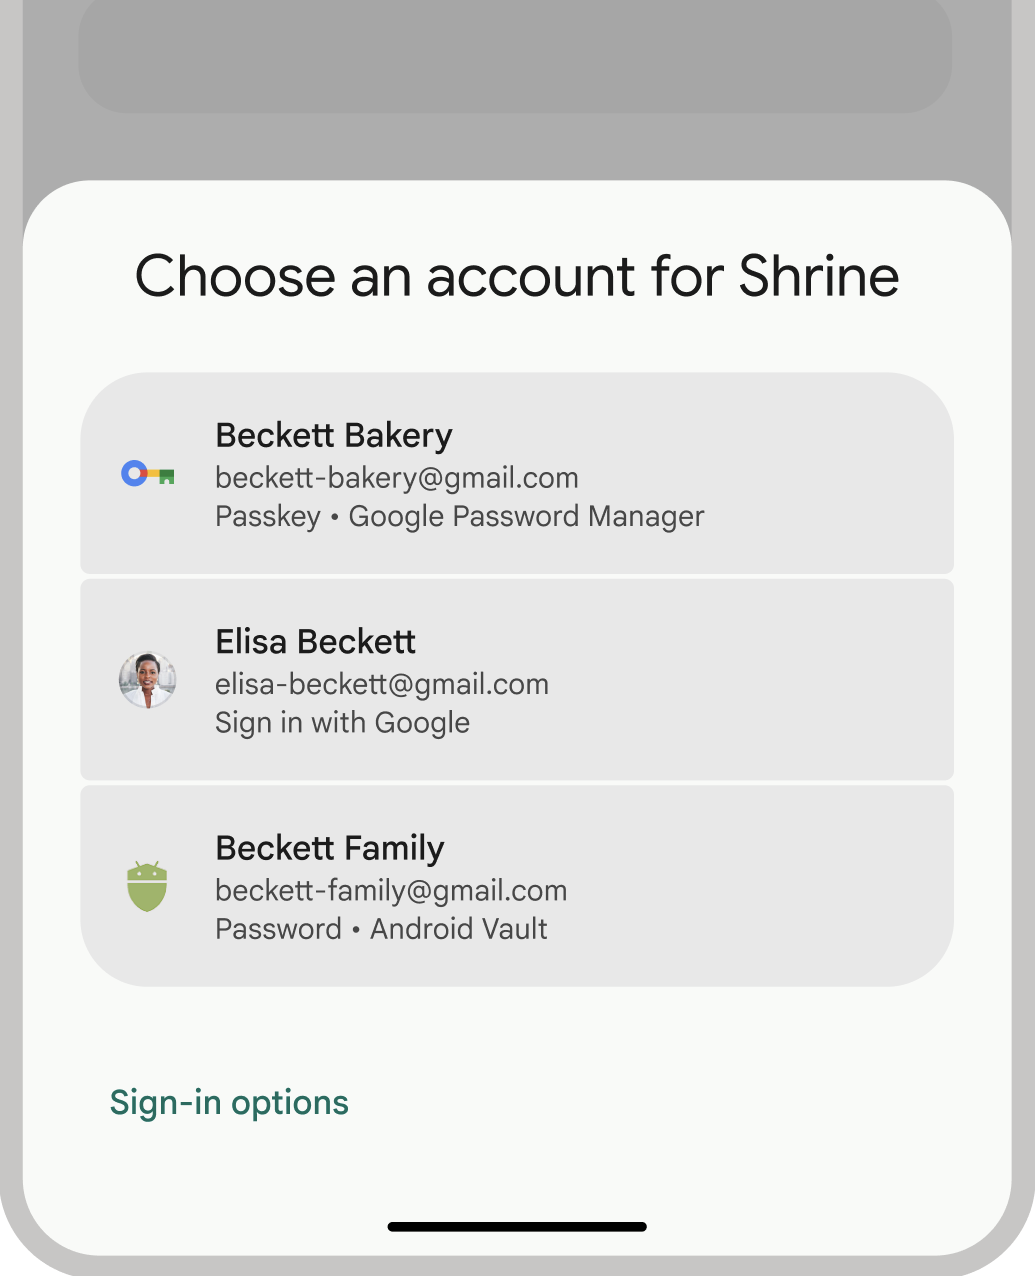
- Improved user experience: Credential Manager's unified interface gives users a familiar and consistent experience and improves registration and sign-in speeds. The bottom sheet UI appears inline to your app's content, so your users remain within your app's context during sign-in. The following image shows Credential Manager's built-in UI:
Authentication terminology
An entity that requires authentication for its users is known as a relying party. An authentication workflow typically includes the following components:
- Relying party client app: The client—in this case, your Android app—that handles the user interface to create and use passkeys.
- Relying party server: An app server that helps with the creation, storage, and verification of passkeys.
- Credential provider: A component that stores and provides user credentials, such as Google Password Manager. Note that the FIDO documentation refers to credential providers as credential managers.
Credential storage
Credential providers, such as Google Password Manager, provide a centralized and secure location for users to manage credentials across their devices, further simplifying the authentication process. To integrate with Credential Manager as a credential provider, see Implement authentication as a credential provider.
For more information about how Google Password Manager keeps your credentials secure, see Security of Passkeys in the Google Password Manager.
Migrate to Credential Manager
Credential Manager is intended to replace legacy Android authentication APIs and local FIDO2 credentials. For more information about migrating to Credential Manager, see the following guides: