
Swipe views let you navigate between sibling screens, such as tabs, with a horizontal finger gesture, or swipe. This navigation pattern is also referred to as horizontal paging.
This topic teaches you how to create a tab layout with swipe views for switching between tabs and how to show a title strip instead of tabs.
Implement swipe views
You can create swipe views using AndroidX's
ViewPager2 widget.
To use ViewPager2 and tabs, you need to add a dependency on
ViewPager2 and Material
Components
to your project.
To set up your layout with ViewPager2, add the <ViewPager2> element to your
XML layout. For example, if each page in the swipe view consumes the entire
layout, then your layout looks like this:
<androidx.viewpager2.widget.ViewPager2
    xmlns:android="http://schemas.android.com/apk/res/android"
    android:id="@+id/pager"
    android:layout_width="match_parent"
    android:layout_height="match_parent" />
To insert child views that represent each page, hook this layout to a
FragmentStateAdapter.
Here's how you might use it to swipe across a collection of Fragment objects:
Kotlin
class CollectionDemoFragment : Fragment() {
    // When requested, this adapter returns a DemoObjectFragment,
    // representing an object in the collection.
    private lateinit var demoCollectionAdapter: DemoCollectionAdapter
    private lateinit var viewPager: ViewPager2

    override fun onCreateView(
        inflater: LayoutInflater,
        container: ViewGroup?,
        savedInstanceState: Bundle?
    ): View? {
        return inflater.inflate(R.layout.collection_demo, container, false)
    }

    override fun onViewCreated(view: View, savedInstanceState: Bundle?) {
        demoCollectionAdapter = DemoCollectionAdapter(this)
        viewPager = view.findViewById(R.id.pager)
        viewPager.adapter = demoCollectionAdapter
    }
}

class DemoCollectionAdapter(fragment: Fragment) : FragmentStateAdapter(fragment) {

    override fun getItemCount(): Int = 100

    override fun createFragment(position: Int): Fragment {
        // Return a NEW fragment instance in createFragment(int).
        val fragment = DemoObjectFragment()
        fragment.arguments = Bundle().apply {
            // The object is just an integer.
            putInt(ARG_OBJECT, position + 1)
        }
        return fragment
    }
}

private const val ARG_OBJECT = "object"

// Instances of this class are fragments representing a single
// object in the collection.
class DemoObjectFragment : Fragment() {

    override fun onCreateView(
        inflater: LayoutInflater,
        container: ViewGroup?,
        savedInstanceState: Bundle?
    ): View {
        return inflater.inflate(R.layout.fragment_collection_object, container, false)
    }

    override fun onViewCreated(view: View, savedInstanceState: Bundle?) {
        arguments?.takeIf { it.containsKey(ARG_OBJECT) }?.apply {
            val textView: TextView = view.findViewById(android.R.id.text1)
            textView.text = getInt(ARG_OBJECT).toString()
        }
    }
}
Java
public class CollectionDemoFragment extends Fragment {
    // When requested, this adapter returns a DemoObjectFragment,
    // representing an object in the collection.
    DemoCollectionAdapter demoCollectionAdapter;
    ViewPager2 viewPager;

    @Nullable
    @Override
    public View onCreateView(@NonNull LayoutInflater inflater, @Nullable ViewGroup container,
            @Nullable Bundle savedInstanceState) {
        return inflater.inflate(R.layout.collection_demo, container, false);
    }

    @Override
    public void onViewCreated(@NonNull View view, @Nullable Bundle savedInstanceState) {
        demoCollectionAdapter = new DemoCollectionAdapter(this);
        viewPager = view.findViewById(R.id.pager);
        viewPager.setAdapter(demoCollectionAdapter);
    }
}

public class DemoCollectionAdapter extends FragmentStateAdapter {
    public DemoCollectionAdapter(Fragment fragment) {
        super(fragment);
    }

    @NonNull
    @Override
    public Fragment createFragment(int position) {
        // Return a NEW fragment instance in createFragment(int).
        Fragment fragment = new DemoObjectFragment();
        Bundle args = new Bundle();
        // The object is just an integer.
        args.putInt(DemoObjectFragment.ARG_OBJECT, position + 1);
        fragment.setArguments(args);
        return fragment;
    }

    @Override
    public int getItemCount() {
        return 100;
    }
}

// Instances of this class are fragments representing a single
// object in the collection.
public class DemoObjectFragment extends Fragment {
    public static final String ARG_OBJECT = "object";

    @Nullable
    @Override
    public View onCreateView(@NonNull LayoutInflater inflater, @Nullable ViewGroup container,
            @Nullable Bundle savedInstanceState) {
        return inflater.inflate(R.layout.fragment_collection_object, container, false);
    }

    @Override
    public void onViewCreated(@NonNull View view, @Nullable Bundle savedInstanceState) {
        Bundle args = getArguments();
        ((TextView) view.findViewById(android.R.id.text1))
                .setText(Integer.toString(args.getInt(ARG_OBJECT)));
    }
}
The following sections show how you can add tabs to help facilitate navigation between pages.
Add tabs using a TabLayout
A TabLayout provides
a way to display tabs horizontally. When used together with a ViewPager2, a
TabLayout can provide a familiar interface for navigating between pages in a
swipe view.
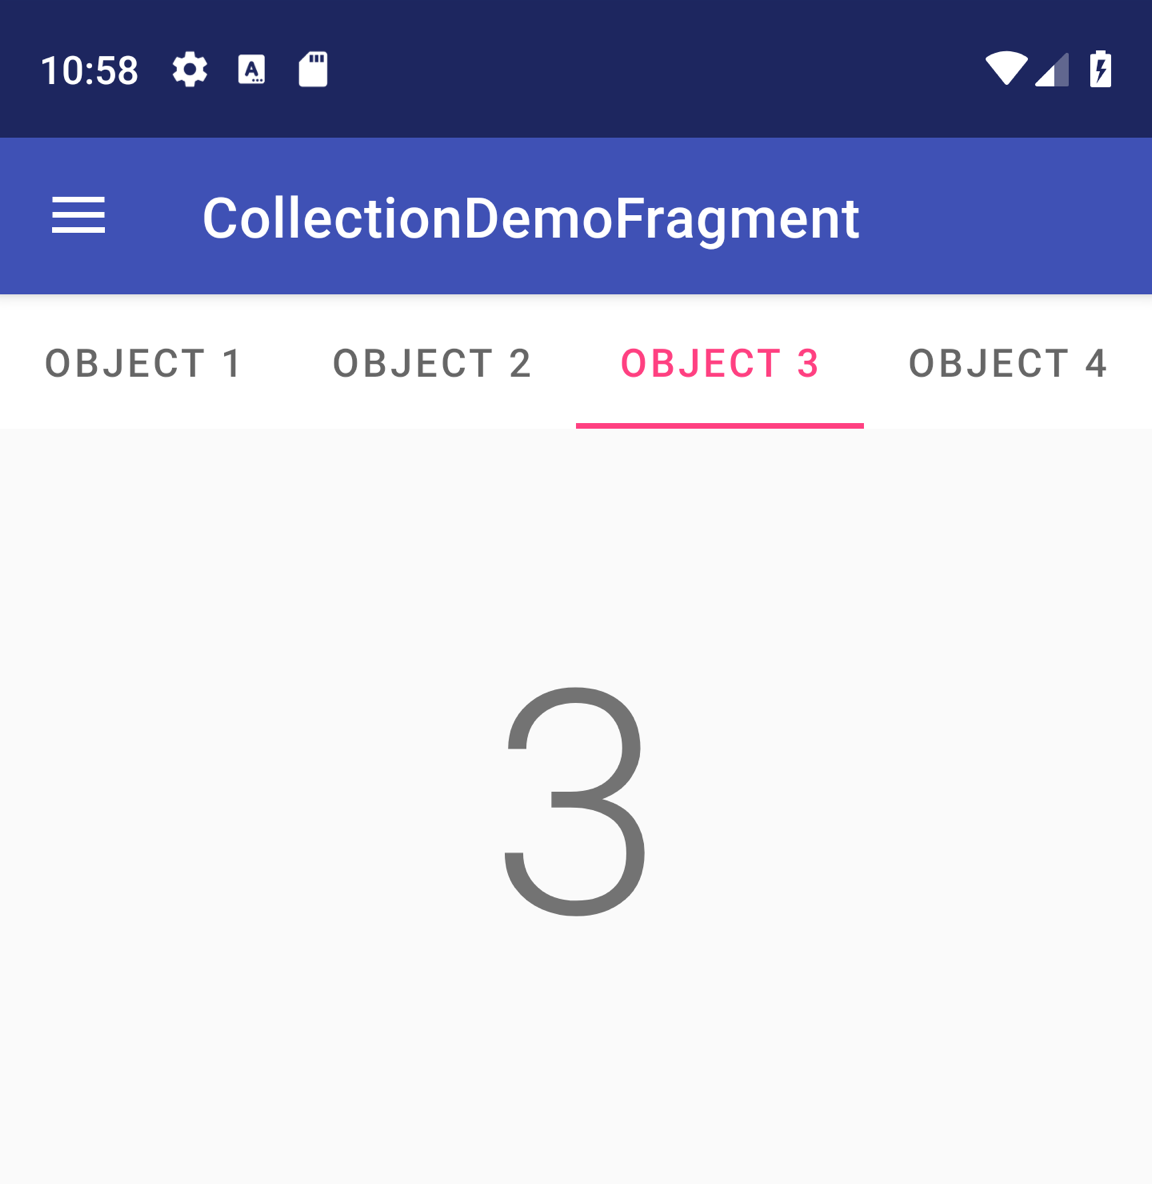
TabLayout with four tabs.
To include a TabLayout in a ViewPager2, add a <TabLayout> element above
the <ViewPager2> element:
<LinearLayout xmlns:android="http://schemas.android.com/apk/res/android"
    android:layout_width="match_parent"
    android:layout_height="match_parent"
    android:orientation="vertical">

    <com.google.android.material.tabs.TabLayout
        android:id="@+id/tab_layout"
        android:layout_width="match_parent"
        android:layout_height="wrap_content" />

    <androidx.viewpager2.widget.ViewPager2
        android:id="@+id/pager"
        android:layout_width="match_parent"
        android:layout_height="0dp"
        android:layout_weight="1" />

</LinearLayout>
Next, create a
TabLayoutMediator
to link the TabLayout to the ViewPager2 and attach it, as follows:
Kotlin
class CollectionDemoFragment : Fragment() {
    ...
    override fun onViewCreated(view: View, savedInstanceState: Bundle?) {
        val tabLayout = view.findViewById(R.id.tab_layout)
        TabLayoutMediator(tabLayout, viewPager) { tab, position ->
            tab.text = "OBJECT ${(position + 1)}"
        }.attach()
    }
    ...
}
Java
public class CollectionDemoFragment extends Fragment {
    ...
    @Override
    public void onViewCreated(@NonNull View view, @Nullable Bundle savedInstanceState) {
        TabLayout tabLayout = view.findViewById(R.id.tab_layout);
        new TabLayoutMediator(tabLayout, viewPager,
                (tab, position) -> tab.setText("OBJECT " + (position + 1))
        ).attach();
    }
    ...
}
For additional design guidance for tab layouts, see the Material Design documentation for tabs.
Additional resources
To learn more about ViewPager2, see the following additional resources.
Samples
- ViewPager2 samples on GitHub