
As you test your app, use the Android XR Emulator to extend your testing capacity beyond your physical test devices. You can use the emulator controls to help you test how your app behaves in common scenarios with XR headsets and XR glasses. See the following sections for details about running your virtual Android XR devices in the emulator and the emulator controls you can use.
Run your app on the emulator
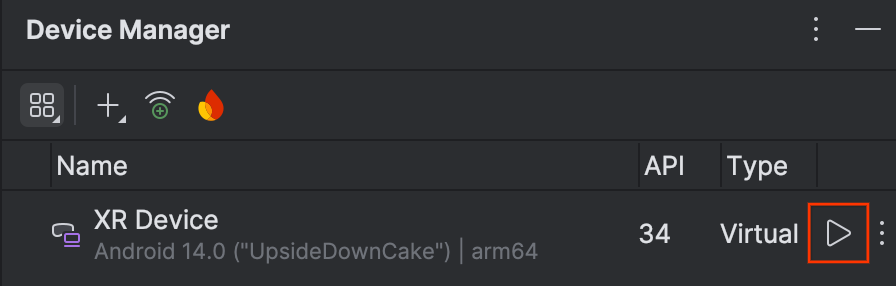
To start the emulator, click Run for the AVD in the Device Manager.
The emulator opens in the side panel.
To launch your app in the emulator, click Run in the Android Studio main toolbar.

Use emulator controls for XR headsets and XR glasses
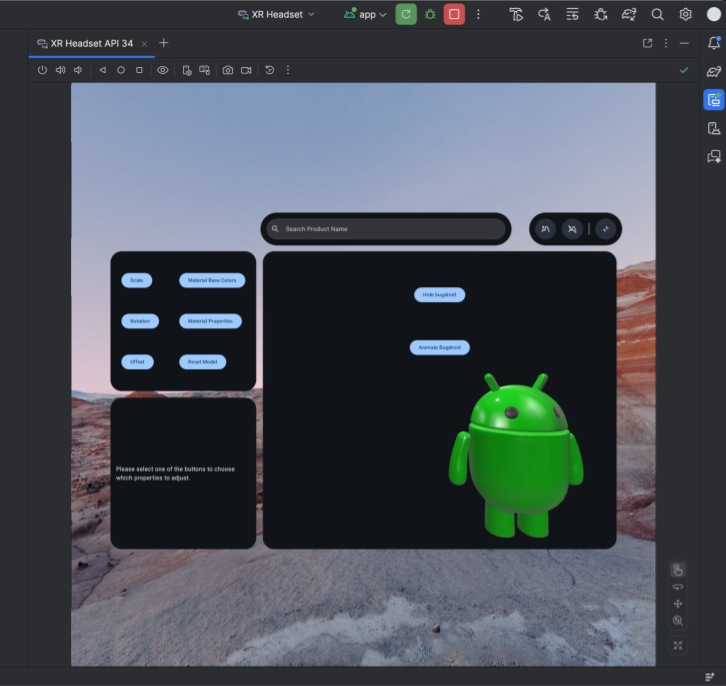
When the Android XR Emulator loads, look for the menu like the one shown in figure 1. Use the controls in this menu to interact with the emulator.

Enable the mouse and keyboard
The emulator supports interaction through a mouse and keyboard. When you want to interact with the system or an Android app in the emulator, select the interaction controls option:
After selecting this, you can start interacting with elements within the virtual space by moving the mouse over the emulator window.
Look and move around in the virtual environment
The Android XR Emulator renders apps and their content in a virtual 3D environment. Use the following controls to change the direction of your view:

|
Rotate: Drag the mouse to pivot your view in that direction. |

|
Pan: Drag the mouse to move up, down, and side to side. This lets you view the emulator contents from different angles. |

|
Dolly: Drag the mouse to move closer or farther from the objects in view. |

|
Reset: Click this button to return the emulator to the default view. |
You can also use the following keyboard shortcuts to move around in the virtual
environment. To use these while using mouse and keyboard input, hold the
Option key (macOS) or Alt key (Windows).
W: (or up arrow key): Move forward in your current view.A: (or left arrow key): Side-step left.S: (or down arrow key): Move backward.D: (or right arrow key): Side-step right.Q: Move vertically downward.E: Move vertically upward.
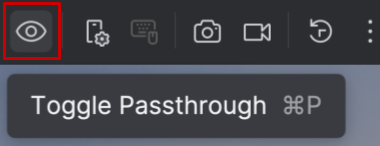
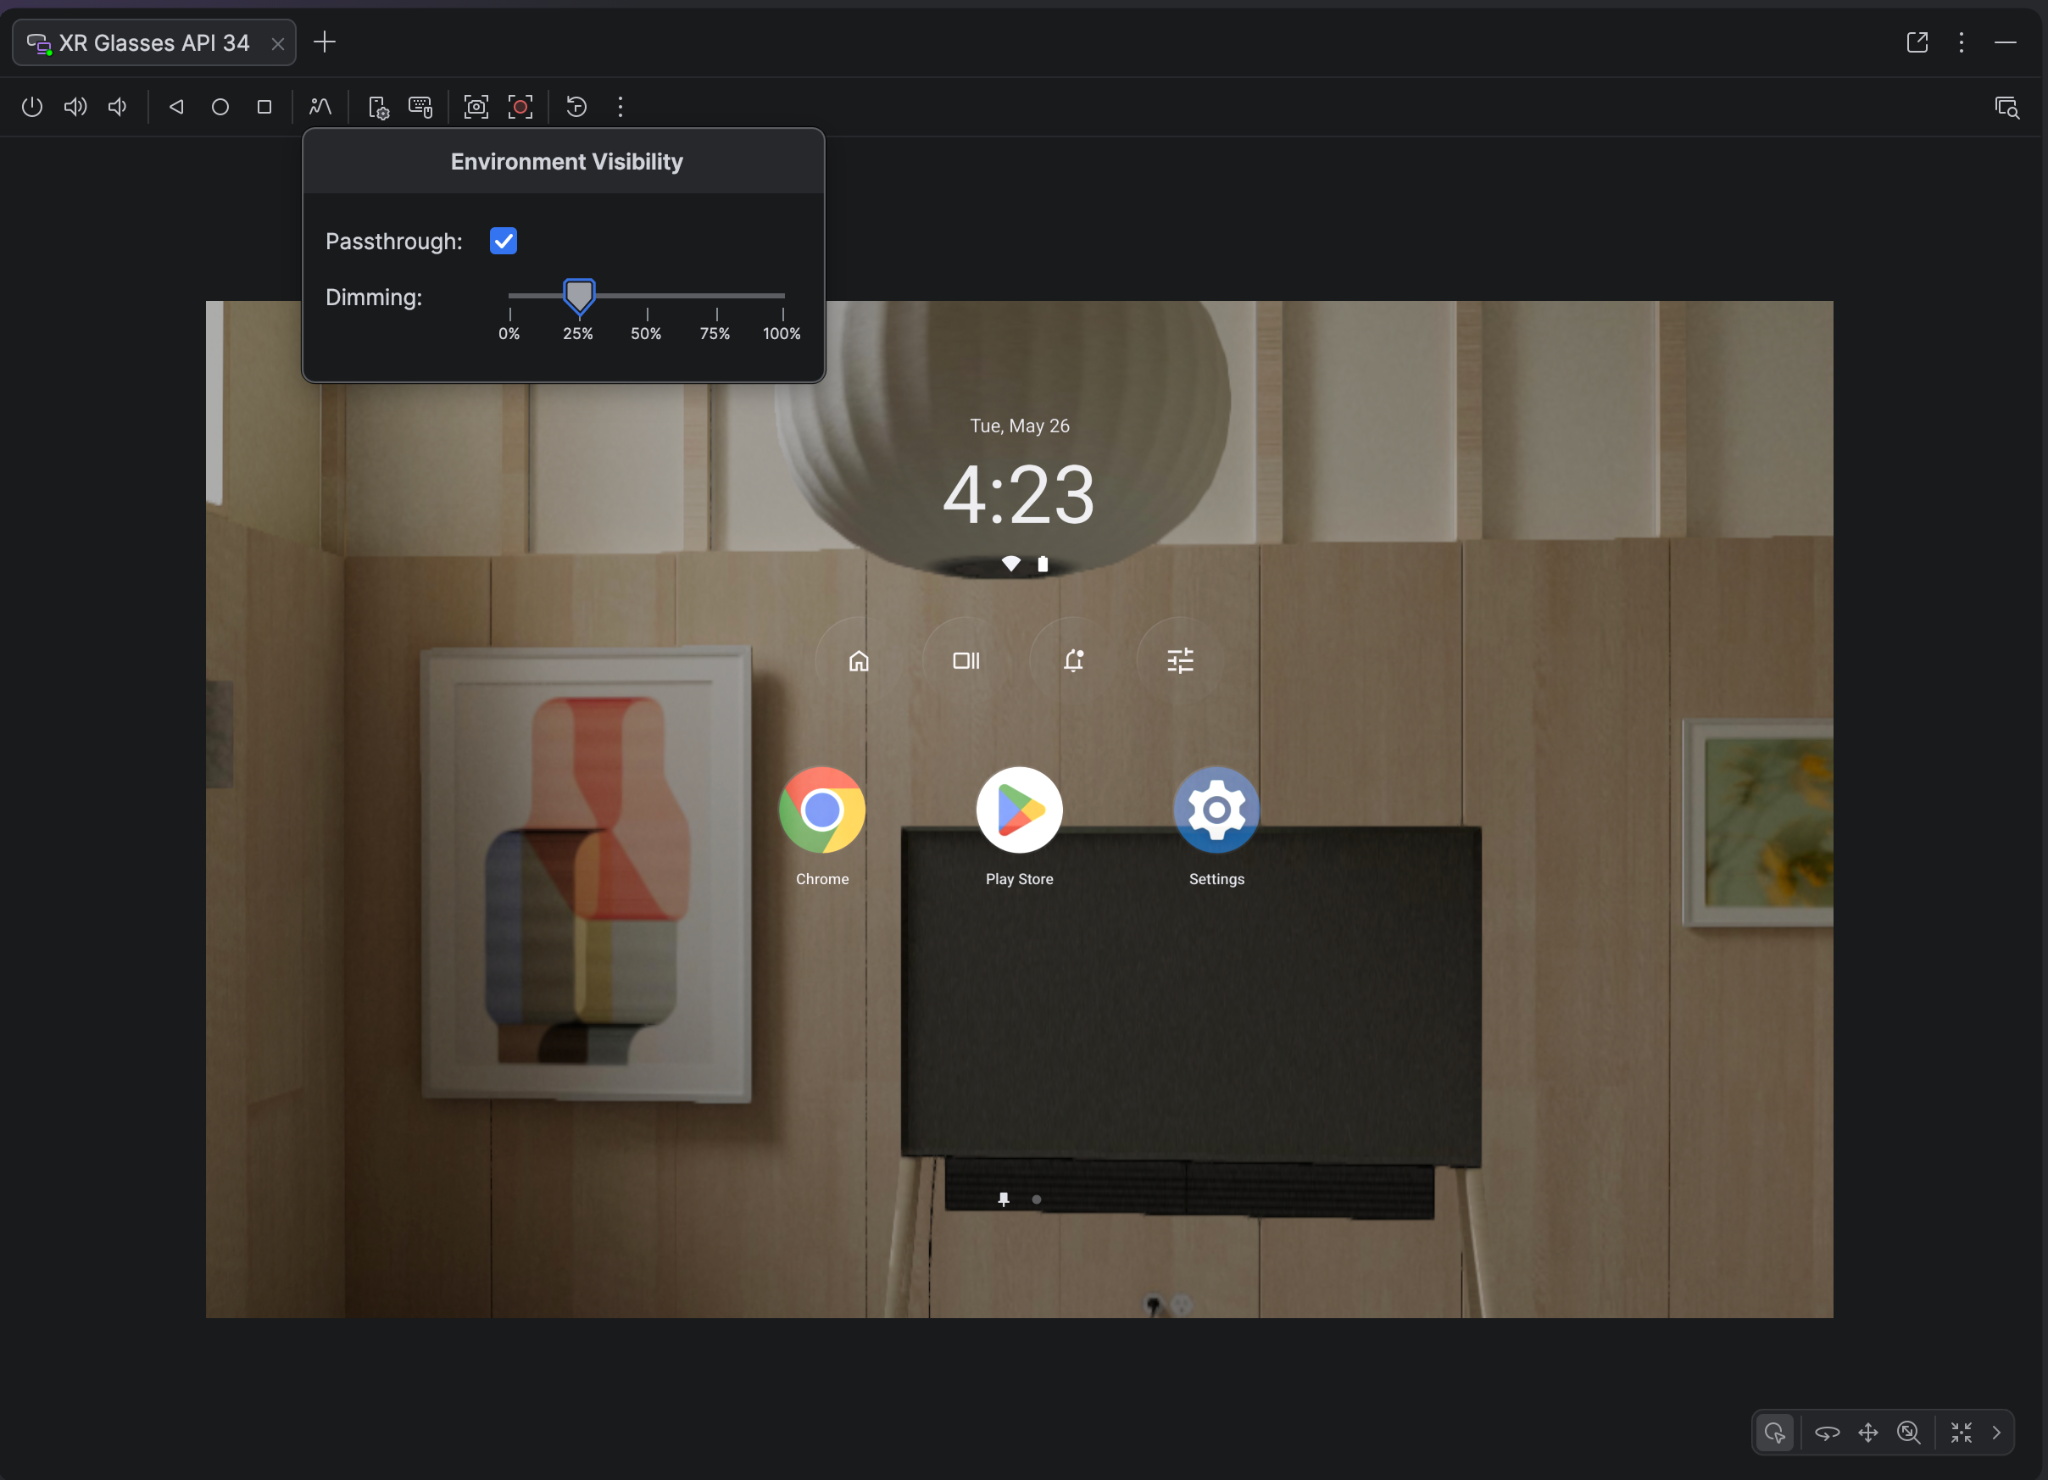
Enable passthrough mode
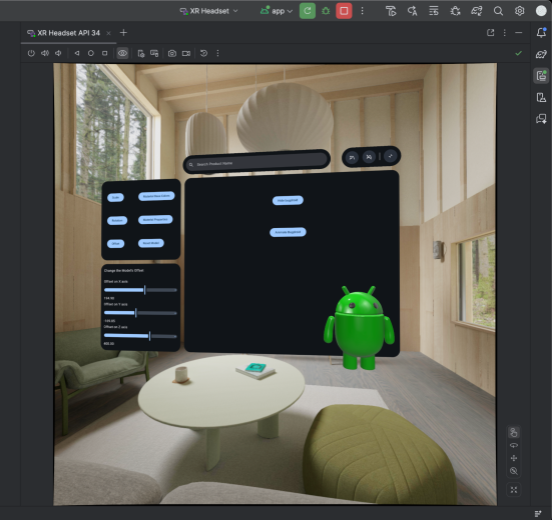
The menu at the top of the emulator includes the Toggle Passthrough option to enable or disable a simulated passthrough environment.
When enabled, passthrough mode displays a simulated indoor environment. Use this mode to test apps in mixed reality.
Adjust the environment dimming levels on XR glasses
XR Glasses utilize additive displays on semi-transparent lenses and can also include dimming technology. By darkening the physical background, these lenses ensure that digital content remains crisp and legible, even in bright physical environments.
Use the emulator's environment dimming controls to accurately preview immersive content on XR glasses. To adjust the dimming levels, click the Environment Visibility icon and use the environment dimming slider to pick a level between fully transparent and maximum opacity.
Other emulator controls
You can also use the following emulator controls:

|
Power: Simulates powering the device on or off. |


|
Volume: Simulates volume control. |


|
Screenshot: Takes a screenshot or screen recording of the current state of the device. |


|
Android 3 button controls: Simulates the Back, Home, and Overview buttons. |