ওয়াচ ফেস ডিজাইনার থেকে Google Play-তে প্রকাশ করুন
সেভ করা পৃষ্ঠা গুছিয়ে রাখতে 'সংগ্রহ' ব্যবহার করুন
আপনার পছন্দ অনুযায়ী কন্টেন্ট সেভ করুন ও সঠিক বিভাগে রাখুন।
এই নির্দেশিকাটি ব্যাখ্যা করে কিভাবে আপনার ঘড়ির মুখ, ওয়াচ ফেস ডিজাইনার ব্যবহার করে তৈরি, Google Play-তে প্রকাশ করবেন৷
Google Play-তে আপনার ডেভেলপার অ্যাকাউন্টে সাইন ইন করুন
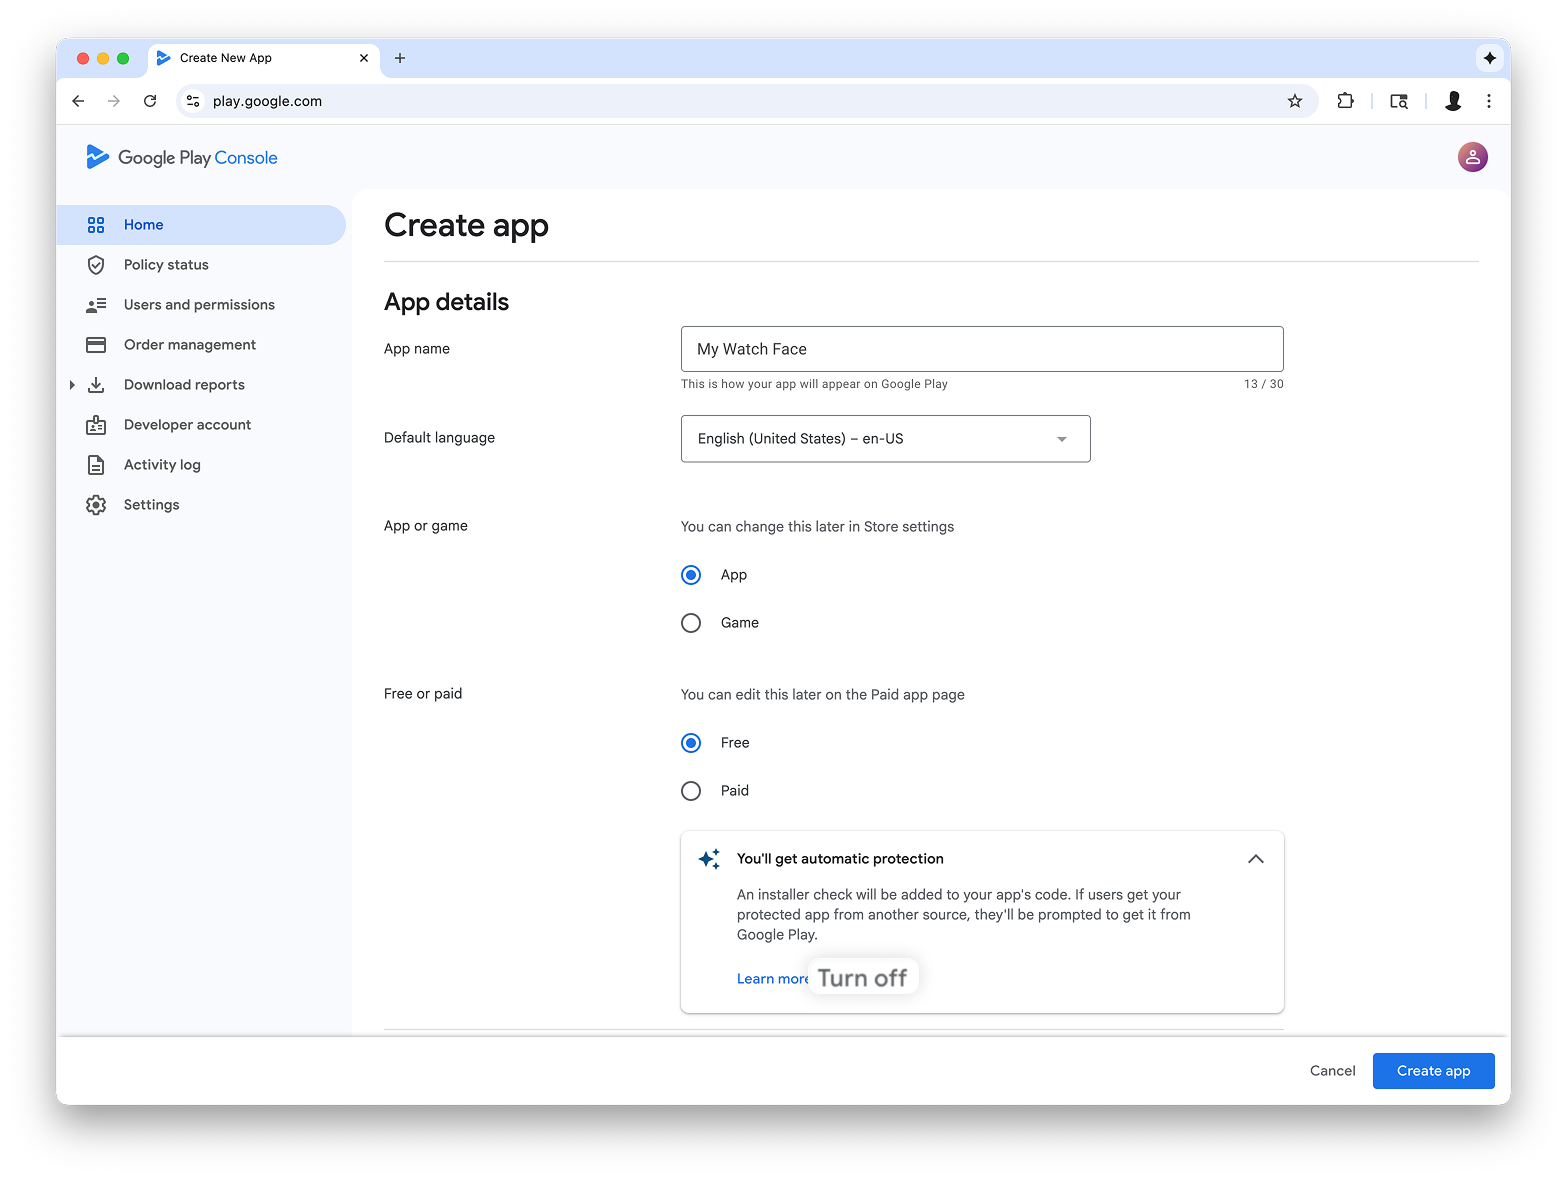
Google Play Console-এ সাইন ইন করুন এবং ড্যাশবোর্ডে 'Create App' টিপুন।
"অ্যাপ তৈরি করুন", ওয়ার্কফ্লো চলাকালীন, অনুরোধ করা হলে স্বয়ংক্রিয় সুরক্ষা বন্ধ করুন ; অন্যথায়, পরে বান্ডিল স্বাক্ষর করতে আপনার সমস্যা হবে। স্বয়ংক্রিয় সুরক্ষা মুখ দেখার জন্য প্রাসঙ্গিক নয় কারণ তাদের কোনও কোড নেই৷
চিত্র 1 : প্লে কনসোলে অ্যাপ তৈরি করুন
Wear OS ফর্ম ফ্যাক্টরের জন্য সমর্থন যোগ করুন
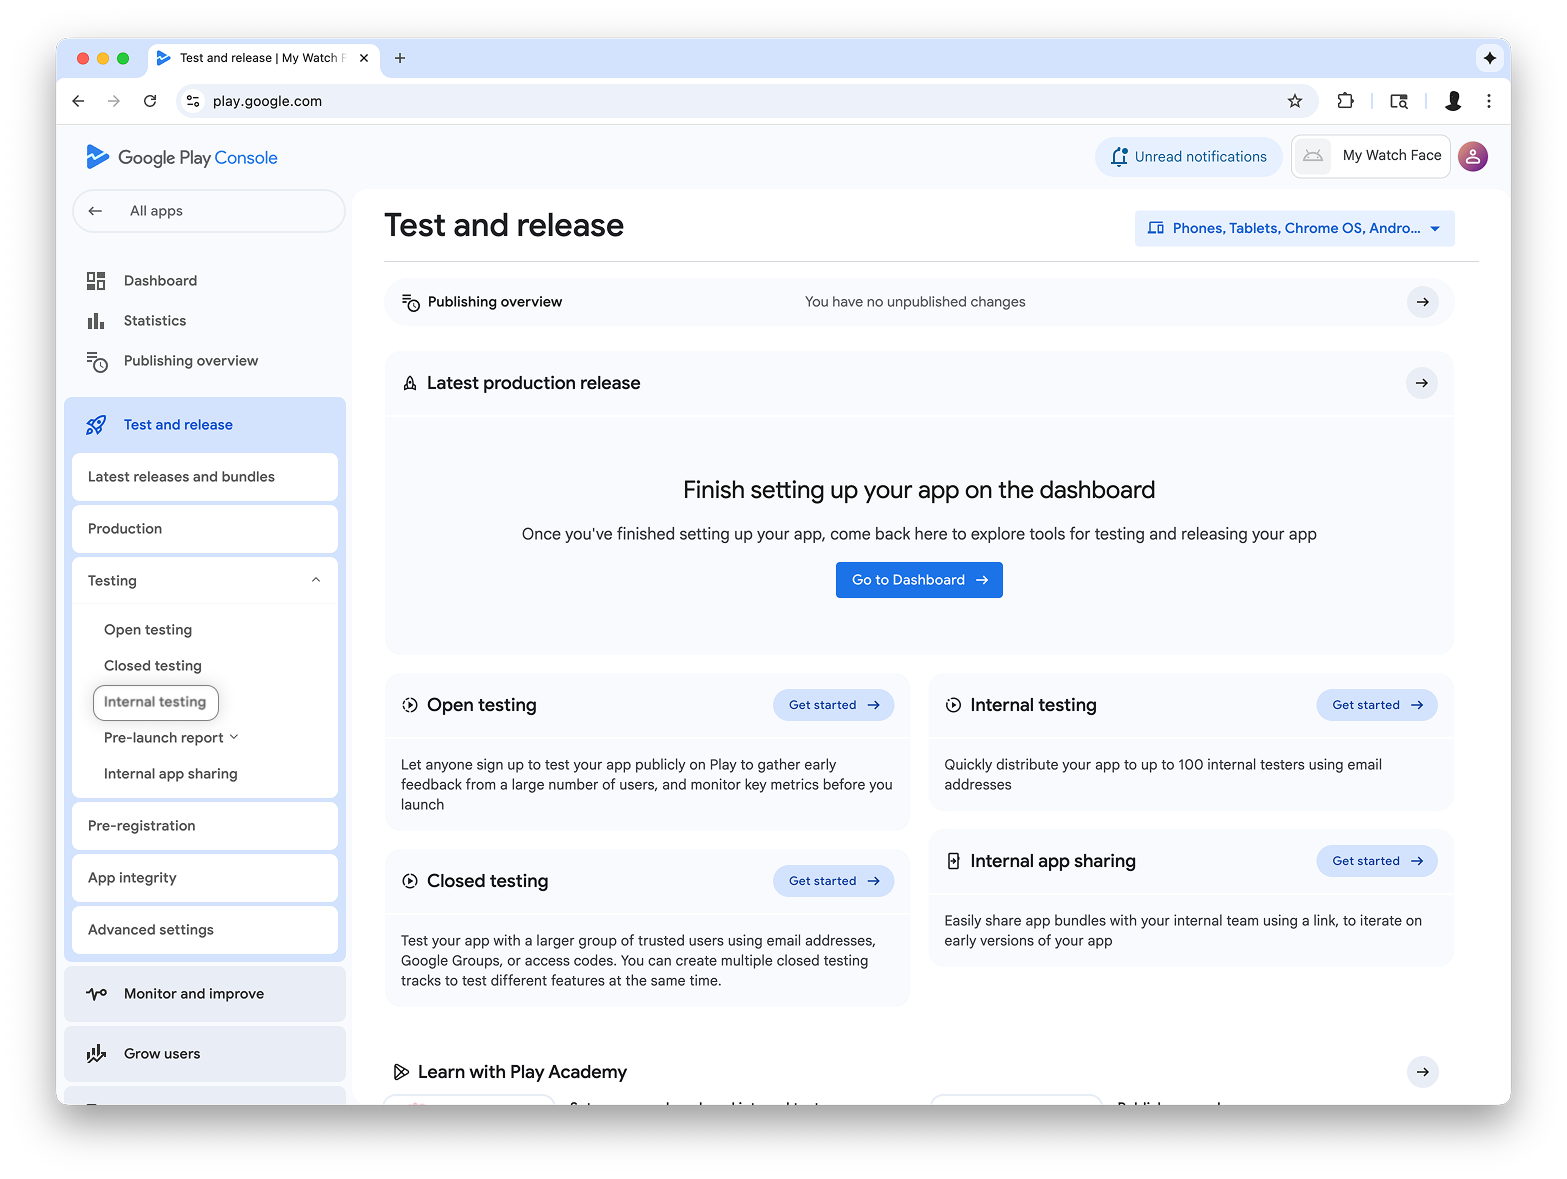
আপনি আপনার অ্যাপ তৈরি করার পরে, পরীক্ষা করুন এবং প্রকাশ করুন > পরীক্ষা > অভ্যন্তরীণ পরীক্ষা :
চিত্র 2 : প্লে কনসোলে টেস্ট এবং রিলিজ স্ক্রীন
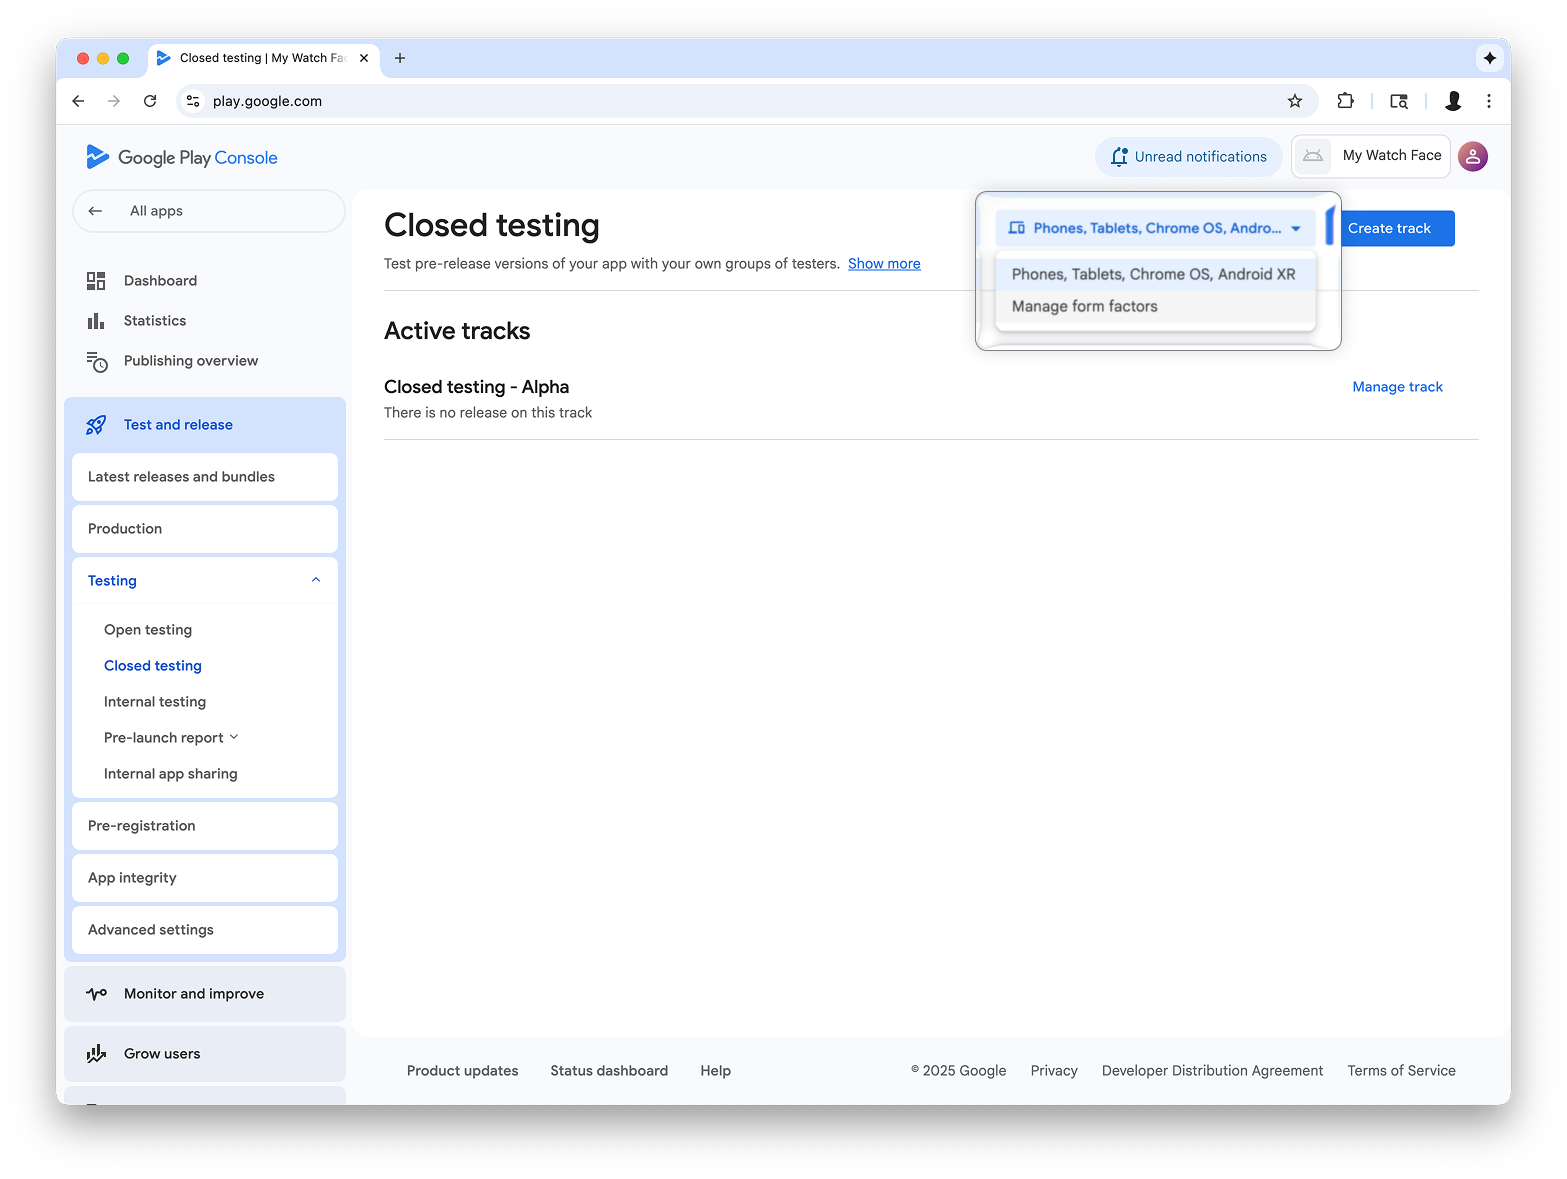
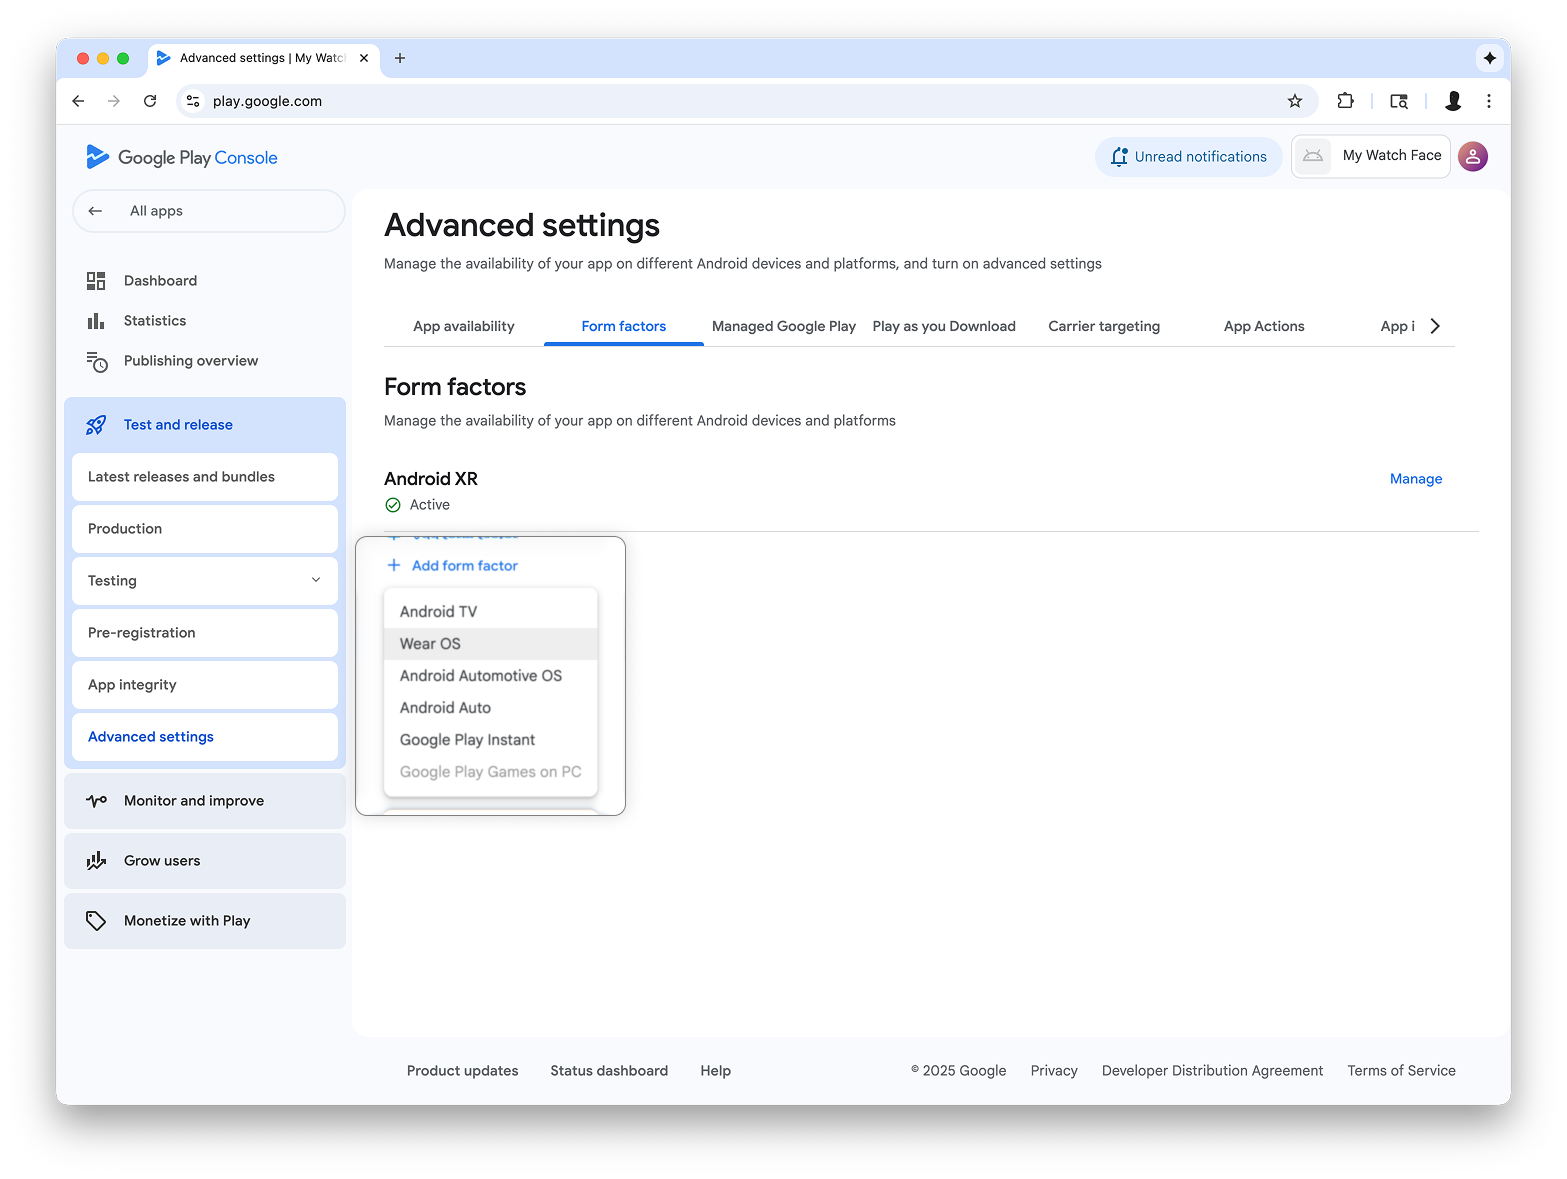
পৃষ্ঠার উপরের ডানদিকে ড্রপ-ডাউনে, ফর্ম ফ্যাক্টরগুলি পরিচালনা করুন নির্বাচন করুন এবং আপনার অ্যাপের ফর্ম ফ্যাক্টর হিসাবে Wear OS যোগ করুন:
চিত্র 3 : ম্যানেজ ফর্ম ফ্যাক্টর বিকল্পটি নির্বাচন করা (বামে), তারপর উন্নত সেটিংস স্ক্রিনে ফর্ম ফ্যাক্টর ট্যাবে Wear OS যোগ করুন (ডানদিকে)
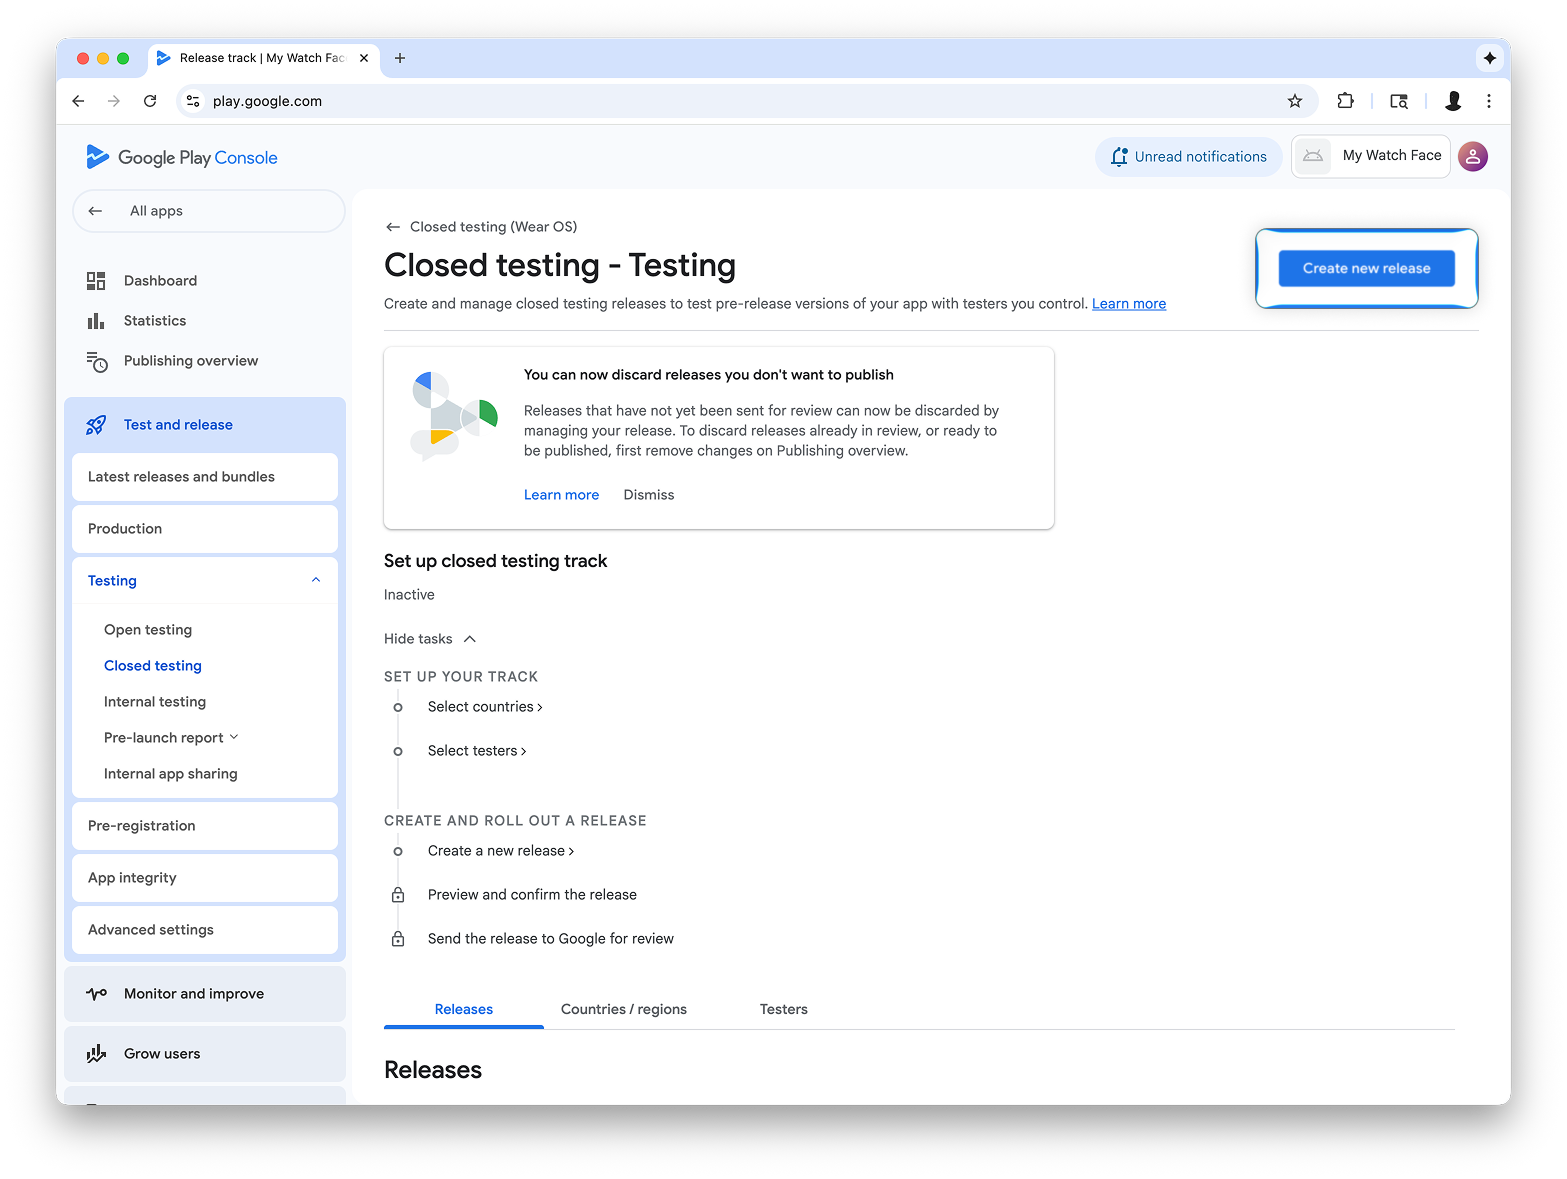
অভ্যন্তরীণ টেস্টিং ট্র্যাকে একটি রিলিজ তৈরি করুন
অভ্যন্তরীণ টেস্টিং মেনুতে ফিরে যান এবং শুধুমাত্র Wear OS-এর অভ্যন্তরীণ টেস্টিং ট্র্যাক তৈরি করুন। তারপর, একটি রিলিজ তৈরি করুন:
চিত্র 4 : ক্রিয়েট ট্র্যাক বোতামটি নির্বাচন করুন (বামে), তারপর পরবর্তী স্ক্রিনে, নতুন রিলিজ তৈরি করুন বোতামটি নির্বাচন করুন (ডানদিকে)।
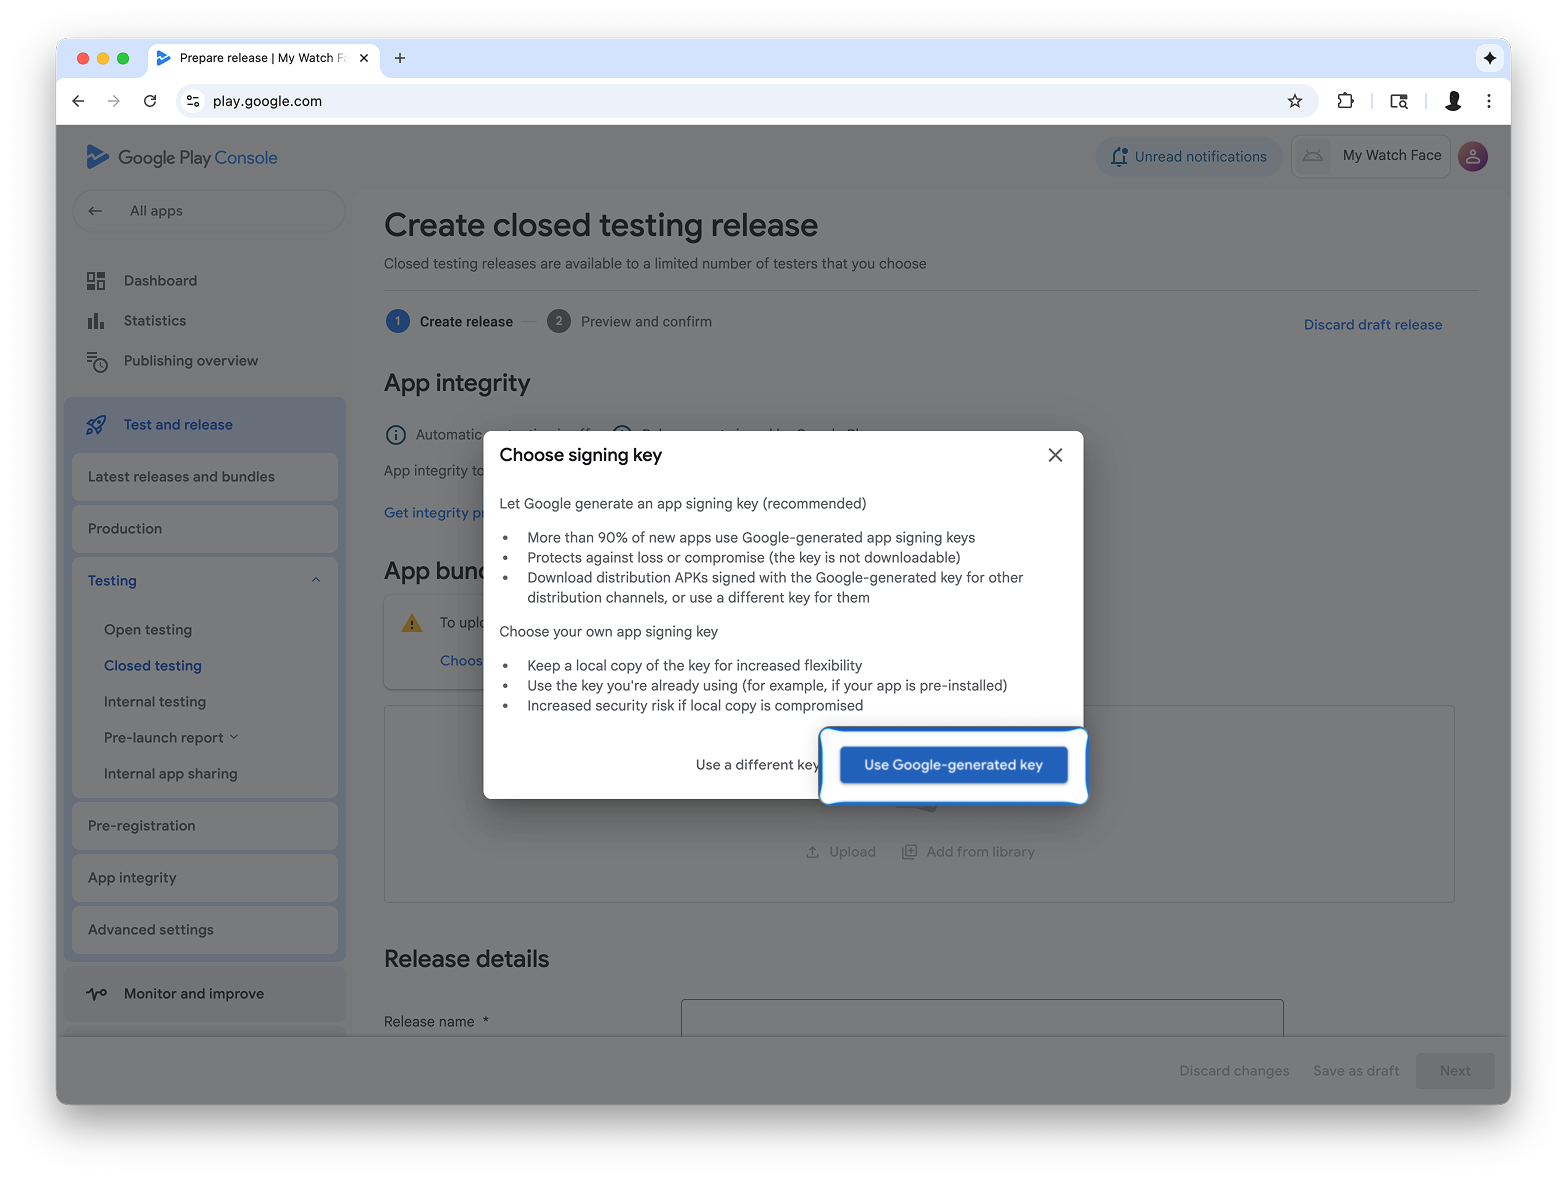
ক্লোজড টেস্টিং রিলিজ তৈরি করুন স্ক্রিনে, সাইনিং কী নির্বাচন করুন নির্বাচন করুন।
চিত্র 5 : সিলেক্ট সাইনিং কী বোতামটি নির্বাচন করুন (বামে), তারপরে প্রদর্শিত ডায়ালগে, Google-জেনারেটেড কী ব্যবহার করুন (ডানদিকে) নির্বাচন করুন।
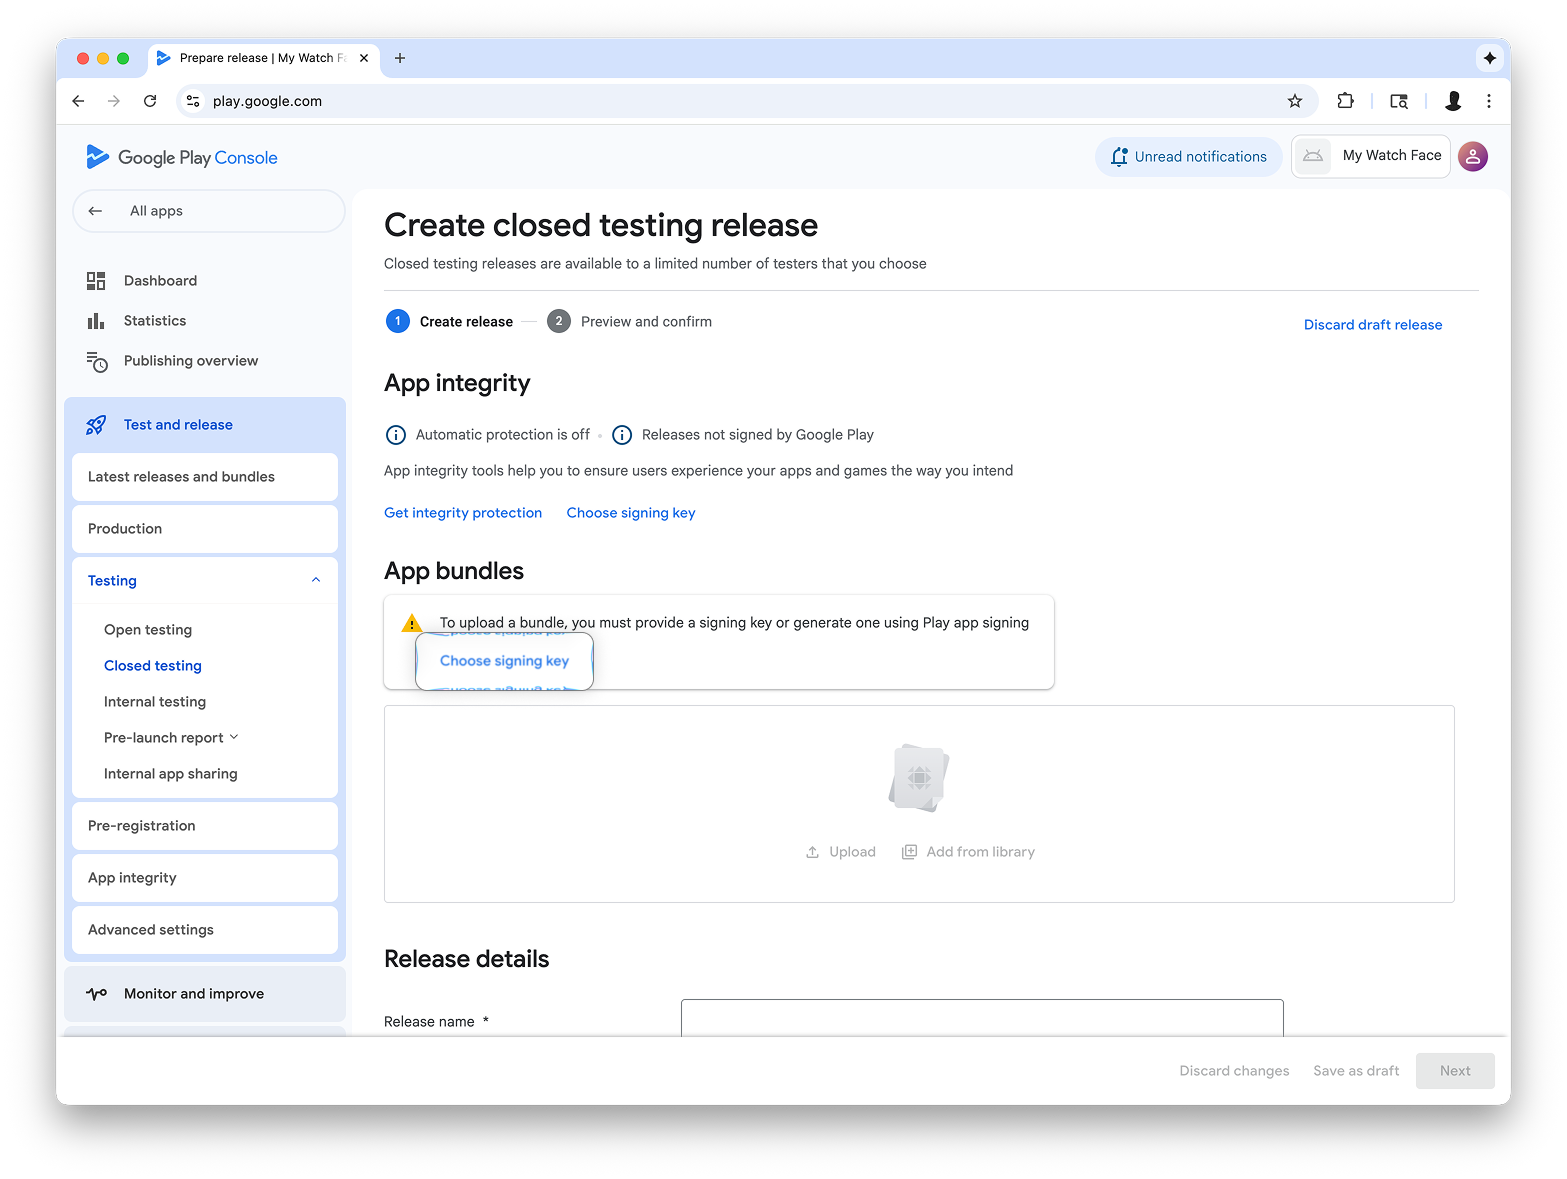
ওয়াচ ফেস ডিজাইনার থেকে AAB ফাইলটিকে আপলোড বিভাগে টেনে আনুন এবং টেস্টিং ট্র্যাকে রিলিজ তৈরি করে এগিয়ে যান।
এই পৃষ্ঠার কন্টেন্ট ও কোডের নমুনাগুলি Content License-এ বর্ণিত লাইসেন্সের অধীনস্থ। Java এবং OpenJDK হল Oracle এবং/অথবা তার অ্যাফিলিয়েট সংস্থার রেজিস্টার্ড ট্রেডমার্ক।
2025-08-26 UTC-তে শেষবার আপডেট করা হয়েছে।
[[["সহজে বোঝা যায়","easyToUnderstand","thumb-up"],["আমার সমস্যার সমাধান হয়েছে","solvedMyProblem","thumb-up"],["অন্যান্য","otherUp","thumb-up"]],[["এতে আমার প্রয়োজনীয় তথ্য নেই","missingTheInformationINeed","thumb-down"],["খুব জটিল / অনেক ধাপ","tooComplicatedTooManySteps","thumb-down"],["পুরনো","outOfDate","thumb-down"],["অনুবাদ সংক্রান্ত সমস্যা","translationIssue","thumb-down"],["নমুনা / কোড সংক্রান্ত সমস্যা","samplesCodeIssue","thumb-down"],["অন্যান্য","otherDown","thumb-down"]],["2025-08-26 UTC-তে শেষবার আপডেট করা হয়েছে।"],[],[],null,["This guide explains how to publish your watch face, created using\nWatch Face Designer, to Google Play.\n| **Note:** Before you begin, [export your watch face using the Google Play option](/training/wearables/watch-face-designer/export#google-play) so that you have an Android App Bundle (AAB) file ready.\n\nSign into your developer account in Google Play\n\nSign in to Google Play Console and press 'Create App' on the dashboard.\n| **Note:** If you don't have a Google Play Console developer account, [follow the\n| official guide to create one](https://support.google.com/googleplay/android-developer/answer/6112435). This includes paying a registration fee.\n\nDuring the \"create app,\" workflow, **turn off automatic protection when\nprompted**; otherwise, you'll have issues signing the bundle later. Automatic\nprotection isn't relevant to watch faces because they don't have any code.\n**Figure 1** : The **Create app** screen in the Play Console\n\nAdd support for the Wear OS form factor\n\nAfter you've created your app, navigate to **Test and release \\\u003e Testing \\\u003e\nInternal testing**:\n**Figure 2** : The **Test and release** screen in the Play Console\n\nIn the drop-down in the top right of the page, select **Manage form factors**,\nand add Wear OS as a form factor for your app:\n**Figure 3** : Selecting the **Manage form\nfactors** option (left), then adding Wear OS on the **Form factors** tab on the **Advanced settings** screen (right)\n\nCreate a release on the internal testing track\n\nReturn to the internal testing menu and create a Wear OS-only internal testing\ntrack. Then, create a release:\n**Figure 4** : Select the **Create track** button (left), then on the next screen, select the **Create new release** button (right).\n\nOn the **Create closed testing release** screen, select **Choose signing key**.\n| **Caution:** In the **Choose signing key** dialog that appears, select **Use Google-generated key**:\n**Figure 5** : Select the **Choose signing\nkey** button (left), then in the dialog that appears, select **Use\nGoogle-generated key** (right).\n\nDrag-and-drop the AAB file from Watch Face Designer into the **Upload** section,\nand proceed with creating the release on the testing track.\n\nNext steps\n\nFrom here, follow official Google Play documentation on [trying out apps in the\ntesting track](https://support.google.com/googleplay/answer/7003180) and [promoting releases to production](https://support.google.com/googleplay/android-developer/answer/9859348), which makes your\napp visible to everyone on Google Play."]]