
keywords: wear, permissions, collection_guideslandingwear image_path: images/training/wear/multiple_permissions.png
Requesting permissions on Wear OS is similar to requesting permissions in mobile apps, with a couple of additional use cases. This document assumes you understand how Android permissions work. If you don’t, review how permissions work on Android.
Just like in a mobile app, the user must grant permissions to a Wear app for access to certain functionality. In your Wear apps, provide meaningful functionality without requesting any permissions.
Permission scenarios
There are several scenarios you might encounter when requesting dangerous permissions on Wear OS:
The Wear app requests permissions for an app running on the wearable device.
The Wear app requests permissions for an app running on the phone.
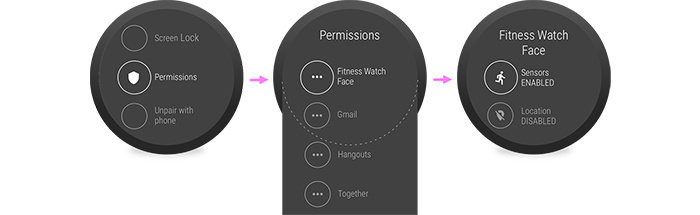
The phone app requests permissions for an app running on the wearable device.
The phone app requests multiple permissions that can be used only while the wearable device is connected.
To see all these scenarios in a working app, review the ExerciseSampleCompose sample on GitHub.
The following sections explain each of these scenarios. For more detailed information about requesting permissions, see the Permission-request patterns section.
Wear app requests wearable permission
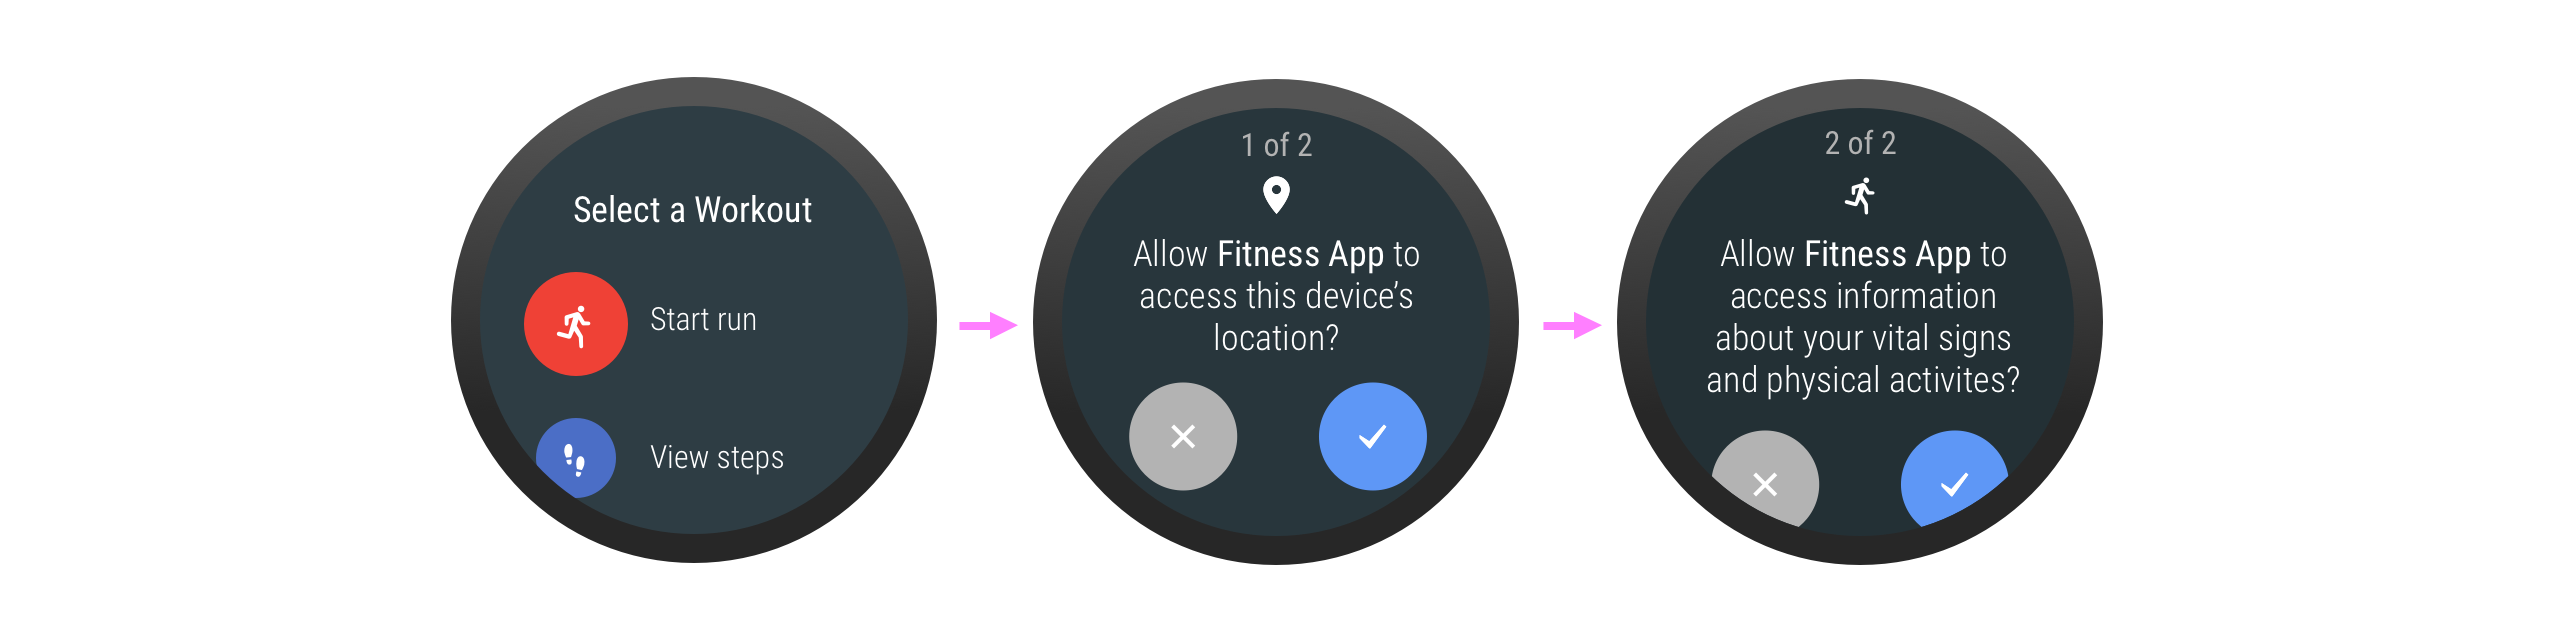
When the Wear app requests a permission for an app running on the wearable device, the system displays a dialog to prompt the user for that permission. In your app, request permissions only when it is clear to the user why the permissions are needed to perform a given operation.
Review the permission principles
to make sure you provide the best experience for your users, and remember
to check
shouldShowRequestPermissionRationale()
and provide additional information
as needed.
If an app or watch face requires more than one permission at a time, permission requests appear one after the other.
Wear app requests phone permission
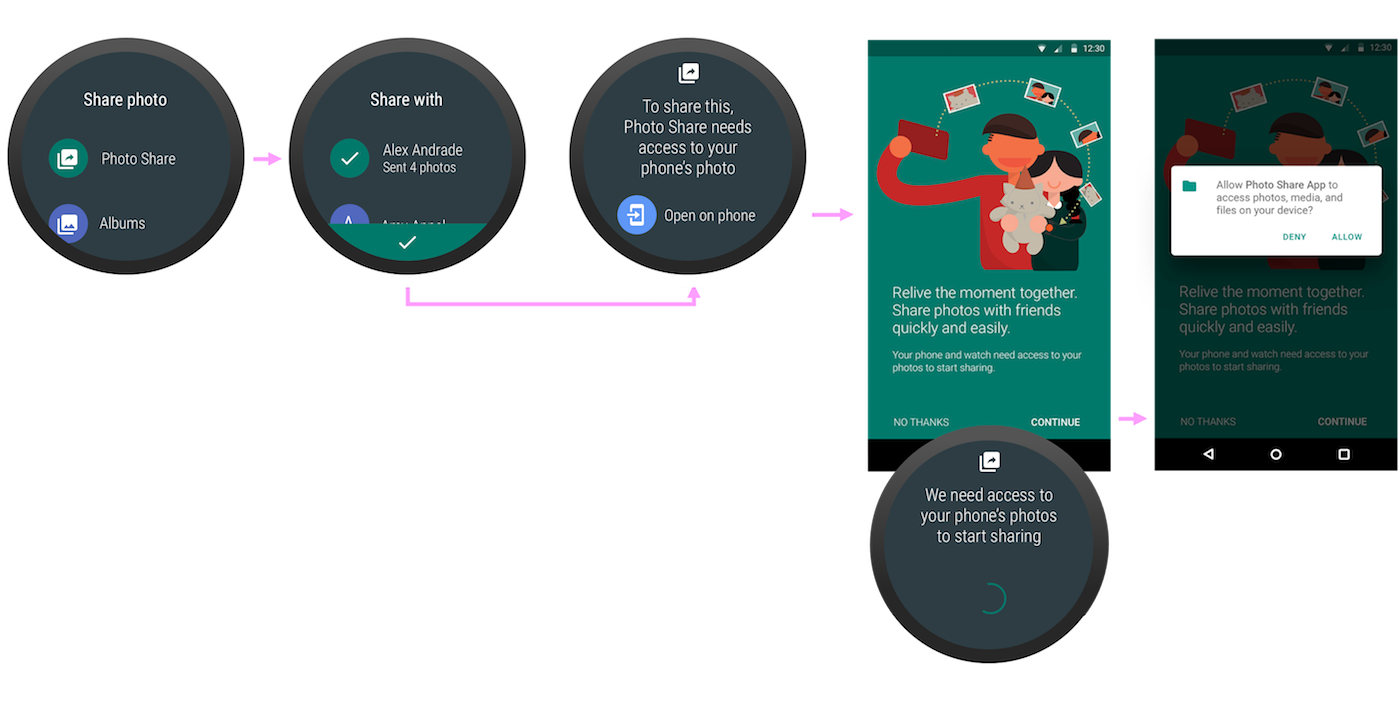
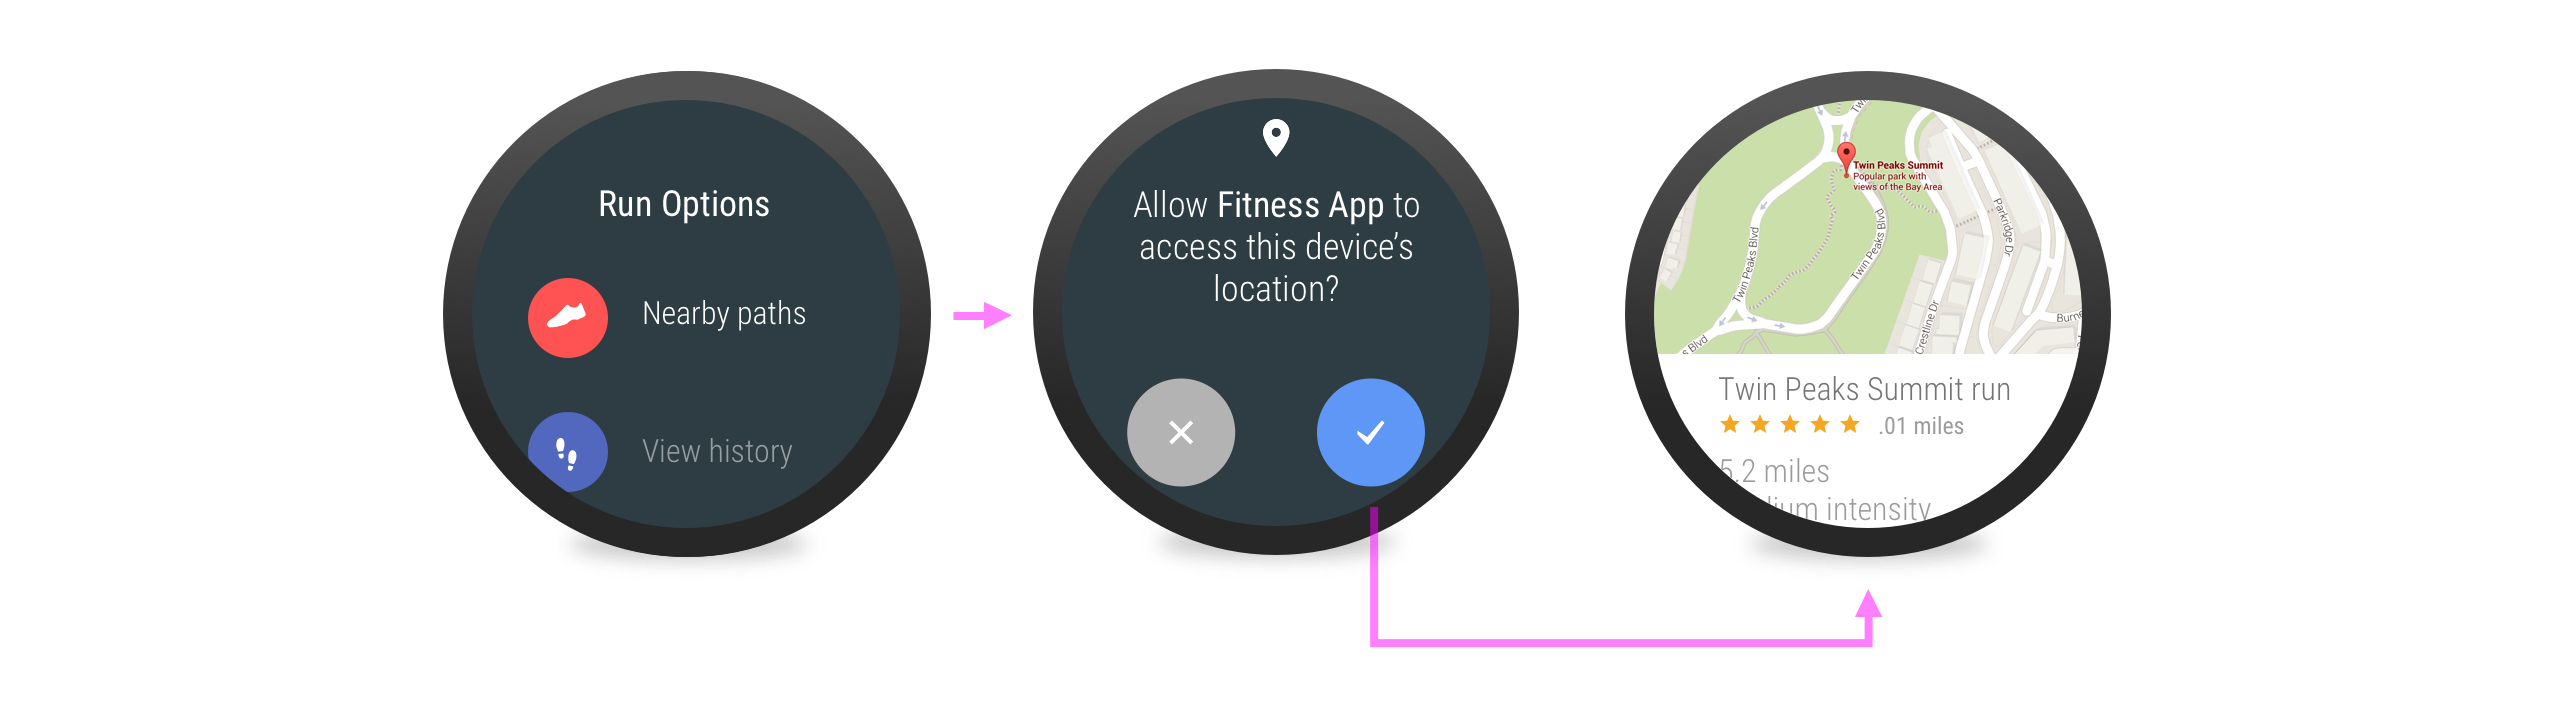
When the Wear app requests a phone permission—for example, a wearable app wants access to photos or other sensitive data on the mobile version of the app—the Wear app must send the user to the phone to accept the permission. There, the phone app can provide additional information to the user, using an activity. In the activity, include two buttons: one for granting the permission and one for denying it.
Phone app requests wearable permission
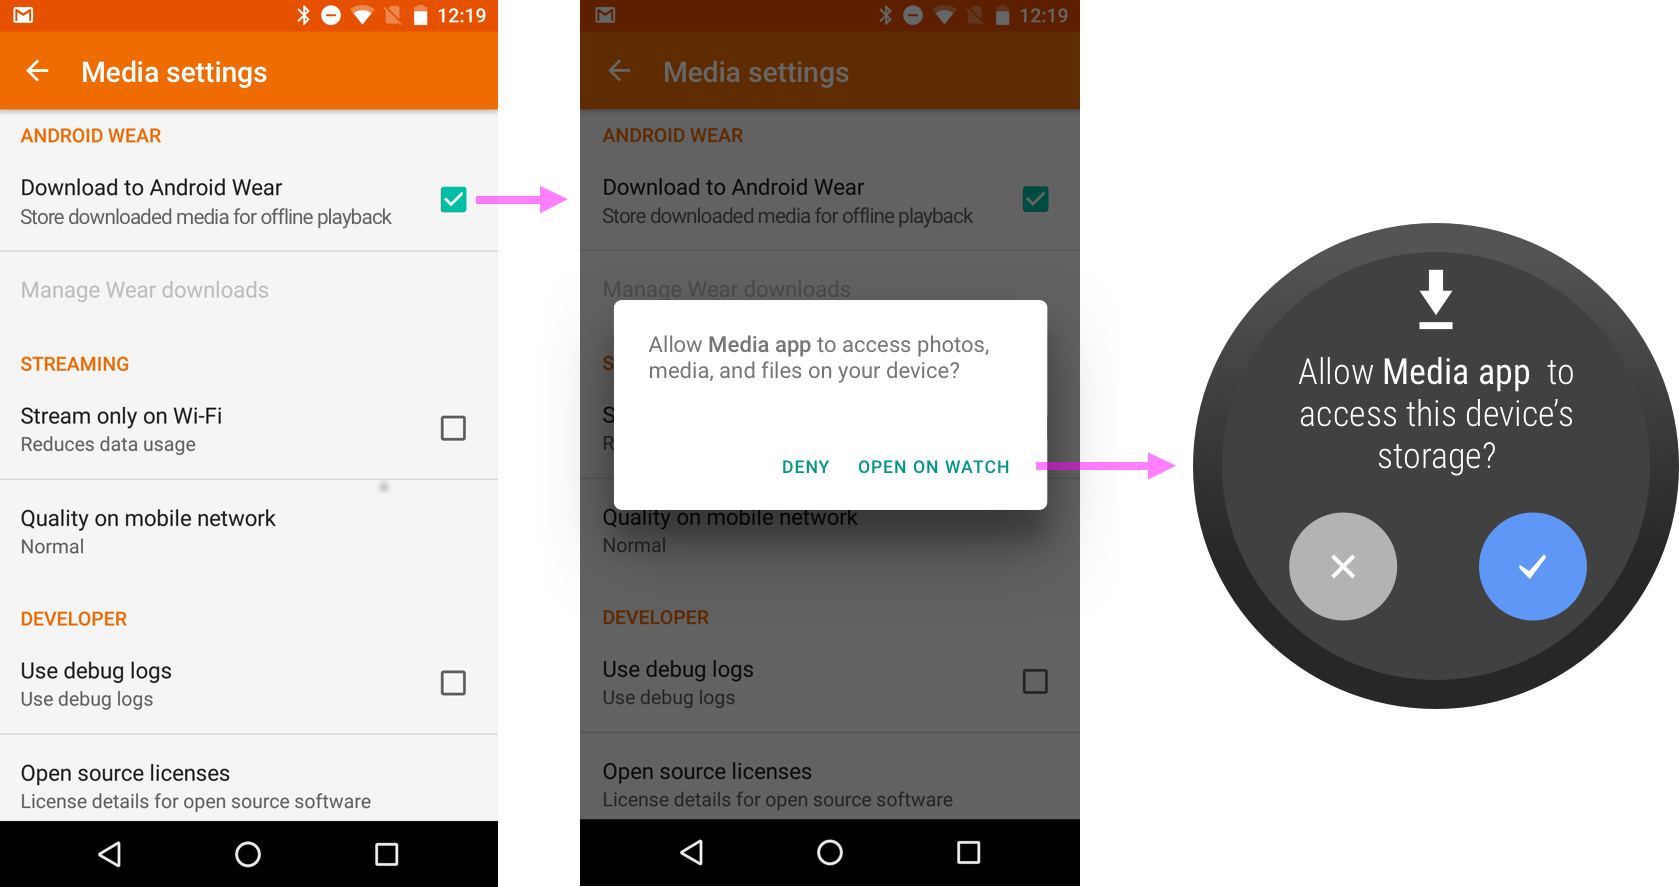
If the user is in a phone app and the app requires a wearable permission—for
example, to preload music in case the phone gets disconnected—the phone app
sends the user to the wearable device to accept the permission. The wearable
version of the app uses the
requestPermissions()
method to trigger the system permissions dialog.
Phone app requests multiple permissions at once
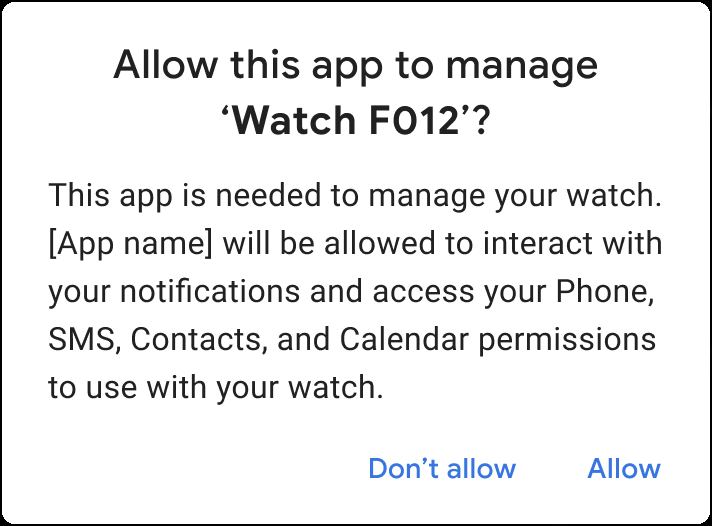
Partner apps on Android 12 (API level 31) and higher can use companion device profiles when connecting to a watch. Using a profile simplifies the enrollment process by bundling the granting of a device-type-specific set of permissions into one step.
The bundled permissions are granted to the companion app once the device
connects, and last only while the device is associated. Deleting the app or
removing the association removes the permissions. For details, see
AssociationRequest.Builder.setDeviceProfile().
Permission-request patterns
There are different patterns for requesting permissions from users. In order of priority, they are:
Ask in context when the permission is obviously necessary for a specific functionality but isn't necessary for the app as a whole to run.
Educate in context when the reason for requesting the permission isn't obvious and the permission isn't necessary for the app as a whole to run.
These patterns are explained in the following sections.
Ask in context
Request permissions when it is clear to the user why the permission is needed to perform a given operation. Users are more likely to grant a permission when they understand its connection to the feature they want to use.
For example, an app might require the user’s location to show nearby places of interest. When the user taps to search for nearby places, the app can immediately request the location permission because there is a clear relationship between searching for nearby places and the need for the location permission. The obviousness of this relationship makes it unnecessary for the app to display additional education screens.
Educate in context
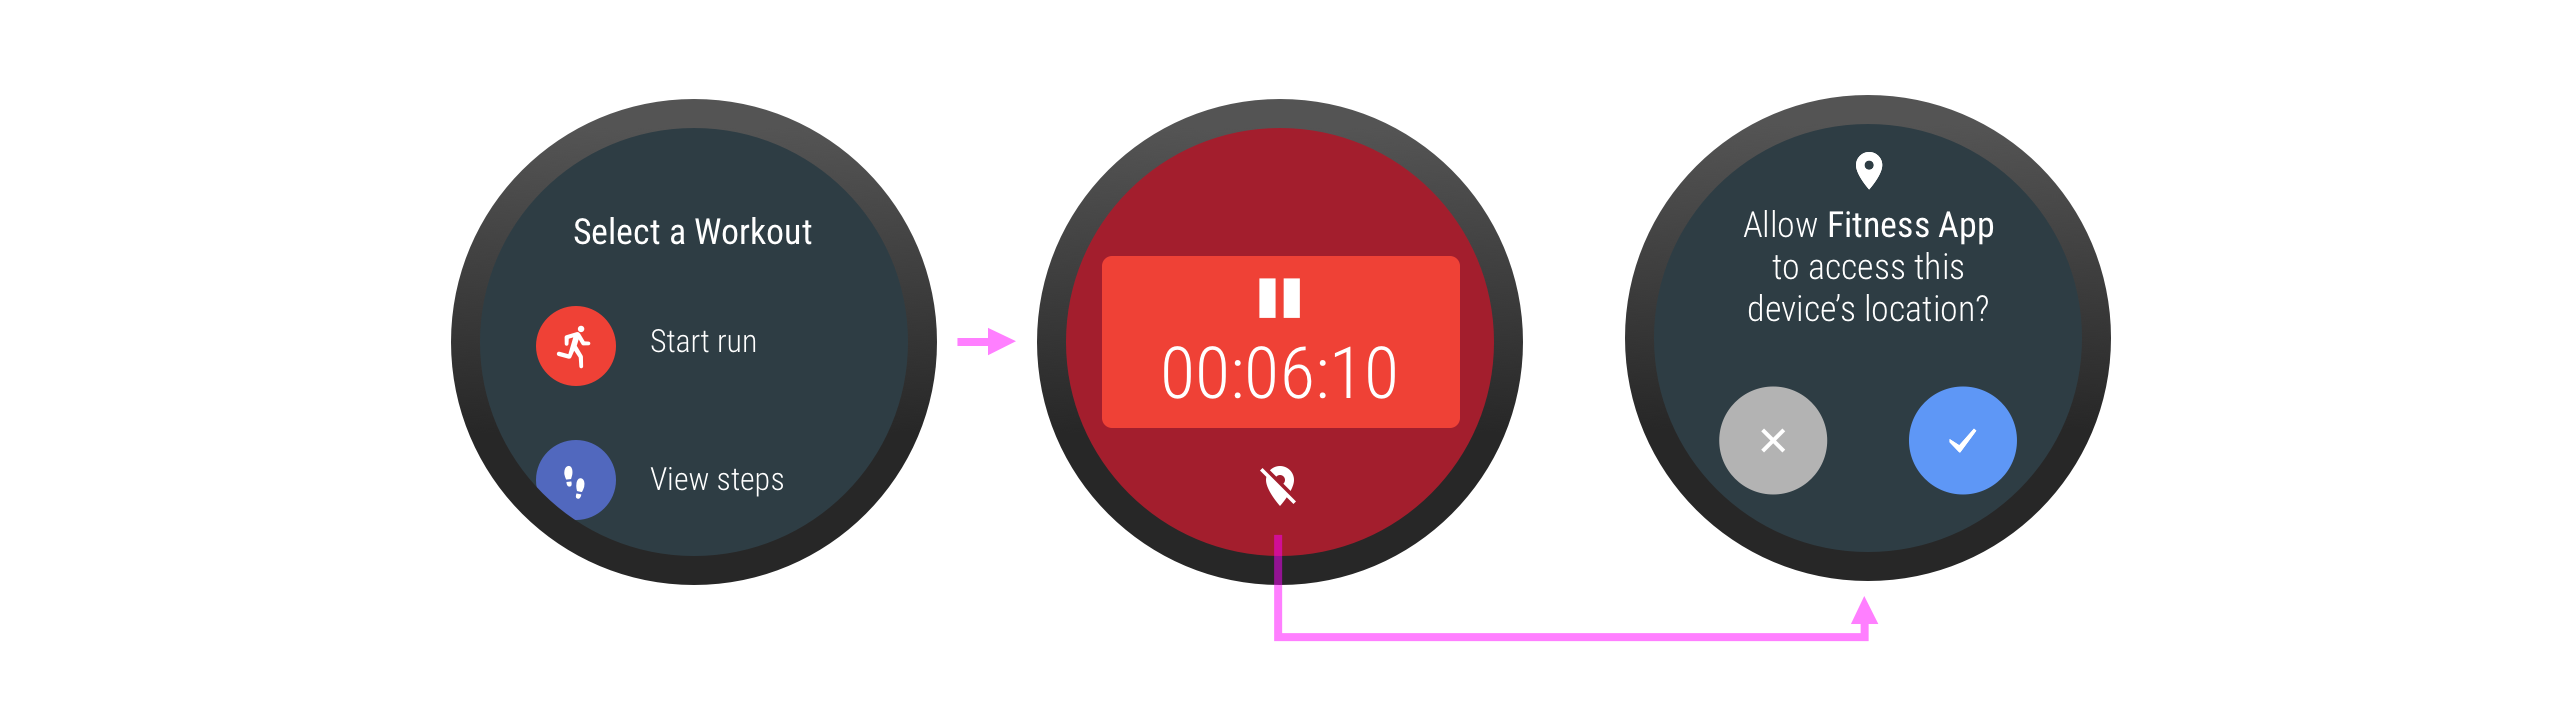
Figure 6 shows an example of in-context education. The app doesn't require permissions to start the timer, but an inline educational cue shows that part of the activity—location detection—is locked. When the user taps the cue, a permission-request screen appears, letting the user unlock location detection.
Use the
shouldShowRequestPermissionRationale()
method to help your app decide whether to provide more information. For
additional details, see Request app
permissions. Alternatively, you
can examine how the speaker sample application on GitHub handles showing
information.
Handle rejection
If the user denies a requested permission that isn't critical to an intended activity, don't block them from continuing the activity. If certain parts of the activity are disabled by the denied permission, provide visual, actionable feedback.
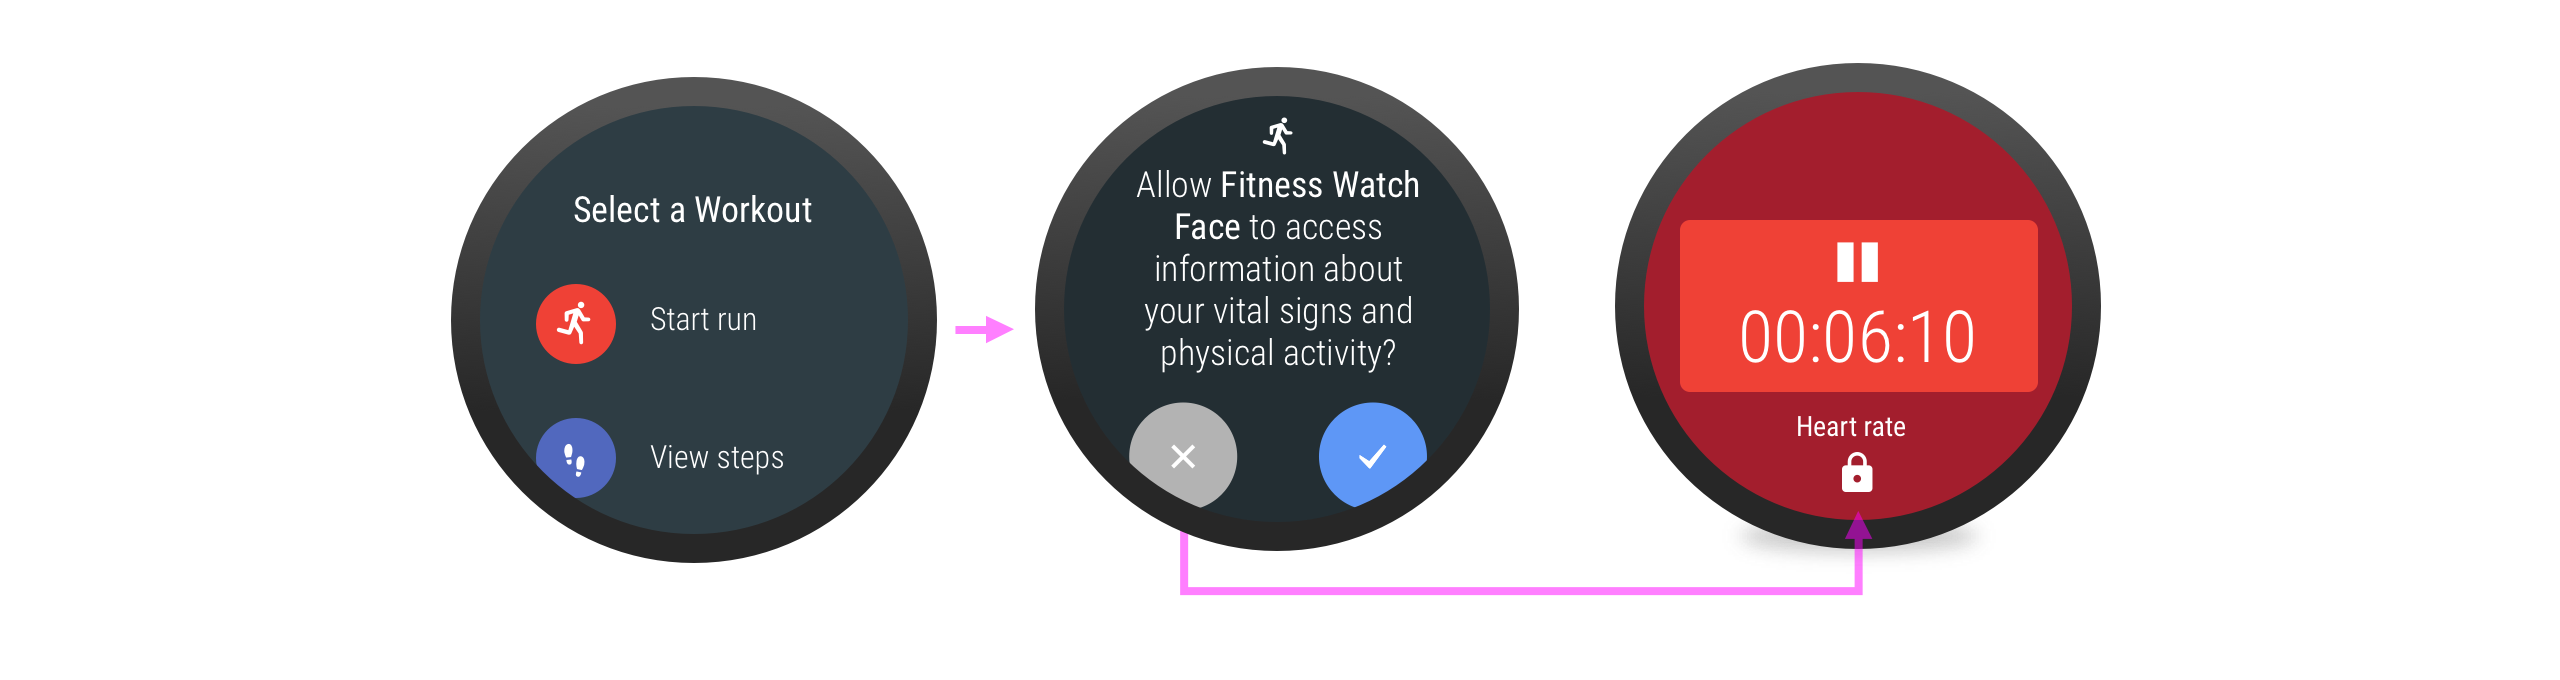
Figure 7 shows the use of a lock icon to indicate that a feature is locked because the user didn't grant permission to use it.
When a previously denied wearable permission dialog appears a second time, it includes a Deny, don't show again option. If the user chooses this option, then the only way for them to grant this permission in the future is to go into the wearable's Settings app.
Learn more about how to handle permission denial.
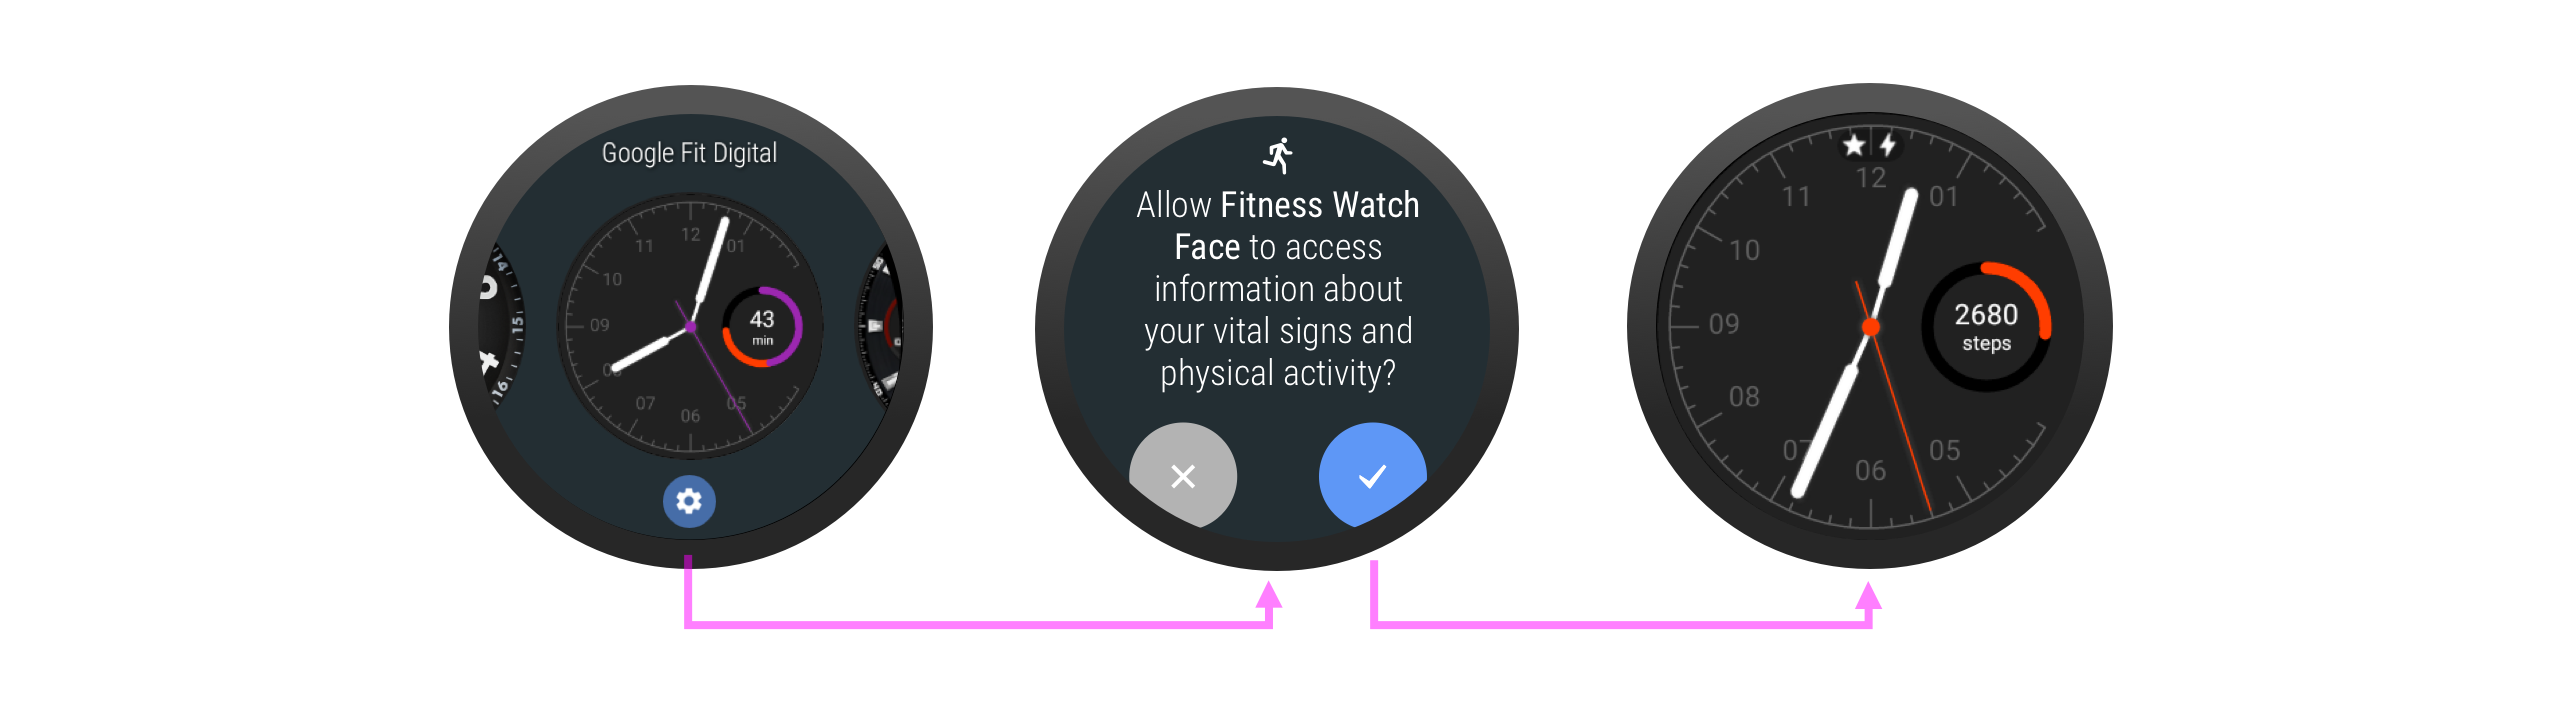
Permissions for services
Only an activity can call the
requestPermissions()
method, so if the user interacts with your app using a service—for example,
through a watch face—the service must open an activity before requesting the
permission. In this activity, provide additional education on why the
permission is needed.
In general, don't request permissions for a watch face. Instead, implement a complication and let the user choose which data to display through the complication.
Settings
A user can change a Wear app’s permissions in Settings at any time. When the
user tries to do something that requires a permission, first call the
checkSelfPermission()
method to see whether the app has permission to perform the operation.
Perform this check even if the user has previously granted the permission, because the user might have subsequently revoked it.
Recommended for you
- Note: link text is displayed when JavaScript is off
- Request runtime permissions
- Bluetooth permissions
- Communicate in the background