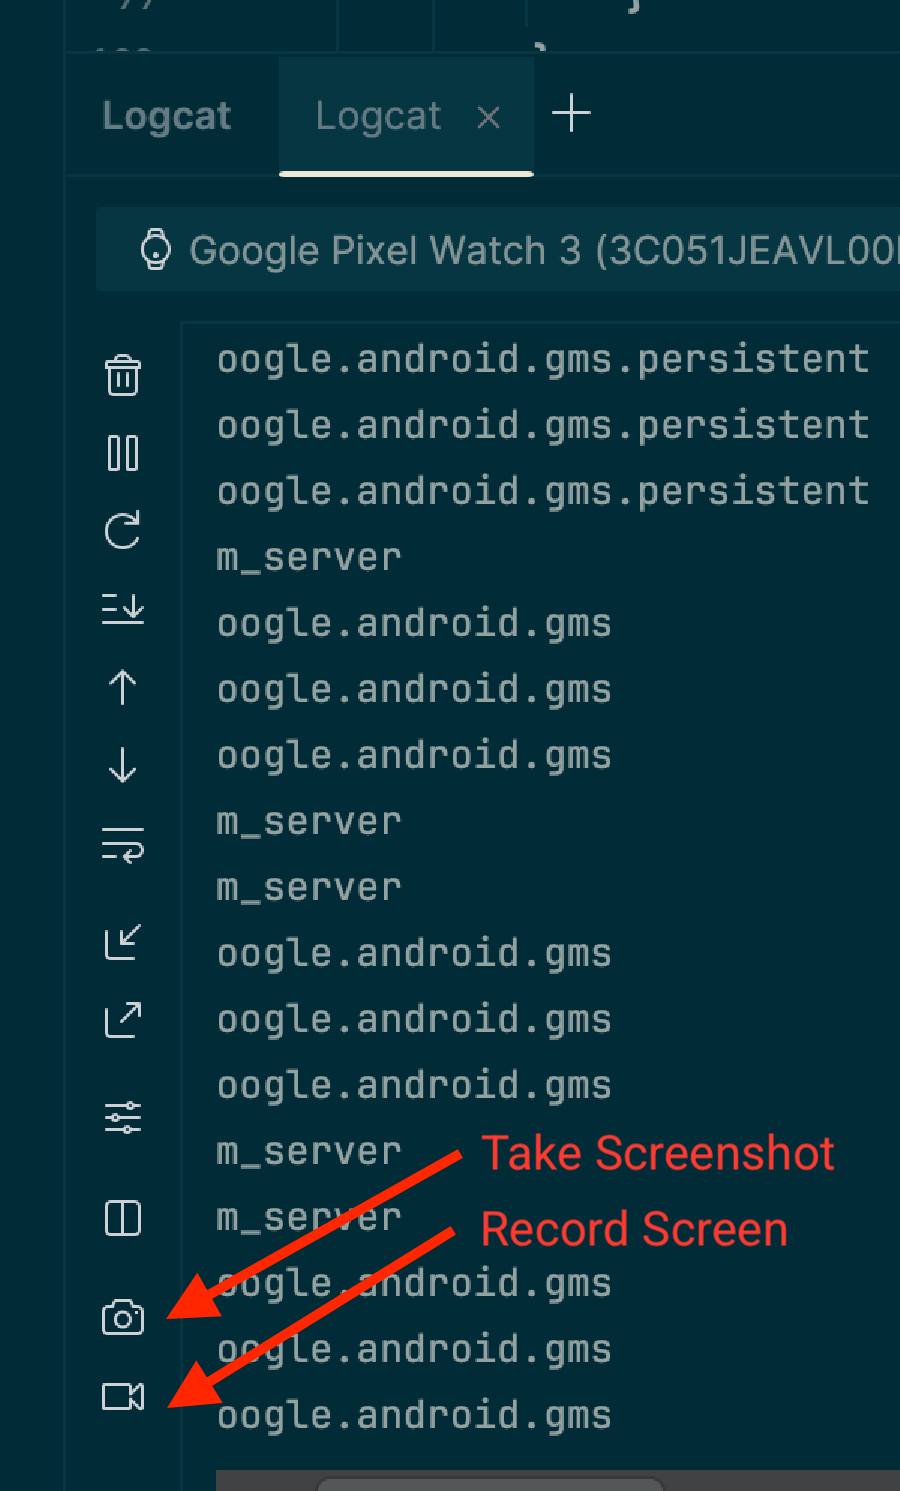
Wear OS มีวิธีบันทึกภาพ UI ของ Wear OS หลายวิธี ดังนี้
- Android Studio: ใช้ Logcat เพื่อถ่ายภาพหน้าจอ
- แอปที่ใช้ร่วมกัน: ในอุปกรณ์ Google Pixel Watch ให้ใช้ตัวเลือกถ่ายภาพหน้าจอของอุปกรณ์ที่สวมใส่ได้เพื่อถ่ายภาพหน้าจอ
- บันทึกหน้าจอสำหรับ Wear OS: บันทึกวิดีโอหน้าจอ
จับภาพหน้าจอและบันทึกหน้าจอใน Android Studio
จับภาพหน้าจอและบันทึกวิดีโอของ UI ของแอปที่ใช้กับอุปกรณ์สวมใส่ได้โดยตรงจาก Android Studio กระบวนการนี้เหมือนกับอุปกรณ์รูปแบบอื่นๆ และสามารถ ทำได้จากหลายที่ภายใน IDE
- เปิดแอปใน Android Studio
- เรียกใช้แอปในอุปกรณ์หรือโปรแกรมจำลอง
- ไปที่หน้าจอที่ต้องการจับภาพ
- เริ่มการจับภาพหน้าจอจากหน้าต่างเครื่องมือใดหน้าต่างหนึ่งต่อไปนี้
- หน้าต่าง Logcat: ในแถบเครื่องมือ ให้คลิกไอคอนถ่ายภาพหน้าจอเพื่อถ่ายภาพหน้าจอ หรือไอคอนบันทึกหน้าจอ
เพื่อบันทึกวิดีโอ ไอคอนเหล่านี้อาจอยู่ใต้เมนู
ล้น

- หน้าต่างอุปกรณ์ที่กำลังทำงาน: แถบเครื่องมือสำหรับอุปกรณ์ยังมีไอคอนถ่ายภาพหน้าจอและบันทึกหน้าจอด้วย หมายเหตุ:
ตัวควบคุมเหล่านี้จะใช้ได้ก็ต่อเมื่อคุณใช้การมิเรอร์อุปกรณ์
เพื่อสตรีมจอแสดงผลของอุปกรณ์ไปยังหน้าต่างนี้

- หน้าต่าง Logcat: ในแถบเครื่องมือ ให้คลิกไอคอนถ่ายภาพหน้าจอเพื่อถ่ายภาพหน้าจอ หรือไอคอนบันทึกหน้าจอ
เพื่อบันทึกวิดีโอ ไอคอนเหล่านี้อาจอยู่ใต้เมนู
ล้น
- สิ้นสุดการจับภาพ
- สำหรับภาพหน้าจอ: หน้าต่างโปรแกรมแก้ไขจะปรากฏขึ้นหลังจากจับภาพ คุณสามารถ ปรับแต่ง เช่น เพิ่มกรอบอุปกรณ์ ก่อนที่จะคลิก บันทึก
- สำหรับการบันทึกหน้าจอ: หลังจากคลิกปุ่มบันทึก ให้เลือก ตัวเลือกวิดีโอ แล้วคลิกเริ่มบันทึก โต้ตอบกับแอป แล้วคลิกหยุดการบันทึกเมื่อเสร็จแล้ว กล่องโต้ตอบจะปรากฏขึ้น เพื่อให้คุณบันทึกไฟล์ผลลัพธ์ได้
จับภาพหน้าจอและบันทึกหน้าจอโดยใช้ adb
คุณใช้ Android Debug Bridge (adb) เพื่อจับภาพเนื้อหาหน้าจอจากบรรทัดคำสั่งได้
ภาพหน้าจอ
ใช้คำสั่ง screencap เพื่อจับภาพหน้าจอของจอแสดงผลของอุปกรณ์ Wear OS
ซึ่งจะทำงานเช่นเดียวกับในมือถือ
# Use 'exec-out' instead of 'shell' to get raw data
$ adb exec-out screencap -p > screen.png
ข้อควรพิจารณาที่เฉพาะเจาะจงสำหรับ Wear OS คือคำสั่งนี้จะบันทึกบัฟเฟอร์เฟรมสี่เหลี่ยมดิบ ซึ่งไม่มีมาสก์วงกลม หากต้องการให้ภาพหน้าจอ ดูดีขึ้น คุณสามารถใช้มาสก์วงกลมโดยใช้เครื่องมือแก้ไขรูปภาพ เช่น หากใช้ ImageMagick
# Use ImageMagick to apply a circular mask
$ adb exec-out screencap -p | magick - \
    -alpha set -background none -fill white \
      \( +clone -channel A -evaluate set 0 +channel -draw "circle %[fx:(w-1)/2],%[fx:(h-1)/2] %[fx:(w-1)/2],0.5" \) \
    -compose dstin -composite \
    png:screen.png
การบันทึกหน้าจอ
adb screenrecordคำสั่งมาตรฐานadb screenrecordไม่รองรับใน Wear OS ซึ่งต่างจากในอุปกรณ์เคลื่อนที่
เราขอแนะนำให้ใช้เครื่องมือ scrcpy แบบโอเพนซอร์สแทน สำหรับการใช้งานขั้นพื้นฐานเพื่อบันทึกไฟล์วิดีโอจากหน้าจอของอุปกรณ์ ให้เรียกใช้คำสั่งต่อไปนี้
# Record the screen to a file named video.mp4. Use Ctrl+C to stop.
scrcpy --no-audio --no-window --record video.mp4
หากต้องการหยุดบันทึกโดยอัตโนมัติหลังจากผ่านไป 30 วินาที ให้ใช้ตัวเลือก --time-limit ดังนี้
# Record the screen to a file named video.mp4, stopping after 30 seconds.
scrcpy --no-audio --no-window --record video.mp4 --time-limit=30
จับภาพหน้าจอด้วยแอปที่ใช้ร่วมกัน
หากต้องการจับภาพหน้าจอของอุปกรณ์ Google Pixel Watch คุณสามารถใช้แอปที่ใช้ร่วมกันของ Google Pixel Watch โดยทำตามขั้นตอนต่อไปนี้
- ใน UI ให้ค้นหาหน้าจอที่ต้องการจับภาพ
- ในโทรศัพท์ Android ให้เปิดใช้ตัวเลือกสำหรับนักพัฒนาแอป หากยังไม่ได้เปิดใช้ โดยไปที่การตั้งค่า > เกี่ยวกับโทรศัพท์ แล้วแตะหมายเลขบิลด์ 7 ครั้ง
- เปิดแอป Wear ที่ใช้ร่วมกันในโทรศัพท์
- แตะปุ่มรายการเพิ่มเติม 3 จุดที่มุมขวาบนเพื่อเปิด เมนู
- แตะถ่ายภาพหน้าจอของอุปกรณ์ที่สวมใส่ได้ ข้อความต่อไปนี้จะปรากฏขึ้น ส่งคำขอภาพหน้าจอแล้ว จากนั้นคุณจะได้รับการแจ้งเตือนต่อไปนี้ พร้อมส่งภาพหน้าจอของนาฬิกาแล้วและแตะเพื่อส่ง
- แตะการแจ้งเตือนเพื่อรับตัวเลือกในการส่งหรือแชร์ ภาพหน้าจอโดยใช้บลูทูธ, Gmail หรือตัวเลือกอื่นๆ
