
O Wear OS oferece várias maneiras de capturar a interface:
- Android Studio: use o Logcat para fazer capturas de tela.
- App complementar: em dispositivos Google Pixel Watch, use a opção Fazer captura de tela do wearable para fazer capturas de tela.
- Gravação de tela para Wear OS: grava um vídeo da tela.
Fazer capturas e gravações de tela no Android Studio
Faça capturas de tela e grave vídeos da interface do app para wearables diretamente no Android Studio. O processo é o mesmo que para outros formatos e pode ser feito em vários lugares na IDE.
- Abra seu app no Android Studio.
- Execute o app em um dispositivo ou emulador.
- Navegue até a tela que você quer capturar.
- Inicie a captura de tela em uma das seguintes janelas de ferramentas:
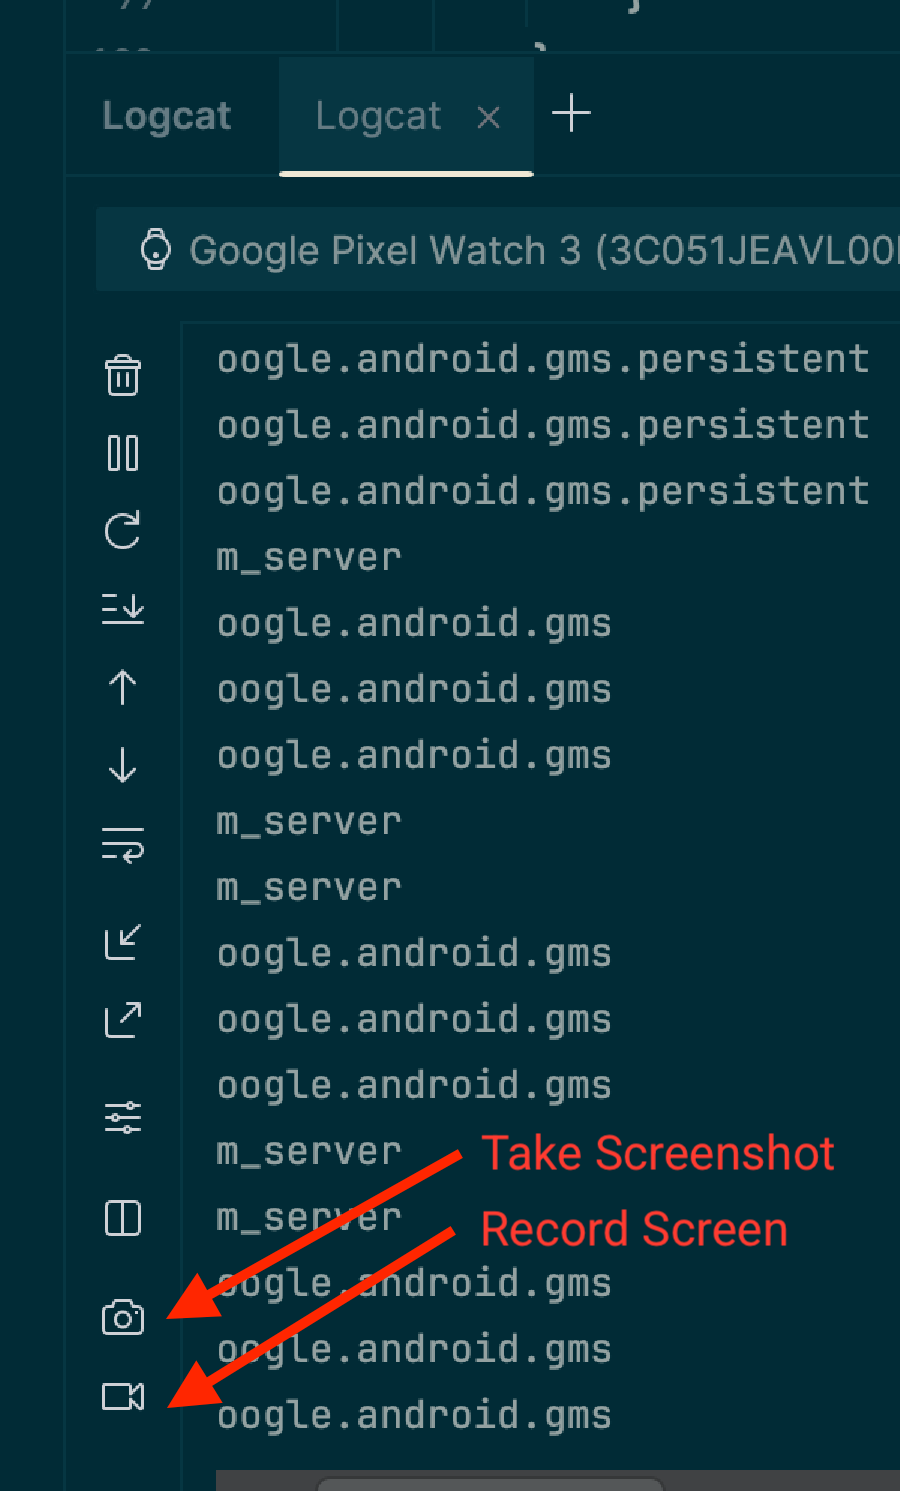
- A janela Logcat:na barra de ferramentas, clique no ícone Fazer captura de tela para fazer uma captura ou no ícone Gravar tela para gravar um vídeo. Esses ícones podem estar localizados no menu
flutuante.
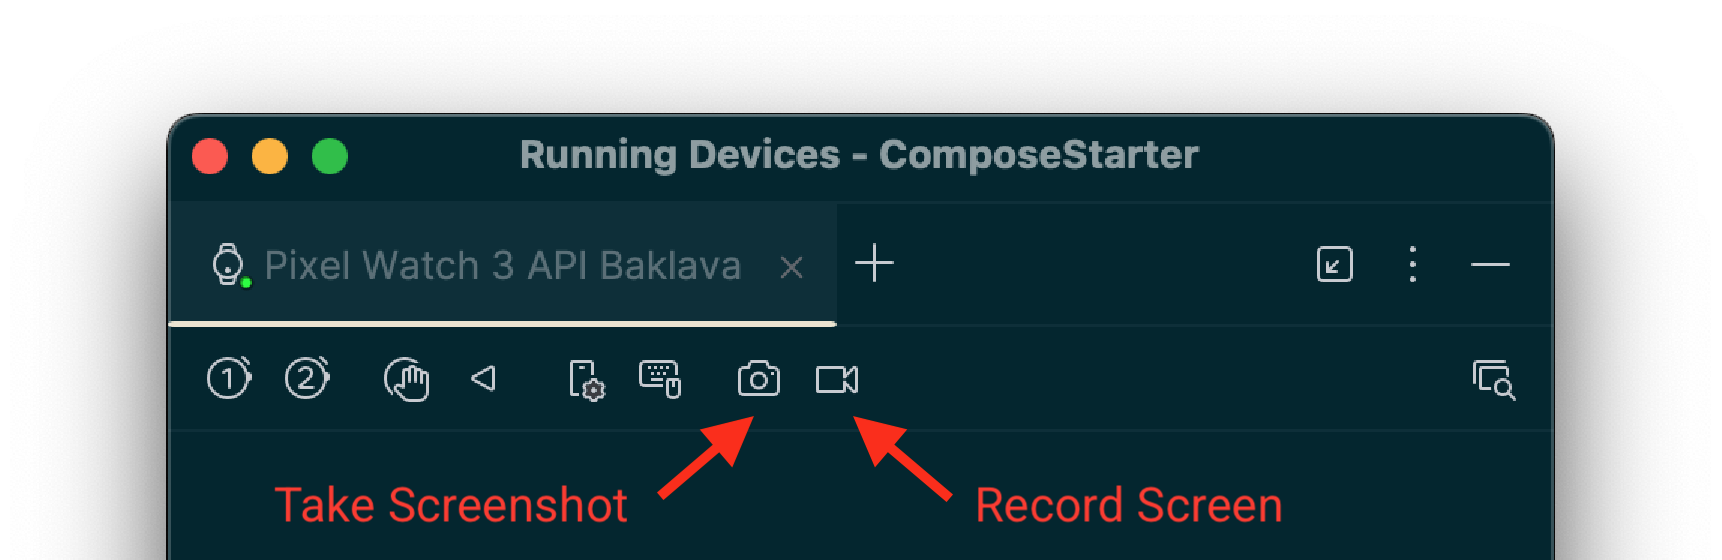
- A janela Dispositivos em execução:a barra de ferramentas do dispositivo também
fornece ícones de Fazer captura de tela e Gravar tela. Observação:esses controles só estão disponíveis se você estiver usando o espelhamento de dispositivo para transmitir a tela do dispositivo para esta janela.
- A janela Logcat:na barra de ferramentas, clique no ícone Fazer captura de tela para fazer uma captura ou no ícone Gravar tela para gravar um vídeo. Esses ícones podem estar localizados no menu
flutuante.
- Finalize a captura:
- Para capturas de tela:uma janela de edição aparece após a captura. Você pode fazer ajustes, como adicionar um frame de dispositivo, antes de clicar em Salvar.
- Para gravações de tela:depois de clicar no botão de gravação, selecione as opções de vídeo e clique em Iniciar gravação. Interaja com o app e clique em Parar gravação quando terminar. Uma caixa de diálogo vai aparecer para que você salve o arquivo resultante.
Fazer capturas e gravações de tela usando o adb
Use o Android Debug Bridge (adb) para capturar conteúdo da tela na
linha de comando.
Capturas de tela
Use o comando screencap para fazer uma captura de tela do dispositivo Wear OS. Ele funciona da mesma forma que em dispositivos móveis.
# Use 'exec-out' instead of 'shell' to get raw data
$ adb exec-out screencap -p > screen.png
Uma consideração específica para o Wear OS é que esse comando captura o buffer de frame bruto e quadrado, que não inclui uma máscara circular. Para capturas de tela refinadas, aplique uma máscara circular usando uma ferramenta de edição de imagens. Por exemplo, usando o ImageMagick:
# Use ImageMagick to apply a circular mask
$ adb exec-out screencap -p | magick - \
    -alpha set -background none -fill white \
      \( +clone -channel A -evaluate set 0 +channel -draw "circle %[fx:(w-1)/2],%[fx:(h-1)/2] %[fx:(w-1)/2],0.5" \) \
    -compose dstin -composite \
    png:screen.png
Gravações de tela
Ao contrário dos dispositivos móveis, o comando adb screenrecord padrão não é compatível com o Wear OS.
Em vez disso, recomendamos a ferramenta de código aberto scrcpy. Para uso básico e gravar um arquivo de vídeo da tela do dispositivo, execute o seguinte comando:
# Record the screen to a file named video.mp4. Use Ctrl+C to stop.
scrcpy --no-audio --no-window --record video.mp4
Para interromper a gravação automaticamente após 30 segundos, use a opção --time-limit:
# Record the screen to a file named video.mp4, stopping after 30 seconds.
scrcpy --no-audio --no-window --record video.mp4 --time-limit=30
Fazer capturas de tela com o app complementar
Para fazer capturas de tela de um dispositivo Google Pixel Watch, use o app complementar Google Pixel Watch. Siga estas etapas:
- Na IU, encontre a tela que você quer capturar.
- No smartphone Android, ative as Opções do desenvolvedor, se ainda não estiverem ativadas. Para isso, acesse Configurações > Sobre o telefone e toque em Número da versão sete vezes.
- Abra o app complementar do Wear no smartphone.
- Toque no botão flutuante de três pontos no canto superior direito para abrir o menu.
- Toque em Fazer captura de tela do wearable. A seguinte mensagem vai aparecer: Solicitação de captura de tela enviada. Depois, você vai receber estas notificações: Pronto para enviar uma captura de tela do relógio e Toque para enviar.
- Toque na notificação para conferir as opções de envio ou compartilhamento da captura de tela por Bluetooth, Gmail ou outros meios.