This page lists the new features introduced in Android Studio preview releases. The preview builds provide early access to the latest features and improvements in Android Studio. You can download these preview versions here. If you encounter any problems using a preview version of Android Studio, please let us know. Your bug reports help to make Android Studio better.
For the latest news on Android Studio preview releases, including a list of notable fixes in each preview release, see the Release Updates in the Android Studio blog.
Current versions of Android Studio
The following table lists the current versions of Android Studio and their respective channels.
Version | Channel |
---|---|
Android Studio Electric Eel | 2022.1.1 | Stable |
Android Gradle plugin 7.4.0 | Stable |
Android Studio Flamingo | 2022.2.1 | Beta |
Android Studio Giraffe | 2022.3.1 | Canary |
Compatibility with Android Gradle plugin previews
Each preview version of Android Studio is published alongside a corresponding version of the Android Gradle plugin (AGP). Preview versions of Studio should work with any compatible stable version of AGP. However, if you're using a preview version of AGP, you must use the corresponding preview version of Studio (for example, Android Studio Chipmunk Canary 7 with AGP 7.2.0-alpha07). Attempts to use divergent versions (for example, Android Studio Chipmunk Beta 1 with AGP 7.2.0-alpha07) will cause a Sync failure, which results in a prompt to update to the corresponding version of AGP.
For a detailed log of Android Gradle plugin API deprecations and removals, see the Android Gradle plugin API updates.
Android Studio Flamingo | 2022.2.1
The following are new features in Android Studio Flamingo.
Themed app icons and dynamic color
With the introductions of dynamic color in Material 3 and themed app icons in Android 13, you can now create layouts or launcher icons that are tinted to inherit the coloring of the user's chosen wallpaper. You can use this feature starting with Android Studio Flamingo Beta 1.
Themed app icons preview support
For launcher.xml
files, you can now use the new System UI Mode selector on
the toolbar to switch wallpapers and see how your
themed app icons react to different users' chosen wallpaper.

Dynamic color preview
For Compose Preview: We've added a new attribute, wallpaper
, to the
Composable Preview annotation. If
you've enabled
dynamic color
in your app, you can use this new attribute to switch wallpapers and see how
your UI reacts to different users' chosen wallpaper. To use this feature, you
must use Compose 1.4.0-alpha03 or higher.

For Android XML: If you've enabled dynamic color in your app, you can now use the new System UI Mode selector on the toolbar to switch wallpapers and see how your layouts react to different user's chosen wallpaper. Note that you must first select to change the theme to a Material dynamic color theme, then change the wallpaper.

Updates to Live Edit
Live Edit now has two modes: manual and automatic. In manual mode, your code
changes are applied every time you manually save using Ctrl
+ S
(Command
+
S
for macOS). In automatic mode, when you update a composable function, your
changes are applied in your device or emulator as you make that change. To
choose the mode you want to run Live Edit in, go to File > Settings from
the menu bar (or Android Studio > Preferences on macOS), click on
Editor > Live Edit, and check the Push Edits Manually or
Push Edits Automatically box.
Compose Tracing
The System tracing utility is an Android tool that saves device activity to a trace file, which provides an overall picture of your app's system processes for a given period of time. Starting with Android Studio Flamingo, you can view your Compose functions in the System Trace profiler using Compose Tracing. Compose Tracing gives you the low intrusiveness from System tracing with method tracing levels of detail in composition, helping you understand which Compose functions are actually being recomposed.
To get started with recomposition tracing, you need to update to at least the following versions:
- Android Studio Flamingo Canary 5
- Compose UI: 1.3.0-beta01
- Compose Compiler: 1.3.0
- The device or emulator you run your trace on must be at least API level 30.
Additionally, you need to add the following dependency on Compose Runtime Tracing:
implementation("androidx.compose.runtime:runtime-tracing:1.0.0-alpha01")
To view recomposition tracing, open the Android Studio Profiler and select the CPU profiler. Navigate your app to the UI that you want to trace and then select System Trace and Record. While recording, use your app in order to cause recomposition. Once you stop recording and the trace processes, you can see the Compose functions in the recomposition trace directly in the Threads timeline. You can also see the Compose functions in the Flame Chart, Top Down, Bottom Up, and Events tabs from the Analysis pane.
This is an experimental feature in active development, and we welcome you to provide feedback. For more details, see Compose tracing.
Updates to project templates
Android Studio Flamingo Canary 6 includes new templates for creating a project or module. By default, templates use Compose Material 3 unless they are specified as a Views template. We recommend using the Compose Material 3 templates (for example, Empty Activity) as the best practice for creating an Android app. To learn more, see the Compose Material 3 reference.
To view the templates, go to open the New Project or Create New Module wizard by selecting File > New > New Project or New Module from the main menu.
Network Inspector traffic interception
Starting with Android Studio Flamingo Canary 1, the Network Inspector shows all traffic data for the full timeline by default. You can select a range within the timeline to see only the traffic in that range.
You can also create and manage rules that help test how your app behaves when encountering different responses such as status codes, and response headers and bodies. The rules determine what responses to intercept and how to modify these responses before they reach the app. You can choose which rule to enable or disable by checking the Active box next to each rule. Rules are automatically saved every time you modify them.
To get started, navigate to the Rules tab in the Network Inspector and click + to create a new rule. In the Rule Details panel, name your new rule and include information about the origin of the response you want to intercept under the Origin subsection. The URL in the Rules table should update based on the changes you made to the origin of the response. All fields in this subsection are optional.
From the Response subsection, you can modify the response before it's sent to your app. For example, you can set the rule to execute on responses with a specific status code as well as modify that status code.
Modify headers
In the Header rules subsection, you can create multiple sub-rules that add
or modify headers in a response. When you create multiple header rules, use the
up and down arrows
at the top of the Rules table to change the order of the header rules. The
order affects the header of the modified response because the header rules are
applied in the order that they are listed.
To get started, click + in the Header rules section.
To add a header, enter a name and value for the header in the Add new header section.
To modify a header, navigate to the Edit existing header tab and specify the header name or value that you want to find. Enter a header name or value that you want to replace it with.
Modify response body
You can also create sub-rules to modify the body of the response. You can choose to either Find and Replace a section of the body, in which the first instance in the body is replaced; or, you can choose to replace the entire content of the body by selecting Replace entire body.
Similar to Header rules, you can create multiple body rules that are applied in the order that they are listed in the table.
Auto-connect to foreground process in Layout Inspector
The Layout Inspector now automatically connects to apps on virtual or physical devices. Specifically, the Layout Inspector automatically connects to debuggable processes running in the foreground of a connected device. If you have feedback on this feature, please file a bug.
Updates to App Quality Insights
Android Studio Flamingo Canary 5 and higher introduce multiple new App Quality Insights features that help you focus on high priority issues and collaborate with your development team.
New filters and filter search
To help you identify the most important issues, you can now filter by the following attributes. Each filter is sorted by the number of events, so you can see where most events occur.
- Android platform version
- Device make and model
Crashlytics Signal: Signal icons also appear next to associated issues in the Issues panel so you can see counts and signals side by side. An issue is considered regressed when it's been closed in the past and has reoccurred in a new version of the app.
App version: This filter now includes a higher-level Play track filter that you can use to automatically select versions in the production, open, closed and/or internal testing tracks.
In addition, filters with lots of options are now searchable so you can customize your view faster, without scrolling through all the menu options.
Annotate and close issues directly from Android Studio
To make it easier for you to collaborate with teammates, you can now do the following directly in the App Quality Insights tool window:
Close issues. To close an issue, click the Close button in the main stack trace panel. Recently closed issues appear in the Issues panel with strikethrough. You can reopen issues that have been recently closed by clicking on the button again. However, once you refresh the App Quality Insights tool window, closed issues are no longer visible.
Read and attach notes to issues so that they are visible in the Firebase Console and your teammates. To write a note about an issue, select the issue and open the Notes panel. You must have write permission to the Crashlytics project in order to write notes. Issues with notes appear with a "notes" icon
in the Issues panel.
If you're new to App Quality Insights and would like to learn more, see the earlier release note.
Investigate with limited functionality when offline
Starting with Android Studio Flamingo Canary 8, you can do some actions in the App Quality Insights tool window while offline. If you make a new request, such as by clicking Refresh, and Android Studio is unable to communicate with Crashlytics, the App Quality Insights window allows you to enter Offline Mode.
While in this mode, you can continue to investigate issues and the latest events from cached data. Certain functionality, such as changing some filter options or closing issues, is not available. To retry your connection to Crashlytics and return to an online state, click Reconnect.
Known issues
The following are known issues with the App Quality Insights preview features.
Incorrect data for apps not published to Play Console
For apps that aren't associated with one or more Play tracks, you might see incorrect data, such app versions and event counts, when selecting a Play Track from the dropdown filter. App versions that are associated with Play tracks should, however, show accurate information. We're currently working on fixing this issue.
Filter search is case-sensitive and limited in scope
The filter search behavior is case-sensitive. It also only searches the top-level fields, for example "Google," and not the sub-fields, for example "Pixel 5." We're currently working on fixing this issue.
Breaking changes related to build
The following are breaking changes related to how you configure your build.
Default values of flags changed
The default values for the buildFeatures.renderScript
, buildFeatures.aidl
,
and buildFeatures.buildConfig
flags have changed from true
to false
. If
you need to enable these features, make sure that they're explicitly set to
true
. These build features should be enabled only in the modules that use
them.
To get help adjusting your code to support this change, use the AGP Upgrade Assistant (Tools > AGP Upgrade Assistant).
Namespace required in module-level build.gradle
file
You must set the namespace in the module-level build.gradle
file, rather than
the manifest file. You can start using the namespace
DSL property starting
with AGP 7.3. To learn more, see
Set a namespace.
To get help moving to the new namespace DSL, use the AGP Upgrade Assistant (Tools > AGP Upgrade Assistant).
When migrating to the namespace DSL, be aware of the following issues:
- Previous versions of AGP infer the test namespace from the main namespace, or
application ID, incorrectly in some cases. The AGP Upgrade Assistant blocks the
upgrade if it finds that your project's main namespace and test namespace are
the same. If the upgrade is blocked, you need to manually change
testNamespace
and modify your source code accordingly. - After you change the test namespace, it's possible that your code compiles
but your instrumented tests fail at runtime. This can happen if your
instrumented test source code references a resource defined in both your
androidTest
and app sources.
For more information, see issue #191813691 comment #19.
New settings plugin
AGP 8.0.0-alpha09 introduces the new settings plugin. The settings plugin lets you centralize global configurations—configurations that apply to all modules—in one place so you don't need to copy and paste the configurations in multiple modules. In addition, you can use the settings plugin to create tool execution profiles, or different instructions for how to run a tool, and switch among them.
To use the settings plugin, apply the plugin in the settings.gradle
file:
apply plugin 'com.android.settings'
Centralize global configurations
To configure global configurations, use the new android
block in the
settings.gradle
file. Here's an example:
android {
compileSdk 31
minSdk 28
...
}
Tool execution profiles
The settings plugin also lets you create execution profiles for some tools. An execution profile determines how a tool is run; you can select different execution profiles depending on the environment. In an execution profile, you can set JVM arguments for a tool and configure it to run in a separate process. Currently, only the R8 tool is supported.
Create execution profiles and set the default execution profile in the
settings.gradle
file, as shown in the following example:
android {
execution {
profiles {
high {
r8 {
jvmOptions += ["-Xms2048m", "-Xmx8192m", "-XX:+HeapDumpOnOutOfMemoryError"]
runInSeparateProcess true
}
}
low {
r8 {
jvmOptions += ["-Xms256m", "-Xmx2048m", "-XX:+HeapDumpOnOutOfMemoryError"]
runInSeparateProcess true
}
}
ci {
r8.runInSeparateProcess false
}
}
defaultProfile "low"
}
}
To override the default profile, select a different profile using the
android.experimental.settings.executionProfile
property in the
gradle.properties
file:
android.experimental.settings.executionProfile=high
You can also set this property using the command line, which lets you set up
different workflows. For example if you have a continuous integration workflow
you can use the command line to change the execution profile without having to
change the settings.gradle
file:
./gradlew assembleRelease \
-Pandroid.experimental.settings.executionProfile=ci
IntelliJ IDEA 2022.2 platform update
Android Studio Flamingo Canary 1 includes the IntelliJ IDEA 2022.2 updates, which improve the IDE experience. For details on the changes, see the IntelliJ IDEA 2022.2 release notes.
Android Studio bundled with JDK 17
Starting from Android Studio Flamingo Canary 3, the Studio IDE is bundled with JDK 17. If Android Studio is configured to use the embedded JDK, new projects will use the latest stable version of the Android Gradle plugin and JDK 17. However, existing projects might break, and you might have to manually set the JDK to a compatible version.
To learn more, see Set the JDK version.
Android Studio Giraffe | 2022.3.1
The following are new features in Android Studio Giraffe.
Device mirroring
Minimize the number of interruptions when developing by streaming your device display directly to Android Studio. Device mirroring gives you the ability to interact with a physical device using the Running Devices window in Studio. To enable this feature, go to File > Settings > Tools > Device Mirroring and check the box next to Enable mirroring of physical Android devices. Once enabled, connect your device and either deploy your app or open the Running Devices window to begin streaming the device's display and interacting with it from the IDE.
To learn more, see the Android Studio Electric Eel release note.
Use Firebase Test Lab devices with Gradle Managed Devices
You can now run your automated instrumented tests at scale on Firebase Test Lab devices when using Gradle Managed Devices. Test Lab lets you run your tests simultaneously on a wide range of Android devices, both physical and virtual. These tests run in remote Google data centers. With support from Gradle Managed Devices, the build system can now fully manage running tests against these Test Lab devices based on the configurations in your project's Gradle files.
Get started with Gradle managed Firebase Test Lab devices
To start using Firebase Test Lab devices with Gradle Managed Devices, follow these steps:
To create a Firebase project, go to the Firebase console. Click Add project and follow the on-screen prompts to create a project. Remember your project ID.
To install the Google Cloud CLI, follow the steps at Install the gcloud CLI.
Configure your local environment.
Link to your Firebase project in gcloud:
gcloud config set project FIREBASE_PROJECT_ID
Authorize the use of your user credentials for API access:
gcloud auth application-default login
Optional: Add your Firebase project as the quota project. This step is only needed if you exceed the no-cost quota for Test Lab.
gcloud auth application-default set-quota-project FIREBASE_PROJECT_ID
Enable required APIs.
In the Google Developers Console API Library page, enable the Cloud Testing API and Cloud Tool Results API by typing these API names into the search box at the top of the console, and then clicking Enable API on the overview page for each API.
Configure your Android project.
Add the Firebase Test Lab plugin in the top-level
build.gradle
file:plugins { ... id 'com.google.firebase.testlab' version '0.0.1-alpha01' apply false }
Enable custom device types in the
gradle.properties
file:android.experimental.testOptions.managedDevices.customDevice=true
Add the Firebase Test Lab plugin in the module-level
build.gradle
file:plugins { ... id 'com.google.firebase.testlab' }
Create and run tests on a Gradle managed Firebase Test Lab device
You can specify a Firebase Test Lab device for Gradle to use for testing your
app in the module-level build.gradle
file. The following code sample creates a
Pixel 2 running API level 30 as a Gradle managed Test Lab device called
device1
.
android { testOptions { managedDevices { devices { device1 (com.google.firebase.testlab.gradle.ManagedDevice) { device = "Pixel2" apiLevel = 30 } } } } }
To run your tests using the Gradle managed Test Lab devices you configured, use
the following command. device-name
is the name of the device you configured in
your Gradle build script, such as device1
, and BuildVariant
is the build
variant of your app you want to test. Note that Gradle doesn't run tests in
parallel or support other Google Cloud CLI configurations for Test Lab devices.
On Windows:
gradlew device-nameBuildVariantAndroidTest
On Linux or macOS:
./gradlew device-nameBuildVariantAndroidTest
The test output includes a path to an HTML file that has the test report. You can also import test results into Android Studio for further analysis by clicking Run > Test History in the IDE.
New Android SDK Upgrade Assistant
Android Studio Giraffe introduces the Android SDK Upgrade Assistant, a new tool
that helps you upgrade the
targetSdkVersion
, or
the API level that your app targets. The Android SDK Upgrade Assistant guides
you through upgrading targetSdkVersion
level by level. For each migration
step, it highlights the major breaking changes and how to address them.
To open the Android SDK Upgrade Assistant, go to
Tools > Android SDK Upgrade Assistant. In the Assistant panel, select
the API level that you want to upgrade to for guidance. For the best experience,
you should upgrade targetSdkVersion
values one level at a time.
The Android SDK Upgrade Assistant includes only the major changes you need to be aware of in each API level. For more comprehensive lists of changes, see the Android release summaries.
This feature is under active development. If you have any feedback, please file a bug.
Support for Gradle Version Catalogs
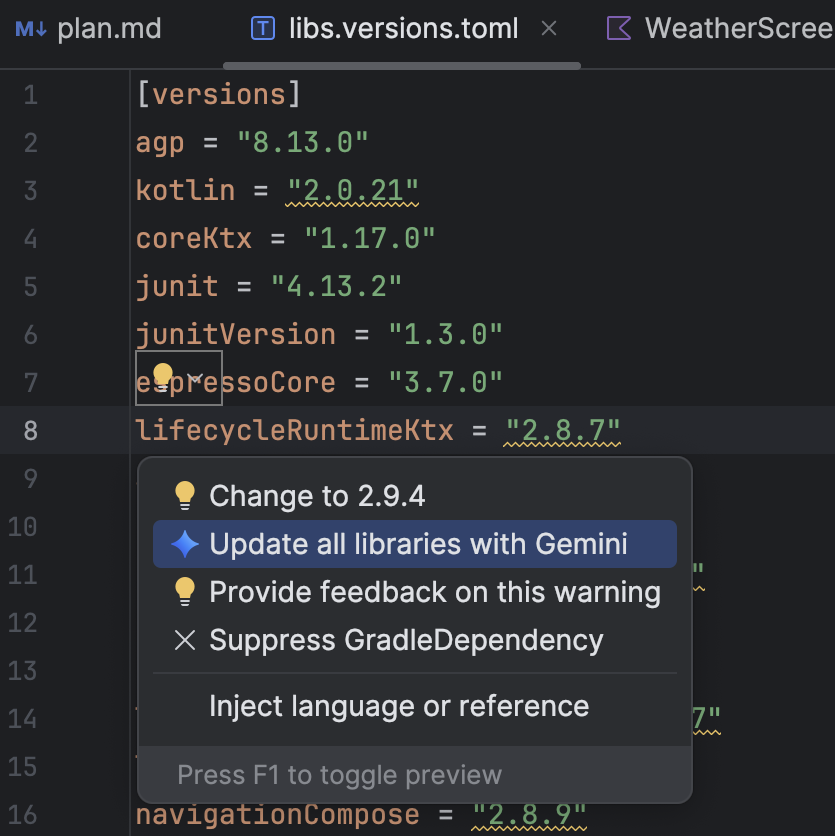
Android Studio Giraffe introduces support for Gradle Version Catalogs, a feature that lets you manage dependencies in one central location and share dependencies across modules or projects. Android Studio now makes it easier to configure version catalogs through editor suggestions and integration with the Project Structure dialog. If you're new to Gradle Version Catalogs, see its documentation first to get started.
Code completion and navigation
Android Studio offers code completion when you're editing a version catalog in
the TOML file format or adding a dependency from a version catalog to a build
file. In addition, you can quickly navigate from a dependency reference in your
app's build.gradle
file to where it's declared in the version catalog by
clicking on it while pressing Ctrl (Command on macOS).
Integration with the Project Structure dialog
If your project uses a version catalog defined in the TOML file format, you can edit variables you've defined there through the Project Structure dialog Variables view (File > Project Structure > Variables) in Android Studio. For each version catalog, there is a drop-down that lists the variables from that catalog. To edit a variable, click on its value and overwrite it. When you save these changes, the TOML file should be updated accordingly.
You can also update dependencies in the Project Structure dialog Dependencies view (File > Project Structure > Dependencies). To update versions, navigate to the module and dependency you want to edit, and then update the Requested Version field. When you save these changes, the TOML file should be updated accordingly. Note that if the dependency version was defined using a variable, updating the version directly this way replaces the variable with a hardcoded value.
Known issues and limitations
The following are known issues or limitations with Gradle Version Catalogs support in Android Studio.
Android Studio support only for version catalogs in TOML format
Currently the Android Studio code completion, navigation, and Project Structure
dialog support is only available for version catalogs defined in the TOML file
format. However, you can still add a version catalog directly in the
settings.gradle
file and use its dependencies in your project.
Can't add dependencies to version catalog through Project Structure dialog
If your project uses version catalogs and you add dependencies through the
Project Structure dialog, they're added to the build.gradle
file instead of
the catalog. This issue will be addressed in a future release.
Navigation for KTSA build files not supported
Navigating to a dependency definition in a version catalog by using Command+click isn't yet supported for build files written using Kotlin script.