এজেন্ট মোড
সেভ করা পৃষ্ঠা গুছিয়ে রাখতে 'সংগ্রহ' ব্যবহার করুন
আপনার পছন্দ অনুযায়ী কন্টেন্ট সেভ করুন ও সঠিক বিভাগে রাখুন।
অ্যান্ড্রয়েড স্টুডিওর এজেন্ট মোডে জেমিনি জটিল, বহু-পর্যায়ের উন্নয়নমূলক কাজগুলি পরিচালনা করার জন্য ডিজাইন করা হয়েছে যা আপনি শুধু জেমিনীর সাথে চ্যাট করার মাধ্যমে যা অনুভব করতে পারেন তার থেকেও বেশি। আপনি একটি উচ্চ-স্তরের লক্ষ্য বর্ণনা করতে পারেন, এবং এজেন্ট একটি পরিকল্পনা তৈরি করবে এবং কার্যকর করবে, প্রয়োজনীয় সরঞ্জামগুলি ব্যবহার করবে, একাধিক ফাইল জুড়ে পরিবর্তন করবে এবং পুনরাবৃত্তিমূলকভাবে বাগগুলি ঠিক করবে৷ এই এজেন্ট-সহায়তা ওয়ার্কফ্লো আপনাকে জটিল চ্যালেঞ্জ মোকাবেলা করার ক্ষমতা দেয়, আপনার উন্নয়ন প্রক্রিয়াকে ত্বরান্বিত করে।
শুরু করুন
অ্যান্ড্রয়েড স্টুডিওতে এজেন্ট মোডে শুরু করতে, এই পদক্ষেপগুলি অনুসরণ করুন:
- মিথুনে ক্লিক করুন
 পাশের বারে। আপনার প্রয়োজন হলে সাইন ইন করুন এবং অনবোর্ড করুন।
 - এজেন্ট ট্যাব নির্বাচন করুন।
- আপনি যে কাজটি এজেন্টকে করতে চান তা বর্ণনা করুন।
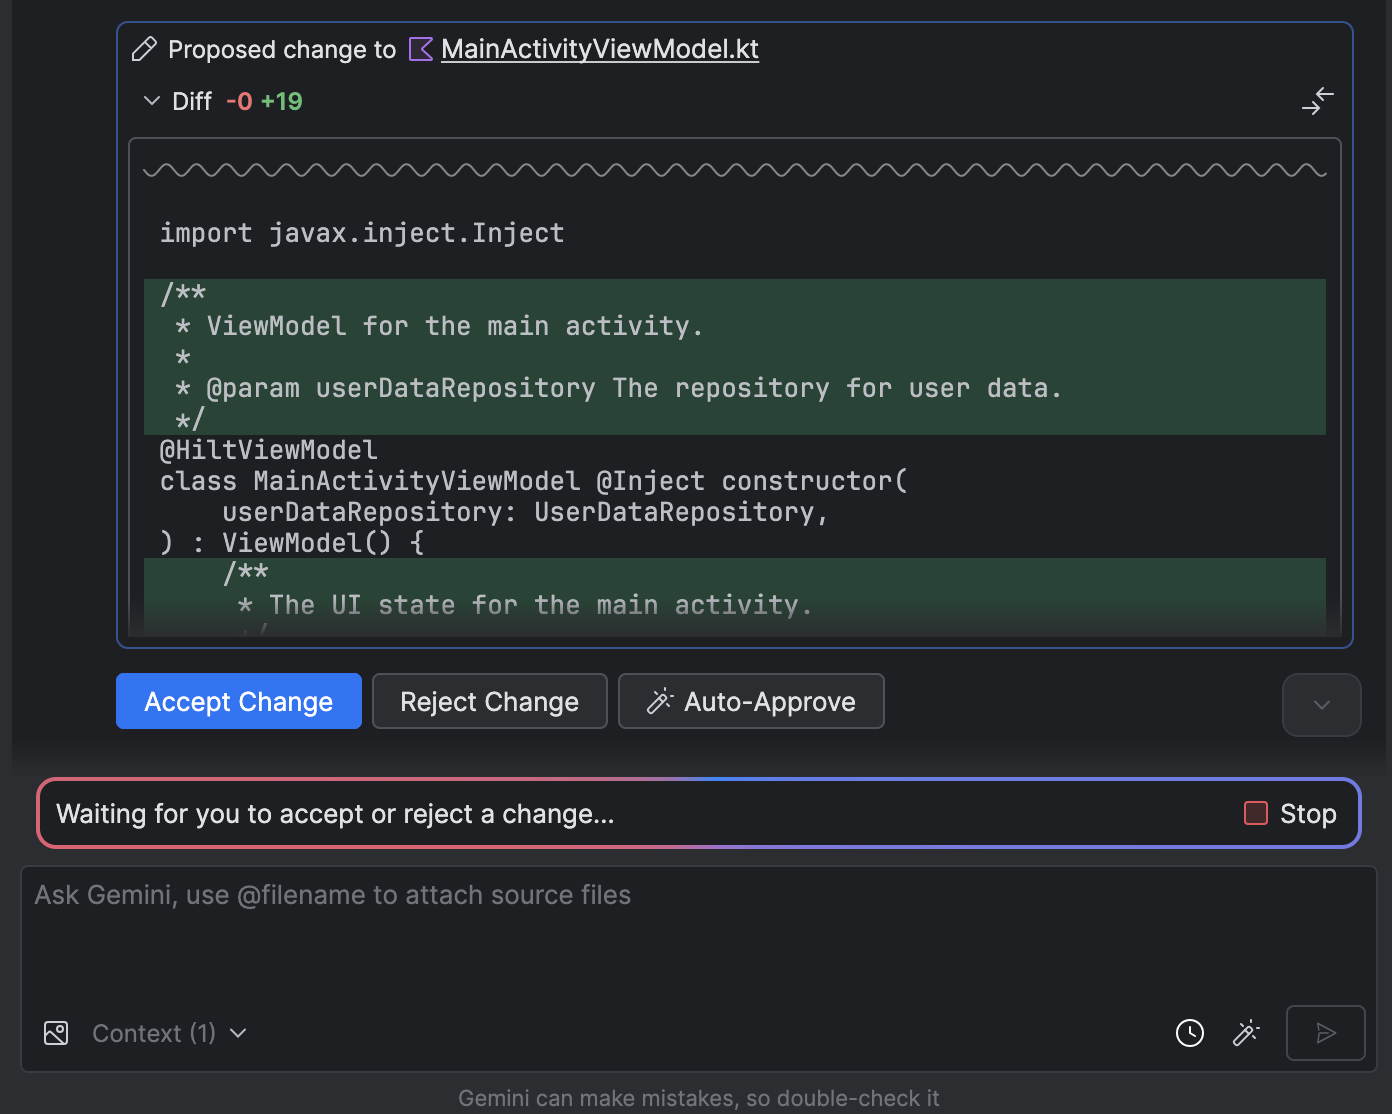
যেহেতু এজেন্ট কাজটি সম্পন্ন করার জন্য ধাপগুলি অতিক্রম করে, আপনার কাছে যেকোনো পরিবর্তন পর্যালোচনা এবং অনুমোদন করার বিকল্প থাকবে।
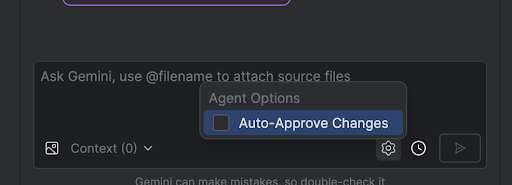
ঐচ্ছিক: পরিবর্তনগুলি স্বয়ংক্রিয়ভাবে অনুমোদন করতে, এজেন্ট বিকল্পগুলি নির্বাচন করুন৷  > পরিবর্তনগুলি স্বয়ংক্রিয়ভাবে অনুমোদন করুন ।
কেস ব্যবহার করুন
এজেন্ট আপনাকে সাহায্য করতে পারে এমন ব্যবহারের ক্ষেত্রে কিছু উদাহরণ এখানে দেওয়া হল:
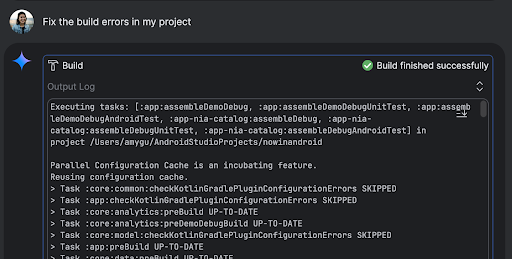
নির্মাণ ত্রুটি ঠিক করুন। আপনি যখন এজেন্টকে "আমার প্রকল্পে বিল্ড ত্রুটিগুলি ঠিক করুন" এর মতো একটি প্রম্পট ব্যবহার করে একটি বিল্ড ত্রুটি ঠিক করতে বলবেন, তখন এটি একটি প্রস্তাবিত সমাধান প্রয়োগ করবে, সমাধানটি যাচাই করতে প্রকল্পটি তৈরি করবে এবং সমস্যাটি সমাধান না হওয়া পর্যন্ত পুনরাবৃত্তি করবে৷
এজেন্ট মোড নিজে থেকেই UI উপাদান যোগ বা আপডেট করতে পারে। উদাহরণস্বরূপ, এজেন্টকে "ব্যবহারকারীর পছন্দগুলিতে ডিফল্ট ডার্ক মোড করুন" করতে বলুন এবং এটি প্রাসঙ্গিক ফাইলগুলি অনুসন্ধান করবে এবং কাজটি সম্পন্ন করার জন্য পরিবর্তনের পরামর্শ দেবে৷ আপনি অবিলম্বে রানিং ডিভাইস টুল উইন্ডোতে UI আপডেটগুলির পূর্বরূপ দেখতে পারেন।
আপনার অ্যাপের প্রোটোটাইপ এবং পরীক্ষা করার সময় মক ডেটা থাকা সহায়ক। নিজে নিজে জাল ডেটা তৈরি করার পরিবর্তে, আপনি এজেন্টকে সেই কাজটি দিতে পারেন। এখানে আমরা এজেন্টকে "জাল ডেটাতে আরও দুটি সেশন যোগ করতে" বলেছি। এটি প্রাসঙ্গিক ফাইলটি খুঁজে পায় এবং mockSessions তালিকায় আরও দুটি ইভেন্ট যোগ করে।
চেষ্টা করার জন্য কিছু অন্যান্য প্রম্পট:
- "<মডিউল>-এ <class>-এর জন্য ইউনিট পরীক্ষা লিখুন।"
- "বর্তমানে খোলা ফাইলের জন্য ডকুমেন্টেশন তৈরি করুন।"
- "অ্যাপের শিরোনামটি <বর্তমান নাম> থেকে <নতুন নাম> এ পরিবর্তন করুন।"
- "নাল পয়েন্টার ব্যতিক্রম সমাধান করুন।"
- "একটি নতুন ফাইলে <composable name> composable সরানোর মাধ্যমে আমার কোড রিফ্যাক্টর করুন। সমস্ত আমদানি আপডেট করা হয়েছে তা নিশ্চিত করুন।"
- অ্যাপের হোম স্ক্রিনে 'ফলো' নামে একটি নতুন বোতাম যোগ করুন যা আপনাকে বিষয়গুলির একটি তালিকায় নিয়ে যাবে৷'
- "<composable name> composable এ, <modifier name> modifier এর প্যাডিং কমিয়ে দিন।"
- "সোশ্যাল মিডিয়াতে শেয়ার করতে একটি শেয়ার বোতাম তৈরি করুন।"
এজেন্ট কিভাবে কাজ করে
এজেন্ট মোডে, আপনার প্রম্পট জেমিনি API-তে উপলভ্য টুলগুলির একটি তালিকা সহ পাঠানো হয়। আপনি সরঞ্জামগুলিকে দক্ষতা হিসাবে ভাবতে পারেন: এর মধ্যে ফাইলগুলি অনুসন্ধান করার, ফাইলগুলি পড়ার, ফাইলগুলির মধ্যে পাঠ্য অনুসন্ধান করার, আপনার কনফিগার করা যে কোনও MCP সার্ভার ব্যবহার করার ক্ষমতা এবং আরও অনেক কিছু অন্তর্ভুক্ত রয়েছে।
আপনি যখন এজেন্টকে একটি কাজ দেন, তখন এটি একটি পরিকল্পনা নিয়ে আসে এবং কোন সরঞ্জামগুলির প্রয়োজন তা নির্ধারণ করে। এজেন্ট ব্যবহার করার আগে এই টুলগুলির কিছুর জন্য আপনাকে অনুমতি দেওয়ার প্রয়োজন হতে পারে। একবার আপনি অনুমতি প্রদান করলে, এজেন্ট প্রয়োজনীয় ক্রিয়া সম্পাদনের জন্য টুলটি ব্যবহার করে এবং ফলাফলটি Gemini API-এ ফেরত পাঠায়। মিথুন কর্মের ফলাফল প্রক্রিয়া করে এবং অন্য প্রতিক্রিয়া তৈরি করে। কর্ম এবং মূল্যায়নের এই চক্রটি কাজটি সম্পূর্ণ না হওয়া পর্যন্ত চলতে থাকে।
এই পৃষ্ঠার কন্টেন্ট ও কোডের নমুনাগুলি Content License-এ বর্ণিত লাইসেন্সের অধীনস্থ। Java এবং OpenJDK হল Oracle এবং/অথবা তার অ্যাফিলিয়েট সংস্থার রেজিস্টার্ড ট্রেডমার্ক।
2025-08-05 UTC-তে শেষবার আপডেট করা হয়েছে।
[[["সহজে বোঝা যায়","easyToUnderstand","thumb-up"],["আমার সমস্যার সমাধান হয়েছে","solvedMyProblem","thumb-up"],["অন্যান্য","otherUp","thumb-up"]],[["এতে আমার প্রয়োজনীয় তথ্য নেই","missingTheInformationINeed","thumb-down"],["খুব জটিল / অনেক ধাপ","tooComplicatedTooManySteps","thumb-down"],["পুরনো","outOfDate","thumb-down"],["অনুবাদ সংক্রান্ত সমস্যা","translationIssue","thumb-down"],["নমুনা / কোড সংক্রান্ত সমস্যা","samplesCodeIssue","thumb-down"],["অন্যান্য","otherDown","thumb-down"]],["2025-08-05 UTC-তে শেষবার আপডেট করা হয়েছে।"],[],[],null,["# Agent Mode\n\nGemini in Android Studio's Agent Mode is designed to handle complex, multi-stage\ndevelopment tasks that go beyond what you can experience by just chatting with\nGemini. You can describe a high-level goal, and the agent will create and\nexecute a plan, invoking the necessary [tools](#how-it-works), making changes\nacross multiple files, and iteratively fixing bugs. This agent-assisted workflow\nempowers you to tackle intricate challenges, accelerating your development\nprocess.\n\nGet started\n-----------\n\nTo get started in Agent Mode in Android Studio, follow these steps:\n\n1. Click **Gemini** in the side bar. Sign in and onboard if you need to.\n2. Select the **Agent** tab.\n3. Describe the task you want the agent to perform.\n4. As the agent goes through the steps to accomplish the task, you'll have the\n option to review and approve any changes.\n\n5. Optional: To automatically approve changes, select **Agent options\n \\\u003e Auto-approve changes**.\n\nUse cases\n---------\n\nHere are some examples of use cases that the agent can help you with:\n\n- Fix build errors. When you ask the agent to fix a build error using a prompt\n like \"Fix build errors in my project,\" it will apply a recommended fix, build\n the project to verify the solution, and iterate until the issue is resolved.\n\n- Agent Mode can add or update UI elements all on its own. For example, ask the\n agent to \"Make dark mode the default in user preferences\" and it'll search for\n the relevant files and suggest changes to accomplish the task. You can\n immediately preview the UI updates in the **Running devices** tool window.\n\n- It's helpful to have mock data when prototyping and testing your app. Instead\n of manually creating fake data yourself, you can give that task to the agent.\n Here we've asked the agent to \"Add two more sessions to the fake data.\" It\n finds the relevant file and adds two more events to the `mockSessions` list.\n\nSome other prompts to try:\n\n- \"Write unit tests for \\\u003cclass\\\u003e in \\\u003cmodule\\\u003e.\"\n- \"Generate documentation for the currently open file.\"\n- \"Change the app title from \\\u003ccurrent name\\\u003e to \\\u003cnew name\\\u003e.\"\n- \"Resolve the null pointer exception.\"\n- \"Refactor my code by moving the \\\u003ccomposable name\\\u003e composable to a new file. Ensure all imports are updated.\"\n- \"Add a new button to the app's home screen called 'Follow' that takes you to a list of topics.\"\n- \"In the \\\u003ccomposable name\\\u003e composable, reduce the padding of the \\\u003cmodifier name\\\u003e modifier.\"\n- \"Create a share button to share to social media.\"\n\nHow the agent works\n-------------------\n\nIn Agent Mode, your prompt is sent to the Gemini API with a list of *tools* that\nare available. You can think of tools as skills: they include the ability to\nsearch for files, read files, search the text within files, use any\n[MCP servers](/studio/gemini/add-mcp-server) you have configured, and more.\n\nWhen you give the agent a task, it comes up with a plan and figures out which\ntools are needed. Some of these tools might need you to grant permission before\nthe agent can use them. Once you grant permission, the agent uses the tool to\nperform the necessary action and sends the result back to the Gemini API. Gemini\nprocesses the result of the action and generates another response. This cycle of\naction and evaluation continues until the task is complete."]]